Copying and Pasting Glyphs»
In FontLab VI, glyphs can be cut, copied, pasted and appended within the same font, or to another font.
Copy-pasting using drag-drop»
The quickest way to copy-paste glyphs is using the drag-drop method. It can be especially handy when copying glyphs from one font and pasting them to another one, because it is visual. To copy-paste glyphs using the drag-drop method, follow these steps:
- Select one or several glyphs.
- Position the mouse cursor on the selection.
- Press the mouse button and hold down the Alt key.
- Now drag the selection to the place where you want it to be copied.
- Release the mouse button, making sure that the Alt key is still pressed.
Using Menu Operations»
To copy selected glyphs»
To copy selected glyphs, select Edit > Copy. This action will copy not only the glyph outline, but also the glyph information, such as its name, Unicode codepoint, metrics, etc. The copied glyphs will be placed in the Clipboard and can be pasted into the same font or into another font.
To cut selected glyphs»
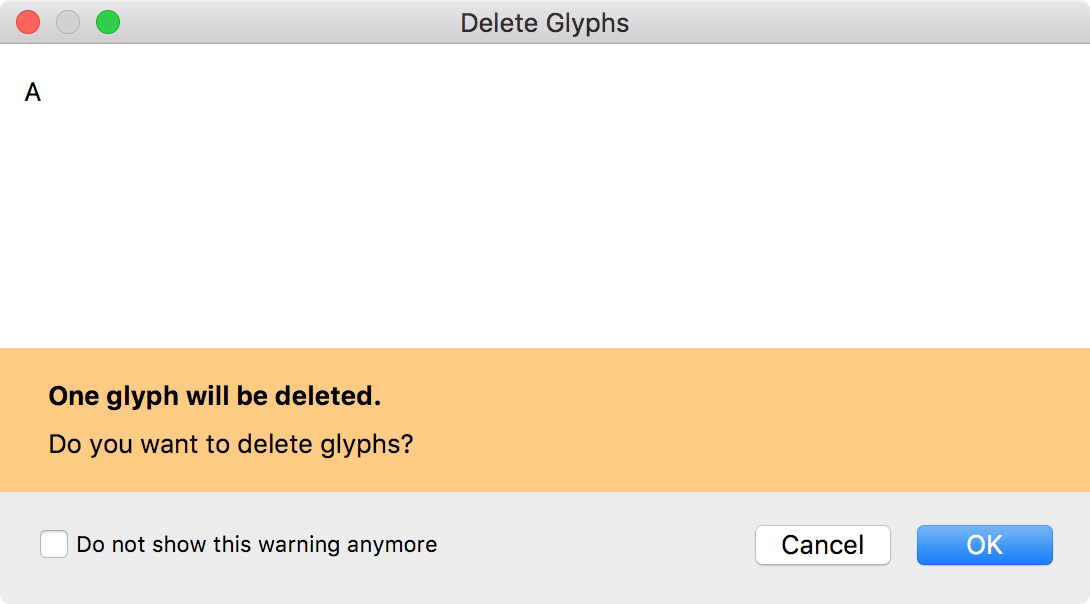
To cut selected glyphs, select Edit > Cut. The glyphs, along with their glyph information, will be copied to the clipboard and deleted from their source positions. Before this action is completed, FontLab will show you a warning dialog and will proceed only if you give your confirmation:
To paste copied glyphs»
FontLab allows you to paste glyphs from the clipboard using the following commands:
Paste»
To paste copied glyphs along with all glyph information, layers and elements, including anchors, guidelines, etc., select Edit > Paste. Glyphs from the clipboard will be placed starting from the first selected glyph in the destination font. If the destination position is occupied by existing glyphs a warning dialog box will appear:
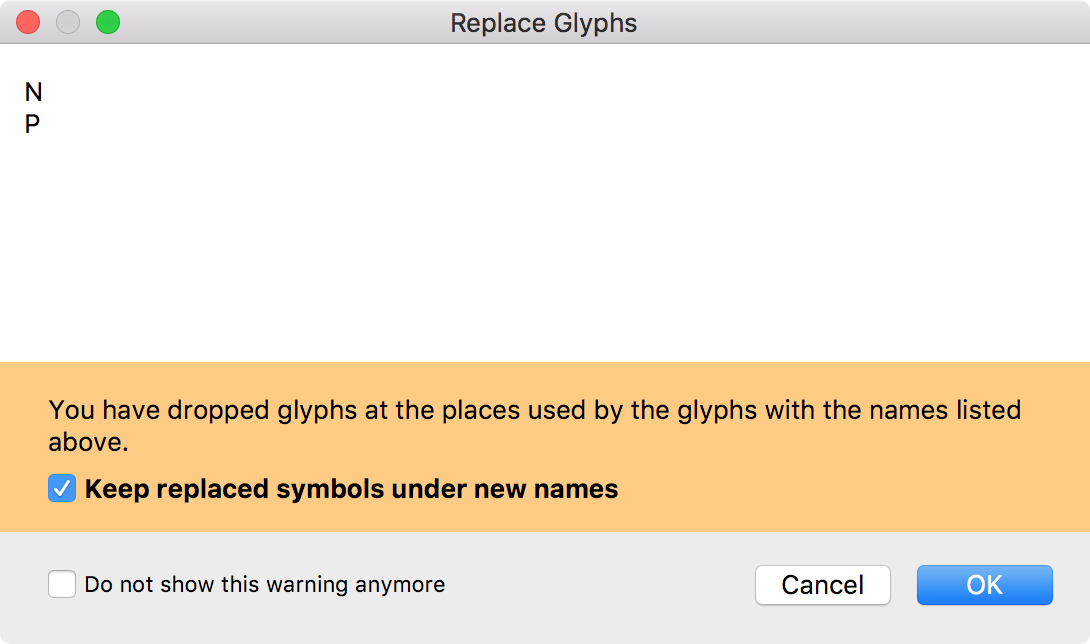
Keep replaced symbols under new names should be checked if you would like to put the new glyphs in the cells and move the existing glyphs to new renamed cells. If left unchecked, this action will delete existing glyphs, and replace them with the glyphs from the clipboard.
Note that this command will paste unlinked copies of elements, i.e. editing the contours of the pasted glyph won’t affect other glyphs because their elements are not linked.
Paste Glyph Reference»
To paste copied glyphs such that references to copied elements are pasted, use Edit > Paste Glyph References. As a result of this operation, the pasted elements will be linked to their source elements. Editing the source element will affect the pasted glyph, and this glyph will be exported as a composite.
Paste Special»
To exercise control over what glyph information is pasted, Edit > Paste Special. Once you select this command, the Paste Special dialog will appear:
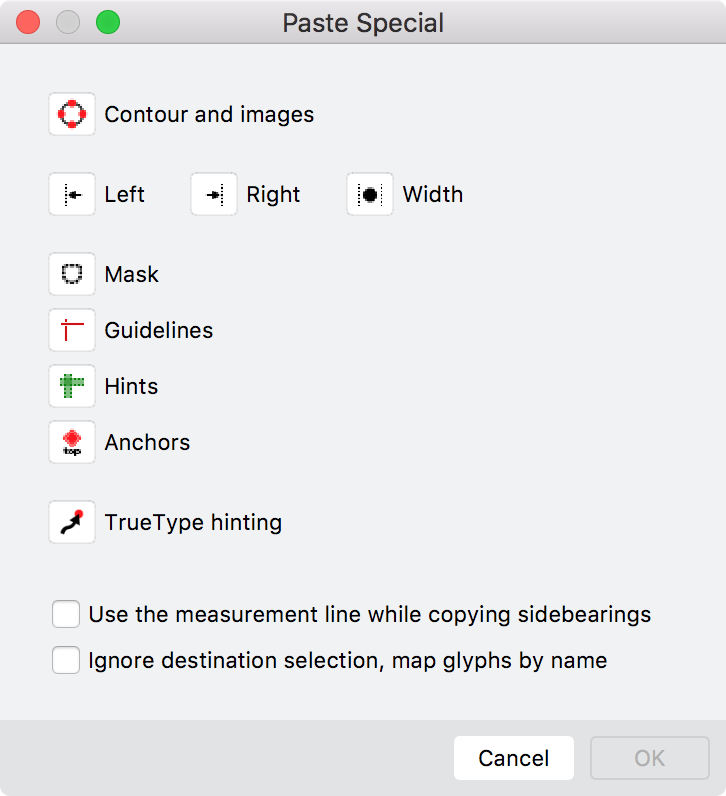
In this dialog, you can choose what glyph information you would like to paste by clicking on them. Check Use the measurement line while copying sidebearings to calculate glyphs’ sidebearings on the basis of the measurement line. Read more about this line in the Measurement line section. Select the Ignore destination selection, map glyphs by name option, if you would like the paste operation to replace glyphs that have the same name as those being pasted. Click OK to finish pasting glyphs.
When pasting with this special command the destination selection does not have to be continuous, i.e. you can select cells to be replaced in any order and combination. The selection is ignored if you choose to map glyphs by their names.
If you paste contours they are pasted to the selected layer replacing its contents. So be careful when pasting contours with this command.
When you choose to paste TrueType hints from one glyph to another FontLab tries to do this in a “smart” way. These “pasted” hinting instructions may need to be reviewed and corrected manually.
Append»
To paste glyphs in their expected Unicode code positions with correct names, select Font > Append Glyphs. This action can be especially useful if you are copy-pasting glyphs from one font to another to add language support. Here is an example: Your first font contains Latin glyphs but has no Cyrillic glyphs. A second font is a Cyrillic font with the matching style and you want to add Cyrillic support to the first font. Select the Cyrillic glyphs in the second font (this will be easy if you select the 1251-Cyrillic codepage or the Cyrillic Unicode range) and copy them to the clipboard using Edit > Copy. Now switch to the first font and select Font > Append Glyphs. The Cyrillic glyphs will be added to the font with their correct Unicode codepoints and names, so you will not have to re-map the font.
Duplicating Unicode codepoints»
In FontLab you may assign more than one (up to 63, actually) Unicode codepoints to a glyph. Visually this means that a glyph that has several Unicode indexes will appear several times when one of the filter modes (Encodings, Ranges or Codepages modes) is selected in the Font window:

But if you switch the Font window to the Index mode you will see only one glyph entry.
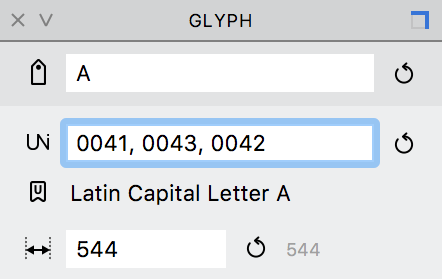
To make several characters based on a glyph, select it and enter additional Unicode codepoints separated by a comma in the Glyph panel: