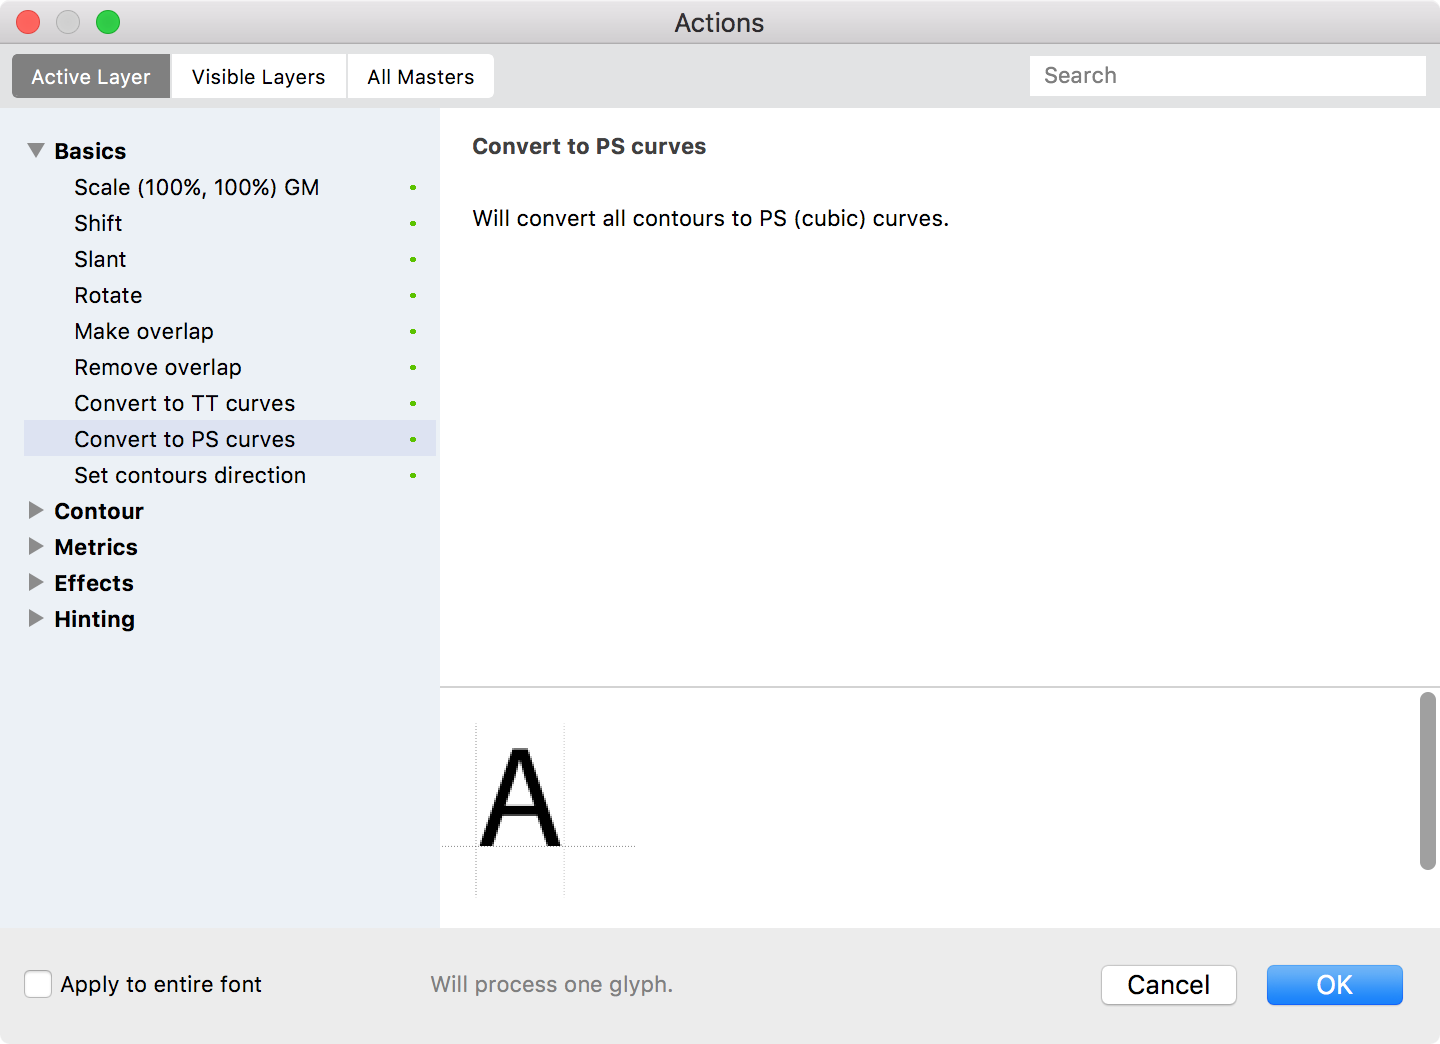
Basic actions»
Basic Tools > Actions are one of five types of Actions in FontLab VI. They are transformations that let you transform the contours in one or more glyphs as a batch operation.
By default, Contour actions will be applied to all the glyphs you have selected in the Font Map panel; or if you are in a Glyph Window, to the glyph that is currently open in it. You will also be able to preview these glyphs in the lower half of the panel, and their total number will be indicated in the status bar at the bottom of the dialog. If you want the changes to be applied to the entire font, select the checkbox in the bottom-left. In addition, you can choose whether the actions should be applied to the Active Layer, all Visible Layers, or to All Masters by selecting the option of your choice in the top-left of the dialog.
Note
When you perform geometric transformations to glyphs Actions (Scale, Shift, Slant or Rotate), FontLab will apply the transformation on the contour level if it can, and will use element-level transformation only if contour-level transformation would affect glyphs that you haven’t selected. See Geometric transformations for information about the difference between element-level and contour-level transformations.
Scale»
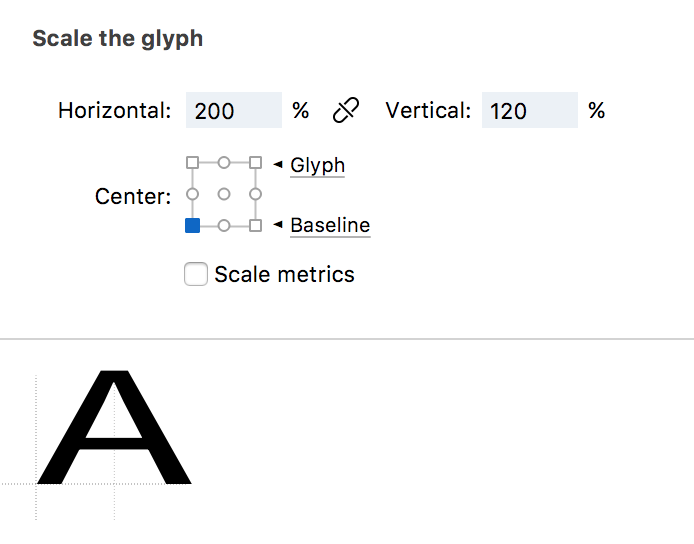
This action can be used to scale the contents of the selected layer proportionally and non-proportionally. Enter the desired vertical and horizontal scale factors in the edit fields to scale your selection. Clicking the icon between the fields switches the proportional scale option on or off. The  icon means the scaling will be non-proportional; and
  means it will be proportional, i.e. the vertical and horizontal scale will be the same.
Use the nine-point proxy box to select the center (origin point) of scaling. FontLab VI’s nine-point proxy box works in the same way as proxy boxes in other applications that you may already be familiar with, such as Adobe Illustrator: the points on the box correspond to the corners and side-centers of an object’s bounding box, and its center. In addition to these nine points, FontLab VI also allows you to set the top or bottom of the transformation to something other than the currently selected contour, such as the baseline or the caps height, etc. This can make your actions more powerful and flexible.
If the Scale metrics checkbox is checked, the glyph metrics, i.e. side bearings and advance width, will scale along with the outlines in the glyphs. Uncheck this option if you don’t want the metrics to be modified in this way.
Shift»
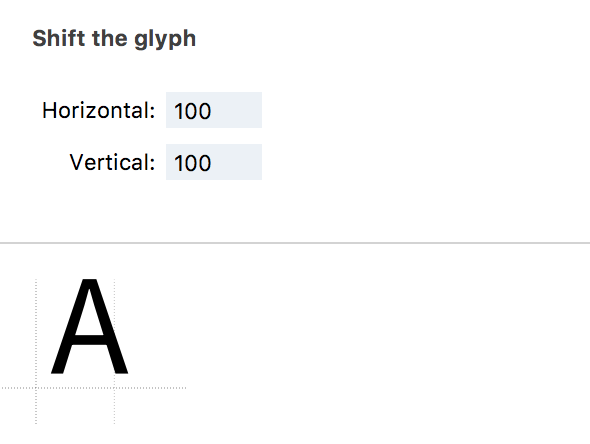
This action can be used to move the contents of the selected layer in the vertical and/or horizontal direction. Positive values will move the selection to the right or upwards; while negative values will move the selection to the left or downwards.
Slant»
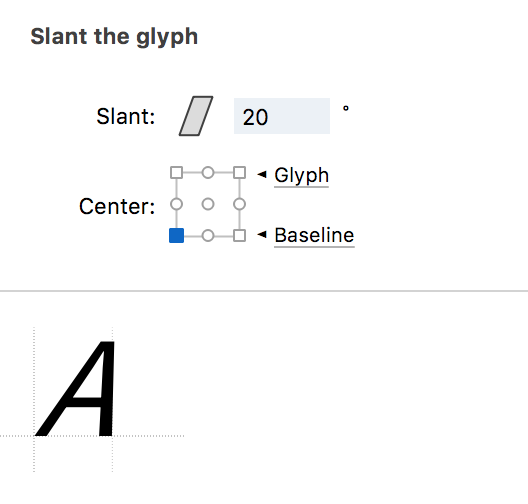
This action can be used to slant the contents of the selected layer. Enter the angle of slant (in degrees) in the input field and use the nine-point proxy box to select the center or origin point of the slant. Remember that FontLab VI allows you to set the top or bottom of the box to something other than the currently selected contour, such as the baseline or the caps height, etc.
You can use the slant action as a starting point for making an oblique version of your font. Apply this transformation to all the glyphs in the font and update the Font Info settings to reflect that the font is oblique. Now you can make any optical corrections to the design.
Rotate»
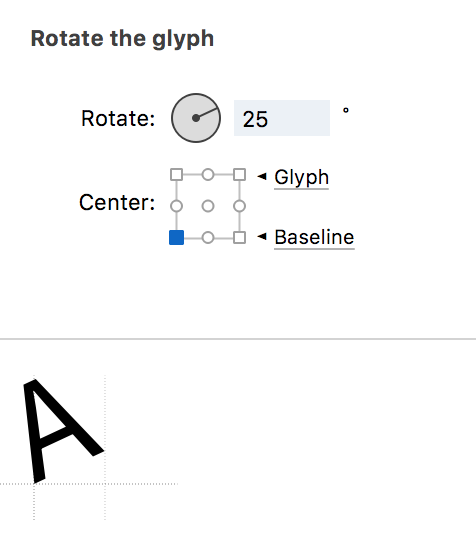
This action can be used to rotate the contents of the selected layer. Enter the angle of rotation (in degrees) to the input field and use the nine-point proxy box to set the center or origin point of the rotation. You can specify the center of the box or any of the points on the edges, as well as select what you would like the the top or bottom of the glyph-bounding box to be.
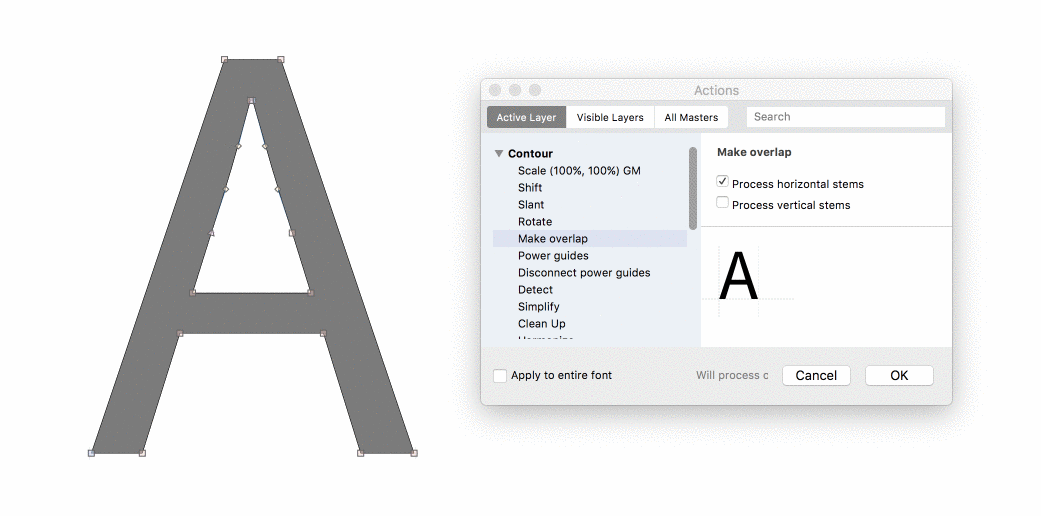
Make Overlap»
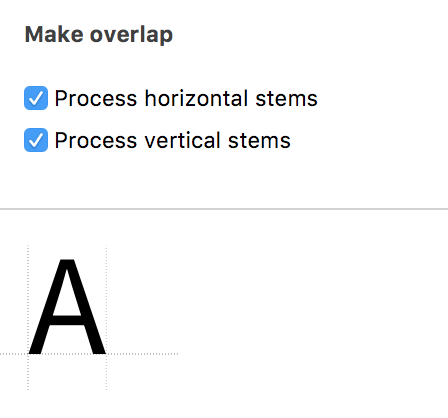
This operation, which is the same as the Make Overlap command Contour > Make Overlap, analyses glyph contours and hints to automatically detach stems from one another and create multiple overlapping closed contours. You can choose whether you would like to apply this action on horizontal stems, vertical stems or both by using the checkboxes.
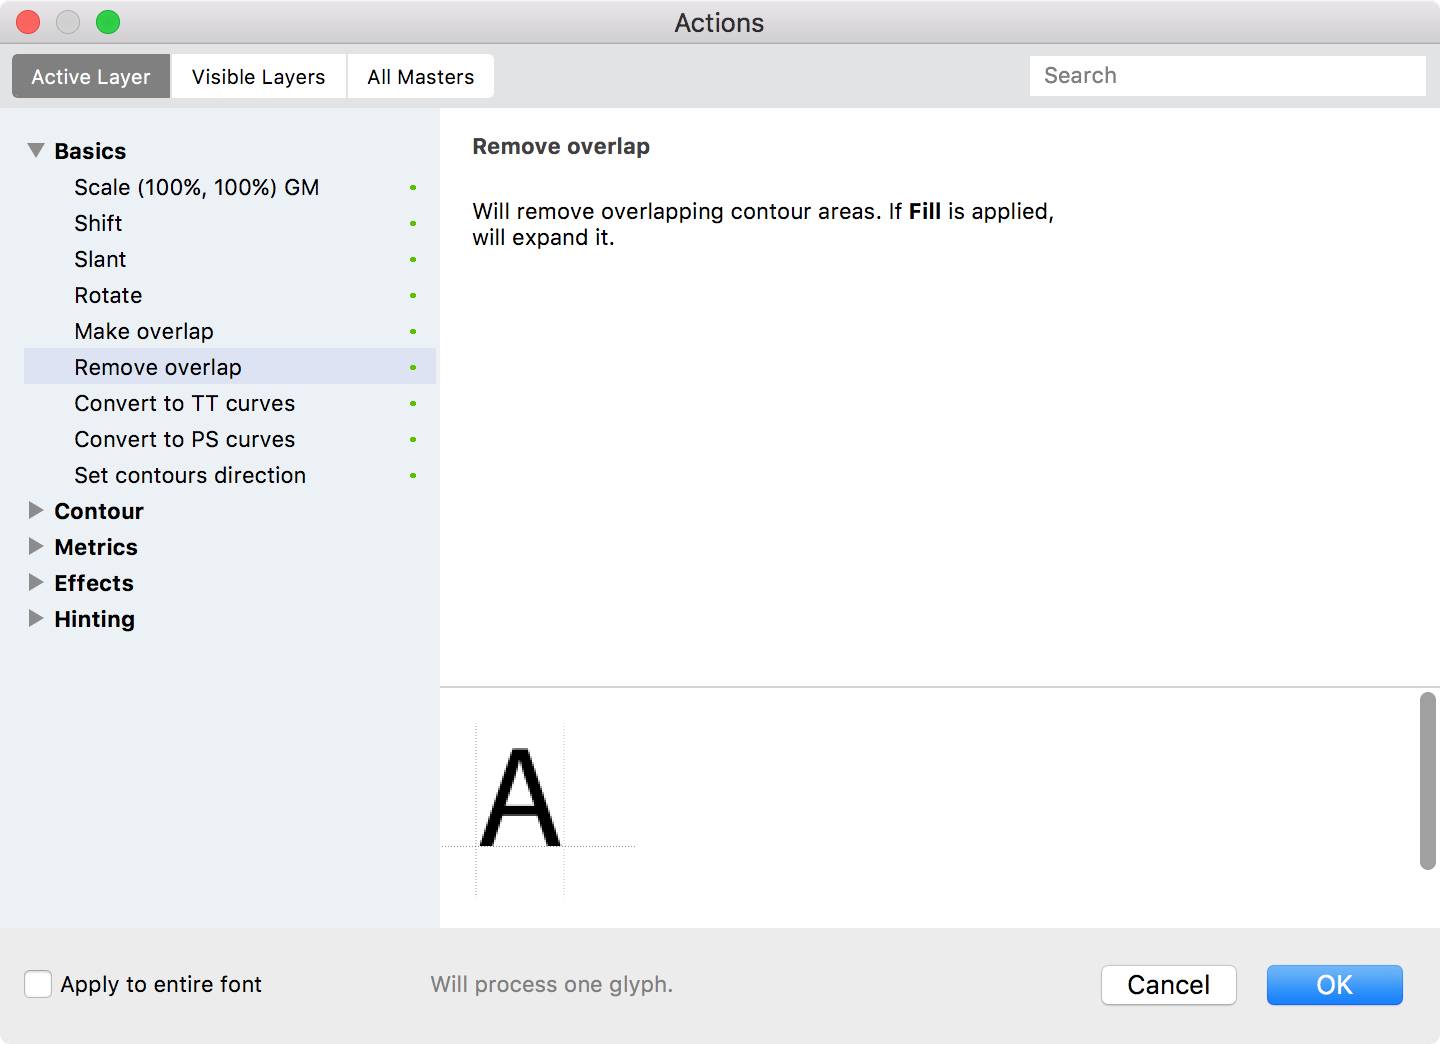
Remove Overlap»
This action, which is the same as the Remove Overlap command Contour > Remove Overlap, can be used to remove overlapping contour areas and orphan nodes. It also a expands the fill, if a fill has been applied.
Convert to TT curves»
This action, which is the same as the Contour > Convert > To TT Curves, can be used to convert PostScript curves to TrueType curves.

Convert to PS curves»
This action, which is the same as the Contour > Convert > To PS Curves, can be used to convert TrueType curves to PostScript curves.