Rewind Record»
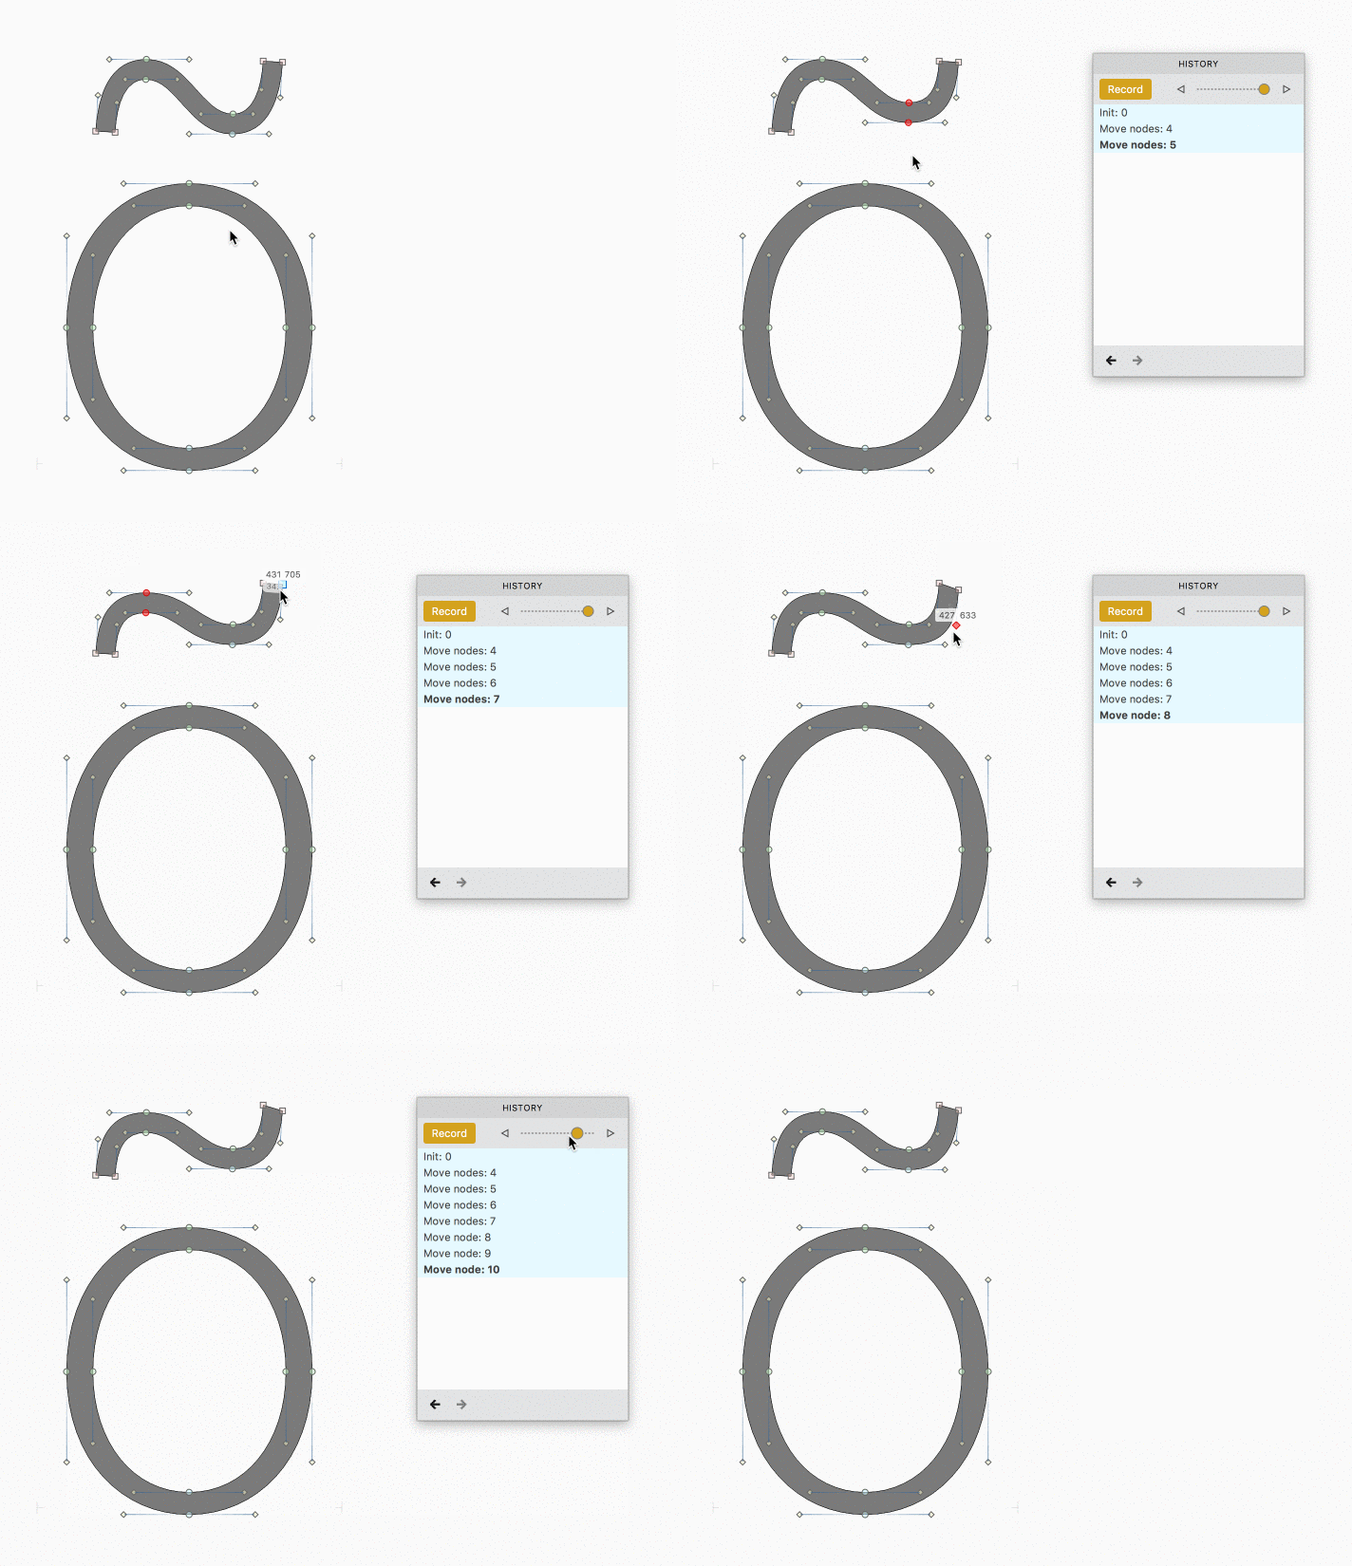
Commands in the Tools > Rewind menu allow you to perform “variation along the time axis” and are illustrated with this sample movie:

-
You have a particular design of a letter. You select Tools > Rewind > Record (CtrlA) or press the Record button on the History panel. That takes a “recorded snapshot” of your design .
-
You perform some changes to the letter design. They may even be a bit extreme, and can involve different tools (resizing, scaling, rotation, changing tension of curves etc.)
-
Rewind and Fast Forward then allow you to go between the recorded snapshot (with the Record command) and your current design — but not like “Undo” or “Redo”, but instead via interpolation. It doesn’t matter which operations you’ve done after you’ve recorded the snapshot and in which order. With Rewind and Fast Forward, your recorded snapshot and your current snapshot are treated like masters, so FontLab is interpolating (blending) between them.
-
Use Tools > Rewind > Rewind (CtrlV) or the left arrow button on the History panel to rewind i.e. interpolate closer to the recorded snapshot, or use Tools > Rewind > Fast Forward (CtrlB) or the right arrow button on the History panel to interpolate closer to the current snapshot. You can also use the slider on the History panel to “scrub” between the two snapshots. The slider really does the same as any axis slider in the Variations panel, except that it works locally per glyph and takes the recorded snapshot and the current snapshot as two masters.
Note
If you press Record again, your previously recorded snapshot gets lost and your current letter design becomes the recorded snapshot.
The whole point of this workflow is that very often, people have some “older” version of a glyph and then they want to make some changes but aren’t really sure how far to take this. So you can make some changes, and then go back and forth smoothly.
You can even take this further. If you have an original design stage (original snapshot), record this snapshot. Then perform some changes that take the design in one direction, and slide along the time variation axis (i.e. rewind and fast forward) to pick an instance that you like. Record a snapshot again, undo your changes all the way to the original snapshot. Perform some other changes that take the design into another direction. Finally, slide along the time axis again to pick another instance. This time you’ll be interpolating between the two different design directions.
Note
Sliding along the time axis may modify the outlines slightly and add some points. Most likely, once you’re happy with your final instance, you’ll need to clean up the contours.
When you perform some design changes and change your glyphs from snapshot 1 to snapshot 2, the in-between steps may be nonsensical. Your design process may be composed of actions that temporarily make the glyph “ugly” and then you make it “pretty” again. Using Undo and Redo takes you through all these steps, including the “ugly” ones. History variation smoothly interpolates between two snapshots, so you can really see only “good” intermediate forms.