Variations panel»
The Variations panel Window > Panels > Variations is the primary place where one sets up and controls Variable Fonts (or OpenType Variations) in FontLab. It is usually used along with the Layers and Masters panel and the Preview panel. Before you work with the Variations panel, you should be familiar with the key concepts of Variable Fonts, such as masters, axes, interpolation, design space and instances. Working with Font Variations gives you a process-oriented overview of how to create and manipulate Variable Fonts.
Views»
The Variations panel has two main viewing modes: List view shows all axes at all times as a list; while Map view shows a visual/spatial representation with full detail of up to two axes at once, including position of masters. Generally, if your font has just one or two axes, you will rarely leave the Map view. But if you have many axes, you may often find it easier to traverse the design space from the List view.
Map view»
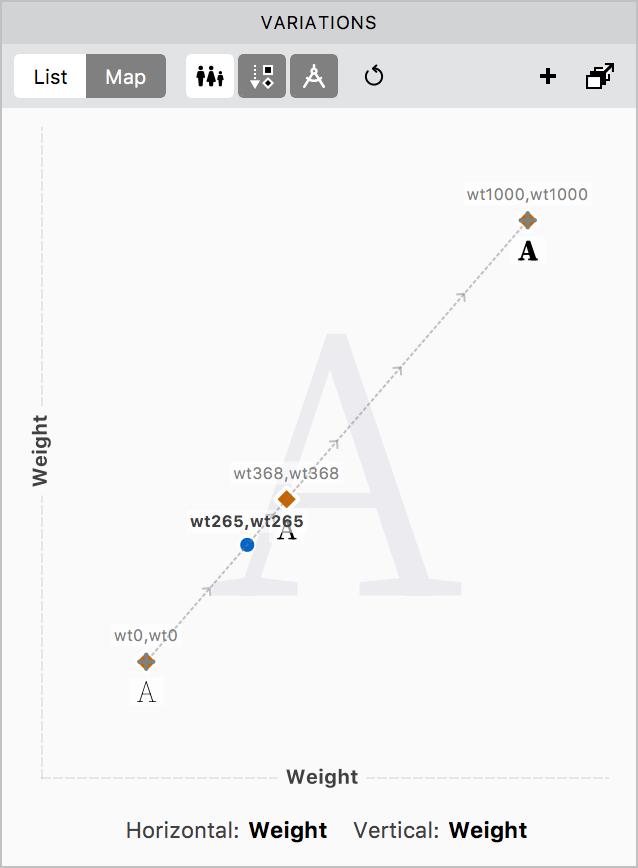
The Map view of the panel shows a visual/spatial representation of up to two axes. If you have only one axis in your font, it populates both the horizontal and vertical axes of the map. If you have more than one axes in your font, the default axes — weight and width — will appear in the map by default. To change the axes you want to see in the map, click on the underlined name of the currently selected horizontal or vertical axes and select a different axis from the list. Any axes that are not being shown in the spatial visualisation, appear as sliders below the map.
The map also shows the position of both font and glyph masters. They are represented by orange diamonds. The dotted line with the plus signs at both ends is called the Interpolation vector. The Interpolation vector shows you how you get from one instance or master to another in the design space via interpolation.
To add a virtual instance, click anywhere on the map and a virtual instance will be added, represented by a blue dot. Note that there can only be one virtual instance. By moving the virtual instance, you can see how the current glyph will look like at any particular position in the design space. This preview is visible within the Variations panel’s map in grey, but also in the Preview panel.
To move the position of the virtual instance, click on it and drag anywhere within the design space. Alternately, click on a new position in the design space, and the virtual instance will appear there. You can also click on the coordinates of the virtual instance, and enter new values by typing them in.
List view»
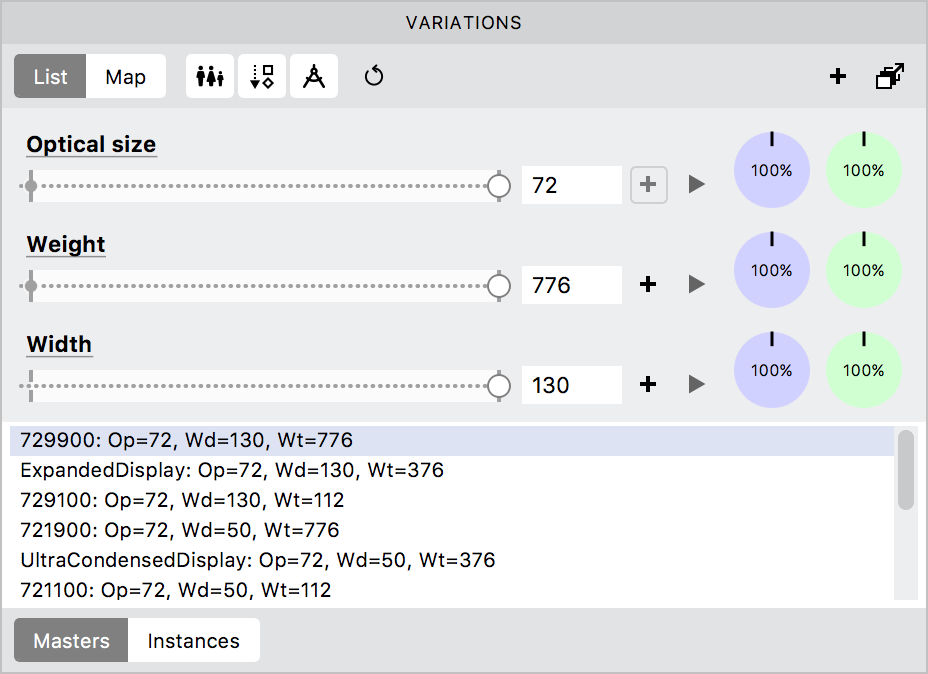
The main area of the List view of the panel shows a list of axes in the font. Under each axes name, you see a slider that can be moved to see how the current glyph will look at any particular position on the axes. You can do this by manually moving the slider control, entering a numeric value to the field or pressing the play button. The preview is visible in the Preview panel. To add a virtual instance in this view, use the slider to pick a position or enter a numeric value in the field and click on the + sign. Below the main area, you can see either the full list of masters or instances in the font. You can choose which one by using the toggle below it.
Anisotropic interpolation»
This view also offers the functionality of Anisotropic interpolation. Anisotropic interpolation can use different interpolation values for X and Y directions, unlike standard interpolation which uses the same values for both directions. This allows you to have an axis have more (up to double) or less (up to zero) effect in either the X or Y direction. To interpolate using different value for X and Y directions, use the purple and green dials in the panel. The purple dial controls the X direction and the green one the Y direction. The values can be set between 0 to 200, and modified by moving the dial control (represented by a black line) to the left to reduce the value or to the right to increase it. You can also click on the number in the middle of the dial to manually enter the value or use the number stepper.
Local toolbar»

Buttons on the toolbar are described below:
Append master fonts»
The Append master fonts toggle  puts and shows all opened fonts belonging to the same family in the Variations panel as if they were master fonts. This doesn’t create master fonts, but only shows the position of the family members in the design space. Several single master fonts form the “virtual” design space allowing you to move and preview a “virtual” instance (blue dot in the Map view).
Sort Contours and Start Nodes»
The Sort Contours and Start Nodes  option is the first automatic step towards achieving compatibility between masters. If this toggle is switched on and you add existing fonts as masters, FontLab will sort contours and points on the fly when fonts are added to make the order of elements, contours and points consistent. Note that this operation assumes that both master have the same number of nodes (only on-curve and TT off-curve points, not handles).
Check masters geometry»
The Check masters geometry toggle  will try to detect if there are problems with types of nodes (smooth/sharp), types of segments (line/curve) and take care of situations where elements have been rotated. If something is wrong with nodes and contours compatibility FontLab will try to fix this automatically.
Here is the sample of interpolation with Check masters geometry off and on:
Note that this operation assumes that both master have the same number of nodes, and for TT curves the same number of off-curve points. (It can interpolate between existent and non-existent PS handles.)
Reset location to default»
The Reset button  puts the current location (blue dot) into the default position – the default point in each axis.
Add glyph(s) master»
The Add glyph(s) master button  opens up the following popup:
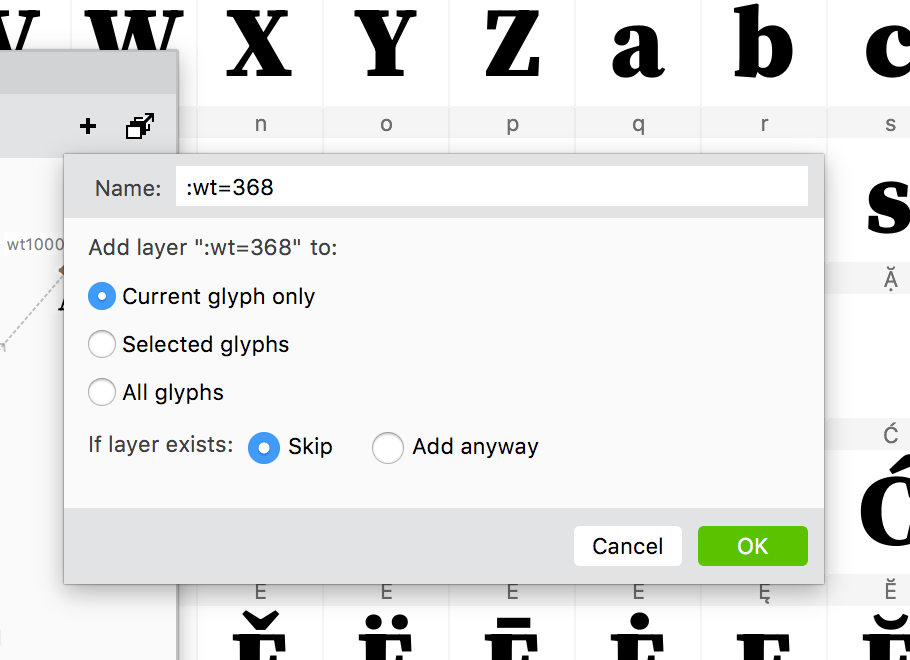
Here you can add a new glyph master for either the current glyph, selected glyphs or all glyphs in the font. In addition, you can name the layer in the popup and choose if the layer should be added even if it exists in the glyphs or not. The new master is added at the position of the “virtual” instance, which is represented by a blue dot in the design space. A new master is added only if it can be interpolated or extrapolated, as the case may be, from the existing compatible masters. Glyphs that have incompatible master layers won’t get a new master, even if they are selected in the popup. You can rename a new master in the Layers and Masters panel or in Font Info.
Create font master»
Clicking on the Generate instance as master or font button  opens up the following popup:
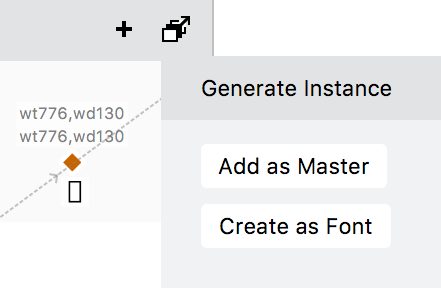
Here you can choose whether you want to create a new font master or an instance font at the position of the “virtual” instance. Click on Master or Font to choose what kind of master you want to add.