Glyph Window»
A Glyph window is used for drawing and editing individual glyphs.
To open a Glyph window, double-click on any character cell in the Font Window or Font Map panel (or select it and then press the Return key). If the “Fonts and glyphs open in windows” option in Preferences > General is not selected, then a new tab with the glyph will be opened. Otherwise the glyph will be opened in a new separate window.
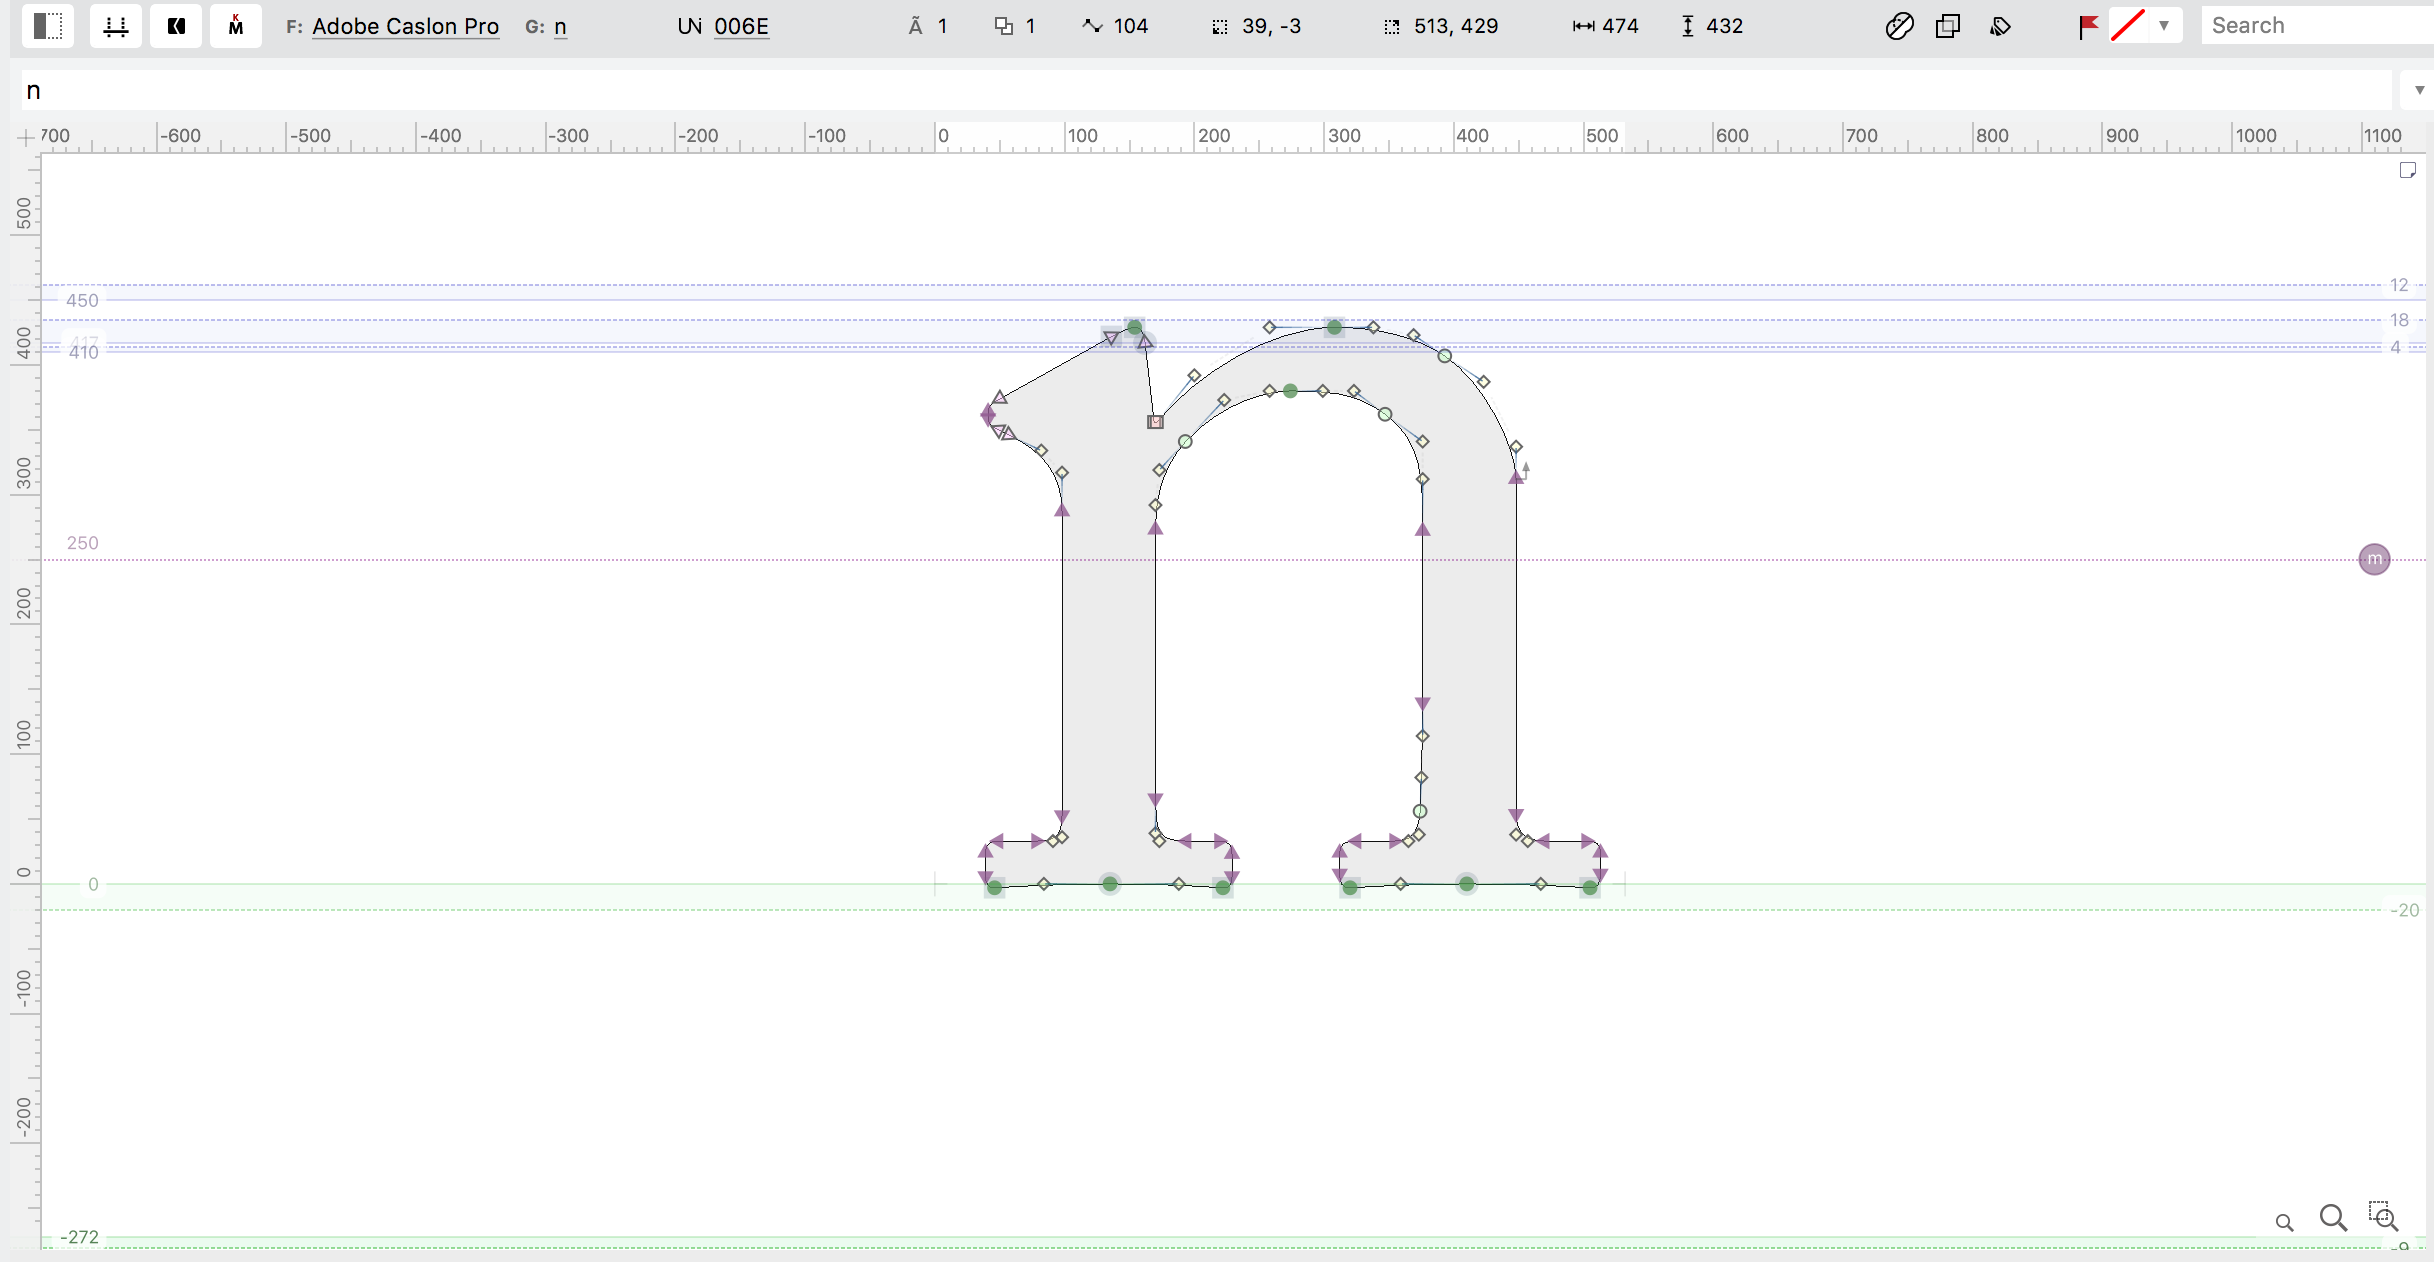
The Glyph Window general view.
Glyph Window Contents»
A Glyph window has the following parts:
Editing Area»
We call the main part of a Glyph window the Editing area. This is where you edit and view your drawings.
Three buttons at the right bottom corner of the Editing area allow you to quickly change the zoom.

See Zooming in the editing area section for more details.
Property Bar»

The Glyph window Property bar is dynamic, aside from some static elements on the left and right:
- The switch for the Content Sidebar.
- The Show Spacing Controls toggle, which enables or disables the controls for glyph metrics and kerning editing in the Glyph window.
- The Kerning toggle, which enables or disables kerning in the Glyph window.
- The Mark Attachment toggle, which enables or disables mark attachment in the Glyph window.
- The Font dropdown menu, which allows switching the current window’s contents to a different font, keeping the same text.
- The Glyph dropdown, which allows switching the currently active glyph to a different “related” glyph.
- On the right side, the Glyph window property bar contains the same Flag selector and Search box as the Font window.
The middle section of the Glyphs window Property bar changes depending on the currently-used tool or the current selection. Please refer to the Property bar section for details.
Content Sidebar»
The first button in the Property bar opens the Content Sidebar. It closes automatically after 3 mins of inactivity. You can change this behavior in Preferences.
Adding text to the Glyph window»
To open a text from the Texts library, click on the local menu Text. You can choose a text from the list, and it will appear both in the Glyph window, and in the text box below this menu.
To add a text to the Text library, type it into the text area in the sidebar or directly in the Glyph window, and then press the  button. It will be added to the list you can access from the Text menu. You can also add texts to the library using Preferences.
To remove texts from the Text library, use Preferences.
Modifying formatting in the Glyph window»
To change the case of the text in the Glyph window, click on the  button to covert to lowercase, and on the
  button to uppercase.
To set the text size in points, enter the text size in  , or use the number stepper to change them, or click on
  and
and  respectively to decrease and increase the text size. Note that the zoom of the window contents may not be set to actual size. To see your text at the selected size without zoom, click on the leftmost magnifier icon
  in the bottom-right corner of the Glyph window.
To set the tracking (distance between glyphs) of the text in the Glyph window, type a text into  , or use the number steppers, or choose a value from the dropdown menu.
To set the leading (distance between lines of text) of the text in the Glyph window, type a text into  , or use the number steppers, or choose a value from the dropdown menu.
Adding context to text in the Glyph window»
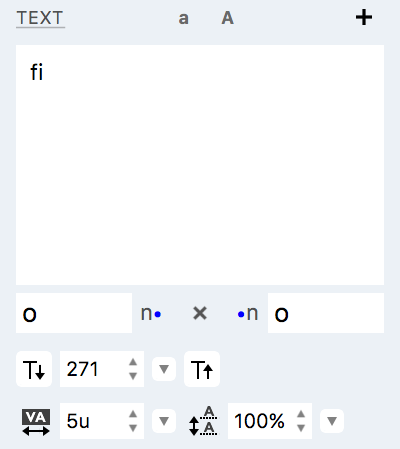
To add strings before or after the glyphs in Glyph window, type in the relevant string to the fields  and
and  respectively. This function can be useful when working on glyph metrics or kerning. For example, type HO in both fields will give you the following string of text:

Previewing OpenType features»
To preview OpenType features in the Glyph window, check the Features option in the sidebar, open the Features panel and compile the features in your font. Once the features in the font are compiled, you will see a list of all features in the Content Sidebar:
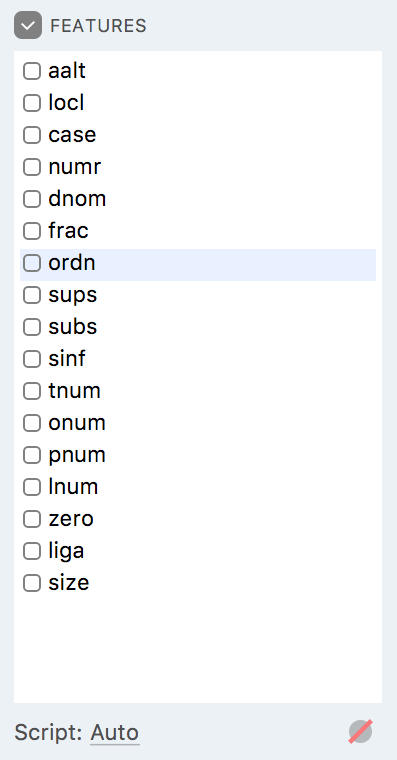
Once the features list appears, choose the script of your choice from the dropdown menu below the list and then check one or more features. They will be applied to the text in the Glyph window:
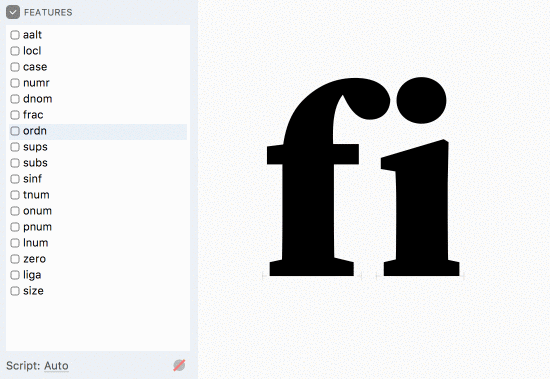
Click on the  button in the bottom-right of the features’ list to unselect all features. Note that if the glyphs in the Glyph window are not impacted by the features you have selected, you will see no change.
Top and left rulers»
Rulers show positions of various elements in the Editing area. Turn them on and off using the View > Rulers menu command. Please see the Rulers section for details.
Metrics table»
The part of the Glyph window can be taken up by the Metrics table. It can be switched on and off with the View > Metrics Table menu command. When working on glyph contours you usually do not need the metrics table, and can switch it off. Please see Using the Metrics Table for further information.

Text Wrapping»
Use the Text > Wrap menu commands to switch the current Glyph window between three formats: Manual (where the entire text is rendered as a single line, only interrupted by manual line breaks), Auto (where the entire text is rendered and automatically wrapped in a fixed-size column — currently it’s not possible to change the width of this column), and Table (which renders the text as a table of glyph cells — the glyphs still remain editable. This is useful for overlapping or narrow glyphs, emoji glyphs etc.)
Edit Across Commands»
The Edit Across Glyphs toggle in the Edit menu switches the Editing area to a mode when you can see and edit nodes of the current glyph only (other glyphs are not editable at the same time).
If you turn Edit > Edit Across Glyphs on you will be able to see nodes and edit all glyphs in the string, frame or table.
One of the glyphs still looks different because it is the current glyph.
Note: if you use grid snapping, the current glyph defines the grid origin. The points in the other glyphs will snap to the grid of the current glyph, which may not be what you want.
See Scope of Editing for information about Edit Across Elements and Edit Across Layers.
Switching glyphs in the Editing area»
While working in a Glyph window you usually have the current glyph. There are several ways to switch from your current glyph to another one.
-
Glyph > Next Glyph (Cmd-] or ++.++) moves from the current glyph to the next glyph in the font
-
Glyph > Previous Glyph (Cmd-[ or ++,++) moves from the current glyph to the previous glyph in the font
-
Text > Next in Text (++]++) moves from the current glyph to the next glyph in the text
-
Text > Previous in Text (++[++) moves from the current glyph to the previous glyph in the text
-
Text > Next Line (++Ctrl+]++) moves from the current glyph to the glyph in the line below
-
Text > Previous Line (++Ctrl+[++) moves from the current glyph to the glyph in the previous line
-
press the / key and start typing the desired glyph name in the popup pane:
Then press Enter to place the first available glyph, or click on the glyph you need in the list. This is the quickest way to open an existing glyph for editing.
-
press the ++#++ (Shift3) key and start typing the desired glyph Unicode codepoint in the popup pane
-
press CmdL (Edit > List Related Glyphs) and choose the glyph in the list of glyphs related to the current one:
- press CmdF (Edit > Find) and choose the glyph in the list of all glyphs included in the font.
This method doesn’t replace the current glyph in the text but puts the selected glyph at the right of the current.
Searching in the Glyph window»
Use the Search box in the upper right corner to quickly change the contents of the Editing area. When you start entering text in this field, the popup list with available search criteria appears below.
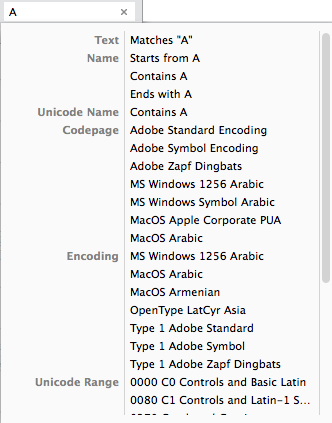
You can continue entering text or select one of the options in the list. For example:
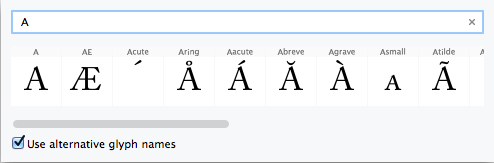
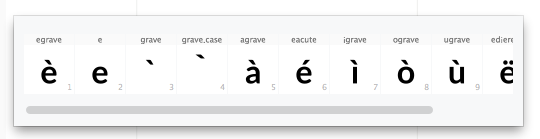
- Text: Matches “A” will put glyph
Ainto the editing area - Name: Starts from A will put all glyphs having their names starting from
A - Name: Contains A will put all glyphs having their names containing
Afor example.
The search results will replace the current contents in the glyph editing area.
Glyph Window Layers»
Every glyph may have several layers/masters; you can switch between them using the Layers icons in the Property bar.
For more info, see the Layers and Masters panel section.
Editing Glyph Tags»
You can label glyphs with different custom text tags. When in the Glyph window, use the Tags button in the Property bar to open the tags pane, where glyph tags can be edited.
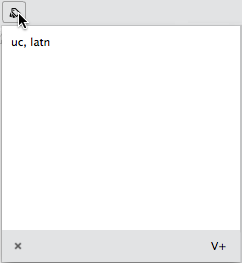
Enter keywords which describe the glyph and click outside the pane to save changes. Click on the small cross to clear tags or click on V+ to add virtual text tags automatically. Here are some virtual tags predefined in FontLab.
- fig = figure
- latn = latin
- uc = uppercase
- lc = lowercase
Find more info about tags in the Glyph Tags and Classes section.
Glyph Window Modes»
The Glyph window (GW) can work in different modes. Each mode has its specific way to present the content, and allows you to perform specific tasks. When you choose a tool in the Toolbar, the GW enters a mode specific to the tool. Note that the same mode can be activated via different tools.
Text mode»
The Text mode of the GW is activated by the Text tool (T). In the Text mode, you can edit the text contents of the GW to enter new phrases displaying glyphs that you wish to preview or edit, or to delete text. In the Text mode, all glyphs are filled and no other details (nodes, handles/BCPs) are visible.
Element mode»
The Element mode of the GW is activated by the Element tool (V). In the Element mode, glyph Elements can be selected, copied, moved and transformed in other ways, for example, scaled or rotated. The transformations will be applied only to that particular instance of the selected elements. Other elements referencing the same contours will stay unchanged. When an element is transformed in this mode, the element properties are changed, and are displayed in the Elements panel.
While in the Element mode, you cannot edit the glyph contours or the text sample; only Element-level adjustments are possible.
Drawing mode»
The Drawing mode of the GW are activated by the Brush (B), Pencil (N), Rapid (5), Pen (P), Ellipse (O) and Rectangle (I) tools. In the Drawing mode, you can add new contours to the current element. Many details of the existing contours, such as nodes and handles (BCPs), are shown in a limited way.
Editing mode»
The Editing mode of the GW are activated by the Contour (A), Eraser (2), Knife (J), Scissors (Q), Magnet (U), Fill (F) and Guides (G) tools. Depending on the active tool, in the Editing mode, you can perform various editing actions on the contours of the current element, or, if Edit Across Elements is on, on the contours of all elements and glyphs visible in the GW. You can control which details will be shown in the Editing mode with the View panel.
Spacing modes (Metrics, Kerning)»
The Metrics mode of the GW is activated by the Metrics (M) tool. The Kerning mode of the GW is activated by the Kerning (K) tool. Collectively, these modes are referred to as Spacing modes. In these modes, you can edit glyph metrics (advance width and sidebearings), and inter-glyph adjustments (kerning).
You can control which details should be shown in the Spacing modes using buttons on the Property bar. You can assign color backgrounds to Metrics and Kerning modes, independently of the general color background in use. This option is in Preferences > Spacing.
There is no dedicated Metrics window in FontLab VI. When you choose the Window > New Metrics Tab or Window > New Metrics Window menu command, a new GW opens in the Metrics mode, allowing you to edit glyph metrics. When you choose Window > New Kerning Tab or Window > New Kerning Window menu command, a new GW opens in the Kerning mode.
Production modes»
The TrueType Hinting mode (or TTH mode) is one of the Production modes. It has a specialized user interface for performing hinting for the TrueType and Microsoft ClearType rasterizers. It is activated by the TrueType Hinting (++Cmd-Shift-F7++) tool.
Another Production Mode is the Matchmaker tool, for semi-automatic masters matching and harmonization.