Importing Artwork»
FontLab allows you to import/export bitmap images (scans, pictures) or vector (outline) data with other graphics editing applications. The most common format for vector data is Encapsulated PostScript (EPS). Bitmap images are usually transferred in png, bmp, tif or gif formats. But FontLab can accept images in many other formats.
FontLab can exchange outline and bitmap data via the Clipboard, and can also import artwork from files. You can use Adobe Illustrator or compatible applications to draw your glyphs, and then import them into FontLab. Adobe Illustrator files needs to be saved in AI 8 or earlier format (AI 3 works great). Conversely, EPS files exported from FontLab can be opened in Illustrator or in any program that supports AI-compatible EPS files, such as CorelDRAW, ACD Canvas, etc.
Step One»
Prepare your artwork in Adobe Illustrator at 700 pt high. By default, font units in FontLab correspond to points in Adobe Illustrator (and other vector drawing applications). This means that if you want your uppercase letter “H” to be 700 units high in FontLab, you should make it 700 pt high in Illustrator. 72 pt = 1 inch, so 700 pt = 9.72 inch. You can populate your Pasteboard in Illustrator with your entire set of glyphs and import them all together, if you wish.
The same scaling applies to bitmap (raster) images. Pixels correspond to font units in FontLab, so to get a 700 unit tall “H” in FontLab, paste or import an image that has the H 700 pixels high.
Step Two»
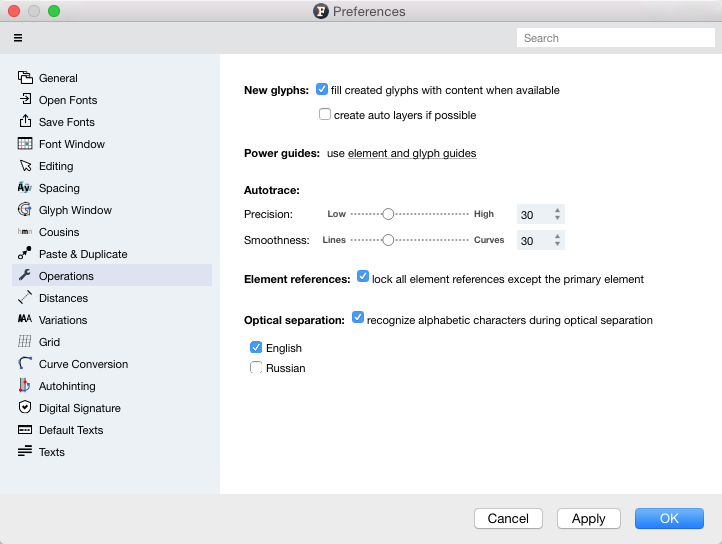
Make sure your Preferences are set to Recognize alphabetic characters
Step Three»
To paste a bitmap image or an outline from a bitmap- or vector-editing program into FontLab, select the image or outline object that you want to copy, and choose the Copy command from the Edit menu in the source application. To place this copied artwork in FontLab, switch to the Glyph Window or Sketchboard and select Edit > Paste.
If you want to trace an image you can use Element > Autotrace.
If you want to trace and divide an image into separate pieces at the same time you can use Element > Image > Separate and Trace.
To import artwork into FontLab, open a Glyph window or Sketchboard and choose File > Import > Artwork. Select the file you want to import in the open dialog. Use the dropdown menu with the list of different image formats to filter image files. You can also open a cell in the Font window, and drag the artwork directly into it from a folder, like the Desktop.
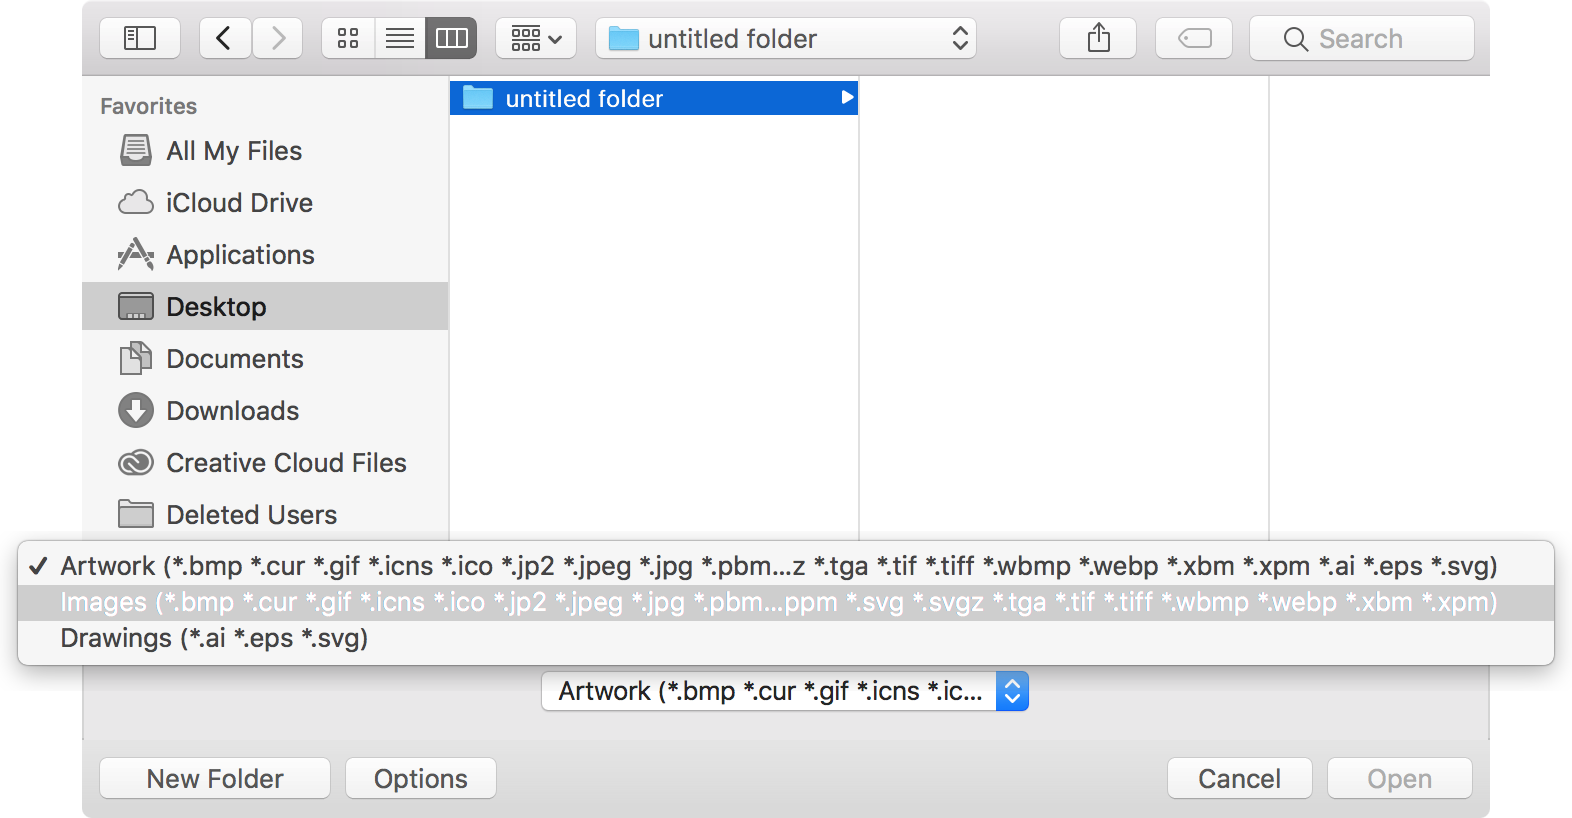
Here is a screen shot of the image file formats currently supported in FontLab. Please note that the safest Adobe Illustrator EPS file format would be Adobe Illustrator 8 EPS with no preview.
Step Four»
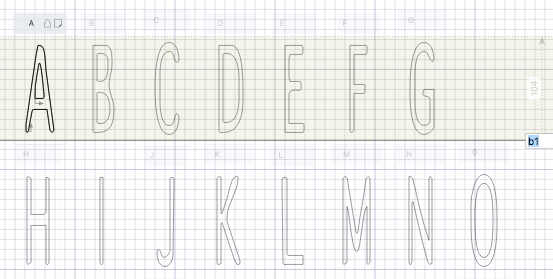
After your artwork is imported, it will appear on the Sketchboard. Make sure that View > Lock > Glyph Guides is unchecked. Drag a horizontal guideline for the Baseline from the Ruler bar. You will notice that these guidelines have names. Double-click the default name for the guideline and give it a name which begins with b for Baseline.
Change the width of the guideline by holding down Shift, and dragging a guide out of the Baseline to the Cap Height. The guideline width will define the cap height.
Note
If you have imported artwork containing more than one row of characters, you can duplicate the guide by positioning the mouse on top of the Baseline guide, holding down Alt, and dragging it so that it can be used on another row of characters.
Step Five»
Use the Element tool, which is depicted by a black arrow, to select all of your artwork. If you use the Contour tool here, the following steps will not work.
Select Element > Optically Separate. You will notice that your elements now appear in an Element Frame with their names at the top. Optically Separate only works on English and Russian glyphs at the moment. Other glyphs would have to be manually placed using the Element > Place As Glyphs > Current Element command.
Step Six»
Select all elements and choose Element > Place As Glyphs > Selected Elements. If you check the Font window, you will see that your elements now appear in their proper cells in the font. If any of your cells did not get a name or did not automatically get placed into a cell, you can take care of this manually. Go to Element > Place As Glyphs > Current Element to give your element a name.
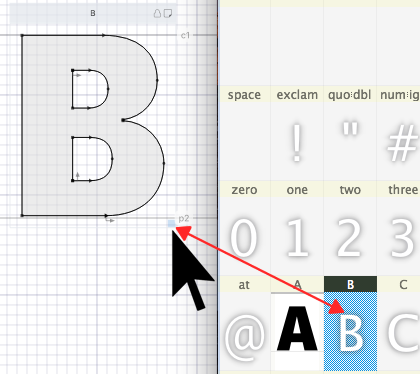
When you use the Element tool, you can select one of your elements in the Sketchboard and drag it into a Font window cell. You can do this by placing the pointer over the blue box on the bottom right corner of the box for that named element, holding down the mouse there and then dragging.