Autotracing»
The Autotrace features are found under the Element > Image > Autotrace menu. They are used to trace bitmap images into vector outlines.
Every imported image is a separate element so you may trace them separately.
To trace a bitmap image, first prepare and import it as described in Importing Artwork, then click on the image to select and choose Element > Image > Autotrace. The Autotrace operation creates a new element and places the result in this new element. You can start editing contours with the Contour tool immediately.
If your scanned image has several glyph images or even the whole alphabet you will rather want to separate it into several elements and trace them all separated.
To separate and trace an image, click on the image and choose Element > Image > Separate and Trace. This operation will try to divide your image into separate images (per glyph), put them in separate elements, and trace them individually.
Autotrace Options»
Autotrace operation can be customized in Preferences > Operations:
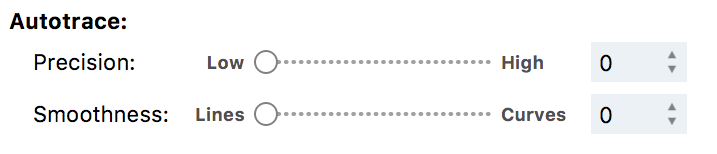
Precision is the trace tolerance. It allows you to change the distance between the generated outline and the edge of the original bitmap. A more precise tracing also requires more points, so it is a tradeoff.
FontLab also needs to make its best guess as to whether various places on a contour should be straight lines with corners, or smooth curves. Depending on the nature of the source material, one guess may be more likely to be correct than another. You can influence FontLab’s autotrace to favor one interpretation or the other by moving the Smoothness slider between “Lines” and “Curves.”