Using Elements»
When you draw in a Glyph Window, contours are automatically added to the current element. Every contour in a glyph belongs to an element. When you paste a bitmap image it appears in the glyph as a new element. If you add a sticker it also appears as a separate element. You can see all elements of the current glyph in the Elements panel.
In many cases, aside from combining accents/diacritics, you may not need more than one element for a given glyph. A common beginner error is creating a separate element and then not understanding why the two elements do not interact—for example, remove overlap no longer works easily. See “Grouping and Combining Elements” below.
Creating New Elements»
To create a new element, choose Element > New Element (CtrlS). Now start drawing and everything you draw will belong to this new element. If you work with monochrome fonts and wish to create a part of your glyph that you also intend to use in other glyphs (such as a serif), you would create a new element. If you work with vector color fonts, you need to create a new element for every set of contours that need to have the same fill color, stroke color or thickness.
Browsing Elements»
To switch between elements within the current glyph, use the Next Element and Previous Element commands in the Element menu. You can also use the Element tool (V) to switch from one element to another, move elements within the glyph editing field, group, copy, delete or add references to elements. This operation can also be done through the Elements panel: double-click on the element you need in the panel.
To turn element frames off and on, use the View > Element Frame command.
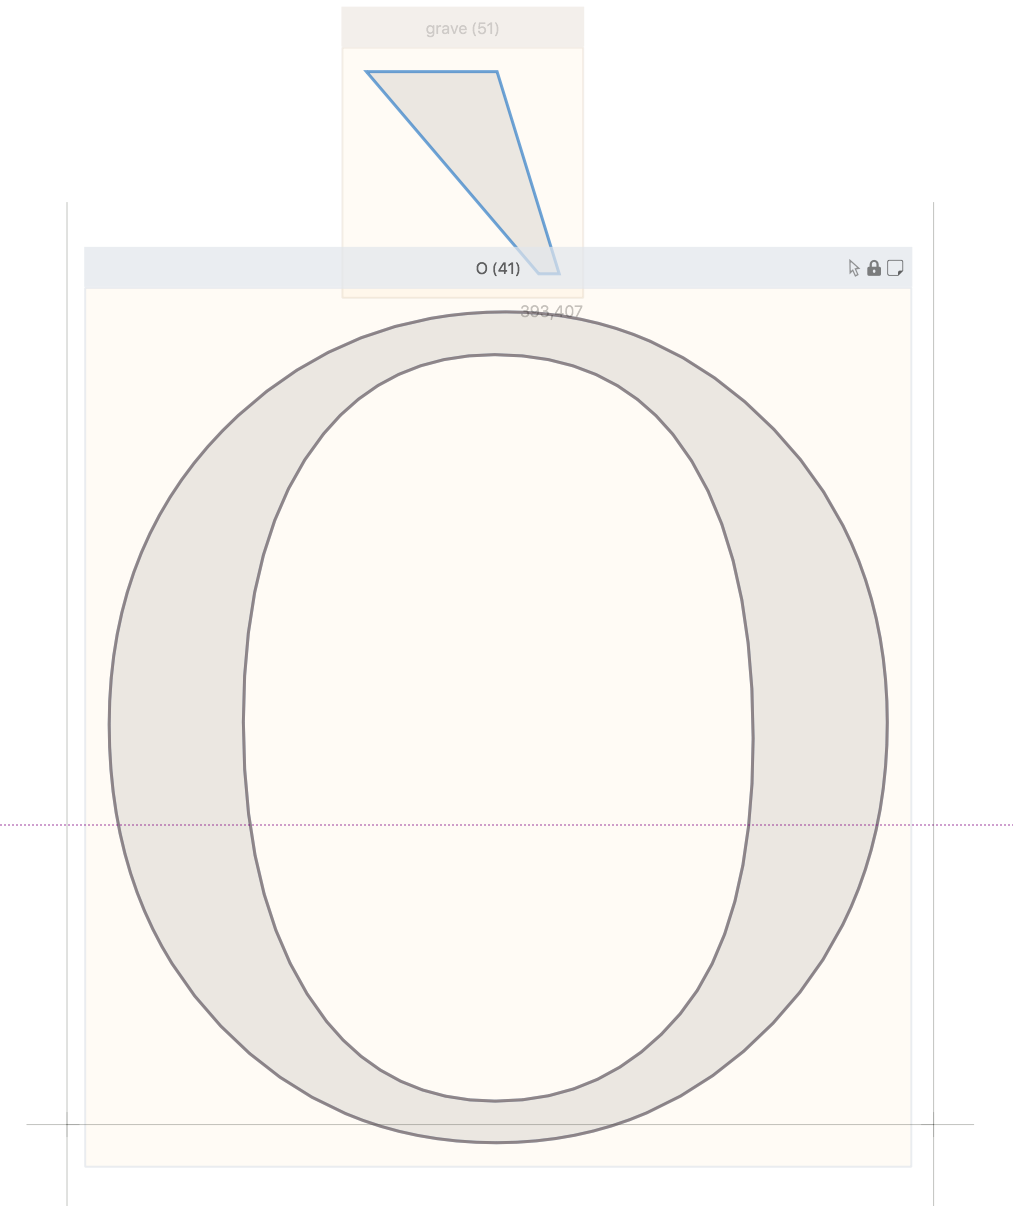
To lock and unlock the element, click on the “lock” icon in the element frame caption. If an element is locked, its contents cannot be edited in-place. Double-click on the element to open the primary glyph where you can edit the contents.
Selecting and Deselecting Elements»
To select an element, click on it with the Element tool selected.
To select several elements, click on each of them with the Element tool holding the Shift key down. When you click, position the mouse cursor over contours (and not any counters).
To deselect element(s), press the Esc key.
Use the Edit > Invert Selection (CmdI) operation to deselect the selected elements and select the rest. This command works only within the current glyph.
Transforming Elements»
With the Element tool and the Elements panel, you edit the “outside” of elements — the “shells” of the “boxes”. The difference is most evident with contour elements:
- If you shift, scale, rotate, slant or mirror the contours in an element using the Contour tool (or the Transform panel when the Contour tool is active), you are editing the contents of the element, so the point coordinates change permanently and the change is visible in all references.
- If you shift, scale, rotate, slant or mirror an element using the Element tool (or the Transform panel when the Element tool is active), the change is “live” and applies only to the active element. The contents of the element (and of all references to the element) stays unchanged. Only the “shell” of the particular element is scaled, which is similar to how scaled or rotated TrueType components work.
To reset the element shift, rotate, slant or mirror and place it in the original position, Ctrl-click on the element and use the Align > Reset Element Offset command in context menu.
To reset the element scale, Ctrl-click on the element and use the Align > Reset Element Scale command.
Aligning Elements»
To align two or more selected elements vertically or horizontally, use the Element > Align command. Elements will be mutually aligned by their bounding boxes.
To align one element to a glyph edge, select the element and go to the Element > Align menu:
1. Align Top will align to the ascender;
2. Align Bottom will align to the baseline;
3. Align Left will align to the left sidebearing; and
4. Align Right will align to the right sidebearing.
All align commands actually move elements so their offset attribute changes. To reset the element offset and place it in the original position, Ctrl-click on the element and use the Align > Reset Element Offset command in the context menu.
Edit Across Glyphs»
When Edit > Edit Across Glyphs is disabled, the contour modification tools (Contour tool, Eraser tool, Knife tool and Scissors tool) work only on contours in the active glyph. When Edit > Edit Across Glyphs is enabled, tools like the Pencil tool or Pen tool will draw in the current glyph, but the contour modification tools work on contours in all glyphs visible in the Glyph window.
Edit Across Elements»
When Edit > Edit Across Elements is disabled, the contour modification tools (Contour tool, Eraser tool, Knife tool and Scissors tool) work only on contours in the active element of the current glyph. When Edit > Edit Across Elements is enabled, tools like the Pencil tool or Pen tool will draw in the active element of the current glyph, but the contour modification tools work on contours in all elements in the Glyph window.
Copying Elements»
To make a (non-linked) copy from an existing element in the same glyph, move the mouse pointer over the element and when it is highlighted with yellow press the mouse button, wait for a second and then drag. You will see the image in a yellow rectangle which means you actually are copying the element. Copied elements are independent. When you edit one of the elements the other doesn’t change.
To make a copy of an element in another glyph, open the Edit menu:
- Open a glyph in the Glyph window and click on the contour with the Element tool.
- Choose Edit > Copy to copy the selected element.
- Switch to another glyph and choose Edit > Paste. The element will appear on the current layer of the glyph. This will be an element copy not a reference.
or
- Select several glyph cells in the Font window and choose Edit > Paste. The element will be added to each of the selected glyphs. Pasted elements will be linked to each other but separate from the original element. To link these new references with the original elements, you can use the Font > Detect Element References command.
To make a reference of an existing element in the same glyph, press Alt and drag the element with the Element tool. Or use the Contour tool, select a path (one or more contours or portions of contours) and copy it, then use Edit > Paste, the path will be added to the contents of the current element. But if you use Edit > Paste New Element, it will be pasted as a new unlinked element. You can also use the Element tool, select an element and copy it, then use Edit > Paste, it will be pasted as a new unlinked element. If you use Edit > Paste Element Reference, the element will be pasted as a locked reference (i.e. a component).
Grouping and combining elements»
Use the Element > Group command to group several selected elements into a compound element. The compound element can be moved, duplicated, deleted or copy/pasted like one element, but the individual properties (fill and stroke color, color thickness, filters such as Power Brush) of each element will be retained.
Contours that belong to separate elements don’t “interact” with each other: you cannot remove (merge) their overlaps, or use the Fill tool to create advanced fills. To allow such operations, select elements with Shift-clicking on them with the Element tool and choose Element > Combine Contours to Element. When you combine contours from multiple elements into one, filters such Power Brush will be expanded and all resulting contours will get the same fill and stroke color and stroke thickness.
Ungrouping and separating elements»
You can ungroup any compound element or an element group using Element > Ungroup.
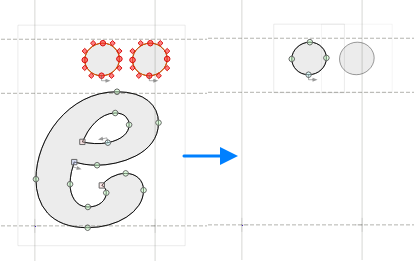
The Element > Separate Contours to Elements command can be used to divide one element into two or more elements. If no contours selected in the glyph the Separate Contours to Elements command will move each contour into a separate element:
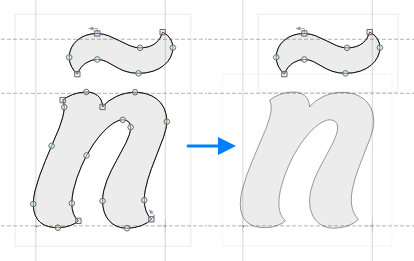
If one or several contours were selected the Separate Contours to Elements command will move each selected contour into a separate element and the rest of the contours will be deleted:
Using Named Elements»
Usually Elements can be accessed by the names of glyphs they appear in. Separate element names can be used if the glyph includes several elements or you need an element which doesn’t belong to any glyph.
Use the Elements panel to name individual elements. The Font > Detect Element References operation will also name all linked elements in the font. All named elements (linked or not) appear in the Gallery panel, from where you can drag-drop them from the panel to your new glyphs or right into the Font window cells.