Using Kerning Classes»
Some glyphs can have the the same outer shape on one or both sides—such as the left side of letters C, G and O, or both sides of A, Ā, Á, Ä and ×and so they could share the same kerning values, when they are being kerned with other glyphs. Such glyphs can be grouped together into classes, and kerning can be defined between classes, rather than between individual pairs. This approach to kerning is called Class Kerning and is defined in the glyph positioning (GPOS) feature kern. The classes used for kerning are called Kerning classes.
FontLab allows you to kern between two glyphs, a glyph and a kerning class, a kerning class and a glyph, or between two kerning classes; but class kerning has the highest priority. This means that if a member glyph of a kerning class is kerned with another glyph or class, FontLab assumes that you want to kern its entire parent class unless you specify otherwise. Kerning values that involve classes are stored with the class, not with the “key glyph of the class” as they were in FontLab Studio 5.
For general information on kerning, see Kerning, for details on how to do class and regular kerning, see Editing Kerning, Classes panel for more information on classes and how to create them, and Kerning panel for the panel that displays all kerning pairs in the font.
Creating a kerning class»
To create a new kerning class:
-
Open the Classes panel.
-
Click on the + button below the list of classes in the panel and the following dropdown will appear:
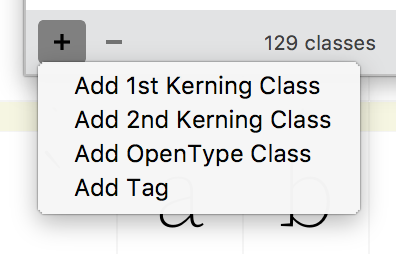
Here, choose whether you want to create a 1st or 2nd Kerning Class. In scripts that are written from left-to-right, 1st kerning class is the on on the left. The new class that appear will have a default name kl and the icon  before its name if it is a 1st kerning class, and the name
 kr and the icon  if it is a 2nd kerning class.
-
To add glyphs to the class, enter glyph names to the text field under the Table area of the panel; or select glyphs in the Font Window and press the + button under the Preview area; or drag-drop glyphs from the Font Window to the Table area or List sidebar. If you are dragging-dropping glyphs from the Font Window, you can use the window’s Search field to find the glyphs you are looking for.
-
To rename the class, select it on the left, and enter a new name in the Name field in the local toolbar.
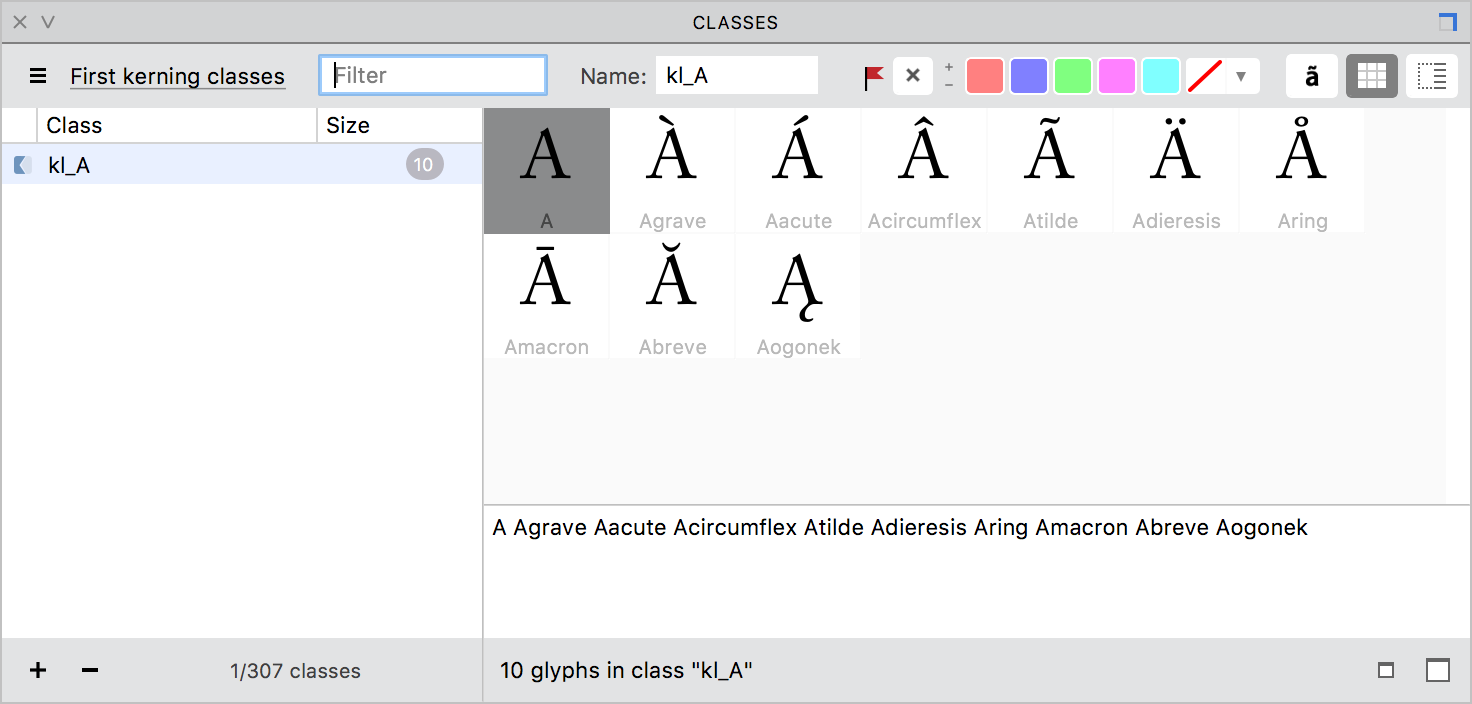
Once a kerning class is defined, this is what it will look like in the Classes panel:
Defining a class kerning pair»
Once you have created two kerning classes, one left and one right, you can begin class kerning. Suppose your kerning classes are defined as followed:
@kl_A = [A Agrave Aacute Acircumflex Atilde Adieresis Aring Amacron Abreve Aogonek];
@kr_T = [T Tcaron Tcommaaccent T_h T_h.commaaccent T_h.caron];
To define a kerning pair:
- Select the Text tool and type
ATin the Glyph Window. - Select the Kerning tool and open the Kerning panel (Window > Panels > Kerning)
- Click on
T, the second glyph, and then drag it closer or farther to the previous glyph in the string, or you can drag the “thumb” below the pair. The new class kerning pair will appear in the Kerning panel:
A green bar and “thumb” under the glyph pair indicate negative kerning. A yellow bar and “thumb” indicate positive kerning. A white “thumb” indicates that there is no kerning. Tap on W to swap positions of the two currently selected glyphs. For example if the current pair is “TA”, tapping W will turn it into “AT”.
Kerning classes in multiple-master or variable fonts»
Kerning classes are defined per master, but when instances or variable fonts are exported, classes from the main master are used (you can set the main master in Font Info > Masters using the blue radio button). To ensure that you have the same kerning classes in all your masters, visit each master and use the “hamburger” menu of the Classes panel to Import Classes, picking the main master each time.
When building variable fonts, kerning pairs that don’t exist in corner masters are assumed to have the value 0 but kerning pairs that don’t exist in intermediate masters get the interpolated value.
Building OpenType Kerning Feature»
After you have defined kerning for all your classes you need to create/update your kern feature.
To build or replace the kern feature using current classes and kerning information:
- Open the Features panel (Window > Panels > Features)
- In the panel’s “hamburger” menu, select Create [kern] feature.
- Click on Compile triangle button and preview your kerning working in the Glyph Window or the Preview panel.
Handling class kerning at font generation»
- If you generate PostScript Type 1 fonts, class-based kerning will be converted (expanded) to plain pair kerning during font generation.
- In OpenType (PS and TT) fonts, class kerning may be exported directly. It will be directly supported by most modern applications. But names of classes are not preserved so you may find them renamed on import.
- In addition, if someone uses OpenType PS fonts with class kerning on very old operating systems, the Adobe system font rasterizer (ATM) on Windows and Mac OS is used to automatically convert the Western European subset of the class-based kerning included in the font into plain (“flat”) kerning when the font was installed on classic Mac OS and Windows 2000. This does not happen with recent operating systems such as Mac OS X and later versions of Windows.