Hinting a Font»
The production of a hinted font can be primarily divided into three major parts:
- reading hinting from an existing font in the final font format
- adding hinting to an existing font in .vfc (or .vfb) format
- writing hinting into generated final fonts.
Hinting in PostScript-flavored glyphs (PS hinting) exists on one level only, so no translation or conversion is necessary on import. FontLab VI can losslessly read and write PS hinting, it can also losslessly modify PS hinting as well as generate it. More precisely: FontLab supports PostScript hints natively. When reading OpenType PS (.otf) fonts, FontLab converts CFF hinting into PostScript hinting.
Hinting in TrueType-flavored glyphs (TT hinting) exists on two levels:
- the low-level TT hinting (native) — assembly code in the TrueType instructions language, compiled into binary form, stored in OpenType TT (.ttf) and TrueType fonts, as well as optionally stored in the FontLab .vfc/.vfb documents.
- the high-level TT hinting (visual) — visual instructions in FontLab’s own TTH language, stored in the FontLab .vfc/.vfb documents.
FontLab can read low-level TT hinting. It can also write the stored low-level TT hinting but only for glyphs that had not been modified. If you modify a glyph, the stored low-level TT hinting will be removed.
FontLab can also convert PS hinting into high-level TT hinting, modify the high-level TT hinting, and convert (compile) the high-level TT hinting into the low-level TT hinting.
Note
FontLab cannot convert (decompile) the low-level TT hinting into the high-level TT hinting.
Opening Fonts»
When you open a TrueType-flavored hinted font, the low-level TT hinting instructions are always read, stored in the .vfc document and written back into a new generated .ttf font — but only for the glyphs which have not been modified within FontLab. Export is controlled by the export profiles.
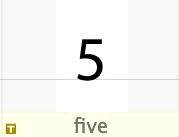
The blue “T” mark in the lower-left corner of a glyph cell indicates that low-level TT hints are present in the glyph and will be exported as is.
When you open PostScript-flavored fonts, their hinting is always read from the font, stored in the .vfc document and exported according to the export profiles.
PostScript outlines and PS hinting»
PS hinting UI elements»
Profiles»
The Profiles dialog box controls some vital aspects of how PostScript-flavored fonts (Type 1 and OpenType PS) are generated. The defaults are to export hinted fonts and automatically generate hints for unhinted glyphs:
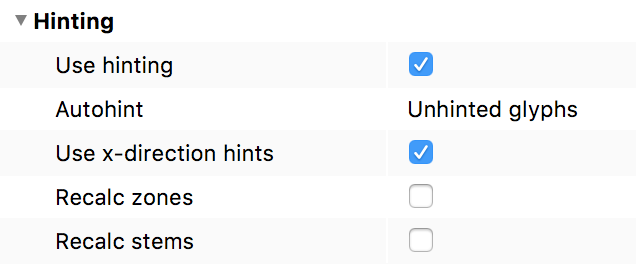
The option Use hinting exports existing hints and new hints if Autohint is on.
The option Autohint: “Unhinted glyphs” allows you to automatically autohint glyphs even if you did not perform any specific autohinting tasks. If a glyph does not contain any PS hints and this option is enabled, FontLab will automatically generate hints for that glyph.
If you wish to control your hinting manually and there are good reasons why you did not hint some glyphs, choose “No” in the Autohint drop-down menu. This will also allow you to generate PostScript-flavored fonts without hinting if you remove the PS hints from all the glyphs.
If you wish to replace all existing hints with autohinting results, choose “All glyphs” in the Autohint drop-down menu.
Use x-direction hints allows to export vertical hints. Turn this off if you do not need them. Y-direction (horizontal) hints will be exported anyway.
Recalc zones and Recalc stems recalculate zones and stems on export respectively. When turned off existing zones and stems are exported.
Note
Note that you must create a new export profile to be able to edit its options.
Glyph window»
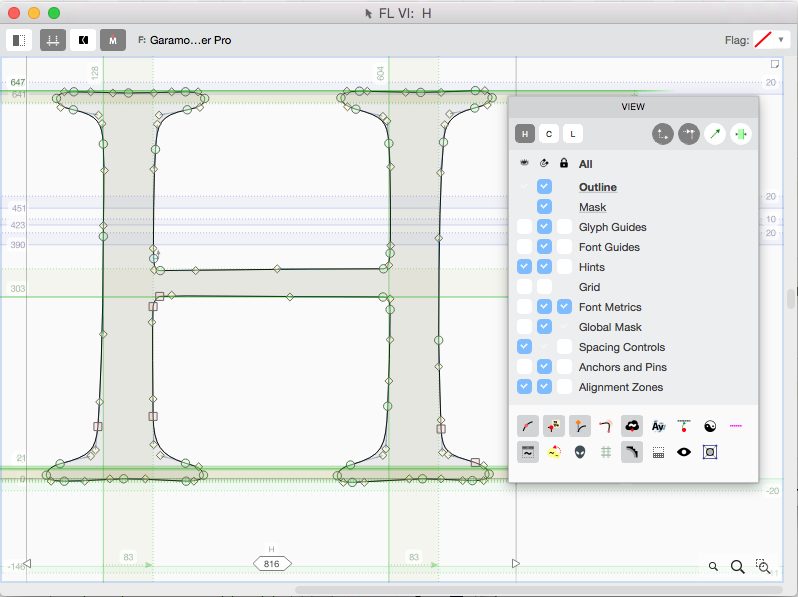
To view the PS hints present in the glyph, enable View > Show > Hints. To view the PS alignment zones (blue zones), enable View > Show > Zones.
Font Info»
While the hints are controlled on the glyph level, there is a number of relevant font-wide hinting settings. To view and edit them, open the Font Info Dialog Box.
Stems
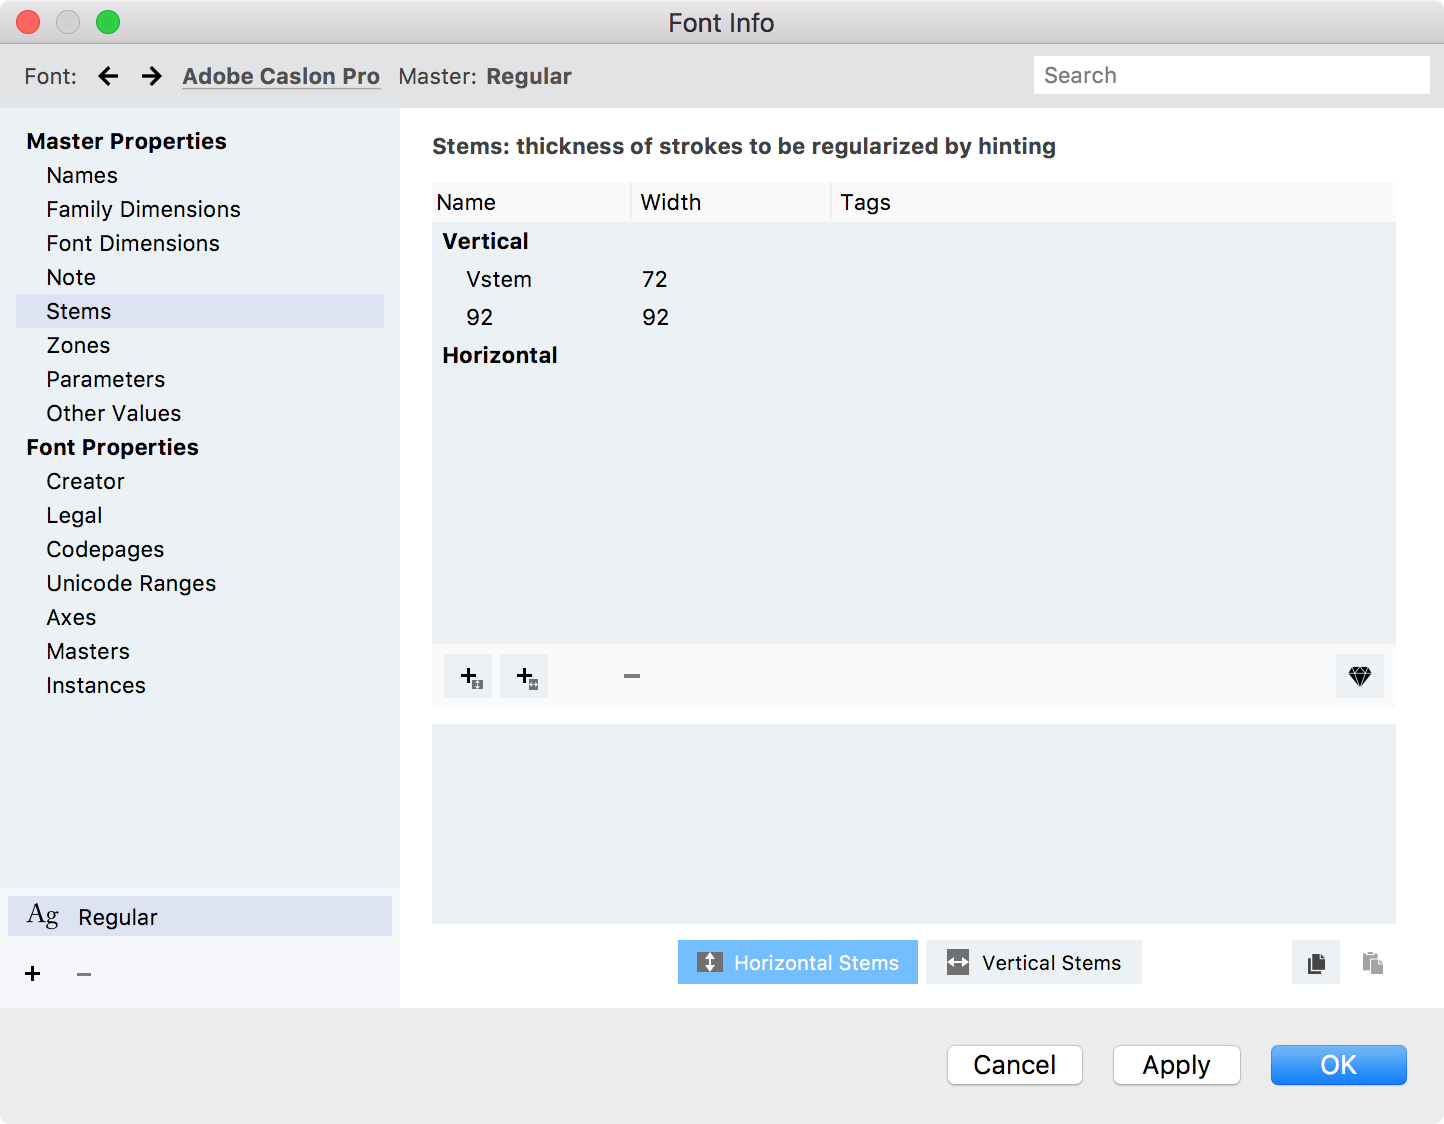
The Stems page controls the vertical standard stems that correspond to x-direction hinting, as well as the horizontal PS standard stems that correspond to y-direction hinting. Horizontal stems are more important than vertical ones.
The standard stems will be used in PS hinting, and they will also be converted into TT standard stems which are stored in the CVT table.
Clicking on Auto stems will automatically build a list of standard stems found in the font. This will be done by analyzing the PS hint values found in the font — which means that the font needs to have hinting for Auto stems to work.
Also note that quite often, FontLab will generate more PS standard stems than really necessary. For example, in Myriad Roman, the original V stem values are 88 92, and the original H stem values are 67 73. After Auto stems, V stem values will be 88 70 97 and H stem values will be 73 55 68. In some cases, stem values will be quite close to each other, and you may want to unify them.
Note
When converting PS hinting into TT hinting, you can control the Single link attachment precision with which FontLab will match each stem width with the TT standard stems. If you create fewer standard stems and increase the precision, the stems in the TT font will appear more uniform. If you create more standard stems and decrease the precision, the stems in the TT font will appear more varied.
Zones
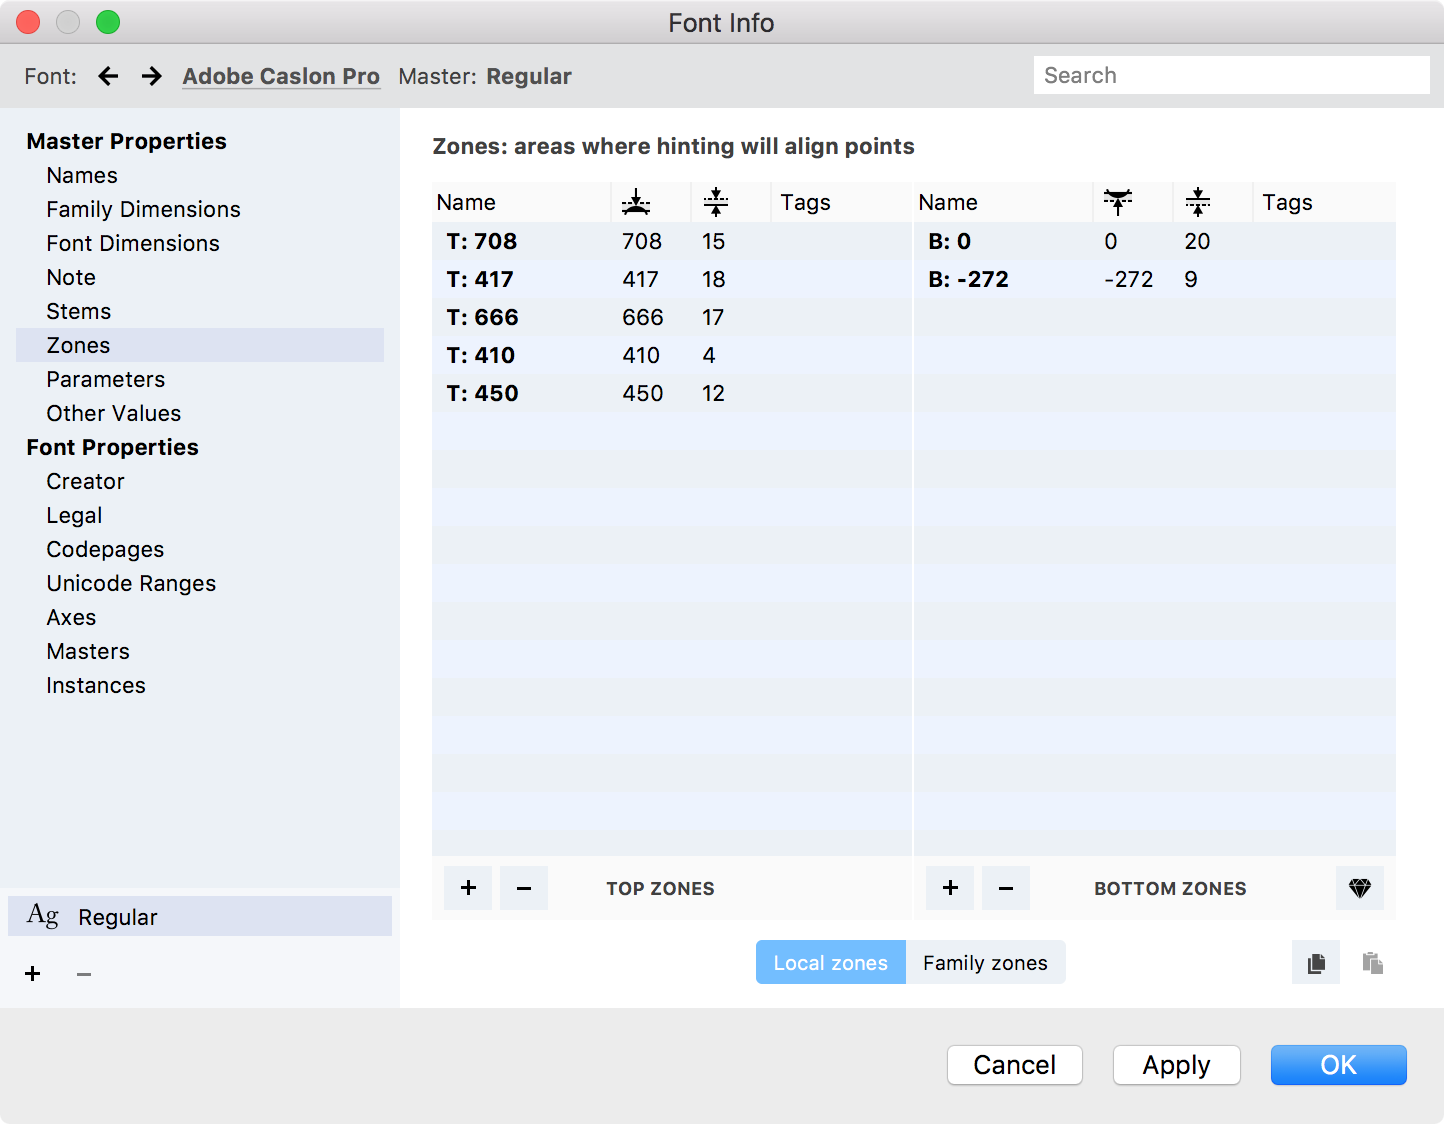
The Zones page controls the primary PS alignments zones (that are typically located above the baseline) as well as the secondary PS alignments zones (typically located below the baseline).
The PS alignment zones will be used in PS hinting, and they will also be converted into TrueType alignment zones.
By clicking on the Auto-detect zones button, FontLab will automatically rebuild alignment zones for the font. It will do so by analyzing the bounding boxes of a hardcoded list of uppercase and lowercase English letters. If your font contains multiple alphabets (scripts), or if it contains numerals or small caps that are of obviously different height than uppercase or lowercase letters, you should add more PS alignment zones that will control the overshoot suppression.
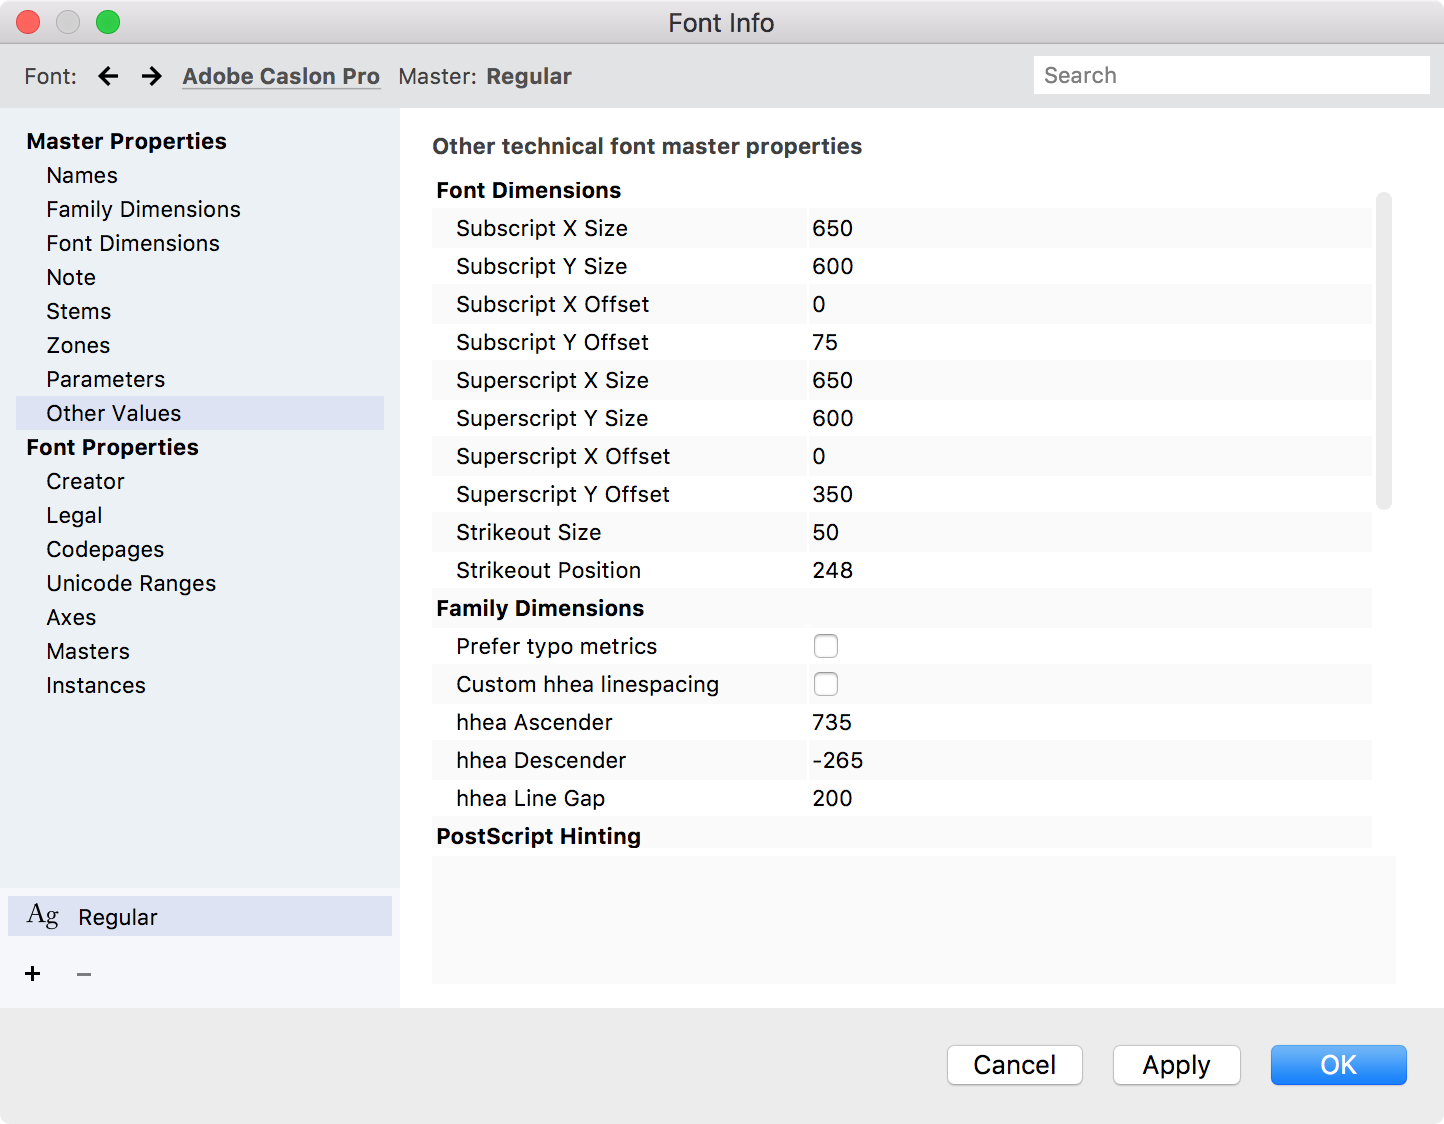
The PostScript hinting parameters are hidden on the Other Values page and only affect PS hinting. Please refer to Font Info Dialog Box and the Type 1 font format specification for more information about those parameters.
PS Autohinting»
If your font already has PS hints, standard stems and alignment zones defined, you can skip this step.
If your font does not have PS hints, you should perform the following steps to obtain PS hinting automatically:
- Go to Font Info > Zones and click on Auto-detect zones.
- Add and revise the alignment zones as needed.
- Choose Tools > Actions.
- From the Hinting section, perform the action Autohint for all glyphs in your font.
- If you’d like to only generate y-direction hints (i.e. horizontal hints) perform the action Remove hints for all glyphs in your font, and in the action’s options check Remove vertical hints and uncheck Remove horizontal hints.
Note
Some reasons why you may only want to generate y-directions would be because you plan to generate a TrueType-flavored font that does not need to be hinted in the x-direction. This would be the case for a font that will only work in ClearType, or the font is italic and the vertical hints do not make much sense.
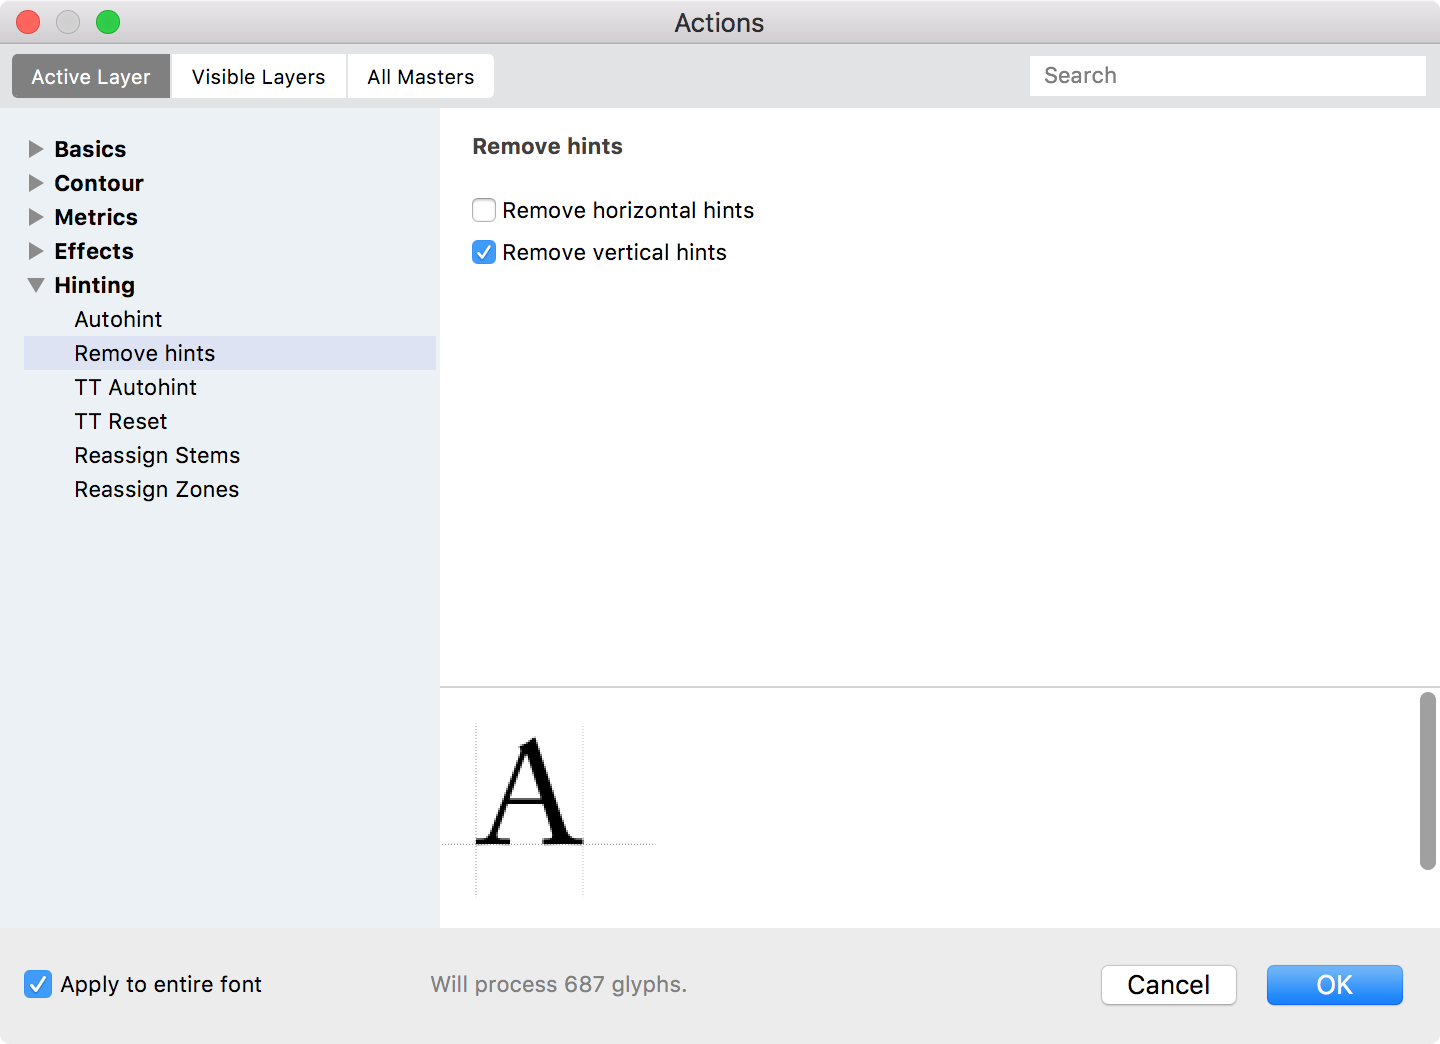
Select Apply to entire font every time you perform an action.
- Go to File > Font Info > Stems and click on Auto stems.
- Add, revise and merge the PS standard stems as needed.
- Click on OK.
After completing this process, you have a hinted PostScript-flavored font.
TrueType outlines and TT hinting»
Before producing a TrueType-hinted font in FontLab, you should verify that you have the following elements present in the font:
- alignment zones
- standard stems
- PS hints
These three parameters will be used by FontLab to automatically generate high-level (visual) TT hints.
TT hinting UI elements»
Profiles»
Like for PostScript hinting, export profiles define how TT hinting will be exported:
Note
Note that you must create a new export profile to be able to edit its options.
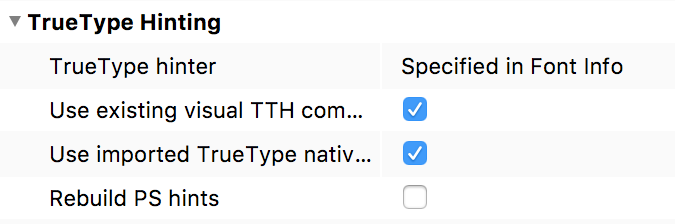
The TrueType hinter menu allows you to choose the hinting engine. You can choose between “FontLab TTH” (native FontLab hinting), “TTFAutohint” (the FreeType‘s auto-hinting system) and the hinting system selected in the Font Info Dialog Box. The “Specified in Font Info” option is set by default so to change your hinting options locally for the particular font, use the Font Info > Other Values page.
Turn Use existing visual TTH commands OFF to not export high-level (visual) TT hints manually created using TrueType Hinting tool.
Turn Use imported TrueType native hinting OFF to not export the imported low-level TT hints.
Turn Rebuild PS hints ON to ignore existing PS hints and automatically rebuild them before using “FontLab TTH” autohinting engine.
Font Info»
The TrueType hinting and smoothing options are hidden on the Font Info > Other Values page and only affect TT hinting for the current font. Please refer to Font Info Dialog Box and the TTFAutohint system specification for more information about those parameters.
Preferences»
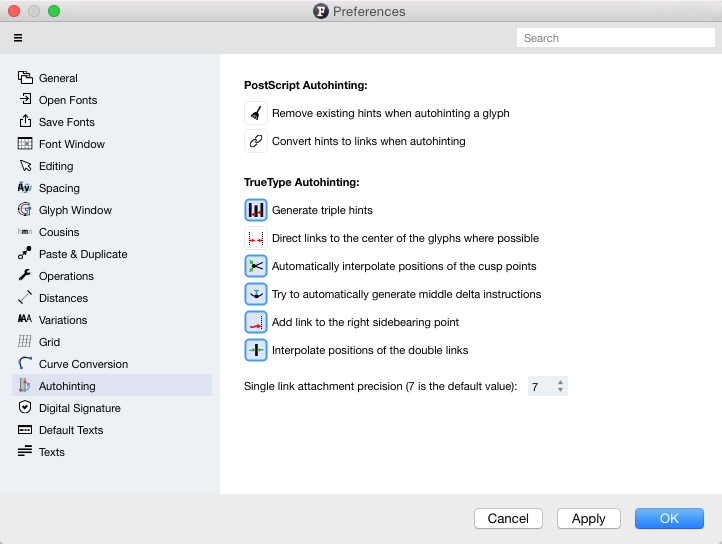
The Preferences > TrueType Autohinting page includes several options that give you fine-grade control in how PS hints are converted into high-level (visual) TT hints in FontLab.
Perhaps the most important setting here is Single link attachment precision. This numerical values controls the tolerance in which FontLab will match each stem width with the TT standard stems (CVT entries). For example, if one of the TT standard stems is 168, and if the precision setting is set to 3, then all stems that are of widths 165–171 will be linked to that value, but not stems that are 164 or 172 units wide.
Please see Preferences > TrueType Autohinting for more detailed explanation of those options.
Application windows»
To view and modify high-level TT hinting, open any glyph in a Glyph Window and choose Tools > TrueType Hinting.
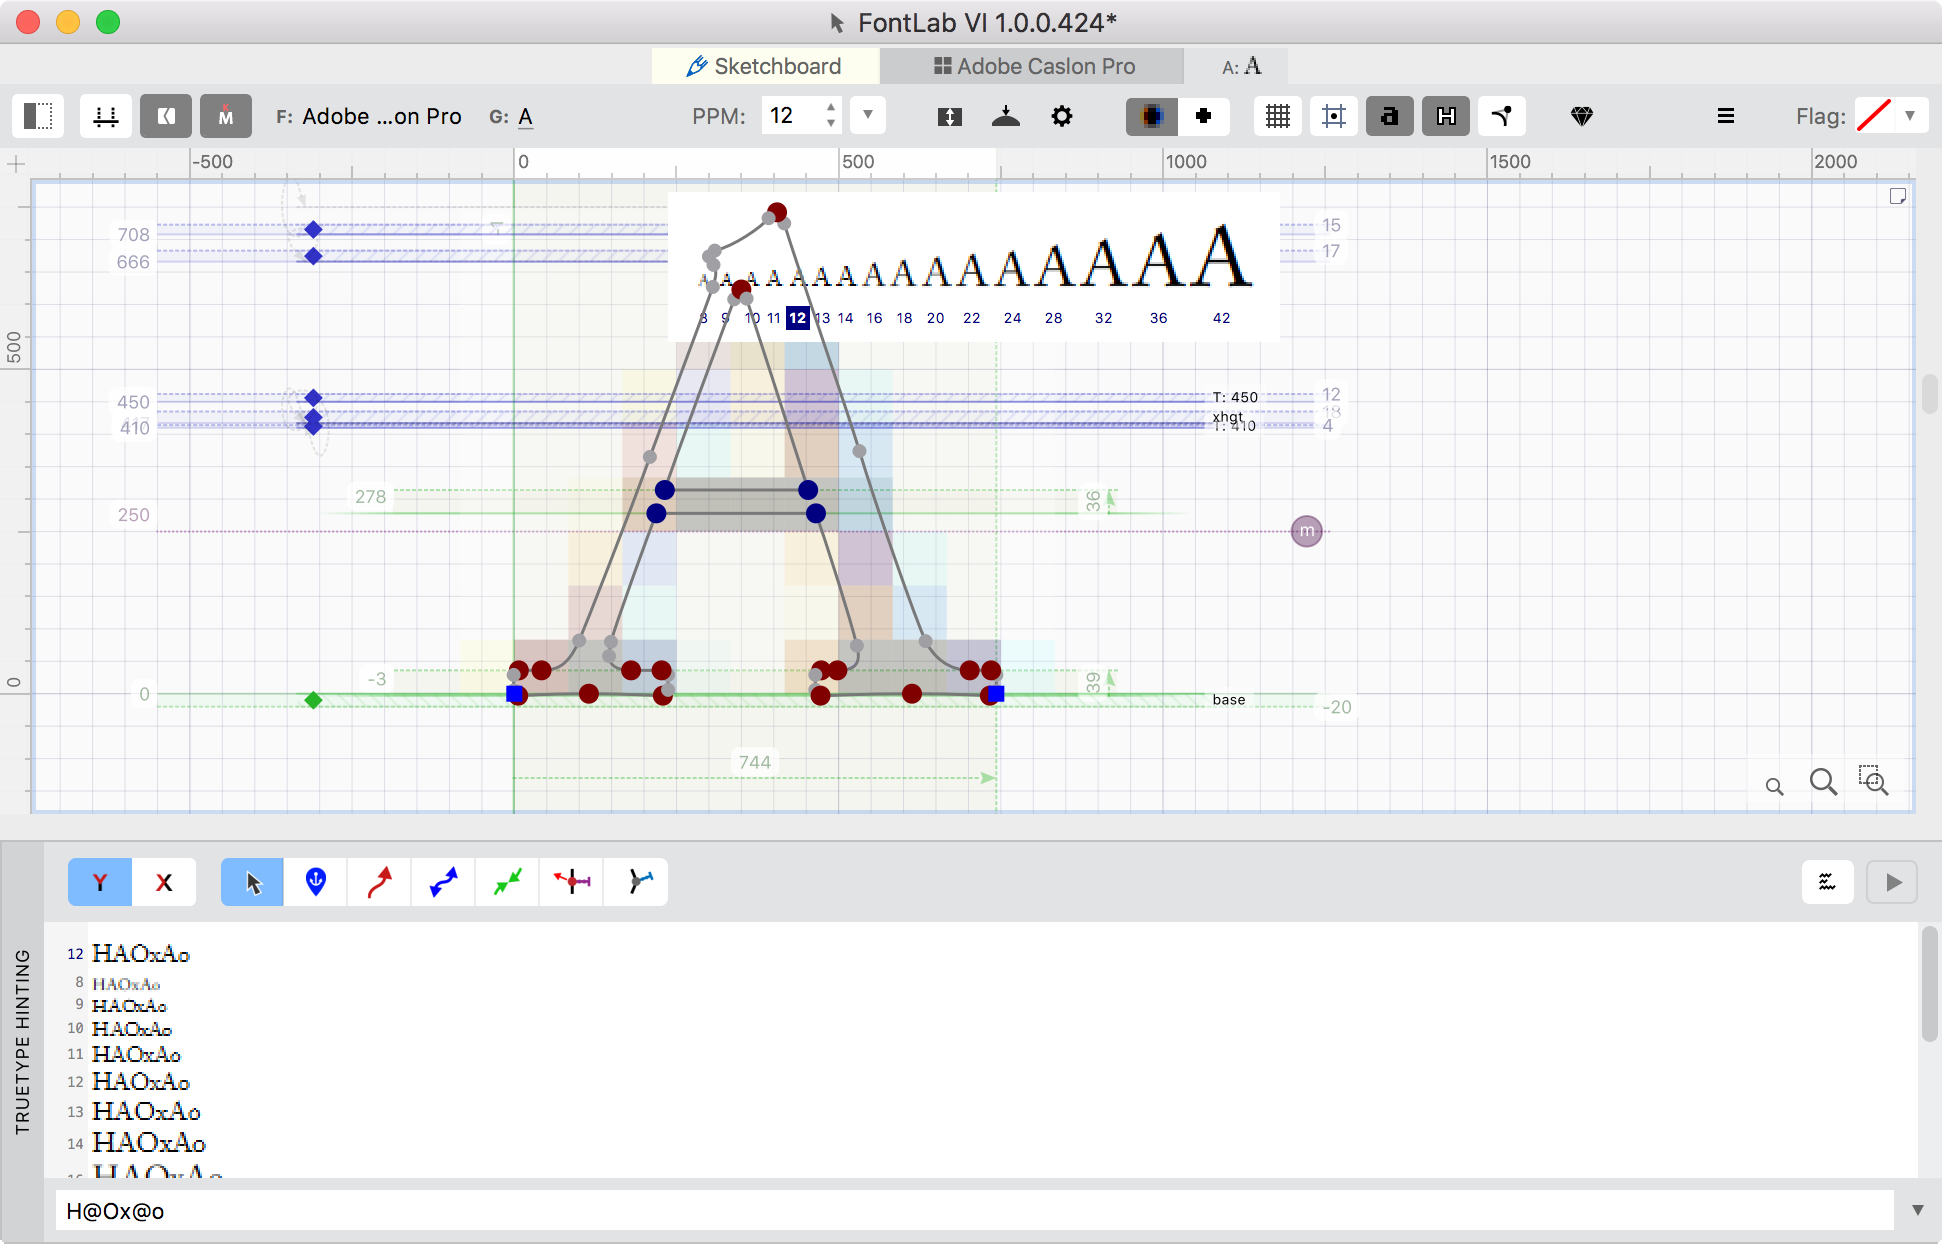
The TrueType Hinting tool has numerous subpanels that you can open: the TrueType Program panel, Stems, Zones and Other Parameters dialogs. The TrueType Hinting panel opens automatically.
Note
The TrueType Hinting panel (in both macOS and Windows versions of FontLab VI) uses the same rasterizer as Microsoft Windows. There are two rendering modes: ClearType, which shows the results of TrueType Hinting with subpixel positioning (as most users of modern Windows systems would see it), and Black/White, which shows the results of TrueType Hinting in pure black-and-white, without antialiasing (as users of older Windows systems would see, or those who have ClearType disabled on modern Windows).
Note
In reality, there are many more font rendering modes and variants in different versions of Windows: different types of smoothing, different settings for subpixel rendering and different ways which affect how glyph metrics are rendered on the subpixel grid. The two modes of rasterization in the TrueType Preview are representative of “tough” scenarios, where TrueType Hinting can help most. Microsoft is constantly advancing their font rendering techniques — if your hinting results look good in FontLab VI, then they will look just as good or better for real Windows users.
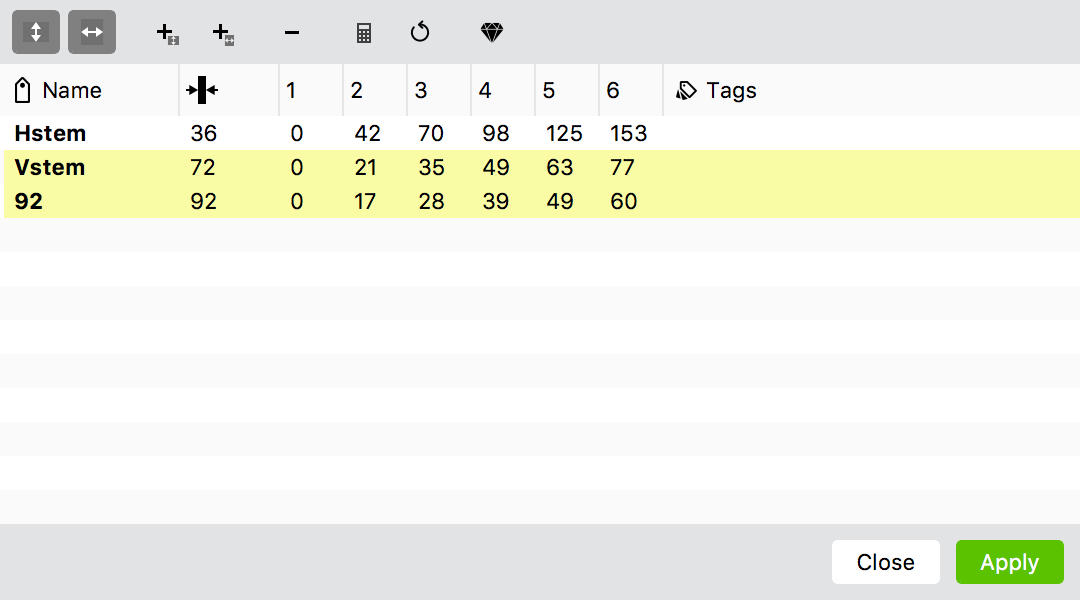
Click on the Stems ![]() button in the Property bar to open the Stems dialog that allows you to control the TT standard stems.
button in the Property bar to open the Stems dialog that allows you to control the TT standard stems.
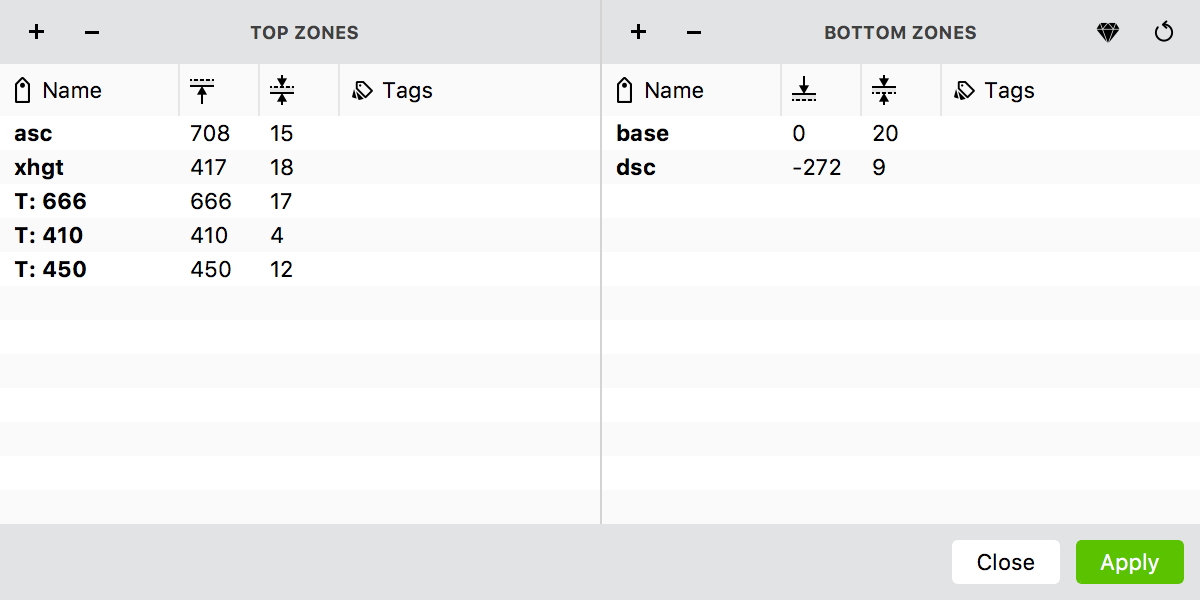
Click on the Zones ![]() button to open the Alignment Zones dialog that allows you to control the TT alignment zones.
button to open the Alignment Zones dialog that allows you to control the TT alignment zones.
Click on the Other Parameters ![]() button to open the TTH Parameters dialog that allows you to control local TT hinting options.
button to open the TTH Parameters dialog that allows you to control local TT hinting options.
After converting PS hinting to TT hinting, the TT stems and zones correspond to the standard stems and alignment zones that have been defined in Font Info, but this can be modified.
Outline conversion and TT autohinting»
Note
These next steps modify the actual outlines of your glyphs, so please be sure you have saved a backup copy of your original design with PostScript outlines.
Also, please keep in mind that when FontLab converts PS outlines into TT outlines, the quality of conversion depends on the UPM size of the font and the curve conversion tolerance found in Preferences. The smaller the UPM size, the fewer TT outline points FontLab will produce. If your UPM size is very high, the number of TT outline points will be large, which may result in less satisfactory TT autohinting results (since FontLab may become “confused” as to which outline points would best be controlled by the TT hinting instructions). It’s also possible to reduce the number of TT outline points after outline conversion, using the FontLab Clean Up feature. As a rule: if possible, try to keep the number of TT outline points at a reasonable minimum.
Please perform the following steps to convert a PS-hinted font into a TT-hinted font with TrueType outlines:
- Go to Preferences > TrueType Autohinting and fine-tune the way PS hinting is converted into TT hinting. In particular, check the Single link attachment precision value.
- Close all opened glyph windows.
- Choose Tools > Actions, from the Basics section select the action Convert to TT curves, turn Apply to entire font and click OK.
- Choose Tools > Actions again, from the Basics section select the action Set contour direction, click on the option Set TrueType direction, turn Apply to entire font and click OK.
- If you decided to reduce the number of TT outline points after the conversion (which may result in small adjustments of the glyph shapes), from the Contour section, select the action Clean Up, turn Apply to entire font and click OK.
- From the Hinting section, select the action TT Autohint, turn Apply to entire font and click OK.
Glyph cells will get the brown “T” mark in the lower-left corner which indicates that high-level (visual) TT hints are present in the glyph:
After completing these steps, you have a basic TT-autohinted font. You can generate your TrueType-flavored font now, or you can proceed to fine-tuning the TT autohinting results.
Fine-tuning the TT autohinting results»
To start fine-tuning the TT autohinting results:
- Open a glyph in the Glyph Window.
- Choose Tools > TrueType Hinting.
- In the Glyph Window Property bar, click on the Stems
 button to open TT stems that have been copied from the PS standard stems. Editing the TT stems may have a significant impact on how consistent the appearance of different stems will display, especially in pure black-and-white rendering. For example, merging some stem values will result in a font in which the slightly different stems will appear more consistent.
 - In the Glyph Window Property bar, click on the Zones
 button to open TT zones that have been copied from the PS alignment zones.
One important parameter for TT stems is the ppm2 value. This value indicates the ppem size at which (mostly in black-and-white mode) the stems will turn from 1 pixel width to 2 pixels width. (The ppm3 entry indicates the ppem size at which the stems will turn from 2 pixels to 3 pixels width etc.).
Lowering those ppem values will result in the affected stems appearing heavier in small sizes. Raising those ppem values will result in the affected stems appear lighter in small sizes. For example, if you have a Medium style and a Semibold style in your family, and they look too similar at small point sizes, you may choose to decrease the ppm2 and ppm3 entries in the Semibold style (so it will appear heavier), and to increase them in the Medium style.