Text tool»
The Text tool is used to switch the Glyph Window to its Text mode, so you can type in the Glyph window and in the Sketchboard. It is selectable using the T key or the T icon on the Toolbar.

The Text tool is useful once your font contains characters that you can type. Once you have typed text or pasted it from the clipboard, you can zoom into any particular glyph, edit the glyphs using other tools, or work on the glyph’s horizontal metrics or kerning by switching to those tools. If, however, you have just created a new font, you will have no characters in the font and typing will only add blank spaces.
To have more control over what you can do with the Text tool, you can use the Property bar.
Text tool property bar»

When you choose the Text tool, the dynamic part of the Property bar displays the following:
-
Thumbnail list of glyphs related to the current glyph (i.e. the glyph that precedes the Text Mode’s text cursor). Click on any thumbnail to insert the glyph at the cursor, or — to replace your selection in the Glyph window.
-
Find button at the end of the thumbnail list, which, on click, opens Find Glyphs Edit > Find Glyphs dialog that allows you to make a more precise search using different criteria.
-
Case buttons, Text to uppercase and Text to lowercase, that let you change the case of text currently selected (using the text mode cursor), or of all the visible text if there is no selection.
-
Features button, which opens a floating dialog that allows you to apply OpenType features to the entire visible text. You need to have features defined and compiled in the Features panel. The Features checkbox enables feature processing, which will also activate Right-to-Left and script-specific Unicode processing. With the checkbox enabled, you can choose which features should be enabled.
-
Text size selector, which lets you choose a text size from the dropdown menu. The button to its left, Smaller text, and to its right, Larger text, can also be used to modify the size of text in the Glyph window.
-
Tracking and line height selectors that are hidden if they don’t fit within the window width.
-
Texts button that opens a floating text editor for the Text phrases. You can apply any of the phrases to the Glyph window using Text > Next Phrase and Text > Previous Phrase, and using the Pairs and Phrases panel.
-
Auto wrap toggle that can be used to apply or remove wrap to the text in the Glyph window. Fontlab turns Auto wrap on automatically every time you open a text from the Texts library which is longer than 80 characters.
-
Text Bar toggle that can be used to show/hide the Text Bar at the top of the Glyph window. You can type inside the Text Bar instead of in the Glyph window.
In addition to the dynamic part of the Property bar, you can use the Glyph name field to the left of the thumbnail list to check the name of the current glyph; or you can type a glyph name inside that field to see results in the thumbnail list. Click on any result to add that glyph to the Glyph window, or hit the Enter key to insert the first result of the search.
Content Sidebar»
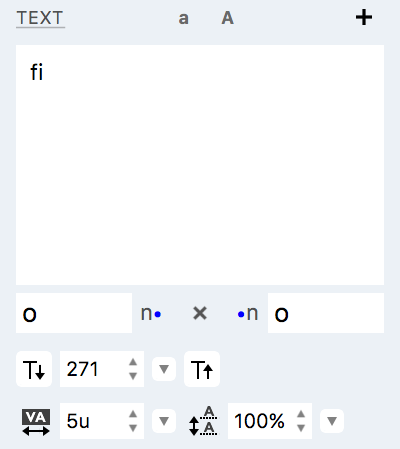
From the static portion of the Property bar, you can open the Content Sidebar. Through the Content Sidebar, you can access texts from the Text Library, modify the text formatting in the Glyph Window and control previewing OpenType features.
Using the Text Library»
To open a text from the Texts library, click on the local menu Text. You can choose a text from the list, and it will appear both in the Glyph window, and in the text box below this menu. Fontlab turns Auto wrap on automatically every time you open a text which is longer than 80 characters.
To add a text to the Text library, type it into the text area in the sidebar or directly in the Glyph window, and then press the  button. It will be added to the list you can access from the Text menu. You can also add texts to the library using Preferences.
To remove texts from the Text library, use Preferences.
Modifying formatting in the Glyph window»
To change the case of the text in the Glyph window, click on the  button to covert to lowercase, and on the
  button to uppercase.
To set the text size in points, enter the text size in  , or use the number stepper to change them, or click on
  and
and  respectively to decrease and increase the text size. Note that the zoom of the window contents may not be set to actual size.
To see your text at the selected size without zoom, click on the leftmost magnifier icon  in the bottom-right corner of the Glyph window.
To set the tracking (distance between glyphs) of the text in the Glyph window, type a text into  , or use the number steppers, or choose a value from the dropdown menu.
To set the leading (distance between lines of text) of the text in the Glyph window, type a text into  , or use the number steppers, or choose a value from the dropdown menu.
Adding context to text in the Glyph window»
To add strings before or after the glyphs in Glyph window, type in the relevant string to the fields  and
and  respectively. This function can be useful when working on glyph metrics or kerning. For example, typing HO in both fields will give you the following string of text:

Auto Preview in Text mode»
When the Text tool is active and you don’t perform any actions, after a few seconds of inactivity the Text mode turns into Auto Preview, and the text cursor disappears.
In Auto Preview, instead of keys producing text, they have the same effect as in other editing modes of the Glyph window: you can zoom in/out using the Z and X keys, pan using the Space key and use other any single-key shortcuts. To activate the Text mode again, click where you want the text cursor to appear.
Previewing OpenType features»
To preview OpenType features in the Glyph window, check the Features option in the sidebar, open the Features panel and compile the features in your font. Once the features in the font are compiled, you will see a list of all features in the Content Sidebar:
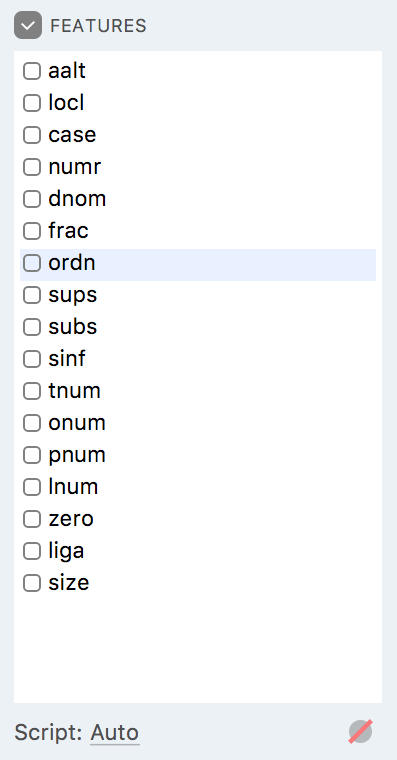
Once the features list appears, choose the script of your choice from the dropdown menu below the list and then check one or more features. They will be applied to the text in the Glyph window:
Click on the  button in the bottom-right of the features’ list to unselect all features. Note that if the glyphs in the Glyph window are not impacted by the features you have selected, you will see no change.