Node panel»
The Node panel Window > Panels > Node shows all the properties of the selected node and allows one to edit them. Click on any node on the contour to see its properties in the Node panel.
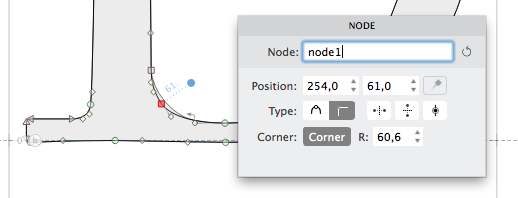
The panel has the following fields:
Node»
This field shows the name of the node. Usually nodes do not have names, but if you are going to hint manually or interpolate the font you may need to name your nodes. Some automatic operations (like autohinting) may also name nodes without informing you. To generate the name for a selected node, click on the generate/update icon. A name will be assigned to the node based on its order in the contour. For instance, if the selected node is the first one, it will be named “n0”.
Position»
The x and y coordinates, which make up the position of the node in the glyph space, are shown here. If the selected node is a Bézier Control Point (BCP), then clicking on the pin button to the right of the co-ordinates will show its relative position from the on-curve point where it originates.
Type»
This shows the type of the node that is selected. A node can be smooth or corner, as well X-servant, Y-servant and Genius. You can change the type of the node by selecting the options of your choice. The same change in node type can be applied to several nodes together by selecting all of them (for example, by Shift-clicking on them) and making the required change only once.
Corner»
If the selected node is a corner node, you click on this button to make it a Smart corner. The R field displays the corner radius, and allows you to edit its value. Note that this button will be deactivated if the selected node is smooth.