Using Glue Selection»
The Element > Glue Selection command can help you to intelligently attach smaller components to base contours while building glyph outlines. It is a special filter that allows a selection to snap to the underlying contours.
Using Glue Selection»
Suppose you are drawing a font with serifs using a sans-serif design as your base. You have already drawn an “L” with serifs, and you now need to add serifs to the “K”. To use Glue Selection to do this, follow the steps below:
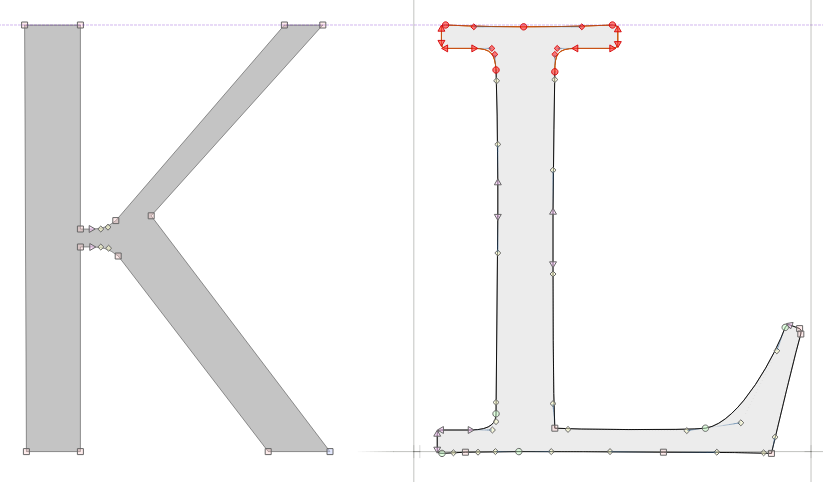
- Open both glyphs in the Glyph window. Select the top serif in “L”’ and choose Edit > Copy:
-
Switch to “K” and select Edit > Paste. The pasted open contour will remain selected.
-
Choose Element > Glue Selection. You will notice that the Element tool becomes the current tool. Your selection is the glued element and it will also turn green:
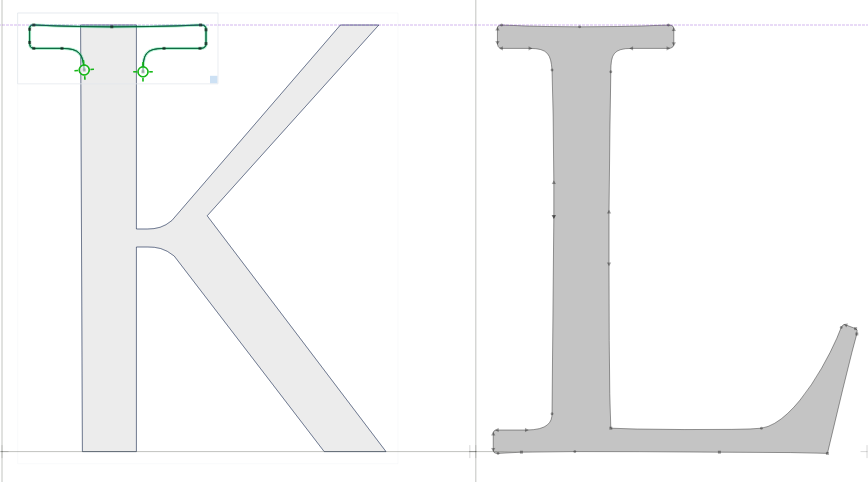
- Position the element where you feel it should be.
- Now Alt-drag this green element to make a copy for another stem:
-
The copied element is a reference, so if you edit its contours the contours of the original element will also be changed. You could choose Element > Unlink Reference to make this copy independent, or you may skip unlinking if you do not need to edit the new element separately right now.
-
Alt-drag once again to make another copy for the bottom. Tap on E to flip it vertically and position it at the bottom of the vertical stem. Repeat the same steps to add the serif to the leg of the “K”:
- When you are finished, you could select the Glyph > Flatten Glyph command to apply filters to elements, unlink references and merge elements. You would do this if you want to customize the different versions of the serif, for example to make inner serifs a different length than outer serifs, or fine-tune connections. On the other hand, if you want changes made to one copy — such as adjusting serif shape or length — to continue to affect all copies to make font-wide modifications, you could leave the references as “live.”
Glue Selection Options»
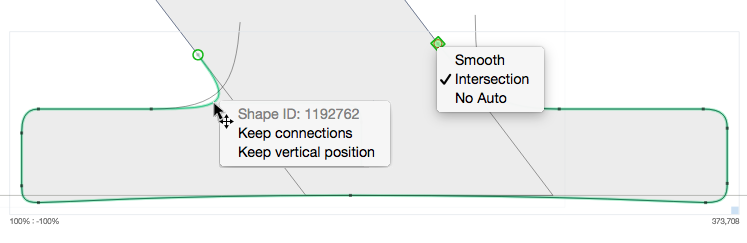
FontLab lets you choose options that dictate how the glued element will behave. To access glue options, Ctrl-click on the element contour or on the final nodes to open the pop-up menu. The following options are available:
| Option | Description |
|---|---|
| Smooth | The point forms smooth connection of the glued element to the underlying contour |
| Intersection | The point forms fixed connection of the glued element to the underlying contour |
| No Auto | Element’s contour doesn’t adjust its form |
| Keep connections | This option glues the element strongly to the underlying stem. Even moving the element to another stem wouldn’t disconnect it |
| Keep vertical position | The glued element’s vertical position is fixed so moving the underlying contour wouldn’t change it. |
Converting Glued elements into regular contours»
When you are ready to convert your glued elements into regular contours:
- use the Element > Expand Filters command to apply the Glue filter. The result is the regular element in a group with the underlying elements
- use the Element > Ungroup command to ungroup elements
- use the ==Glyph > Flatten Glyph to expand filters and combine all elements in one (if possible).