Language Support and Glyphs»
Language Support & Encoding Views»
Defining language support for fonts in FontLab VI requires selecting the glyphs you want to create, and then designing them and including the appropriate OpenType features. FontLab will help you with glyph names and Unicode encoding, and will set appropriate Unicode range and codepage flags as needed in the generated font, based on the encoded glyphs present in the font.
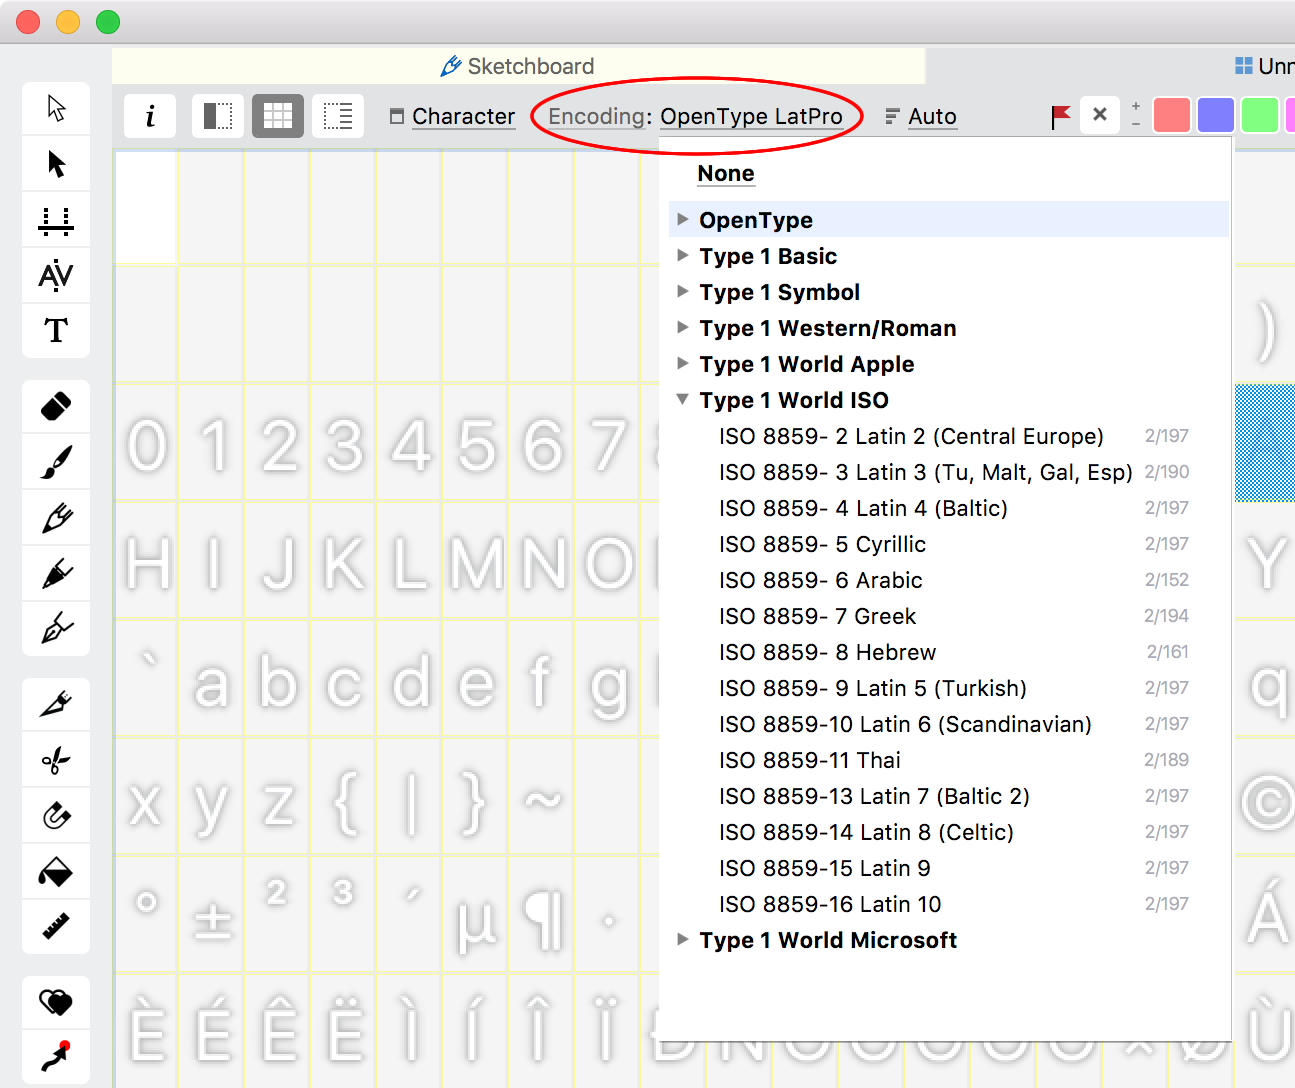
How do you decide which glyphs to create? This depends on your goals, but FontLab provides several helpful tools. In a Font Window, you can view a specific set of glyph slots in a defined order, whether or not the glyphs in question are even present yet in your font. We call this an “Encoding.” You can switch your Encoding view at any time. This can be useful to show you which glyph slots you may wish to populate.
See Glyph Naming and Encoding for more details.
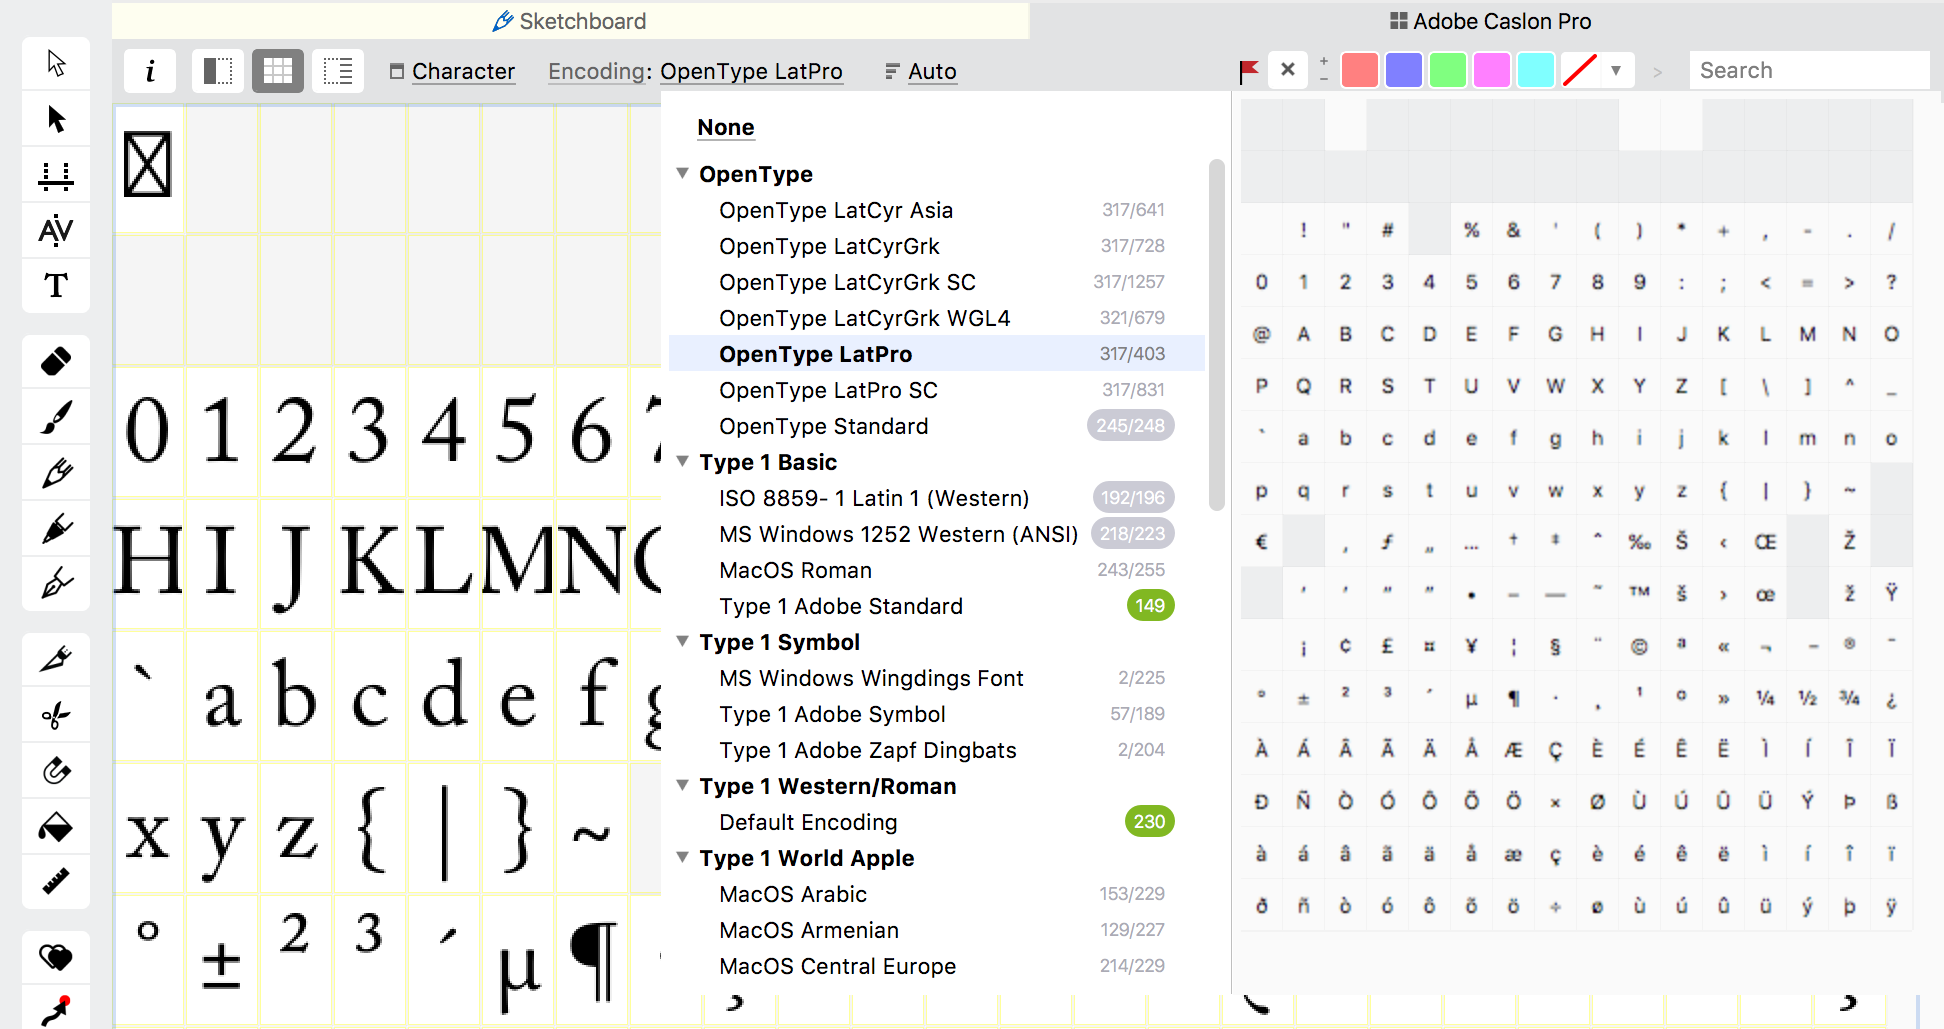
FontLab’s default view mode is “Encoding”. Others are Codepages, Unicode Ranges, Categories and Scripts. The default encoding for new and newly opened fonts is “OpenType LatPro” which offers a large character set of over 400 glyphs, covering western and central European Latin-based languages such as English, French, German, Polish, Latvian, Romanian and Turkish (among others).
You can change the default view mode and the default encoding in Preferences > Font Window.
For a basic western-Europe character set, consider the “OpenType Standard” encoding.
Using friendly names»
If you are working on a font for a script other than Latin or Greek, consider using friendly names, which can be created in the Preferences. To see friendly names, go to Preferences > Open Fonts > “Convert uniXXXX and afiiXXXX to friendly names”. This will allow you to see friendly names for all your glyphs in the Font Window, rather than glyph names using only Unicode numbers. A generated font will still use “correct” names and encoding will be maintained.

Adding Glyphs to Your Font»
Double-click on slots shown in your current encoding view to create new glyphs. If you need to instantiate glyphs not shown in your encoding, or want more options when adding them, the Add Glyphs and Generate Glyphs options on the Font menu can be used to add glyphs to your font (see below).
No matter which of these three methods you use, if you have no usefully related glyphs already in your font for FontLab to draw on, these will be blank glyphs. FontLab will still give them a width, but until you add outlines to them they will just show as empty spaces. (Note: having large numbers of blank glyphs may make your font harder to develop and test.)
If FontLab has appropriate/relevant/related glyphs and “knows” this, it will try to use those existing glyphs to put outlines and not just empty space into newly created glyphs. This includes assembling accented glyphs from existing base letters and diacritics (accent marks) that you have already designed, and using any Anchors you have defined to position them. However, aside from cases of assembling accented letters from base letters and accents, most such initial assembly is just intended to give you a starting point: throwing a zero and an equal sign in the Euro slot just gives you some outlines to start working with—it’s not a finished product!
How do the two glyph generation options differ?
Font > Add Glyphs allows you to quickly select Unicode-based glyphs from a table. Add Glyphs is useful for populating glyphs that are all encoded in Unicode, whether by Unicode script (writing system) range or by particular Unicode categories, such as punctuation, spaces, or currency symbols. It also allows you to type “smart descriptions,” for example if you only want uppercase Cyrillic letters.
Font > Generate Glyphs is very powerful and flexible. Generate Glyphs is useful when you want to create ligature or variant glyphs that do not have their own Unicode codepoints, such as a Th ligature or oldstyle numerals. It also allows you to specify the glyph names for the generated glyphs, and even to use a formula-like syntax for what goes into a glyph, and for accent positioning.
Please refer to the Add Glyphs and Generate Glyphs articles for more details on how each one works.
Step Two
Once you have selected a range of glyphs and a Script (writing system) it is time to populate your font with glyphs. You will notice that when you double-click a cell in the Font Window, the Glyph Window may display a ghost image of the appropriate glyph needed to match the Unicode for that cell.
The unoccupied slots show placeholders in the Font Window, so you can easily see what you need to do or will be working with. All you need to do is draw or import the artwork for that glyph into the cell.
For many writing systems you will find the range you need on the Font Window’s Encoding menu. Once you have selected a Script you can switch the Font Window view using the Encoding menu. This menu allows you to toggle the view to select your encoding and/or compare it to additional encoding views.
If there is no appropriate Encoding view, you may wish to use Add Glyphs as discussed above, to create a set of slots.
Step Three
If you did not already do so, visit the Font Info > Names dialog (see Font Naming).
Then, generate and install your font to make sure that it works with your targeted keyboard. If a glyph does not appear when the correct key is struck, that suggests an incorrect encoding for that glyph.
Additional Information:
CJKV fonts may be imported into FontLab but they can only be generated as Truetype fonts and will have no vertical metric sidebearings.
Custom Data Files - *.enc, uranges.dat, alias.dat – are discussed in Custom data files and locations. Using custom data files can enhance your ability to work with particular languages and character sets, for example by having their own encoding setting, or set of friendly glyph names instead of uniXXXX names.