Customize Your Drawing Window
Benefit Get the best view of your designs.
View
In some apps, View doesn’t matter.
In font or logo design, since a shape might be viewed at many sizes, you have to zoom in and out…a lot.
Here’s a quick tutorial about zooming in and out of the drawing window.
To Zoom
Use Z on keyboard to zoom IN. Use X on keyboard to zoom OUT.
Use Alt-Mouse scroll wheel to move in and out.
If you have a track pad, you can pinch.
Try it out!
Zoom on Area
Helpful for zooming exactly onto small details—like serif tips or ink traps.
❶ In the lower right corner of the drawing window, click the magnifying glass with the dotted square.

Info
If you don’t see this, go to menu View > Control Bars > Property Bar ON.
❷ Hold left mouse button. Drag over the area you want.
Other Zooms
Here’s the other zooms and what they’re used for. Black star is what I use most. White star is sometimes.
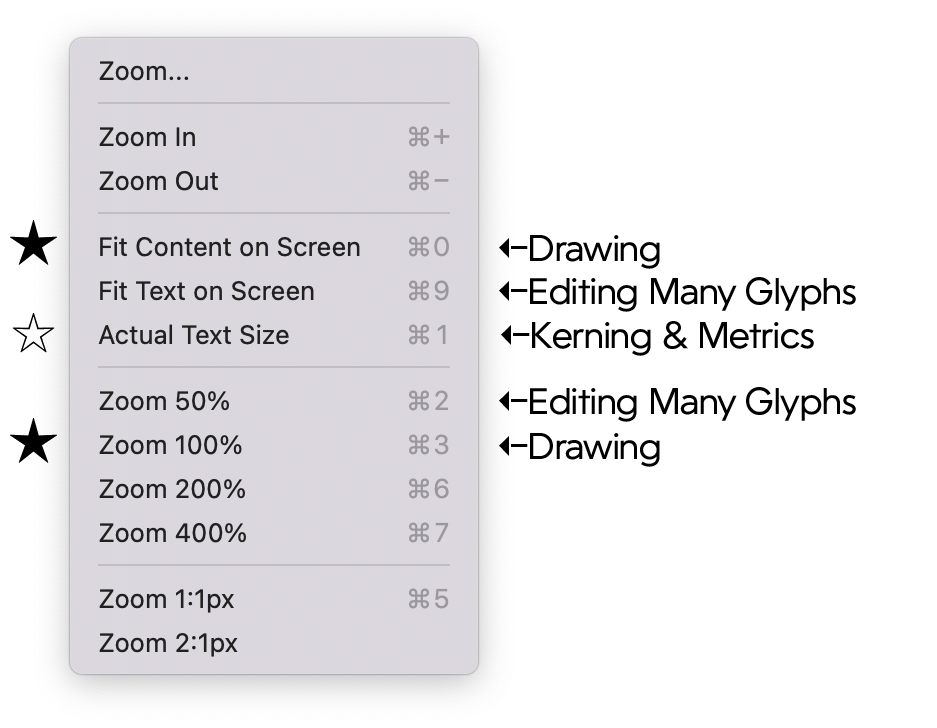
Cmd1 Actual Text Size
Cmd3 Zoom 100% Aligns the drawing window exactly to your vertical boundaries. (Same as font info.)
Cmd9 Fix Text on Screen Great when you are working on many shapes at the same time.
Pixel zooms:
Zoom 1:1px One pixel equals one unit, Normal Res Screens
Zoom 2:1px One pixel equals one unit, Retina Screens
I find pixel zooms fascinating, but I have not yet found a use for these.
Digging Deeper
For more information about View, see this section of the manual. Want to customize your view more?: Check out the tutorial on Measuring and Viewing.
That’s it! Thanks for tuning in!
Bonus! Customizing Your View
If you want to customize your zooms more!
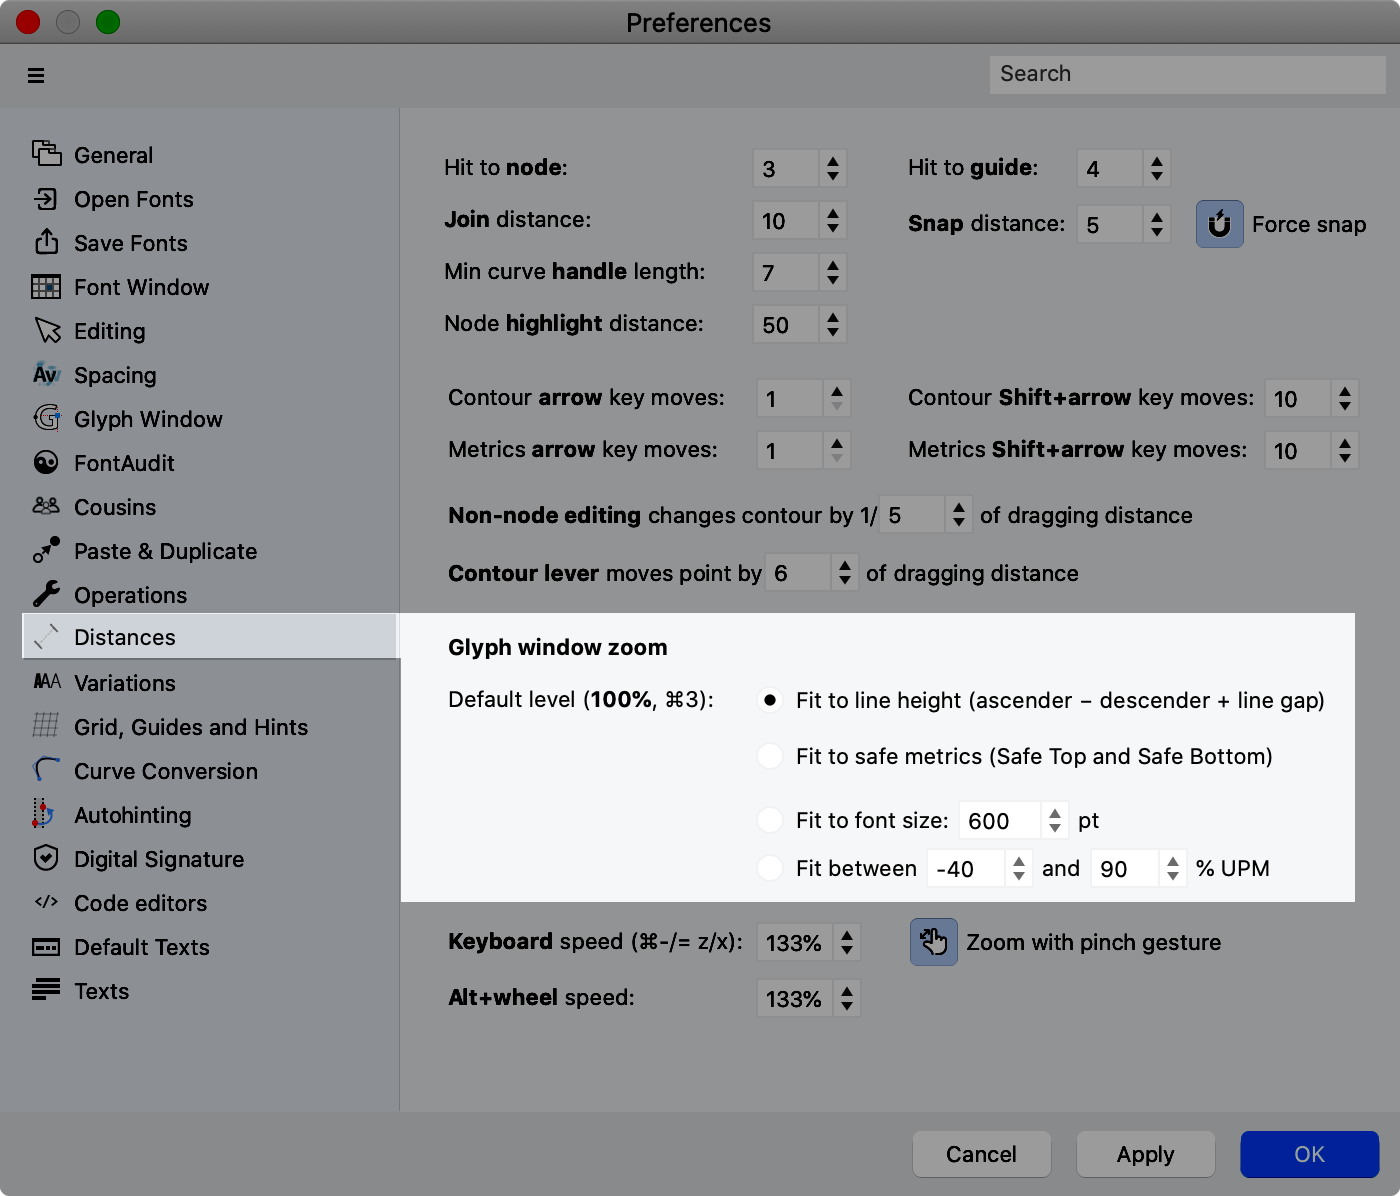
Changing Your Default View
To change the default view (Cmd3) go to Preferences > Distances > Default Level
PRO Tip
You can also change how zoom in and out work in this area of preferences.
PRO Tip
If you want to change the shortcut for default view, go to menu Tools > Commands & Shortcuts.