Font Families and Variations Intro
This series shows you how to make font families and variable fonts in FontLab.
But know that font families are not the only way to structure your fonts!
If you are doing work for clients, you find the best method to match their needs.
If you are doing work for retail, you can focus on standalone fonts, as some foundries do.
Others make font families using variations.
Others make smaller families not making variations, but by drawing each style. (This is often necessary for scripts.)
Others make collections of vector resources—a mix of letters and other vector assets.
Here’s the basics of how it works.
But first a brief history of the font family.
Family History
Singles Only
At the beginning were single, standalone fonts.
Take for example, this Jenson font.
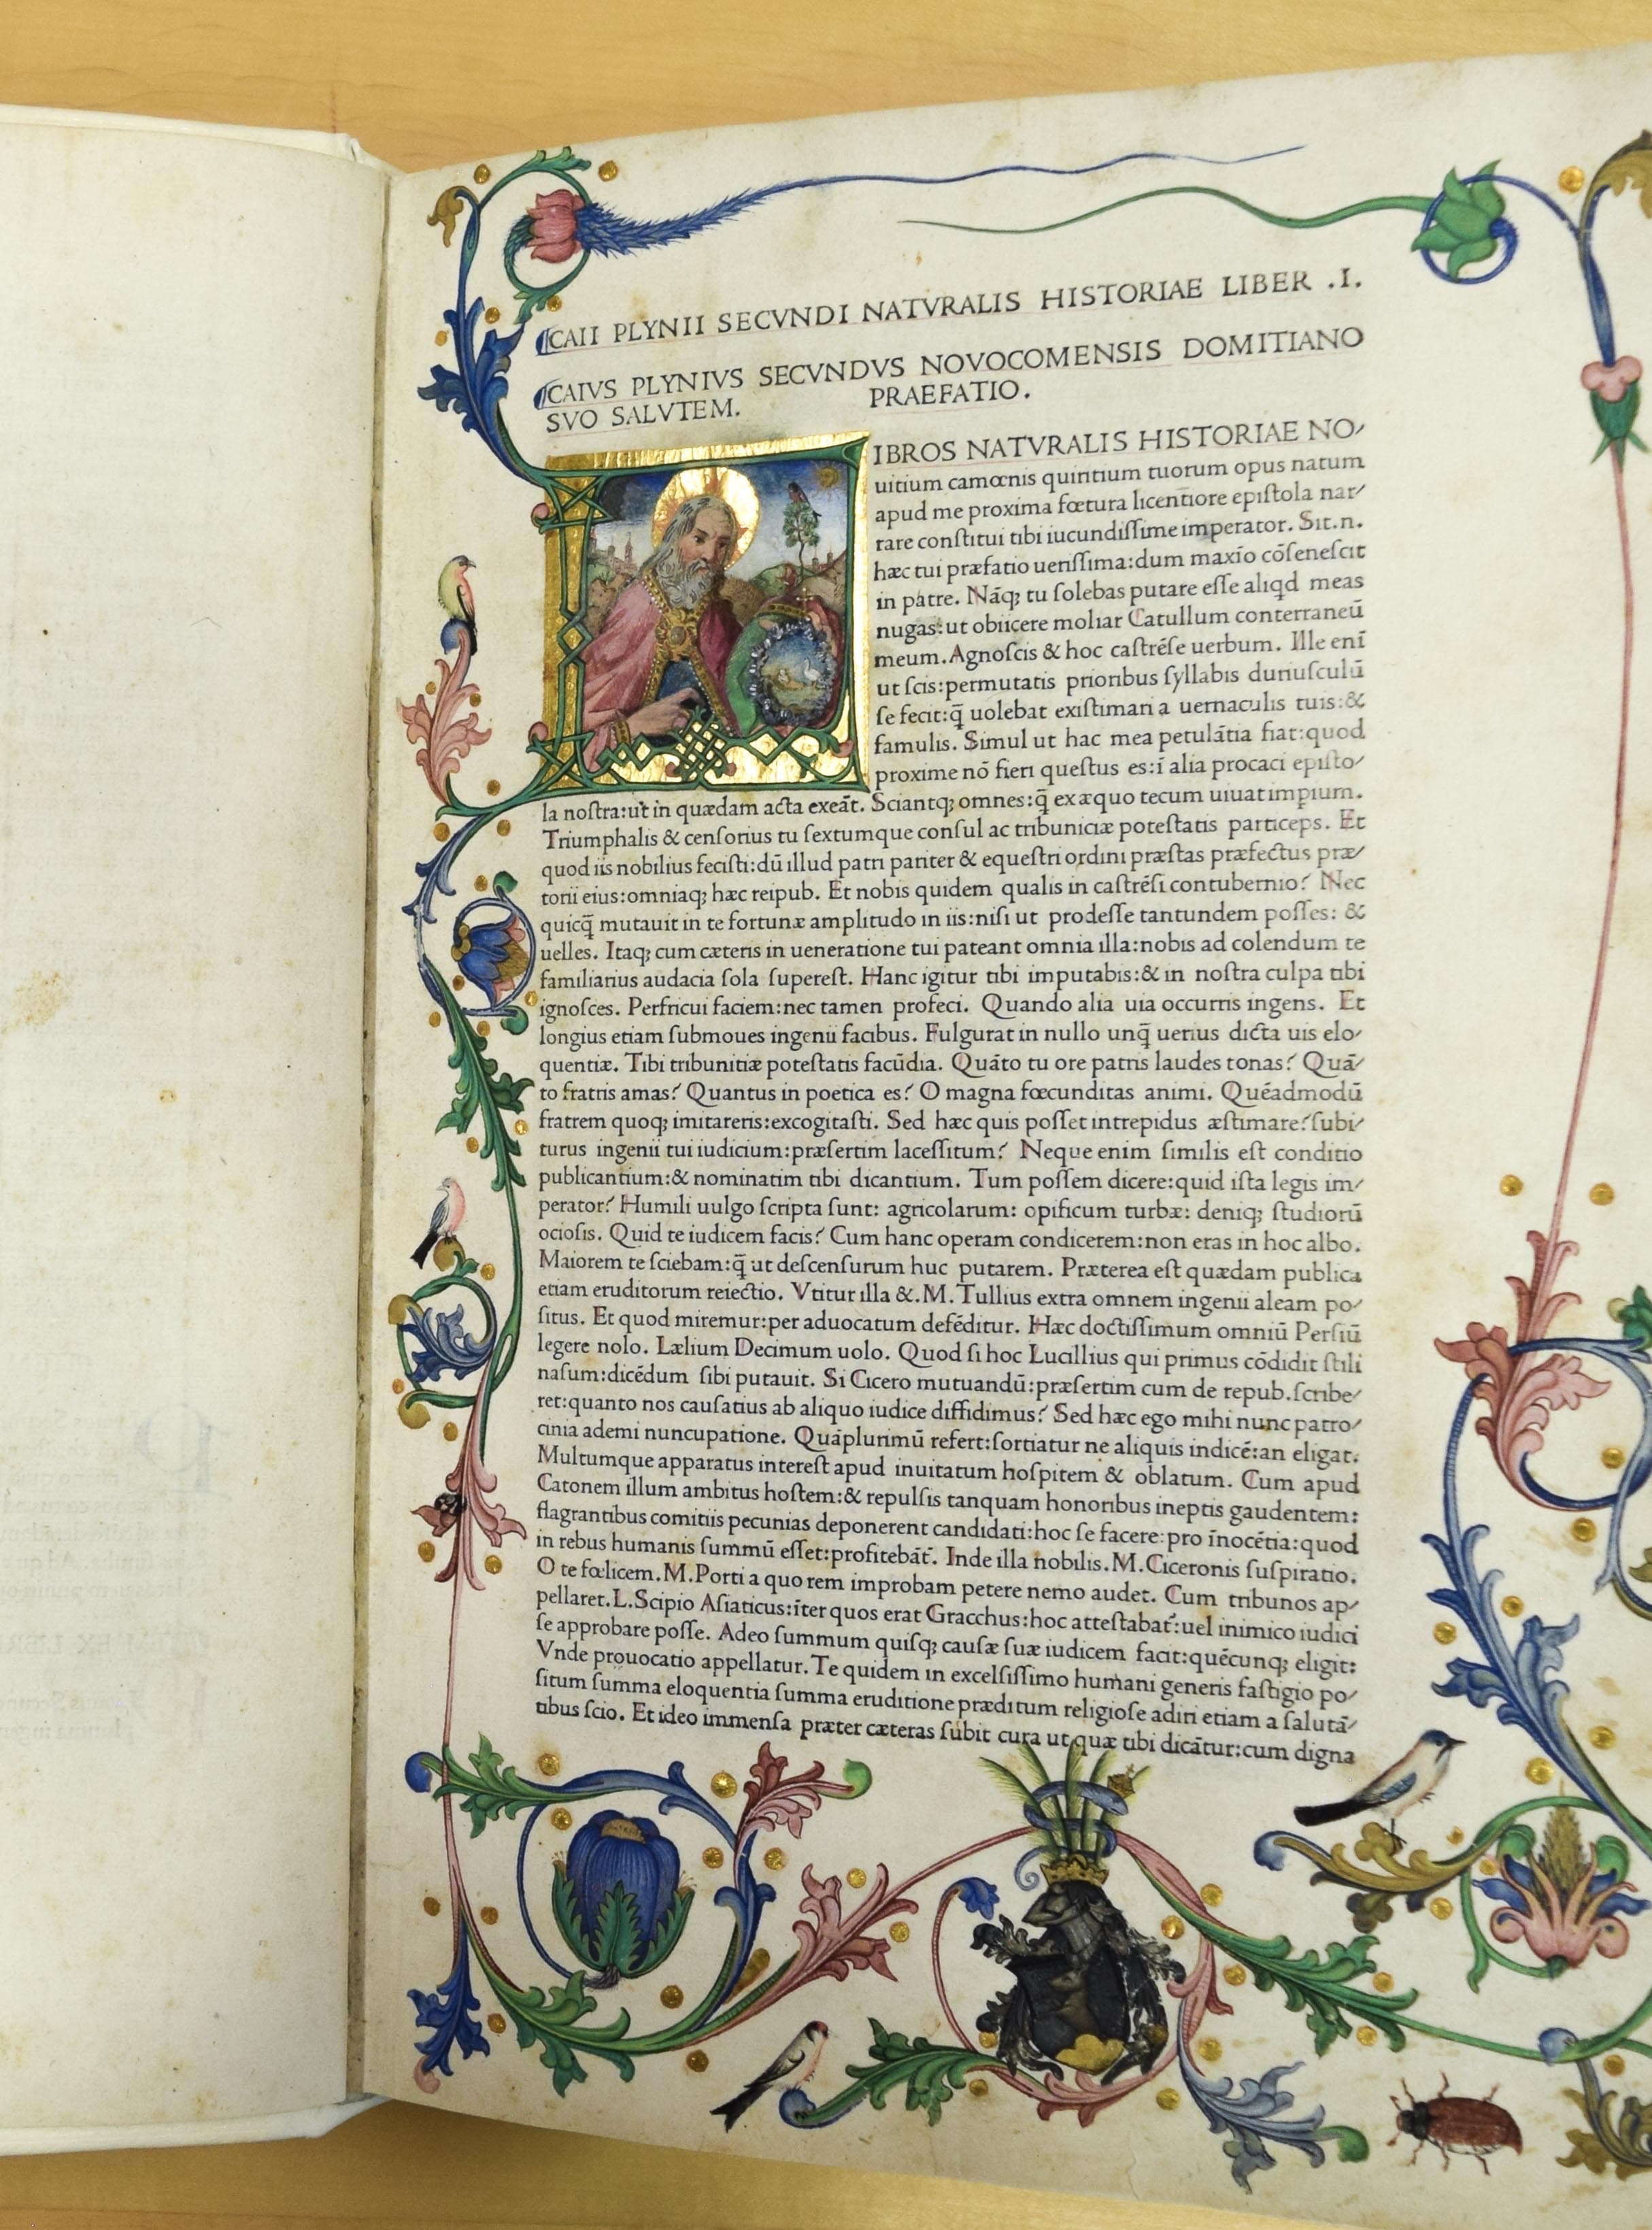
image © 2016 Dave Lawrence
One font. The title even is the same as the body text!
Italics worked on their own. Aldus Manutius’s Virgil is considered to be the first book printed in Italic.
© 2017 Dave Lawrence, Aldine Virgil 1501
Notice also that caps were not sloped yet.
Relatively soon after, the Italics were mixed with the Romans on the same page.
La Comedie Estienne, 1552
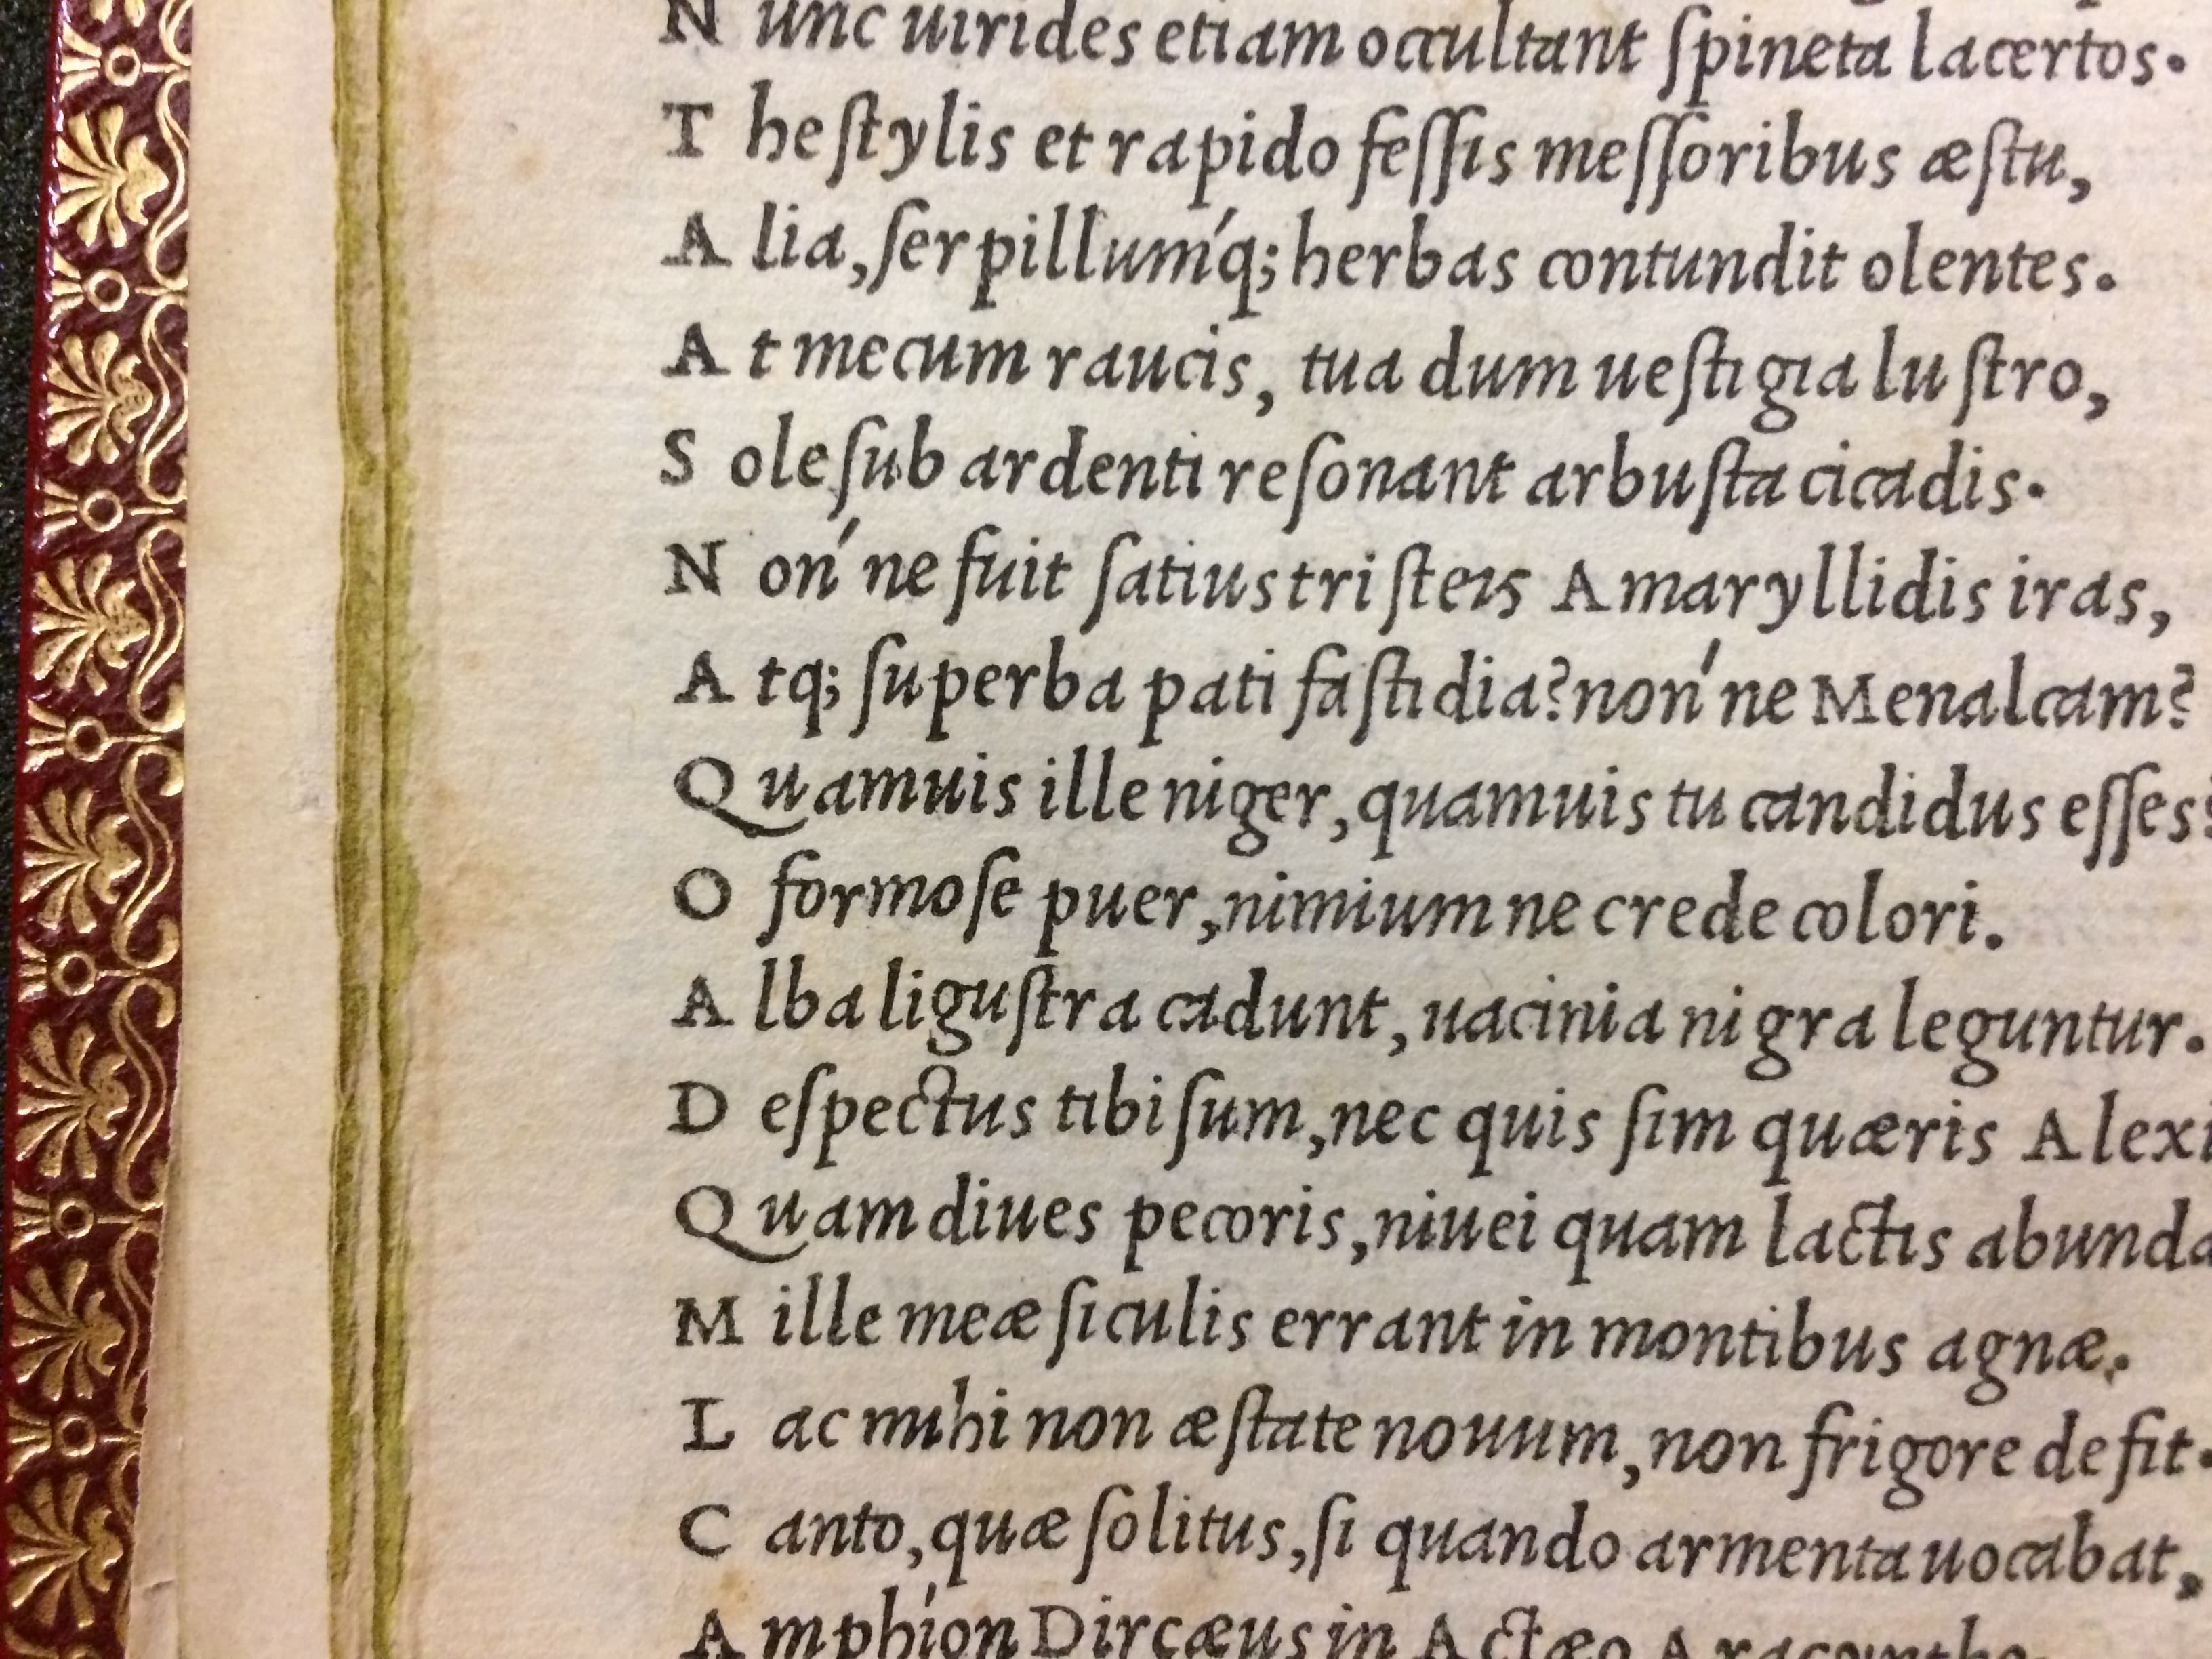
Later, the italic, small caps and Roman were mixed on a line.
Roman du Roi, 1702 Image © 2017 Dave Lawrence
Bold came in the 1800s.
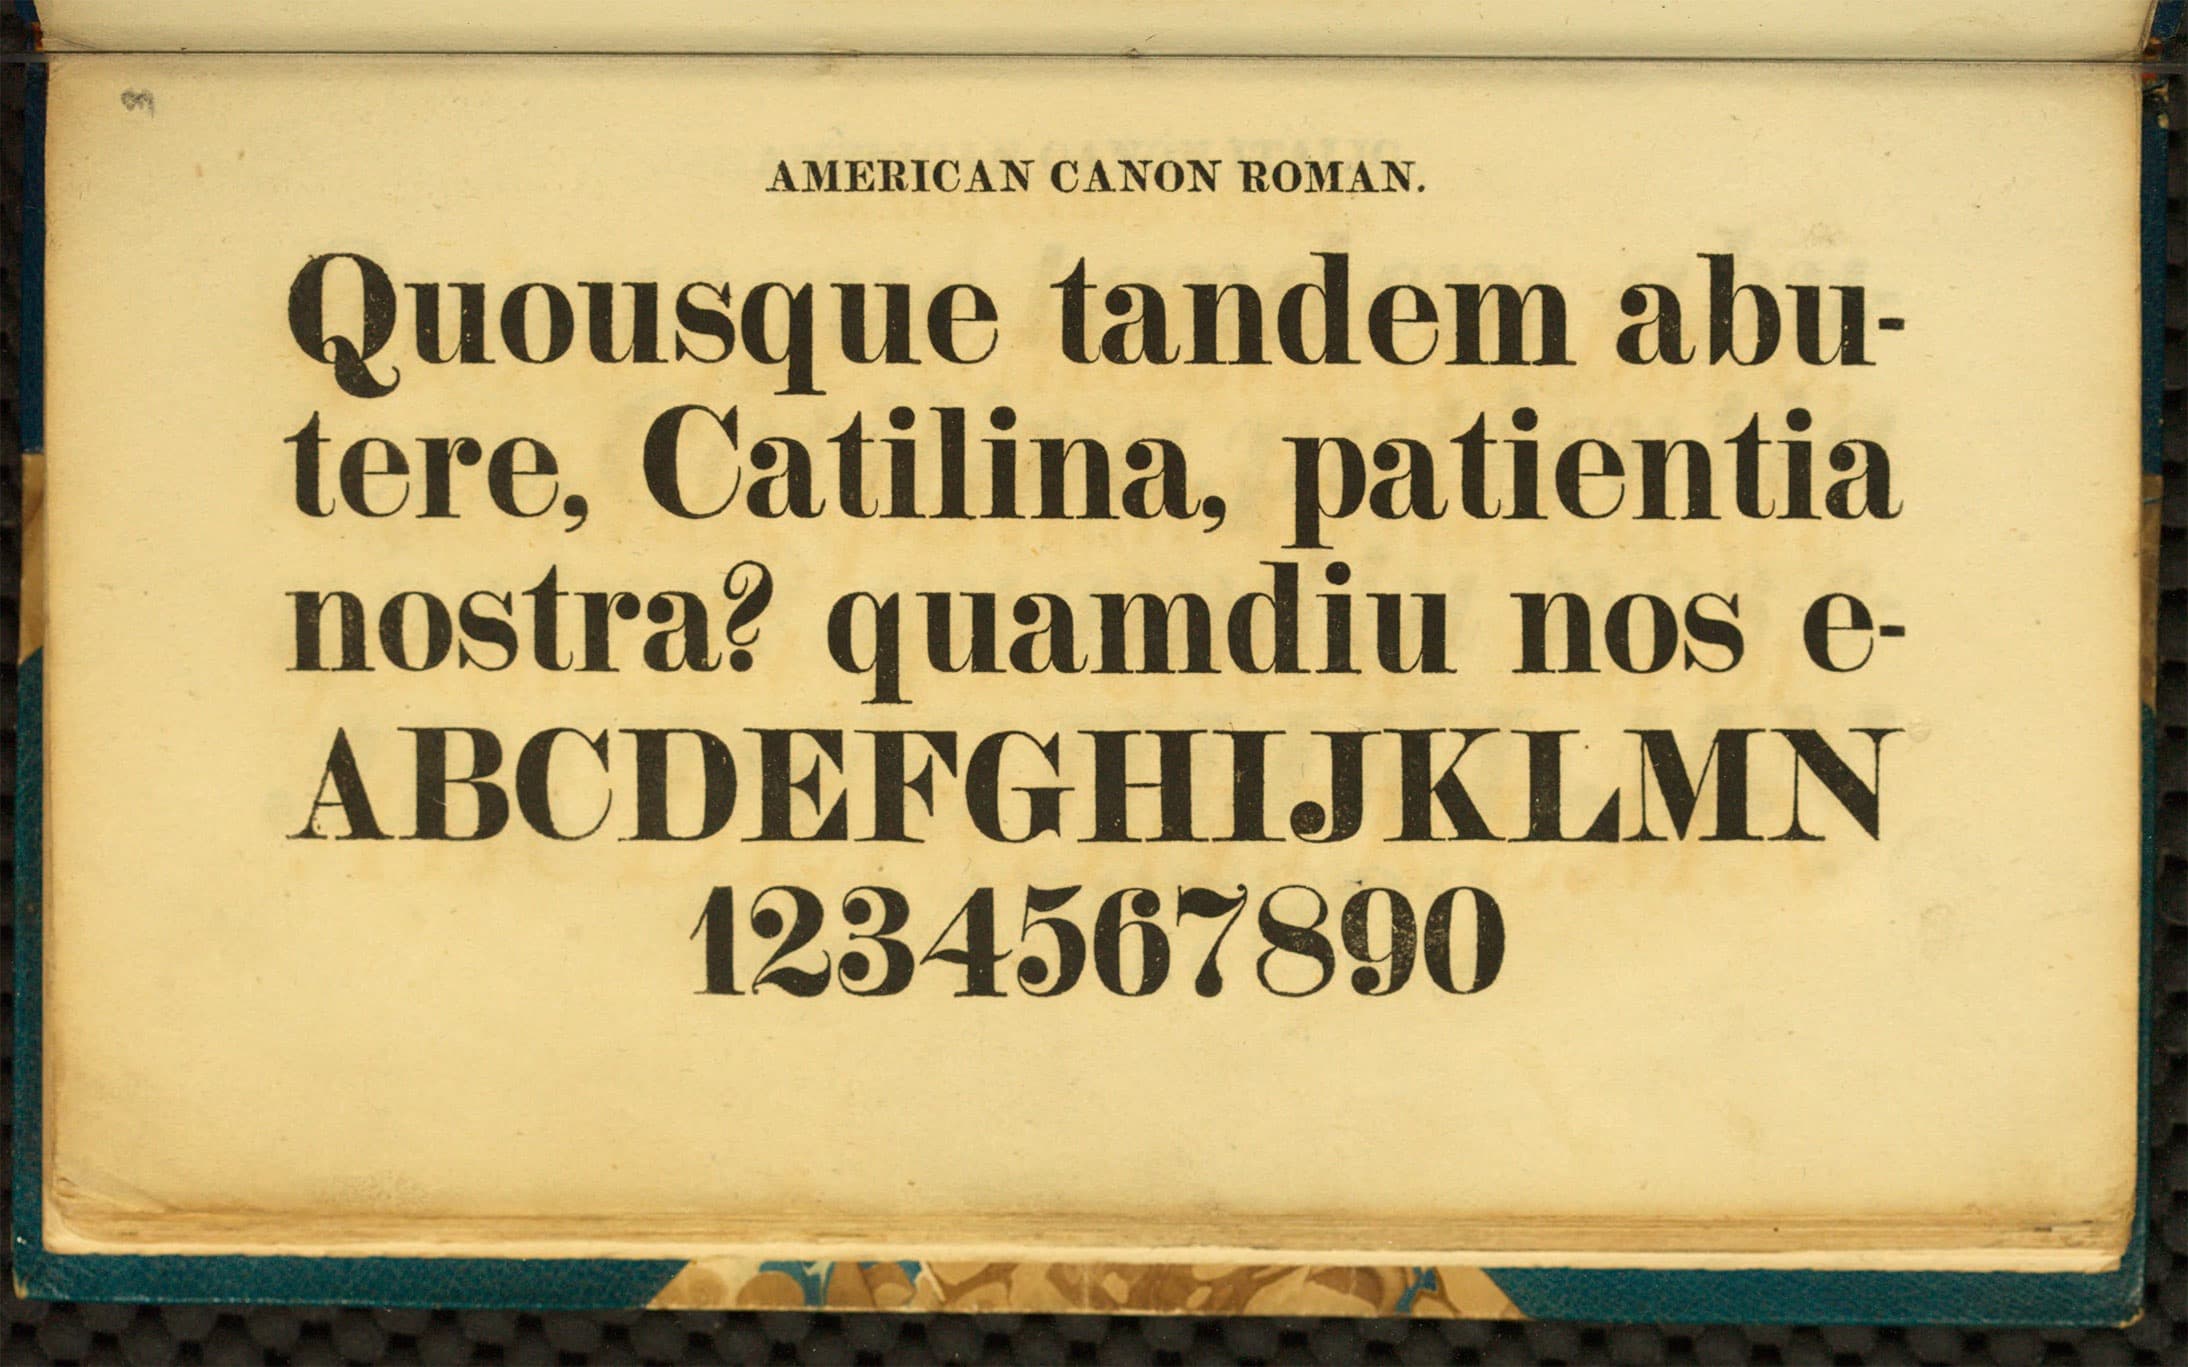
Specimen of printing types from the foundery of Binney & Ronaldson, Philadelphia 1812
This specimen also contained bold italics.
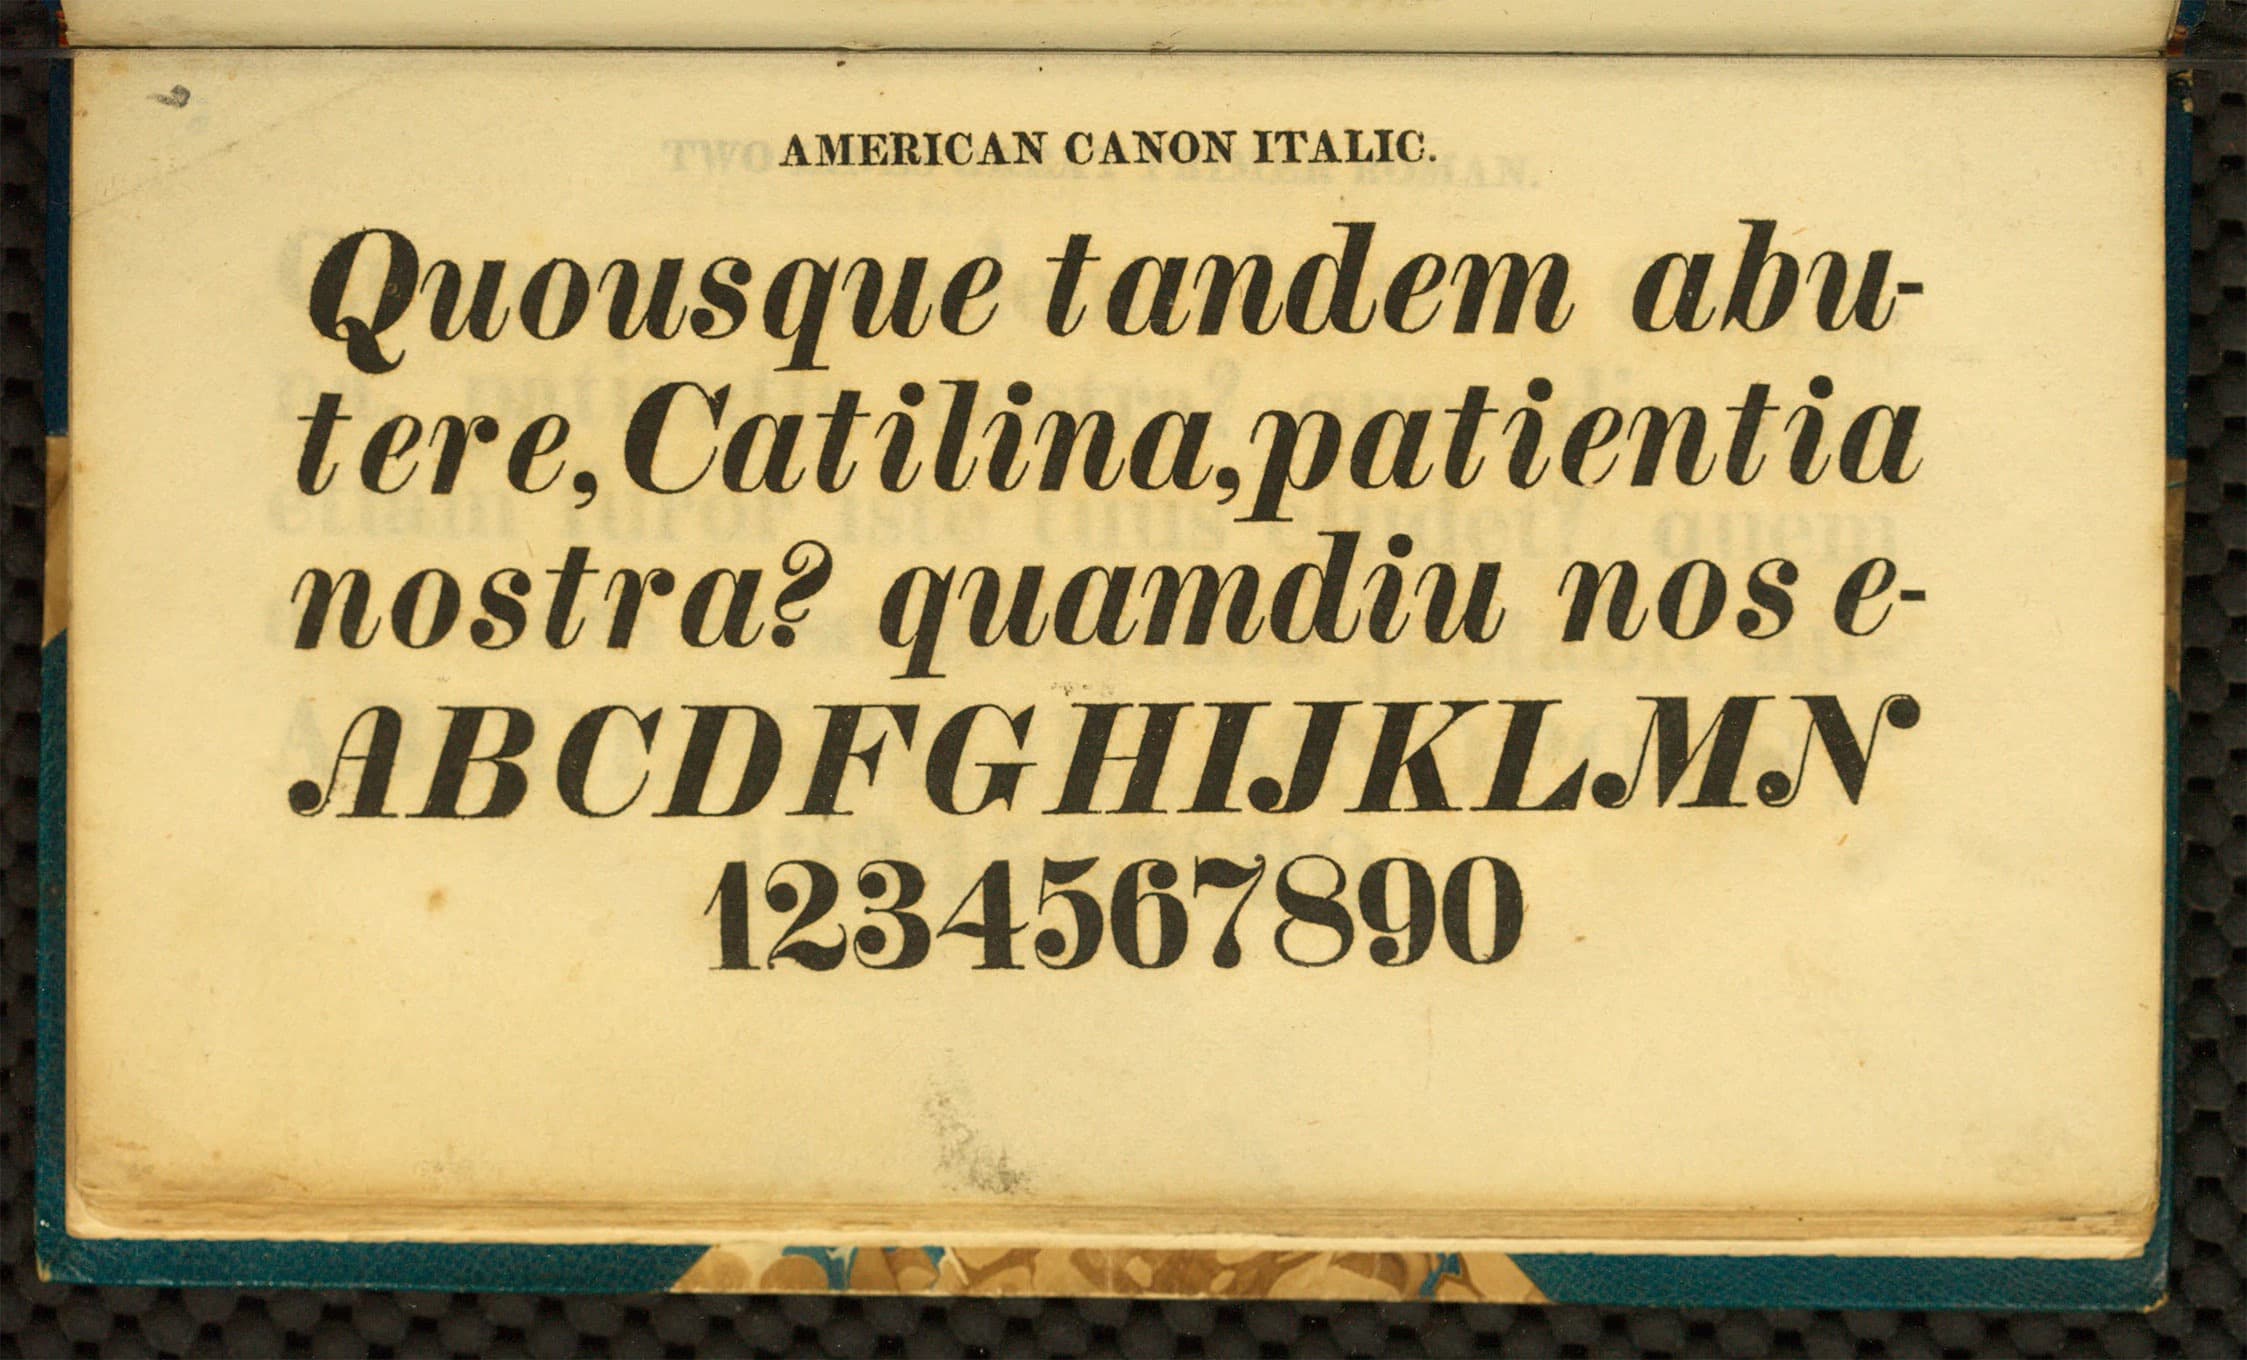
Those (with features like small caps) make up the main styles in a font family.
Basic Family
So you now have the basic family.

(Century Schoolbook shown.)
Later light and other styles were added in a haphazard way.
Large Family
Adrian Frutiger’s Univers typeface (1957) is considered to be the first fully conceived large font family.
Recreation of the original Bruno Pfäffli’s display of the fonts, from digital Univers.
An example of a plane, with a weight (as y) and optical axis (as x).

Bodoni Ferrara
Above we had weight × optical size. 2 dimensions.
When you add an italic to this you get two planes.▼
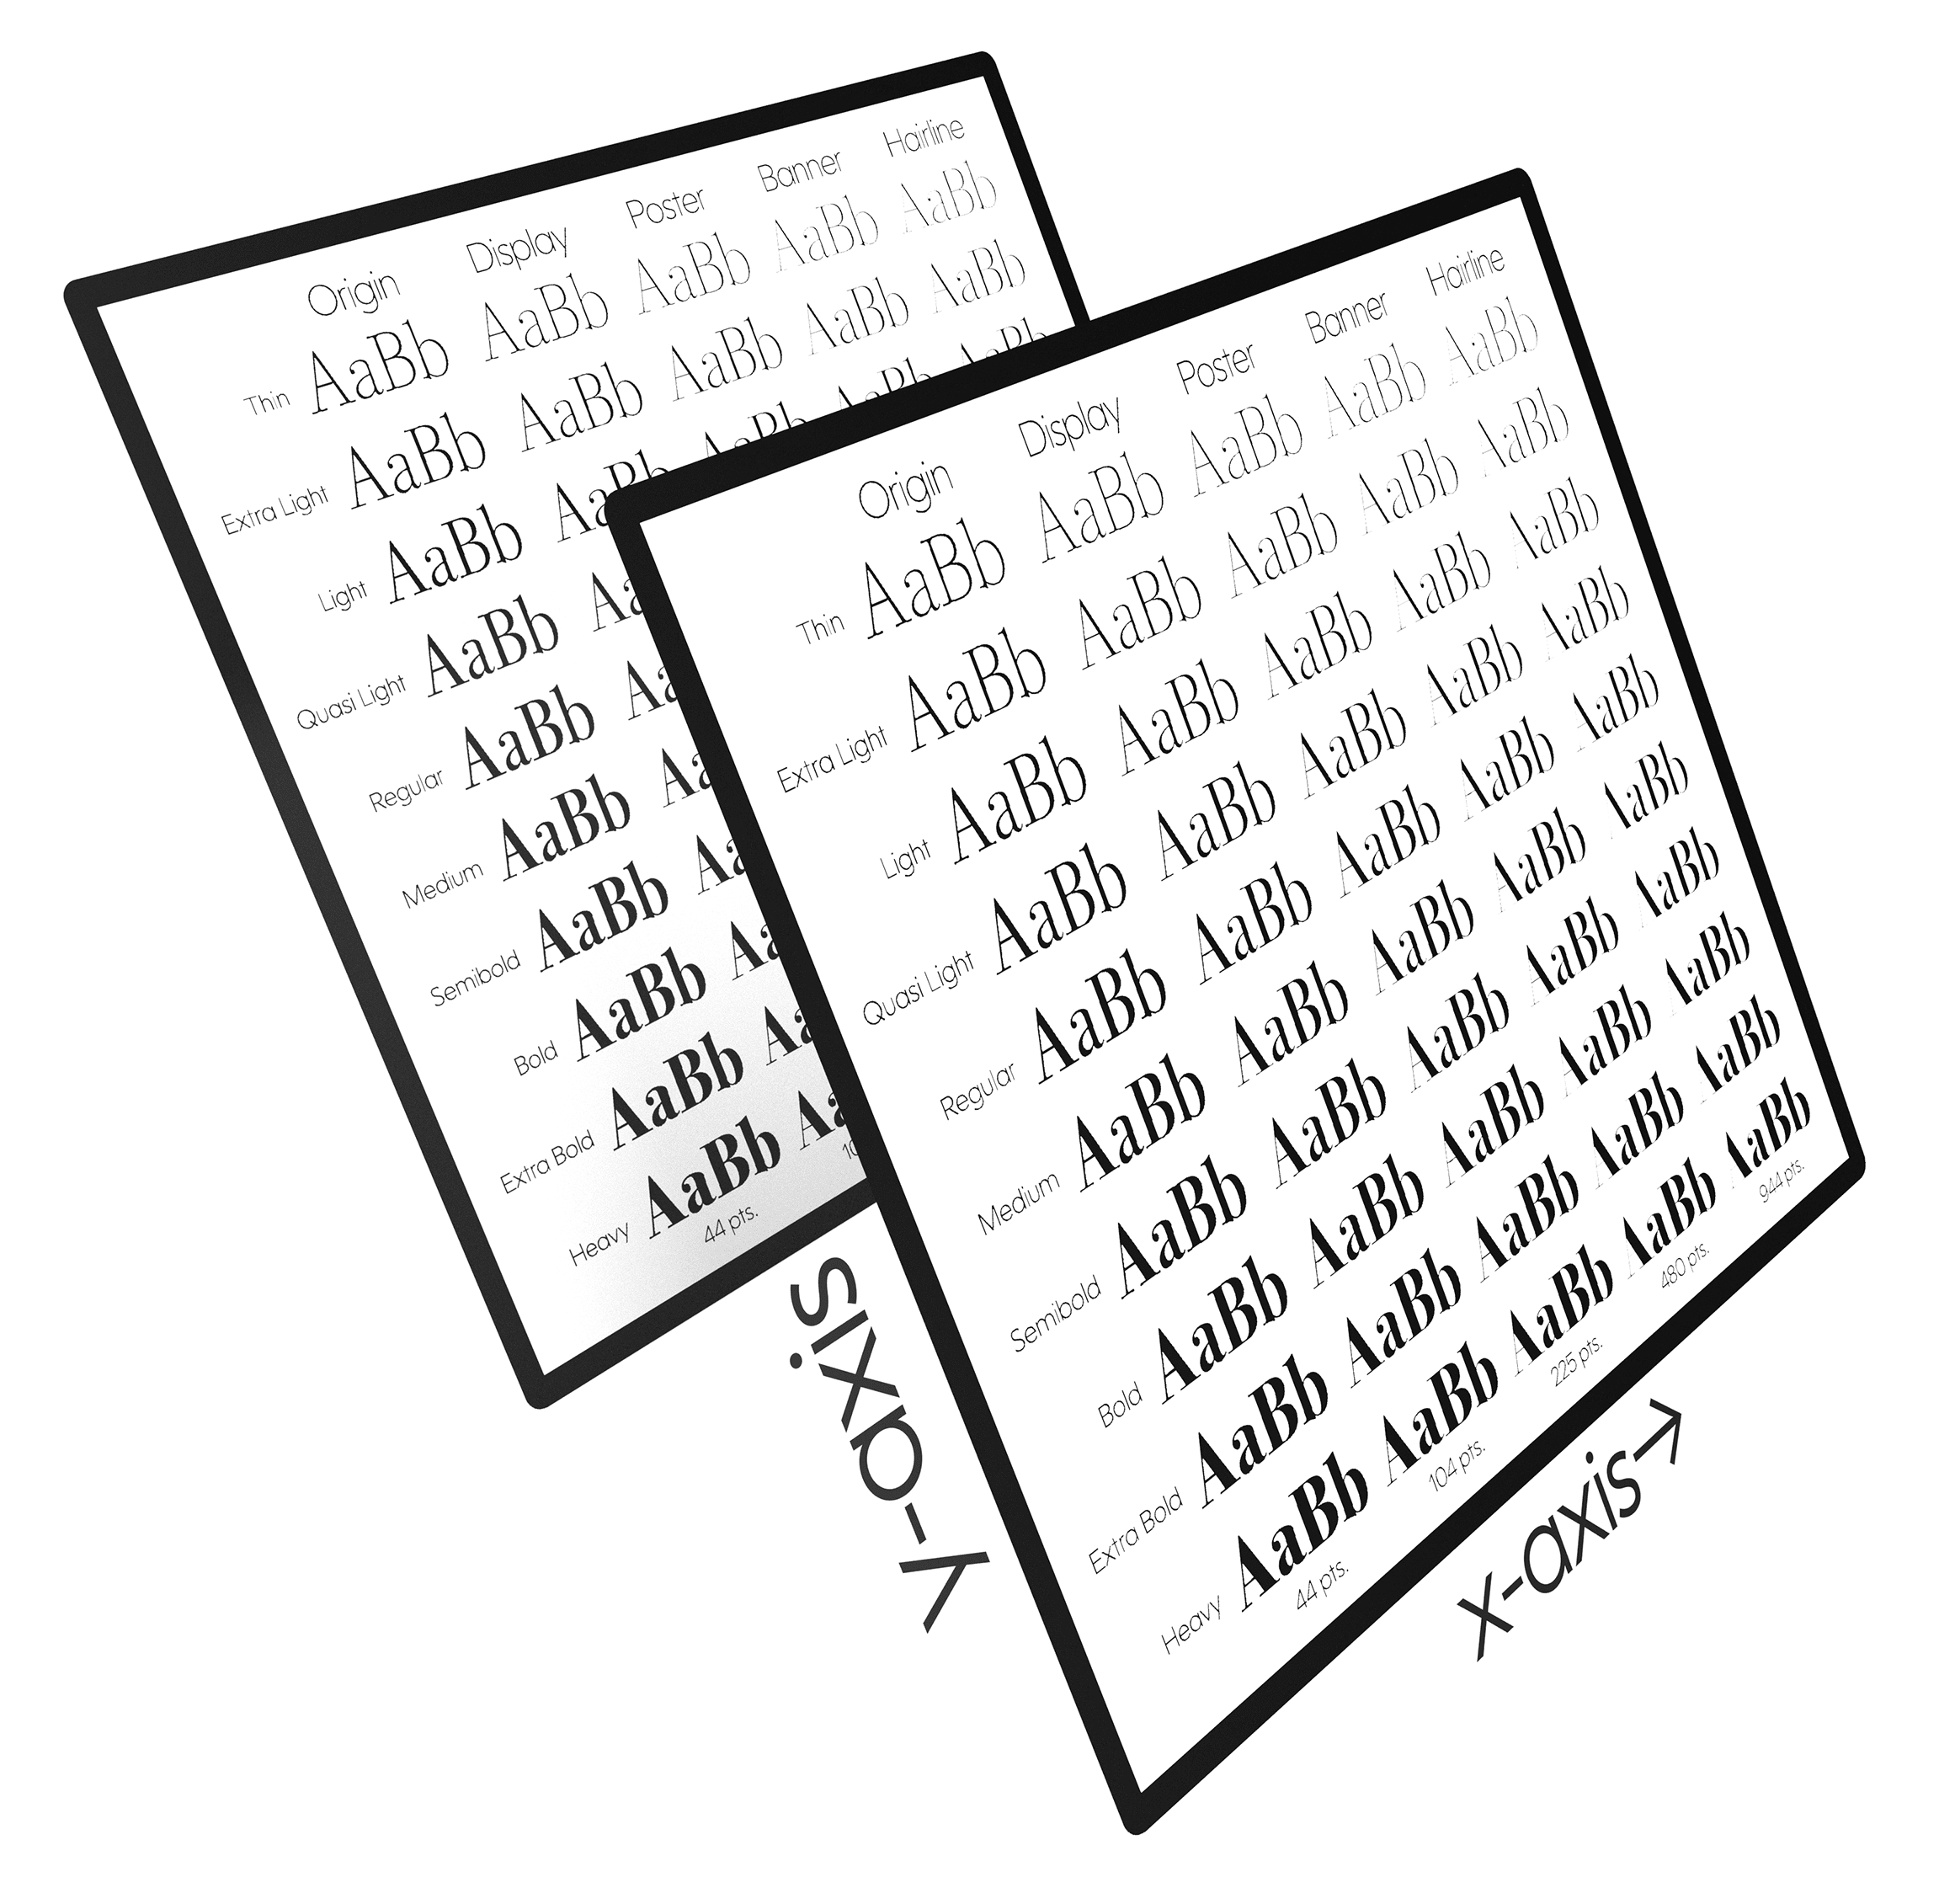
This two plane setup is very common. One plane for italic and one plane for upright.
Super Families
There are superfamilies made of planes, and superfamilies made of cubes.
An example cube: weight × width × optical size = 3 dimensions.
Currently, families are not usually made in 3 dimensions.
In a later section, you’ll learn your different options when it comes to cubes!
FontLab Displays Dimensions
Obviously you cannot display 3 dimensions on a 2 dimensional surface! Here’s how FontLab displays it.

FontLab allows you to choose what is the x-axis, y-axis or z-axis!
And you can always change the horizontal axis to be slant or width, or whatever you want. (See this tutorial about the common axis types.)
How to Start a Family
If you are new to fonts, and you have been going through the tutorials, and doing all the exercises, you have probably been putting together one font.
Info
In this intro, I’m just giving you the big picture. In a later tutorial, you’ll discover how to add axes.
This is one example of how you might start a family. (We’ll talk about other ways later.)
One Master Font
So let’s say this is an R from your font.▼

With one master, you get what you see. One set of letters.
Definition
A master is the place where you draw all your letters. Then through the Variations panel you can mix your masters.
This is what the Variation panel looks like.▼
Since there are no axes, there’s no where to plot this one master.
There’s no variation!
Adding a Second Master
But suppose you like this font enough that you want to expand it to an entire family?
Well…
It’s like a nice couple settling down in the suburbs to start a family. You have two parents and then you get a bunch of kids, that need to be taken to soccer and little league.
In FontLab, these parents are called “masters”. (Sounds a bit overbearing.) The children are called “instances”.
There’s many types of second masters that you can add. One type of second master is a “skeleton”, also called a hairline.
This is the bare-bones of the letter.

You set up your axis and your two masters. (You will see how in this tutorial.)
Now when those two mix together and then give birth, you get this.▼

You have the entire range of R’s in between!
The Variations panel will look like this.▼
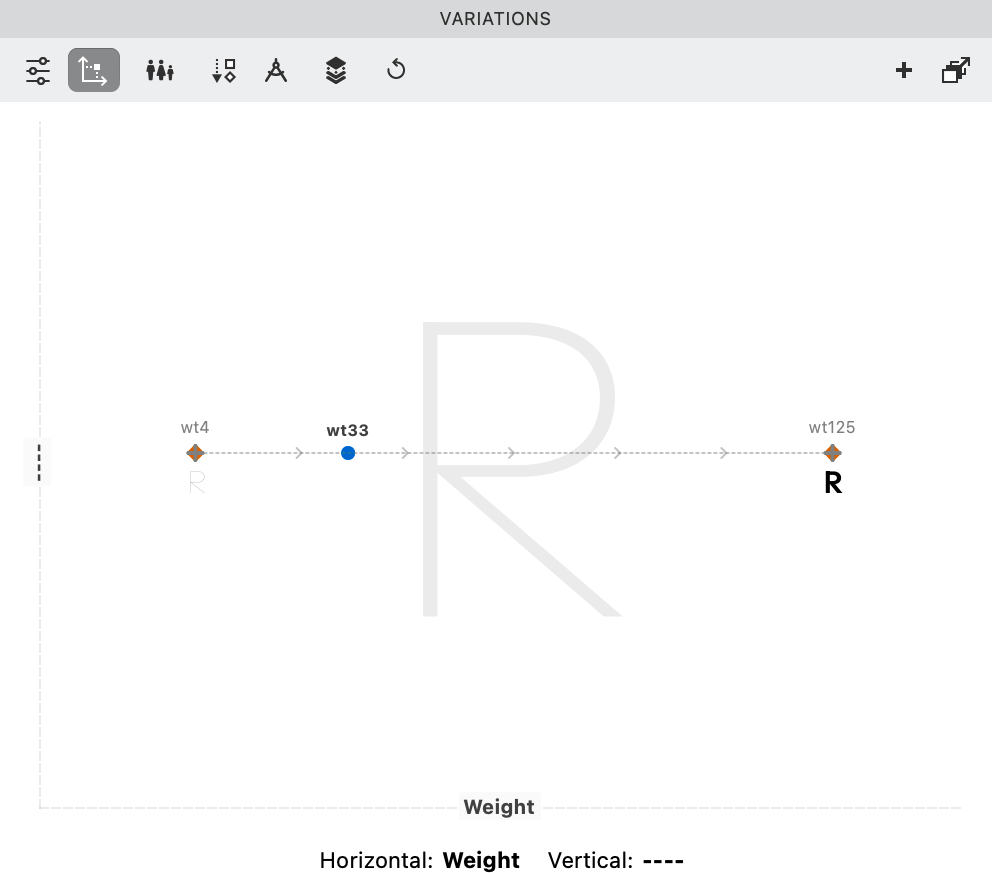
Here’s how to read that panel. This is in map mode.

And the number such as wt125, in this case, means that the lowercase stem is 125.
But you can really give it any number, such as the stem of your uppercase. (See the tutorial Setting Up Variations.)
Quick Note
I made the mistake of naming these at 125 based on the weight of my source! However, at 125, it is impossible to center a dot on an i. Keep your weight masters to even numbers!
More Info
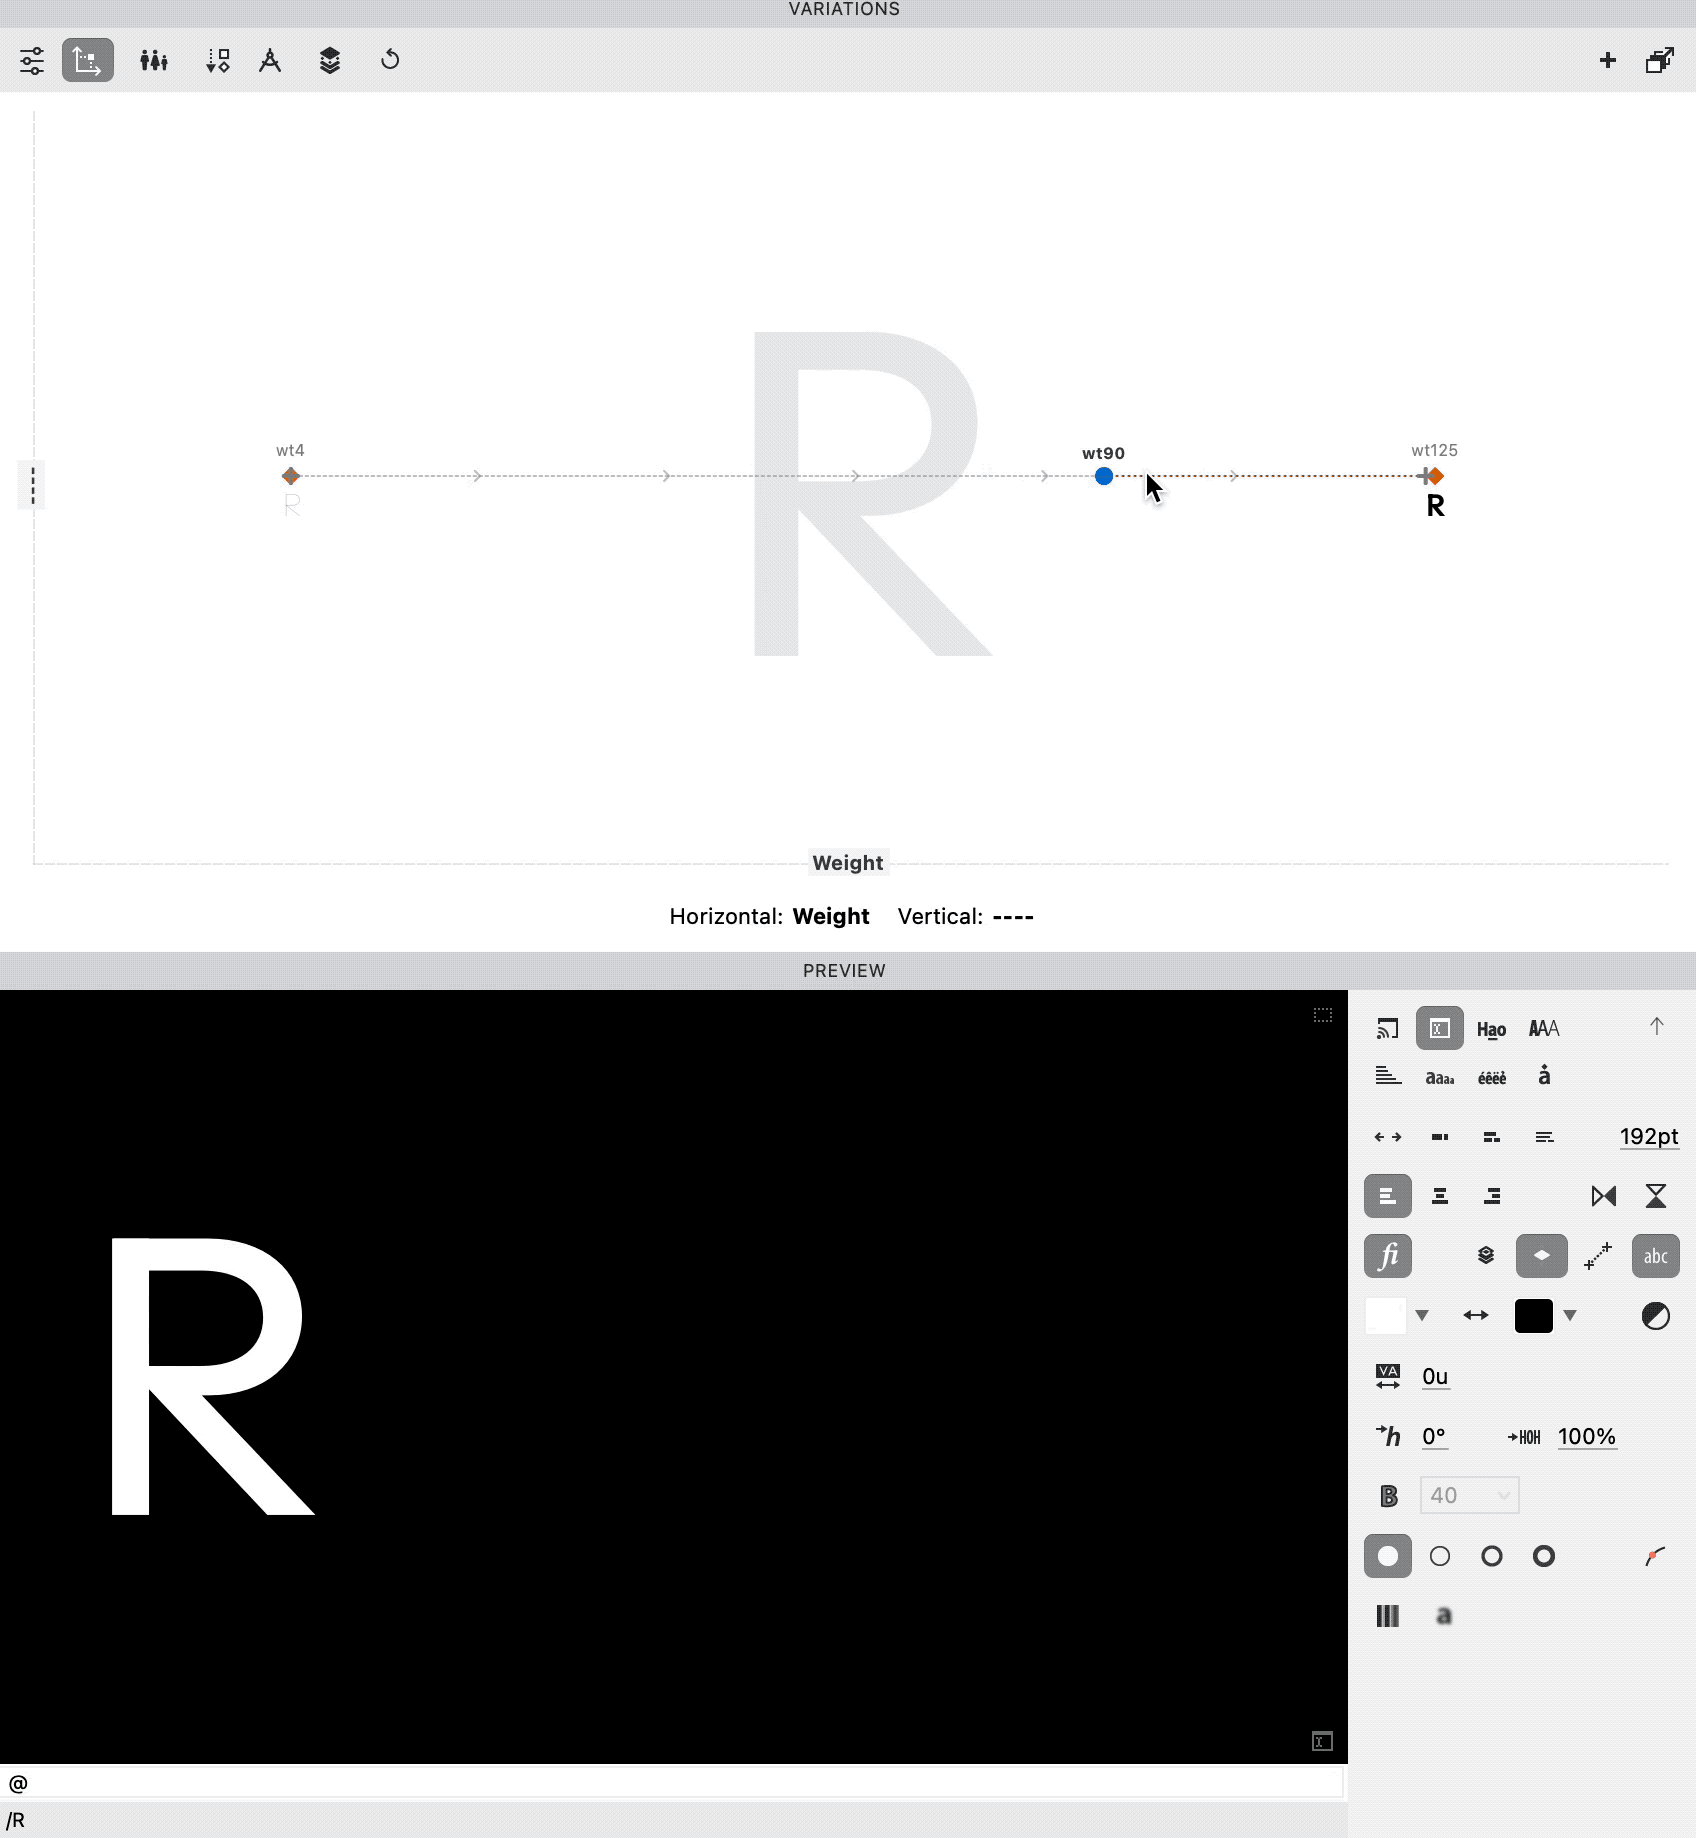
The blue dot and the dotted line control the Preview panel.▼
3rd Master
You started from a semibold R. Then we added the skeleton.
Well…That doesn’t really cut it, as far as families go.
You don’t have a big enough range to make a family!
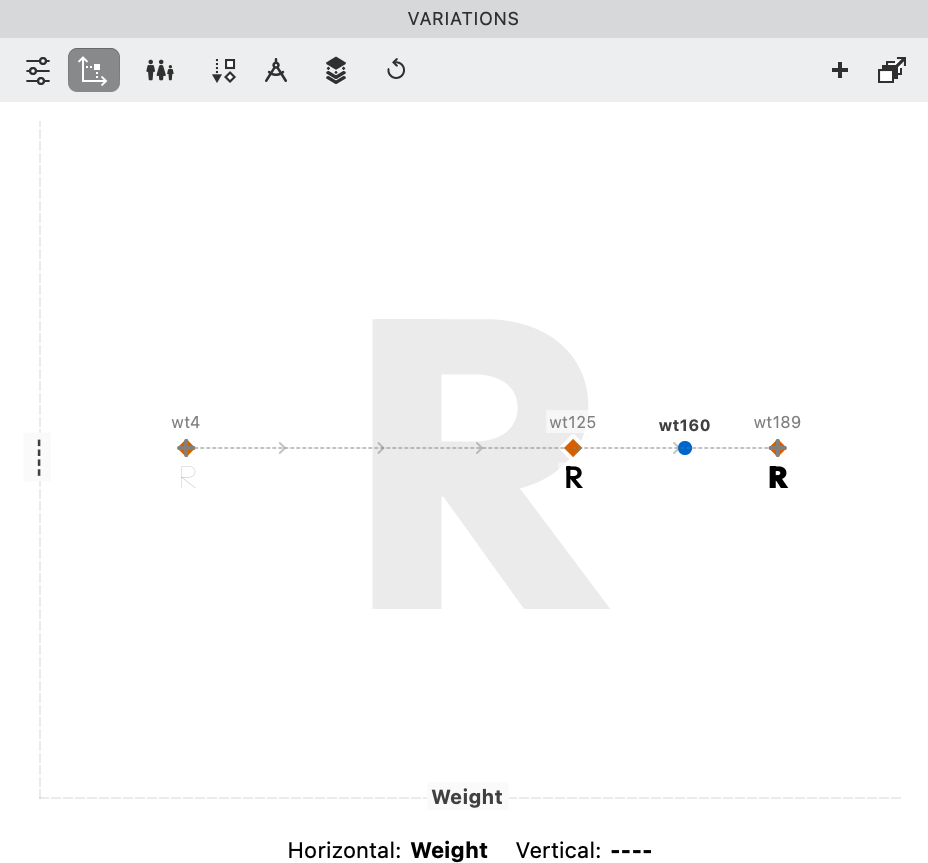
So you create a 3rd master.
This one is a heavy or black.

Here’s the Variations panel now.▼
Info
As you will see in the tutorial on weight gain, some families go from light to black. They skip the skeleton altogether.
4th Master?
Look back at the 3 masters image.
You see how the diagonal of the R looks too thin?

You can fix that by:
- Changing the node structure of the R.
- Adding a glyph (intermediate) master.
- Adding a font master.
Each of these options will be discussed in this series!
For this example, I used #1 and #3.

Yesss!
Now those letters are choice.
Warning
Now, I’m not recommending that you actually go here. In this case, I had started with the top masters, then expanded to the hairline. For monolines (similar thickness of strokes but optically corrected), I’ve found that I need masters at 40 and 124 to bring the middle under control.
It’s time to look at some challenges.
Exponential Growth
Problems with Adding Masters
When you first add a master, it doesn’t seem like a big deal.
However..for every master you make, you also need at least an italic or oblique!
So you have to multiply everything by two! At least!
So a lot of making these families is knowing how to cut out some of that extra time. Use the least masters as possible.
There are many tools for this, such as re-using shapes, and non-destructive editing. There are also tools to help you get better masters faster.
You’ll find things like glyph (intermediate) masters to help save you time.
Font Family Trade-offs
Variations don’t work for every font.
Remember how we had all those rules for exports, and to make our fonts look good?
Well, once you add variations, new problems pop up like rabbits. Then you get rules to fix those!
Complex letters can’t be easily made into variable fonts.
————
But it can be like a puzzle! To continually find new challenges as you make different fonts. And finding unique solutions for your particular problem, with your set of tools.
That discovery can be a lot of the fun!
