Masterclass: Better Vector Drawing
Part 2: Drawing Against “The Rules”
Benefit Empower yourself to draw difficult shapes.
The trick of vector drawing is how to most easily achieve difficult shapes.
But how?
First, let’s break down the different types of vector rules.
Three Types of Vectors Guidelines
- Vector guidelines for exported fonts. (Beginners)
- Vector guidelines for interpolation. (Making font families.)
- Vector guidelines for drawing. (Intermediate)
🛑 If you are a beginner, stop! You should look at the rules here first.
Don’t Draw with Export Rules
Many of the good font designers draw their work against the rules.
#1 Handles thrust curves forward
Instead of “Nodes at Extremes”
It’s easier to draw up and down.
But up and down things can often be more boring.
“Nodes at extremes” is a static approach.
It’s focused on the stationary points—the nodes.
If you have a static font (I have many), thinking about extrema is great.
Static letters feel solid. Their axis of stress is 0°.
Here’s another static shapes. This one is more tense because curve tension is high.
Here’s an example of something dynamic.
I will show you the node structure, in a bit.
This type of shape is very difficult to make with vertical and horizontal nodes.
Here’s why.
A Different Way to Think about Handles
Let’s go back to basics.
Handle Force
Handles (the yellow diamonds) push the curve out like this.
But that’s not the entire story.
What if we made a handle zero, so it doesn’t exert any outward force?
You can make the handles zero by holding ShiftAlt, then click a handle.
Here’s an example with handles at zero, “retracted”.
The blue and red node’s handles are zero. They exert no outward force.
But they have inward force.
The nodes are like black holes sucking in the curve.
Node force, the sucking in force, is stronger than the handles’ pushing out force. No matter how far you push out the handles, the nodes will always suck up the curve.
You might think of this as “handle force” and “node force”. Weak force and strong force.
Forces All Together
Ok, now we’ll pull the zero handles out. (Use Alt-drag to pull them out.) Here’s all the forces in this segment.
Now that the red and blue nodes have handles, the strong force goes in the direction of those handles.
That means, both weak and strong forces travel along the handles.
Warning
About retracted handles: Retracted handles are much easier to deal with, because as you can see, there are less forces involved. However, retracted handles don’t convert well to TT curves. You will get bad kinking.
It’s the interplay of these forces, the thrusting out and sucking in, that allows you to manipulate curves.
Besides these, you have other tools to manipulate your curves.
Handle Direction
Handles also specify direction.
When you change handle angle, it changes how the curve is pushed out.
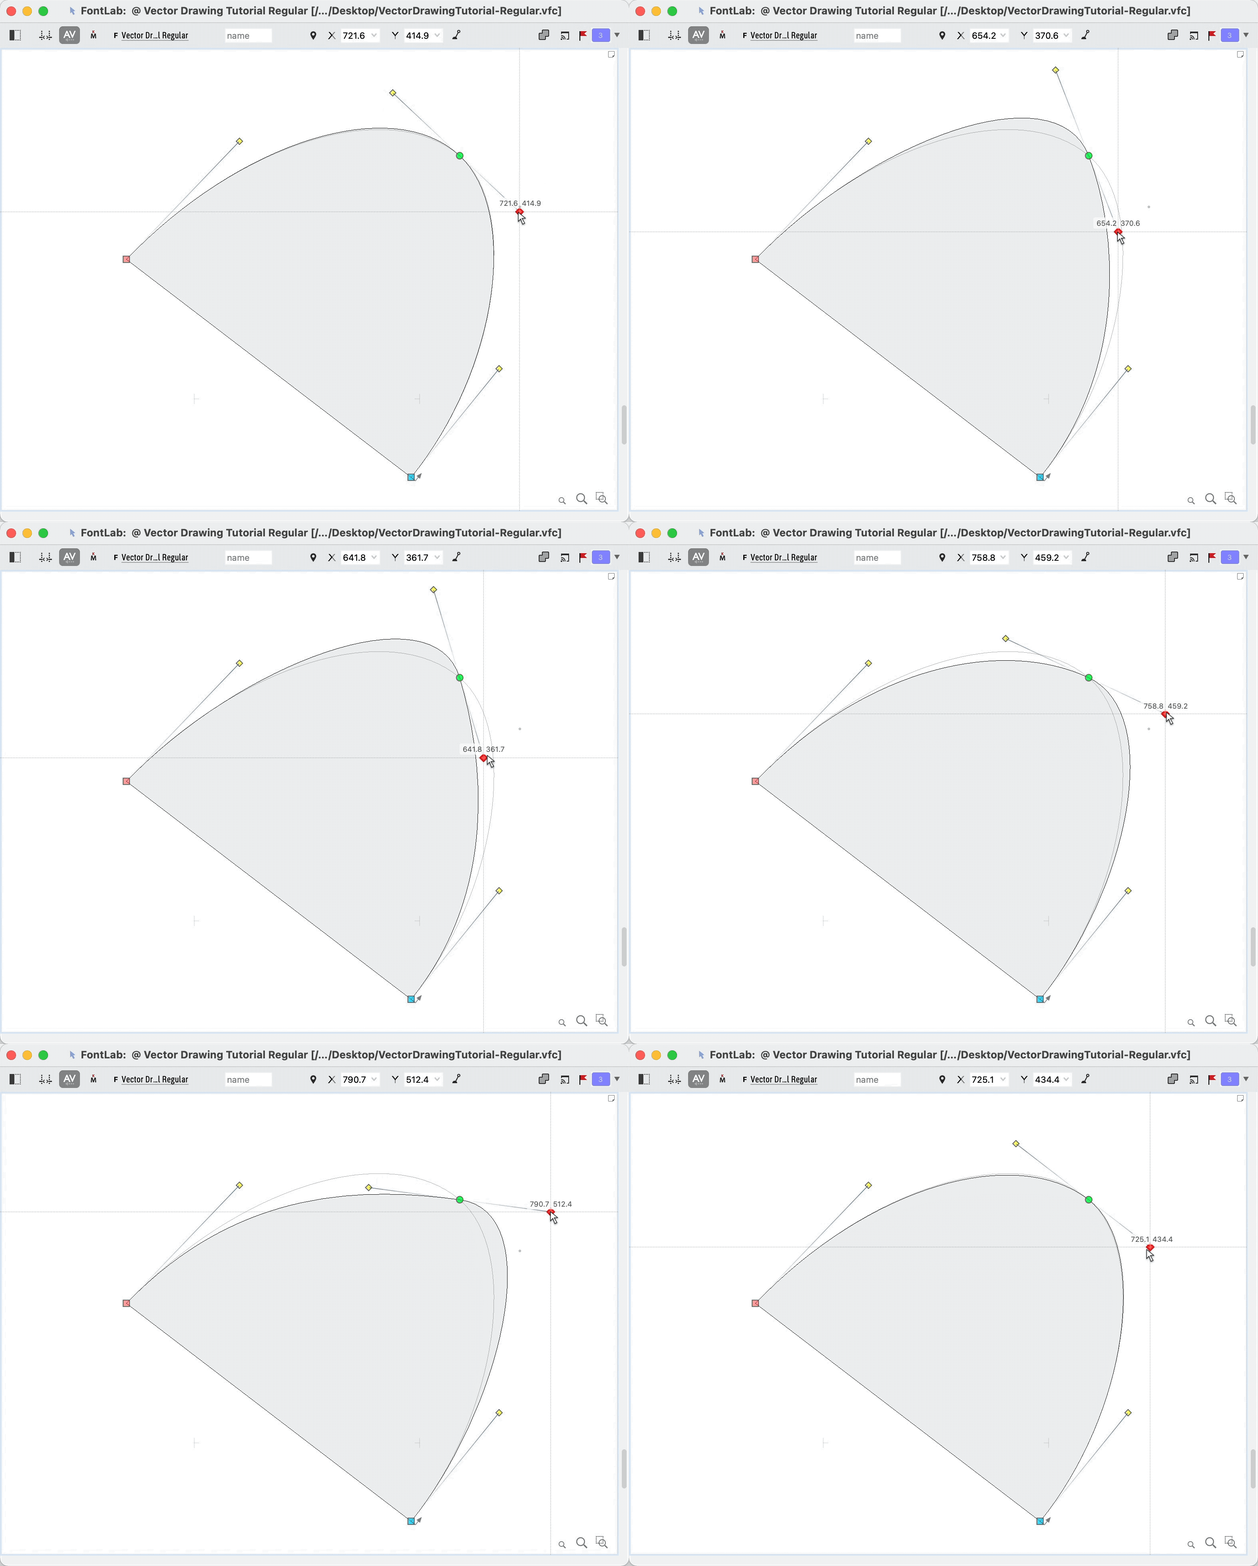
So now… What is the problem with nodes at extremes?
You don’t have control over direction! The handle angle has to stay FIXED!
Putting Force and Handle Direction Together
So don’t just think about node position.
If you want to make dynamic shapes think about handles. They thrust your curves forward.
Here’s the swirly @ again, with node structures. Notice how the handles drive the swirl ahead.
Here’s the axes of stress.
See how handles are not always parallel? When the inside curve has to change different from the outside, it is easier to do this with subtle direction changes.
With “nodes at extremes” handles stay horizontal or vertical. Direction change is impossible.
Tip
Hold down Cmd when dragging to change handle angles. Adjustments should be very slight.
Info
Follow the rule “no nodes on shallow curves” while drawing.
Warning
Remember, this is how you’d draw, but not export. This is incorrect node structure for variations.
PRO Tip
This entire discussion is a bit oversimplified. Many times I will get things sort of in the right place using nodes at extremes. Then I will add nodes at a slant. Then delete the nodes at extremes.
#2 No Kinks
This is a rule that you probably shouldn’t break.
#3 Extra Nodes, Sparse Nodes
Instead of “Pithy Paths”
When you are drawing sometimes you want to have extra nodes. You can always take those out during the refining stage. More nodes gives more control.
More nodes=more handles=more control=more nuanced curves=more work
More handles allows you to achieve some very nice shapes.
On the flip side of this, it sometime helps to have LESS nodes.
Less nodes=less handles=less control=basic curves=less work
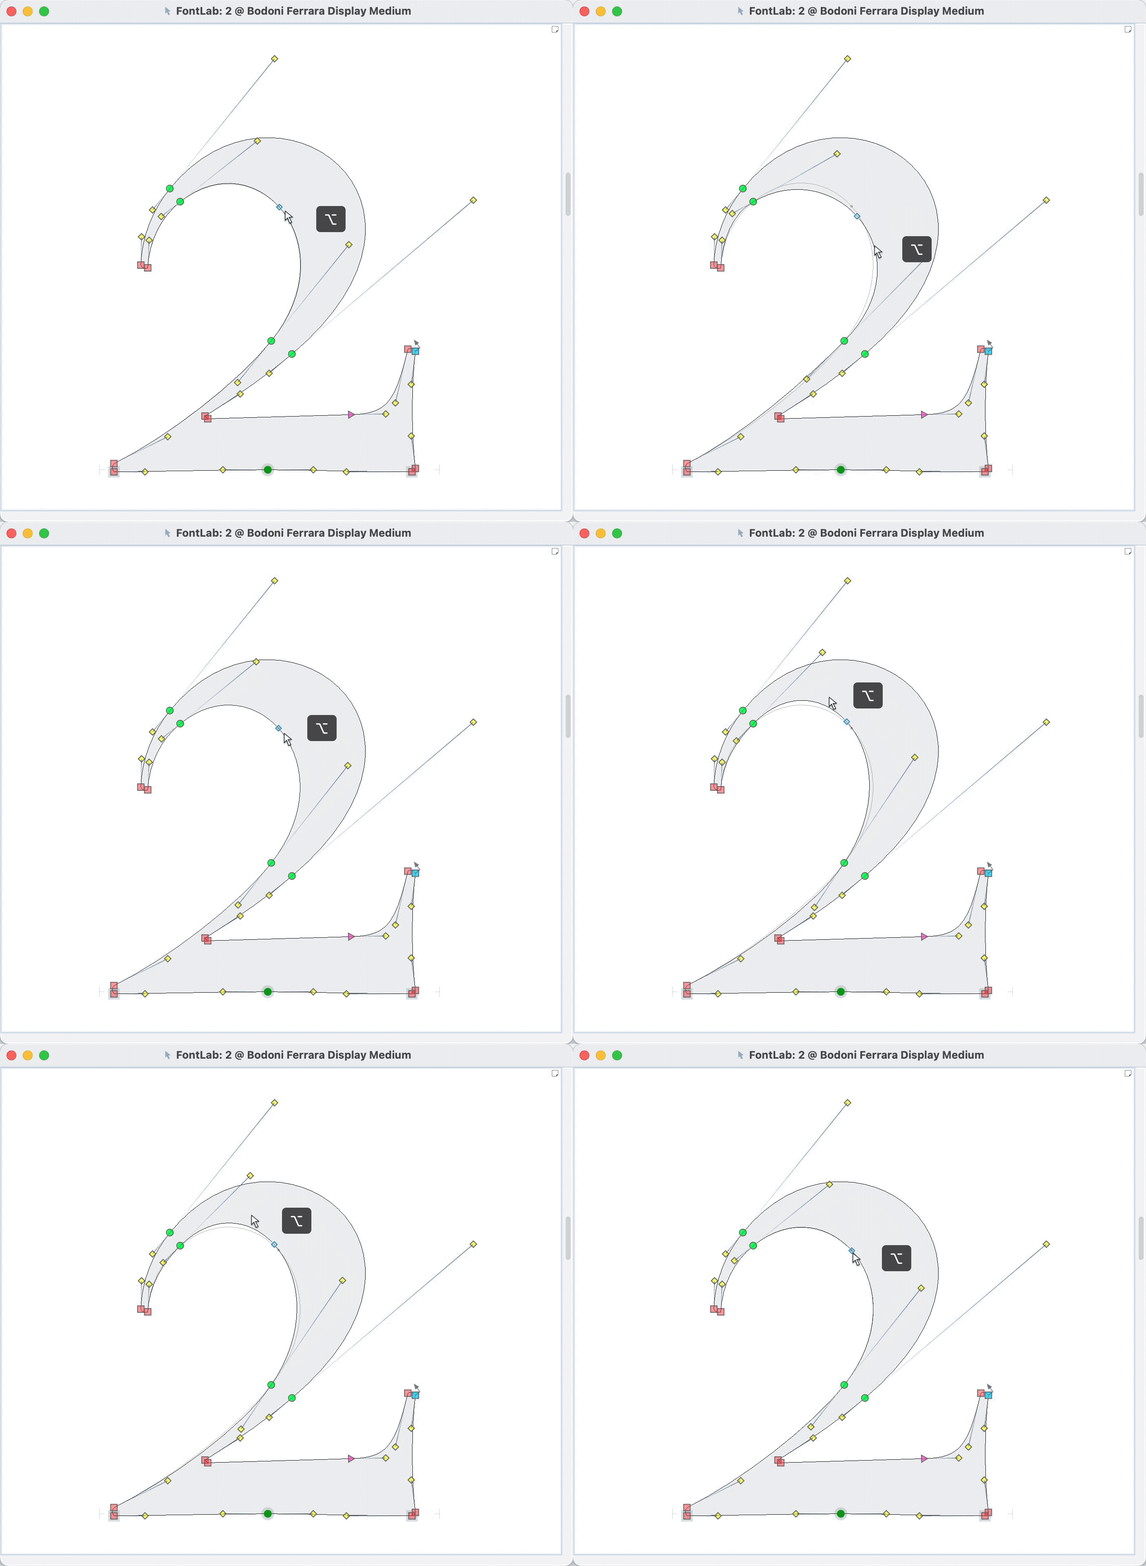
Less handles are especially great for the numbers 2, 3, and 5.
Besides moving nodes individually, here’s a few other things you can do.
- You can use Tunni lines to exactly change the handle “force”.
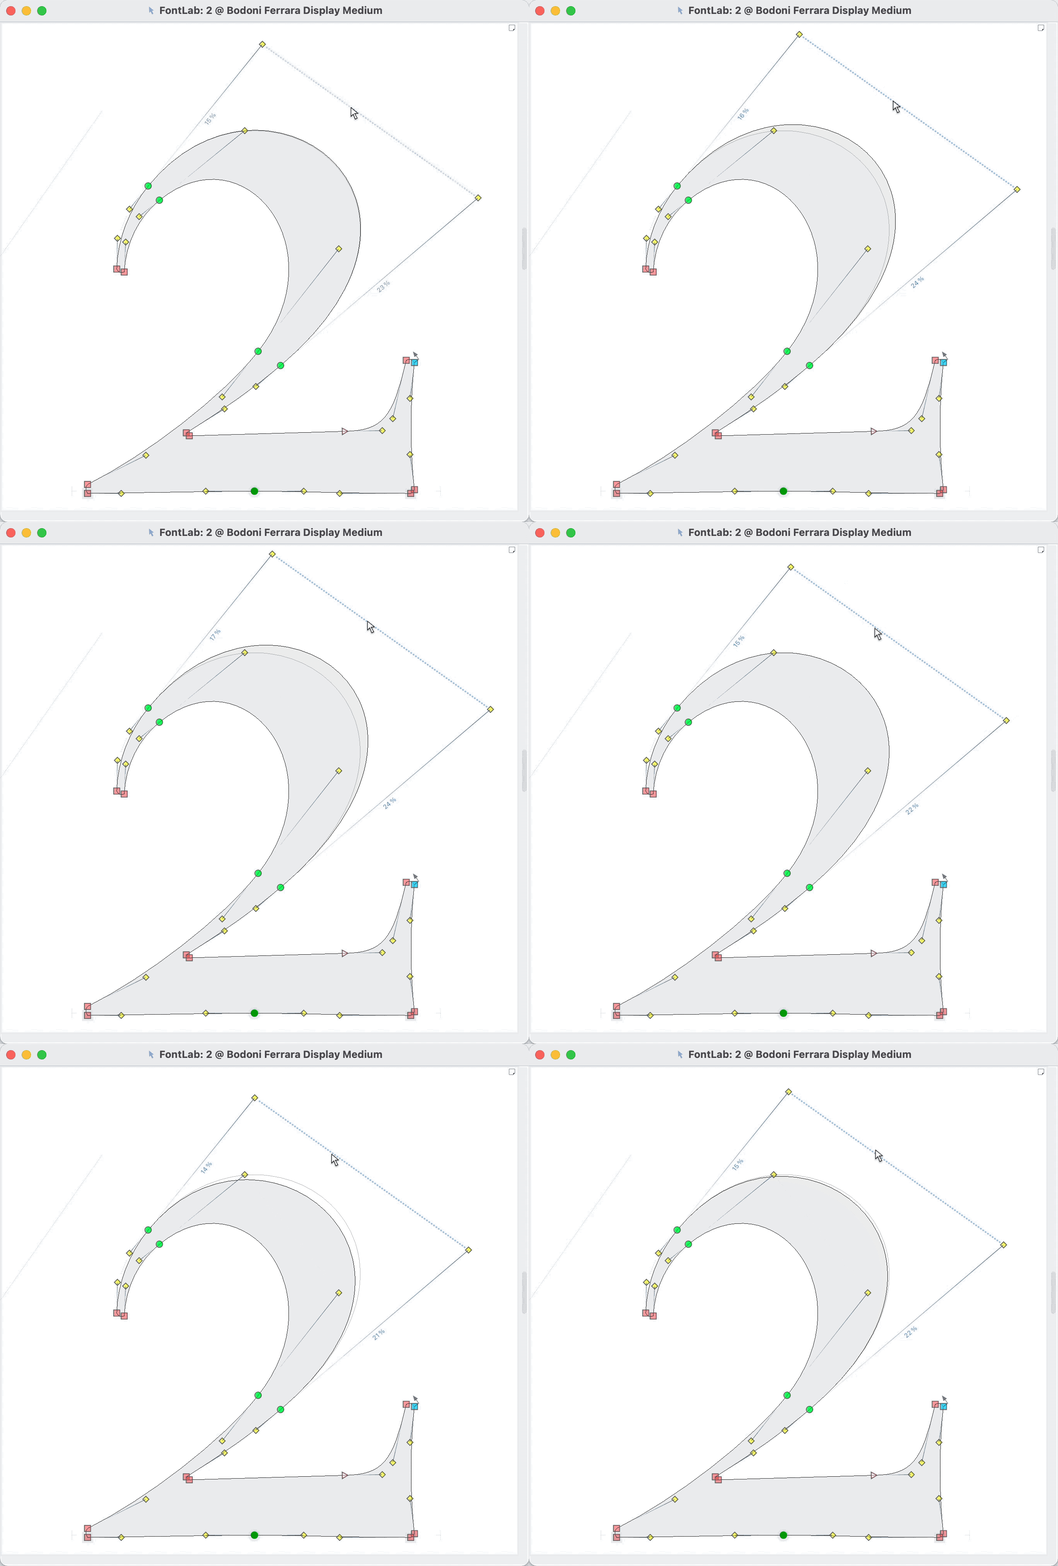
- Drag the segments. (Make sure segment doesn’t get highlighted.)
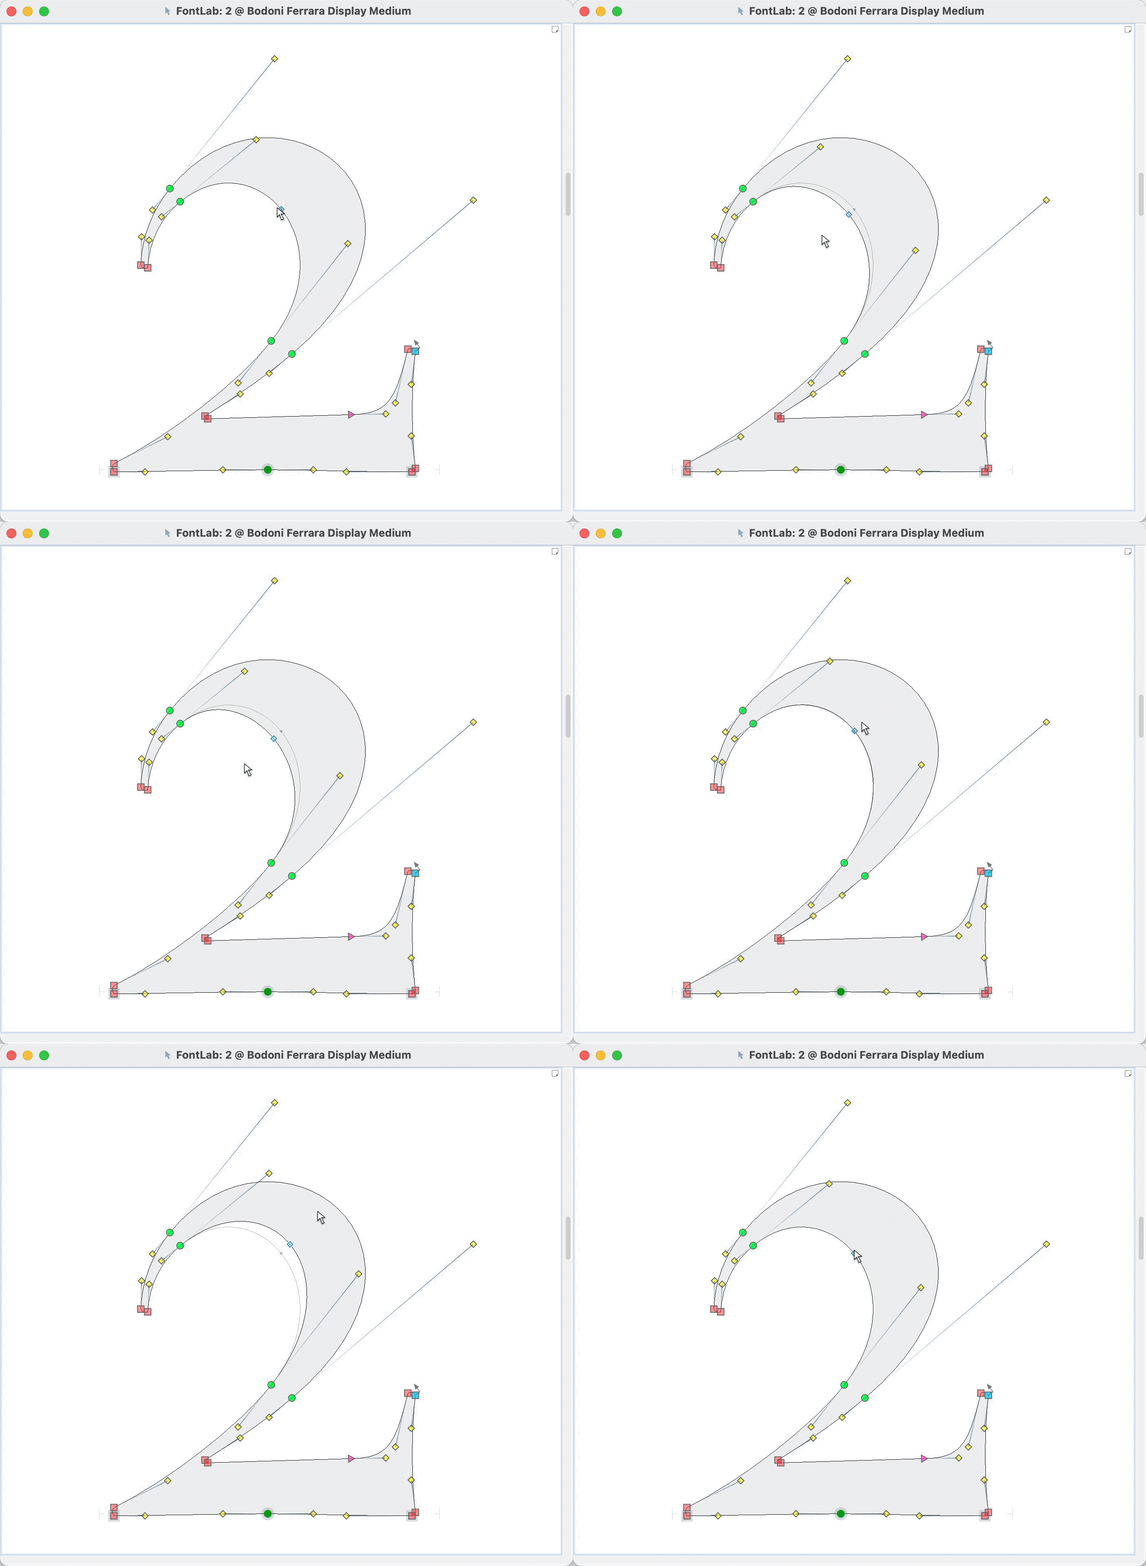
- You can see-saw the handles.
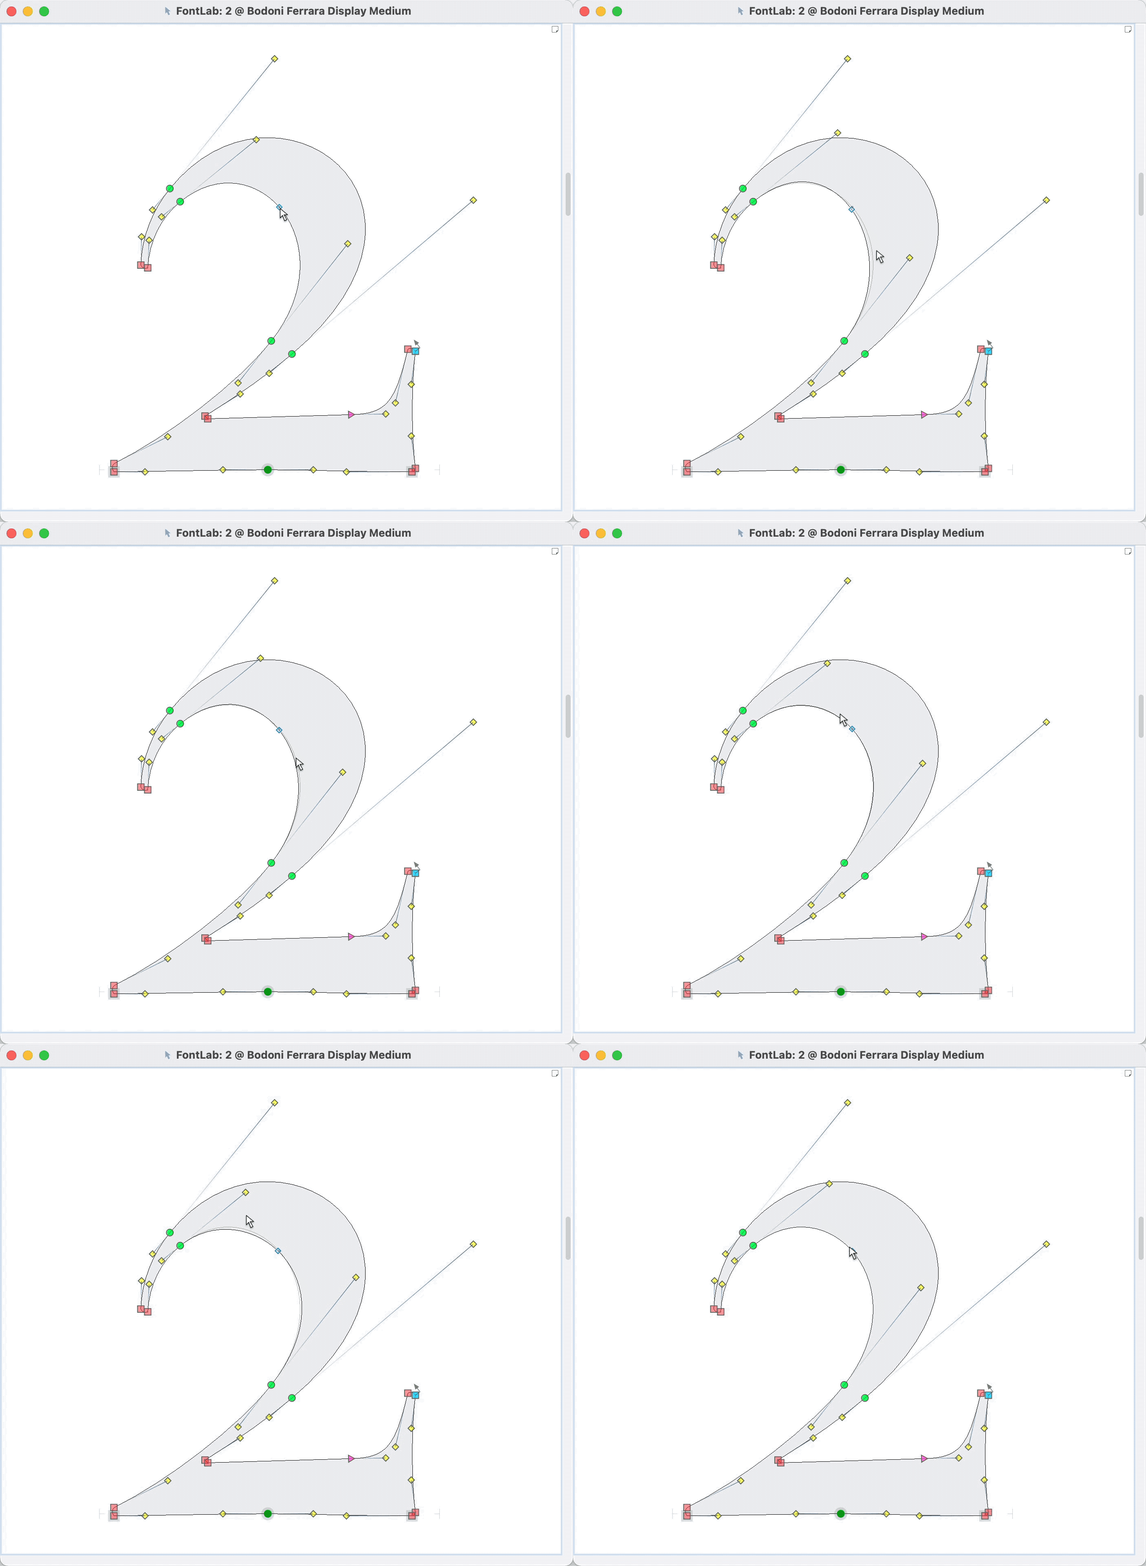
- Holding down Alt and dragging, you can move the handles together.
#4 Temporarily Ignore Magic Triangle
Instead of “Magic Triangle”
You can temporarily ignore the magic triangle for adjusting nodes. The examples of the two above ignore the triangle rule.
It’s just easier sometimes.
But most of the time you want to use the triangle.
#5 Whatever Path Works
Instead of “Path Direction”
Suppose your b design is the reverse of the d.
Well if you make an element and reverse the d, it looks like this. ▼
This type of wrong path direction is OK. It helps you save time if you decide to modify the d.
Path direction gets fixed during export.
#6 Use Overlaps
Instead of “Avoid Overlaps”
Overlaps are widely used in order to get good interpolation.
But also, they can just make things like diagonal letters a lot easier to manage. (Since you can move sides independently.)
Avoid Double Overlaps
You still need to avoid double overlaps because those will make a white spot.
See the tutorial on letter configuration and variable fonts, to get more info.
Getting Ready for Export
Once you get your drawing done, you do in fact, need to get it ready for export. You need nodes at extremes, and all that good stuff.
The more static your shapes, the more you can draw using the export rules. This saves you time in post production.
Here’s a table to keep track of all this nonsense!
| Rule | Export (Static OTF, TTF) | During Drawing |
|---|---|---|
| 1 | Points at Extremes | Think about Node and Handle Forces |
| 2 | No Kinks | No Kinks |
| 3 | Pithy Paths | Extra Nodes or Less Nodes to help drawing |
| 4 | Magic Triangle | Most of the time |
| 5 | Path Direction | Not Needed for Reversed Shapes |
| 6 | No Overlaps | Use Overlaps |
| 7 | Rare Inflection Nodes | Rare Inflection Nodes |
Cheers!