Fonts Look Bad at Size
The Size Problem
Benefits Avoid embarrassment when your font doesn’t work well at size.
It’s happened to everyone. You work really hard on a bunch of letters. Maybe you’ve blown them up all big.
Then you print out a page…
And it doesn’t work!!
By at size, I mean whatever size your font is printed at. Or supposed to be printed at.
There’s a few reasons your fonts can look bad at different sizes.
First we’ll look at those problems, then see how you can fix and check those problems in FontLab 8.
We’ll call this The Size Problem.
Spatial Frequencies
No matter if you make scripts, icons, lettering, serifs, sans, blackletter…spatial frequencies will impact your design—consciously or unconsciously.
This is one of the top factors in type design, or any type of graphic design.
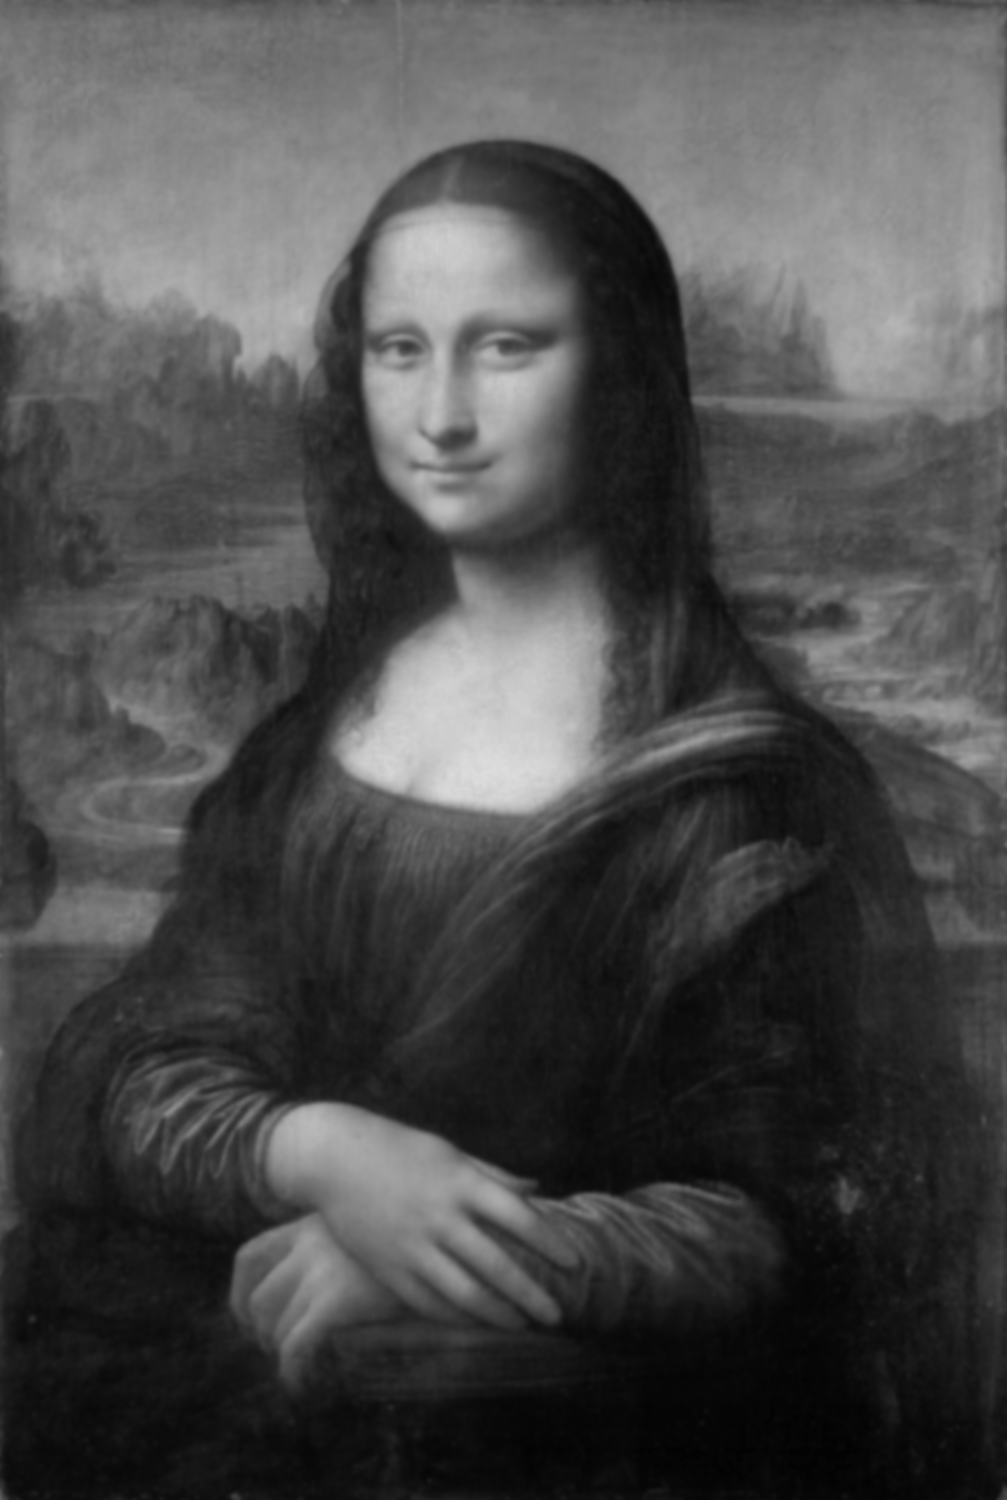
The Mona Lisa
Spatial frequencies are what da Vinci (knowingly or unknowingly) used to make Mona Lisa’s Smile.

So what you do is this. Look at other parts of the painting.
Look at her hands. The background. It seems like Mona Lisa is smiling.
But then you go back to her face and her smile is very subtle—or is it there?
What is happening?
Let’s apply different effects to bring out various spatial frequencies.*
Info
Applying effects using Photoshop with painting at 1007x1500 size. Changed to black and white. Source: Wikipedia
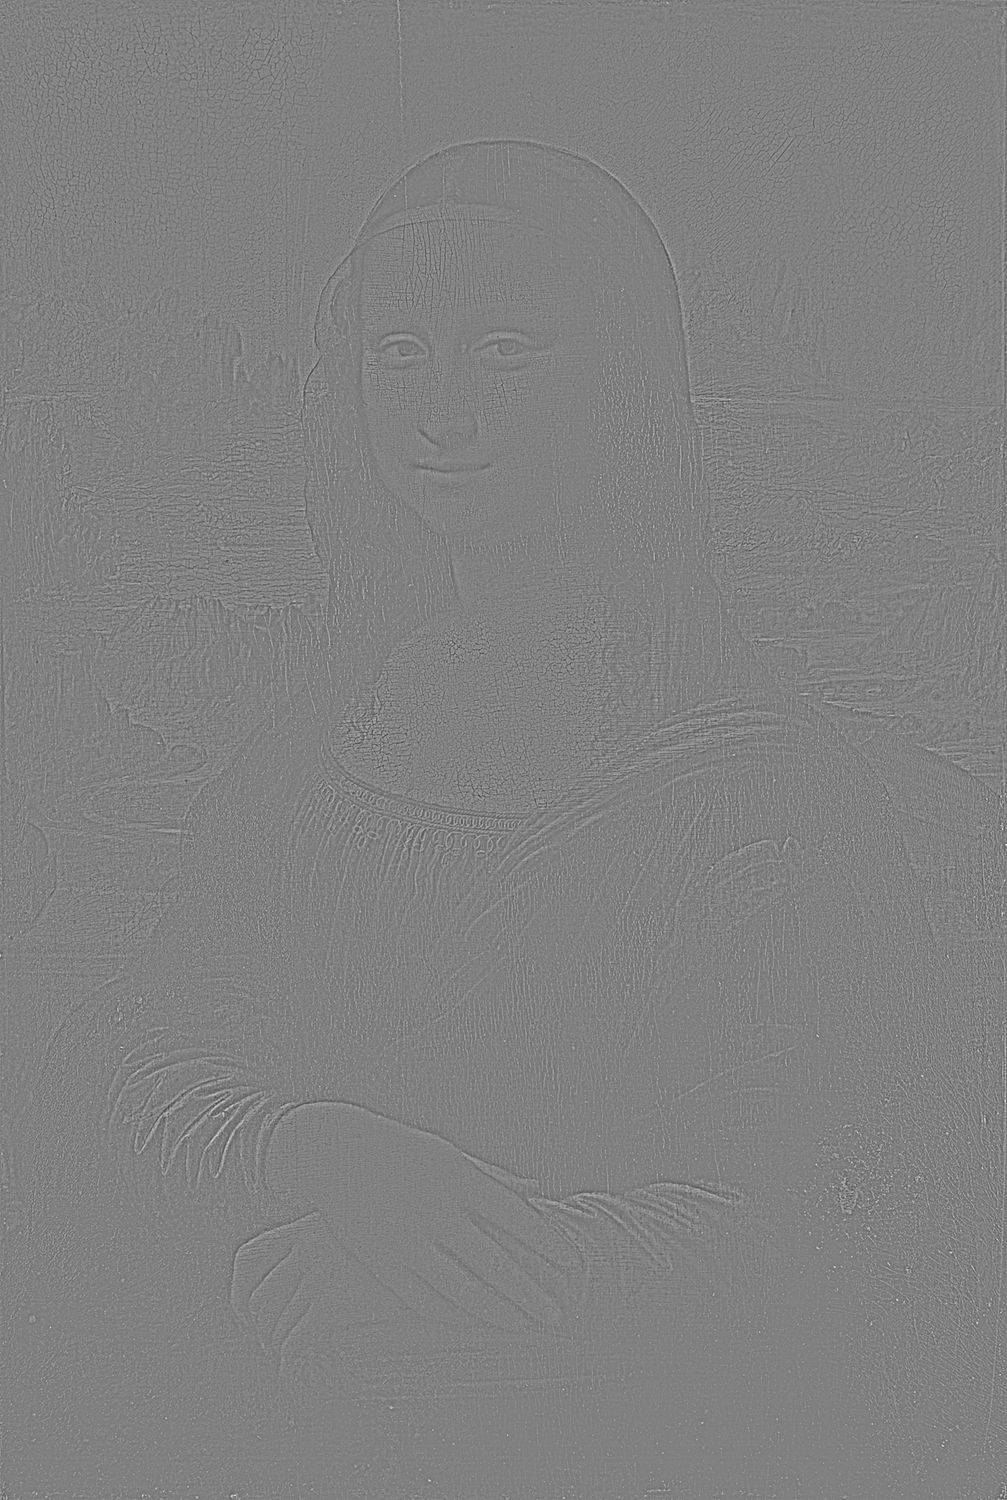
High Pass Filter at 1 Pixel

At one pixel at this size, only the highest frequency details are easily visible:
- Chips in the paint
- Lace and wrinkles of the dress
- Outline of head against background
- Some sharp details of the mountains
- Only the sharper lines of the face
- Lines of the veil, hair
- etc.
At the very highest frequencies, it seems like she is smiling.
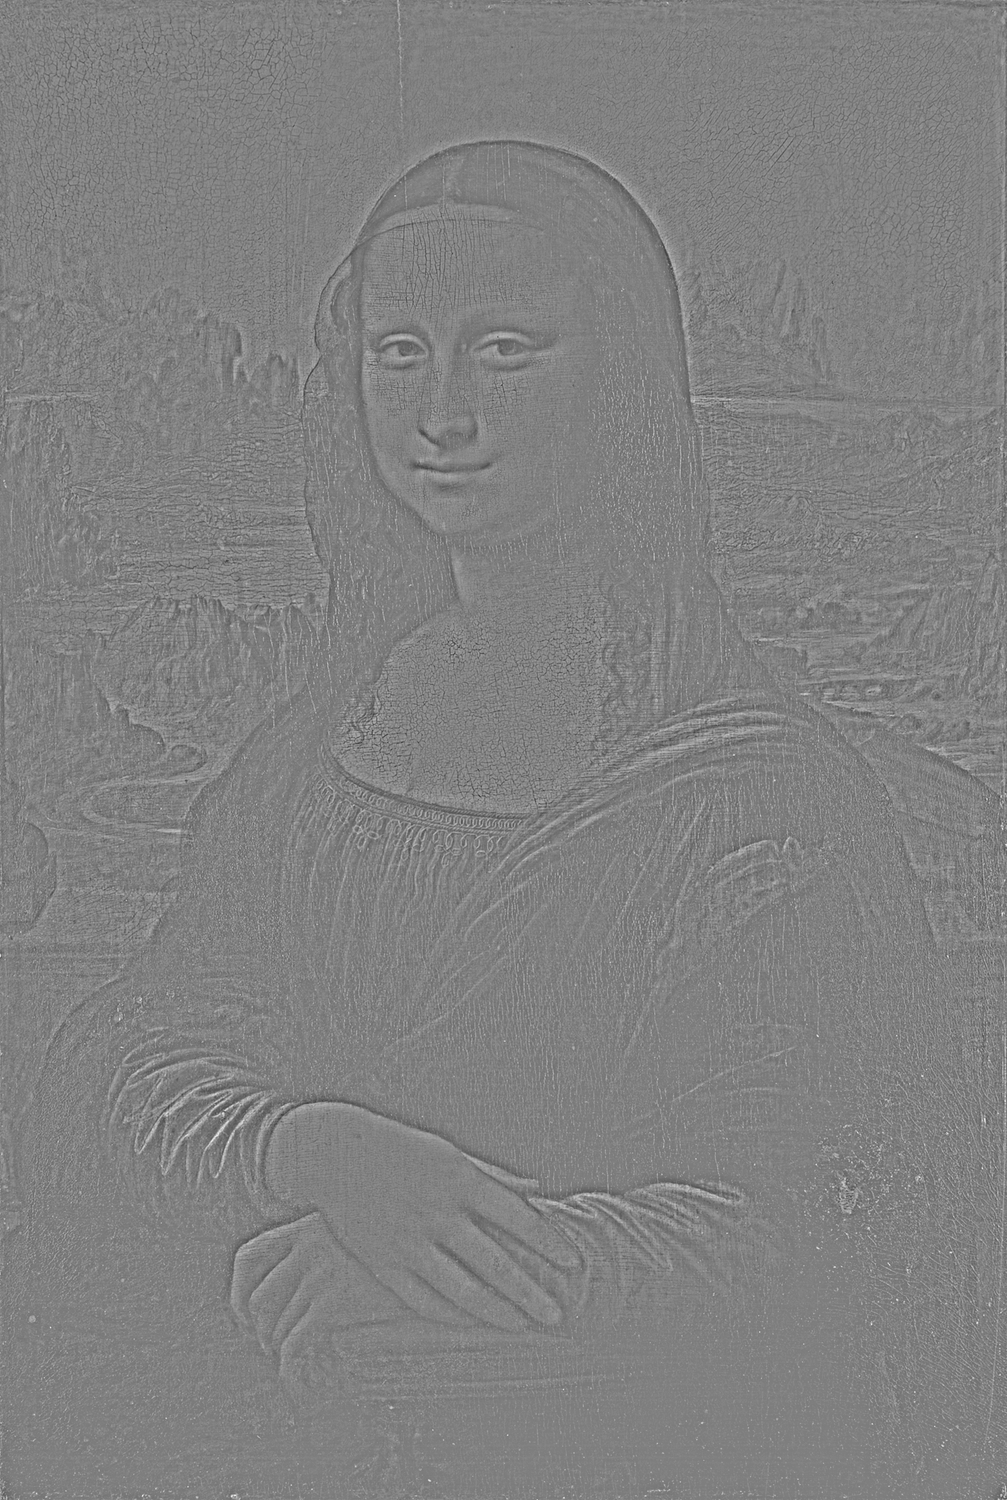
High Pass Filter at 2 Pixels
At 2 pixels many of the medium details are visible.
You can still see the cracks and smaller details, but the larger ones take more attention.
Once you add these frequencies, her smile feels less strong.
High Pass Filter at 5 Pixels
By 5 pixels we can see more medium details, such as the unevenness of the paint in the sky.
High Pass Filter at 15 Pixels (1% of image)
At 15 more medium frequency details of the background and sky become visible.
Let’s jump to lower frequencies:
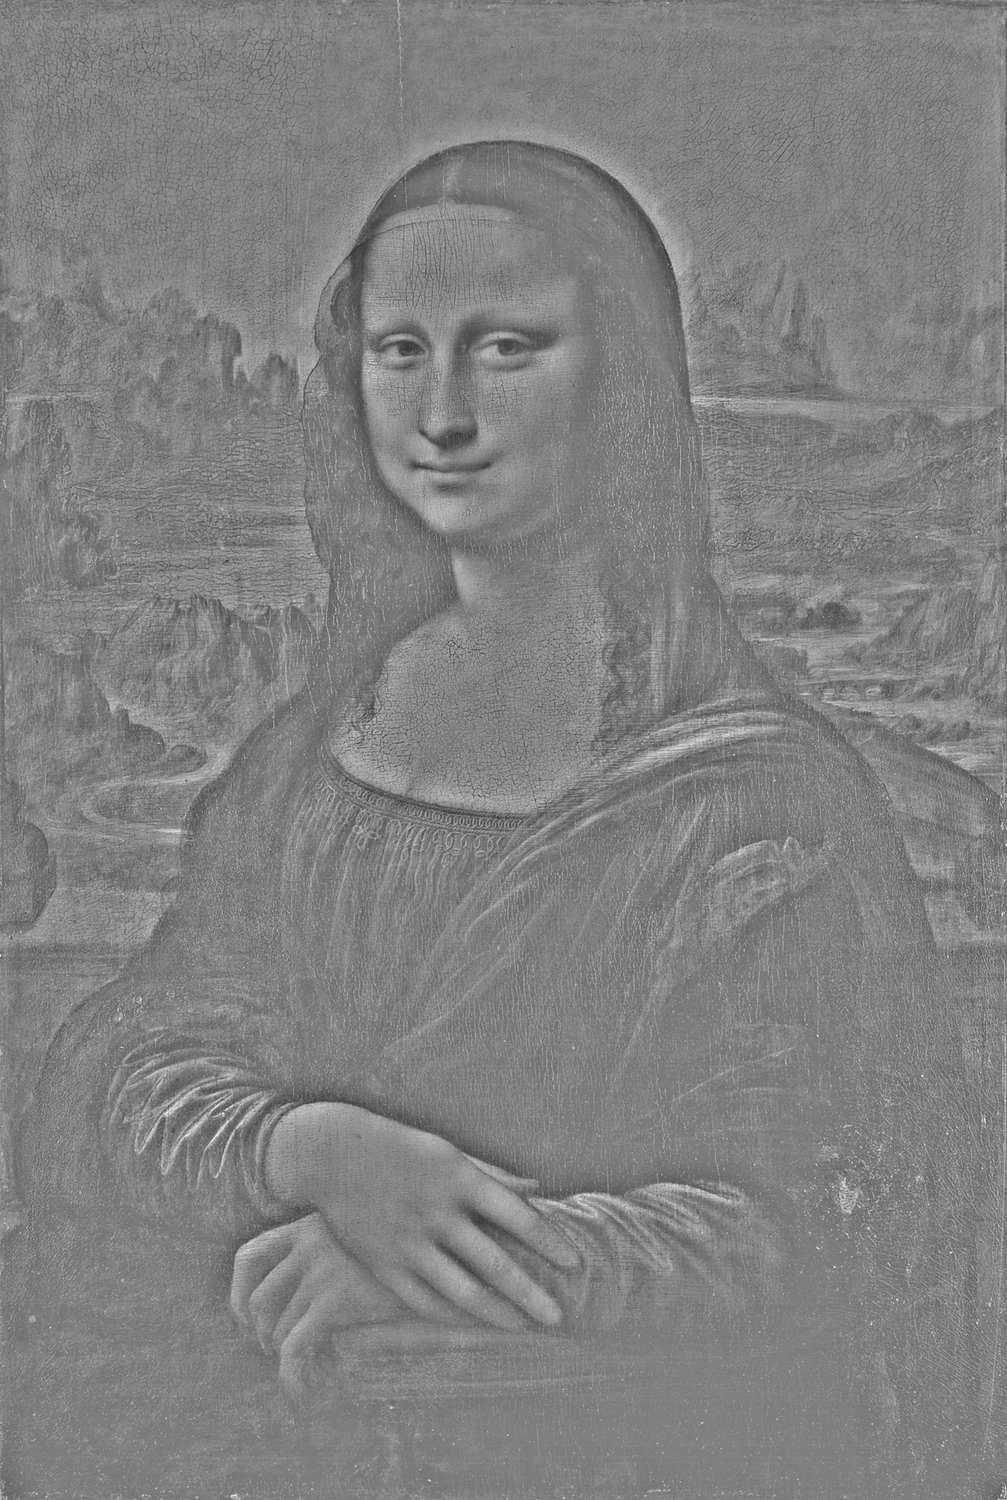
Gaussian Blur at 2 Pixels
At 2 pixels most of the fine details (hair, dress crinkles) have disappeared.
At this frequency her smile seems just about gone.
Gaussian Blur at 5 Pixels

Gaussian Blur at 7.6 Pixels

At about this range is where the smile seems to come back.
Gaussian Blur at 15 Pixels
If we take this up to 15 (1%) we see it looks like this.▼

Pretty much the mouth is gone.
Gaussian Blur at 50 Pixels (3.33%)
I’m starting to get a headache from looking at all these blurry images!! We just have one more.

At this level, you get a better feeling for the composition of the painting. A white-dark-white-dark-white-dark-white-dark motif moving down the middle.
Info
Now, for you to see what I’m seeing you also have to be about the same distance I am from the computer screen. Almost one arm length. And viewing at the same size. Which is 100% size at 218 pixels per inch.
Anyways…
Great art works on many different levels!
The smile is only one level of detail in the painting. So this painting has many levels within one level.
The Size Problem in Fonts
Letters are more binary than pictures.
You have either on or off. Ink or no ink. (Of course, metal type on handmade paper was more analog, with various shades of black and gray.)
Because of this, high pass filters aren’t as helpful for type.
However, it’s pretty simple to determine what has high and low frequency.
If it has small details, it is high frequency. It it has low details, it is low frequency.
High Frequency
High frequency details include:
- Sharp points
- Thin joins
- Angles less than 90°
- Thin lines
- Subtle swelling

Really, the top two have some thick parts. That means that they have middle and lower frequencies as well.
Even these high frequency letters have some lower and middle frequencies—their basic shape.
Low Frequency
Now for low frequency letters.
Low frequencies have thick strokes at size. The have a limited amount of sharp details.

Of course, there’s the possibility to mix frequencies. Medium contrast fonts have this. Also distressed fonts can have a mixture of wide strokes, but high frequency details.

Distressed types tend to be mixed frequency. Very chaotic types can be mostly high frequency.
If a type was extremely high frequency, letters would be unrecognizable because there would be no main strokes.
Very Low Frequency
Corners actually have a frequency to them. That’s because they narrow to a point. You can make shapes lower frequency by cutting off the corners.▼

See how these corners have been changed from 90° to 135°?

Practically speaking, wider angles have lower frequency.
OK…Now…
What’s even better than cutting corners??
Rounding them!

But these are still not all the way low frequency. Although the corners are rounded, the empty space is not.
Look at the sharp empty space.▼

So what would be even lower frequency?
Something that has rounded corners and rounded counters!
Maybe an H like this?

That’s about as low frequency as it can get and still be somewhat legible.
Info
Technically, spatial frequency is cycles of change between black and white per unit of length.
Does your font have The Size Problem?
Here’s some ways you can check in FontLab.
Checking Your Spatial Frequencies in FontLab
Low Frequencies: Blurring Method
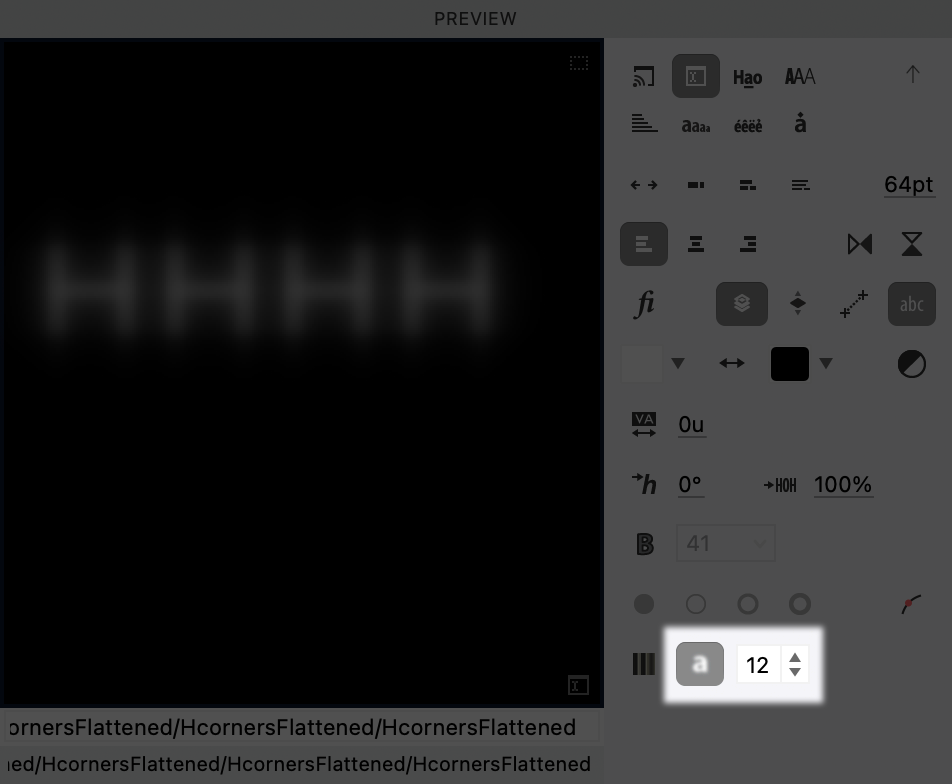
FontLab also has a built in blur to help you test the low frequencies of your fonts.
Good low frequencies will help your fonts look better at small sizes.
Open up the sidebar in the preview panel and change it here.
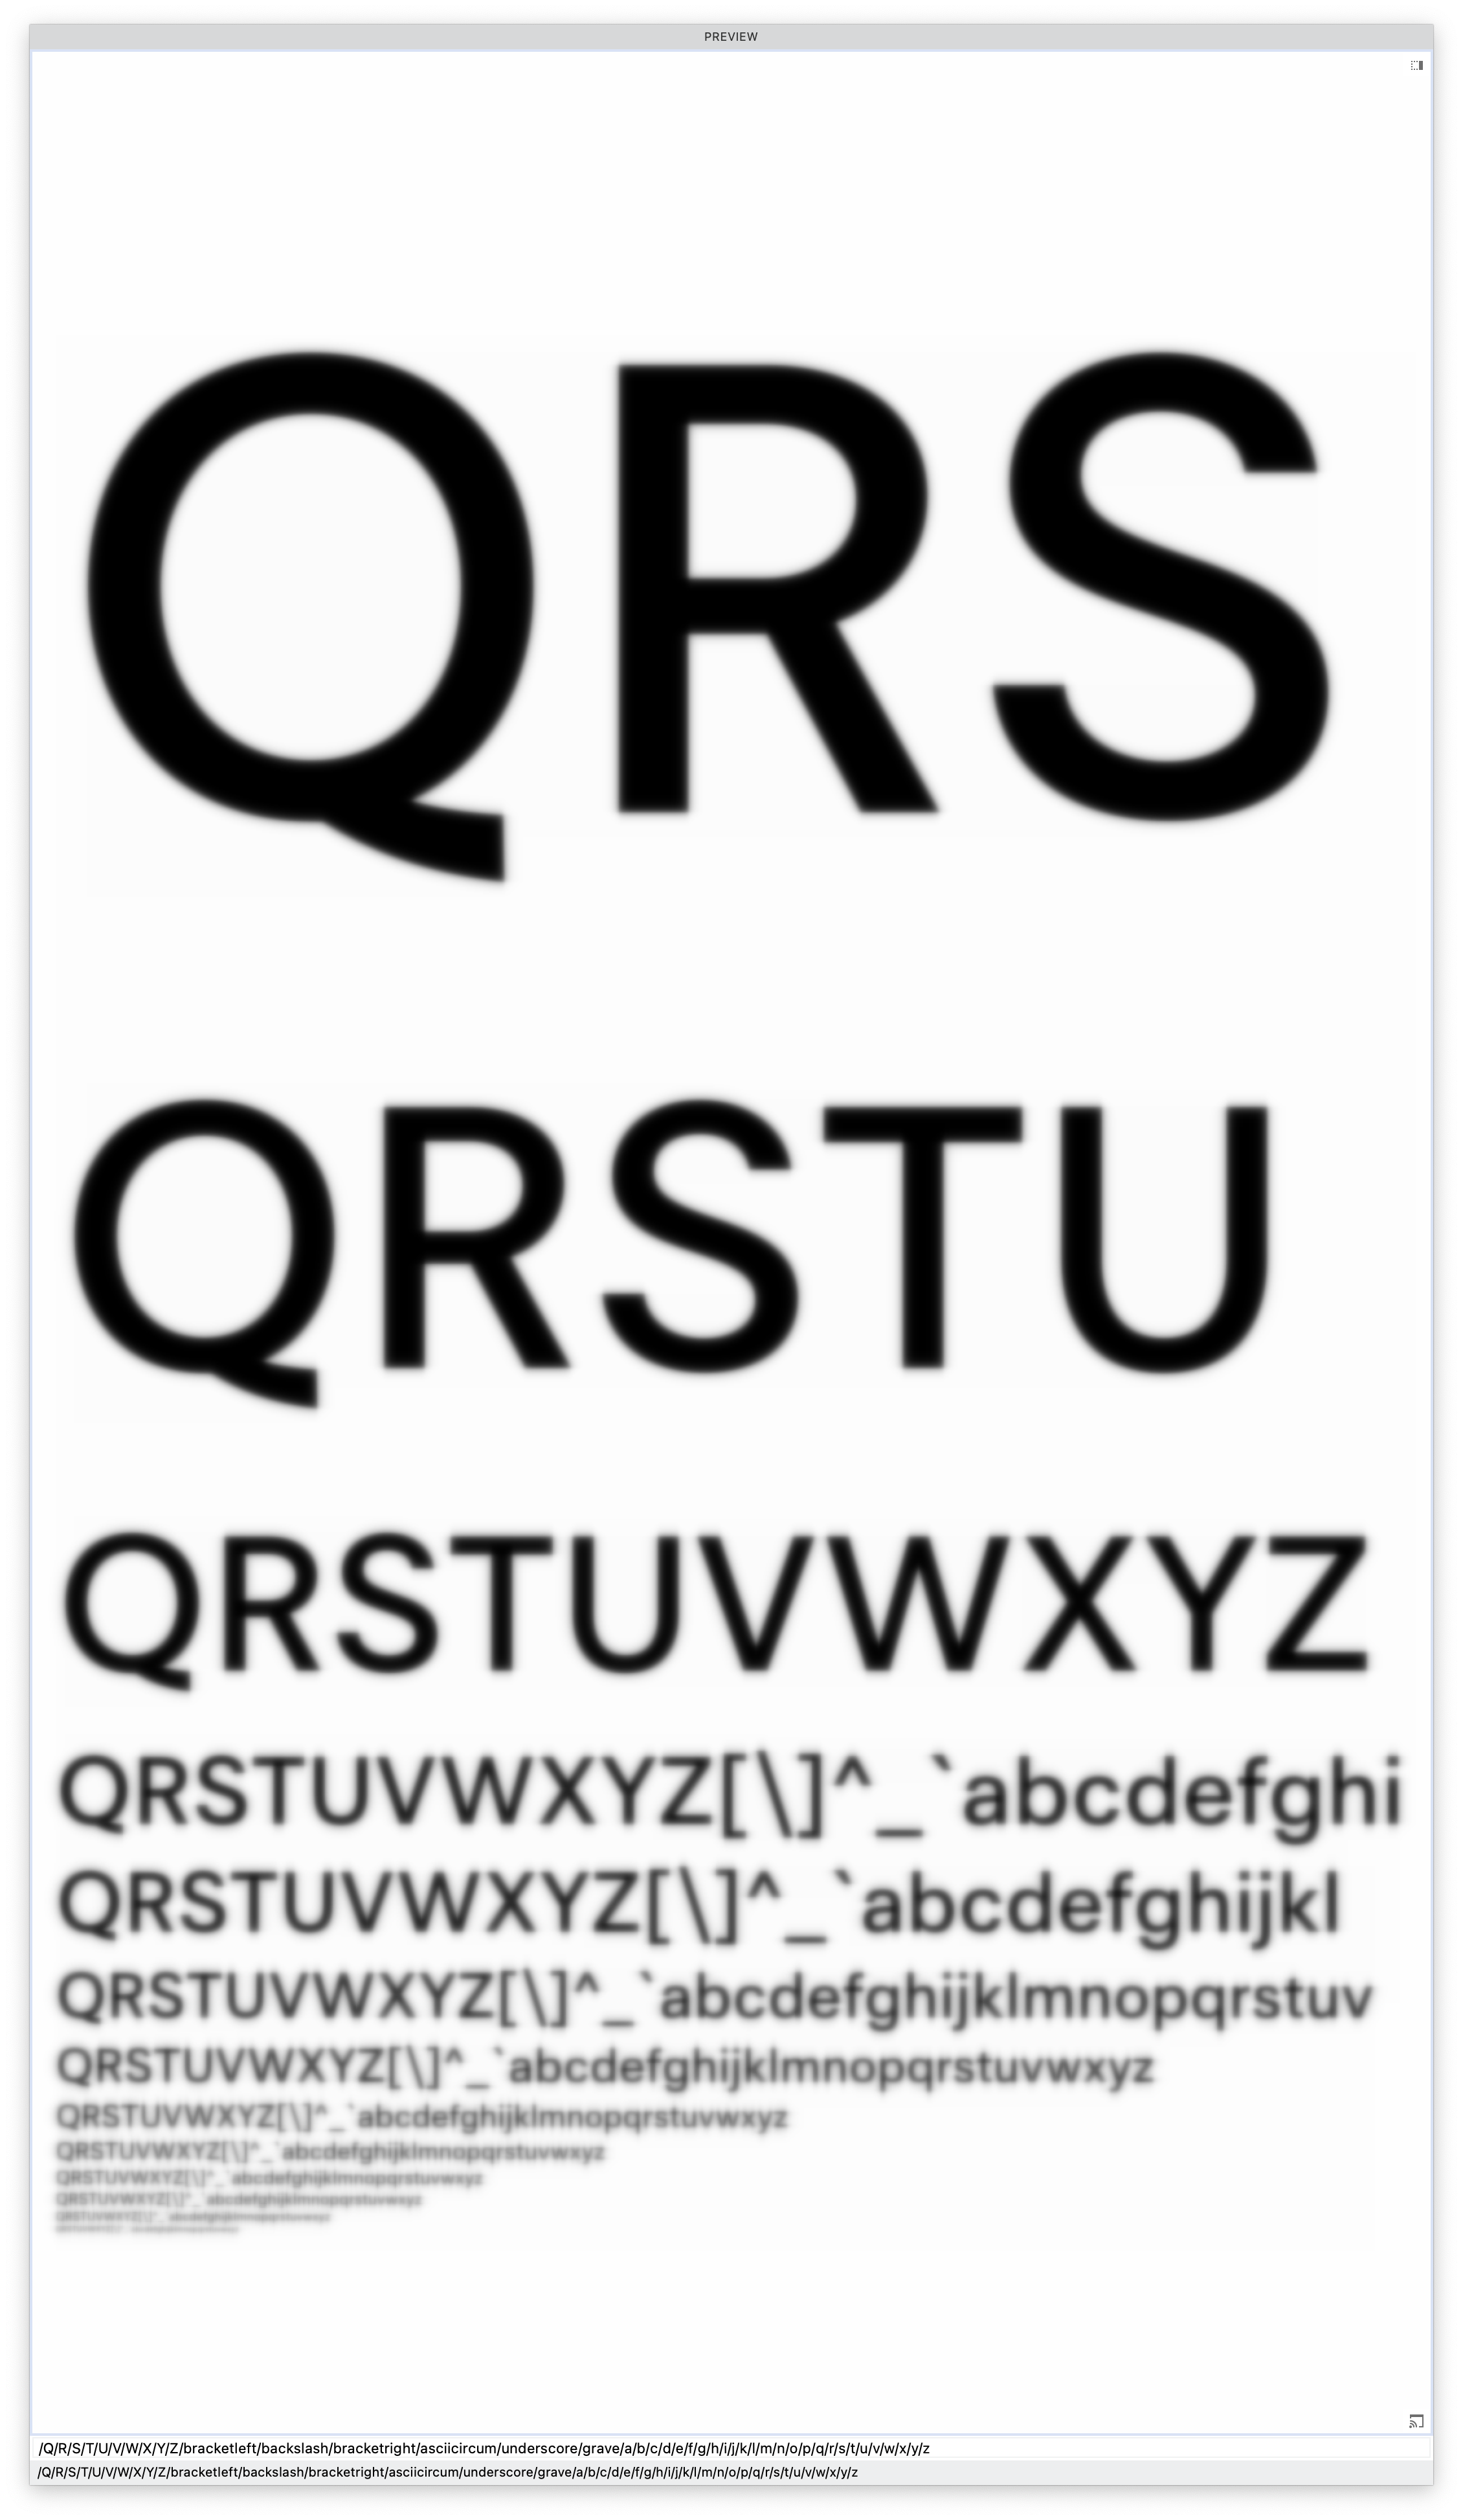
Low Frequencies: Waterfall Method
If you have a normal res-monitor (like an HD—1920×1080—at 23”), you might want to use the blurring method instead of waterfall.
With normal res, at small sizes you can get bad pixelation. This won’t give you an accurate view of your lettershapes.
Low Frequencies: Combo
Now let’s get the best of both worlds.
Bam!
That’s just about everything you need to discern the legibility of your letters.
That’s what I’m talkin’ about!
Finding High Frequencies in FontLab
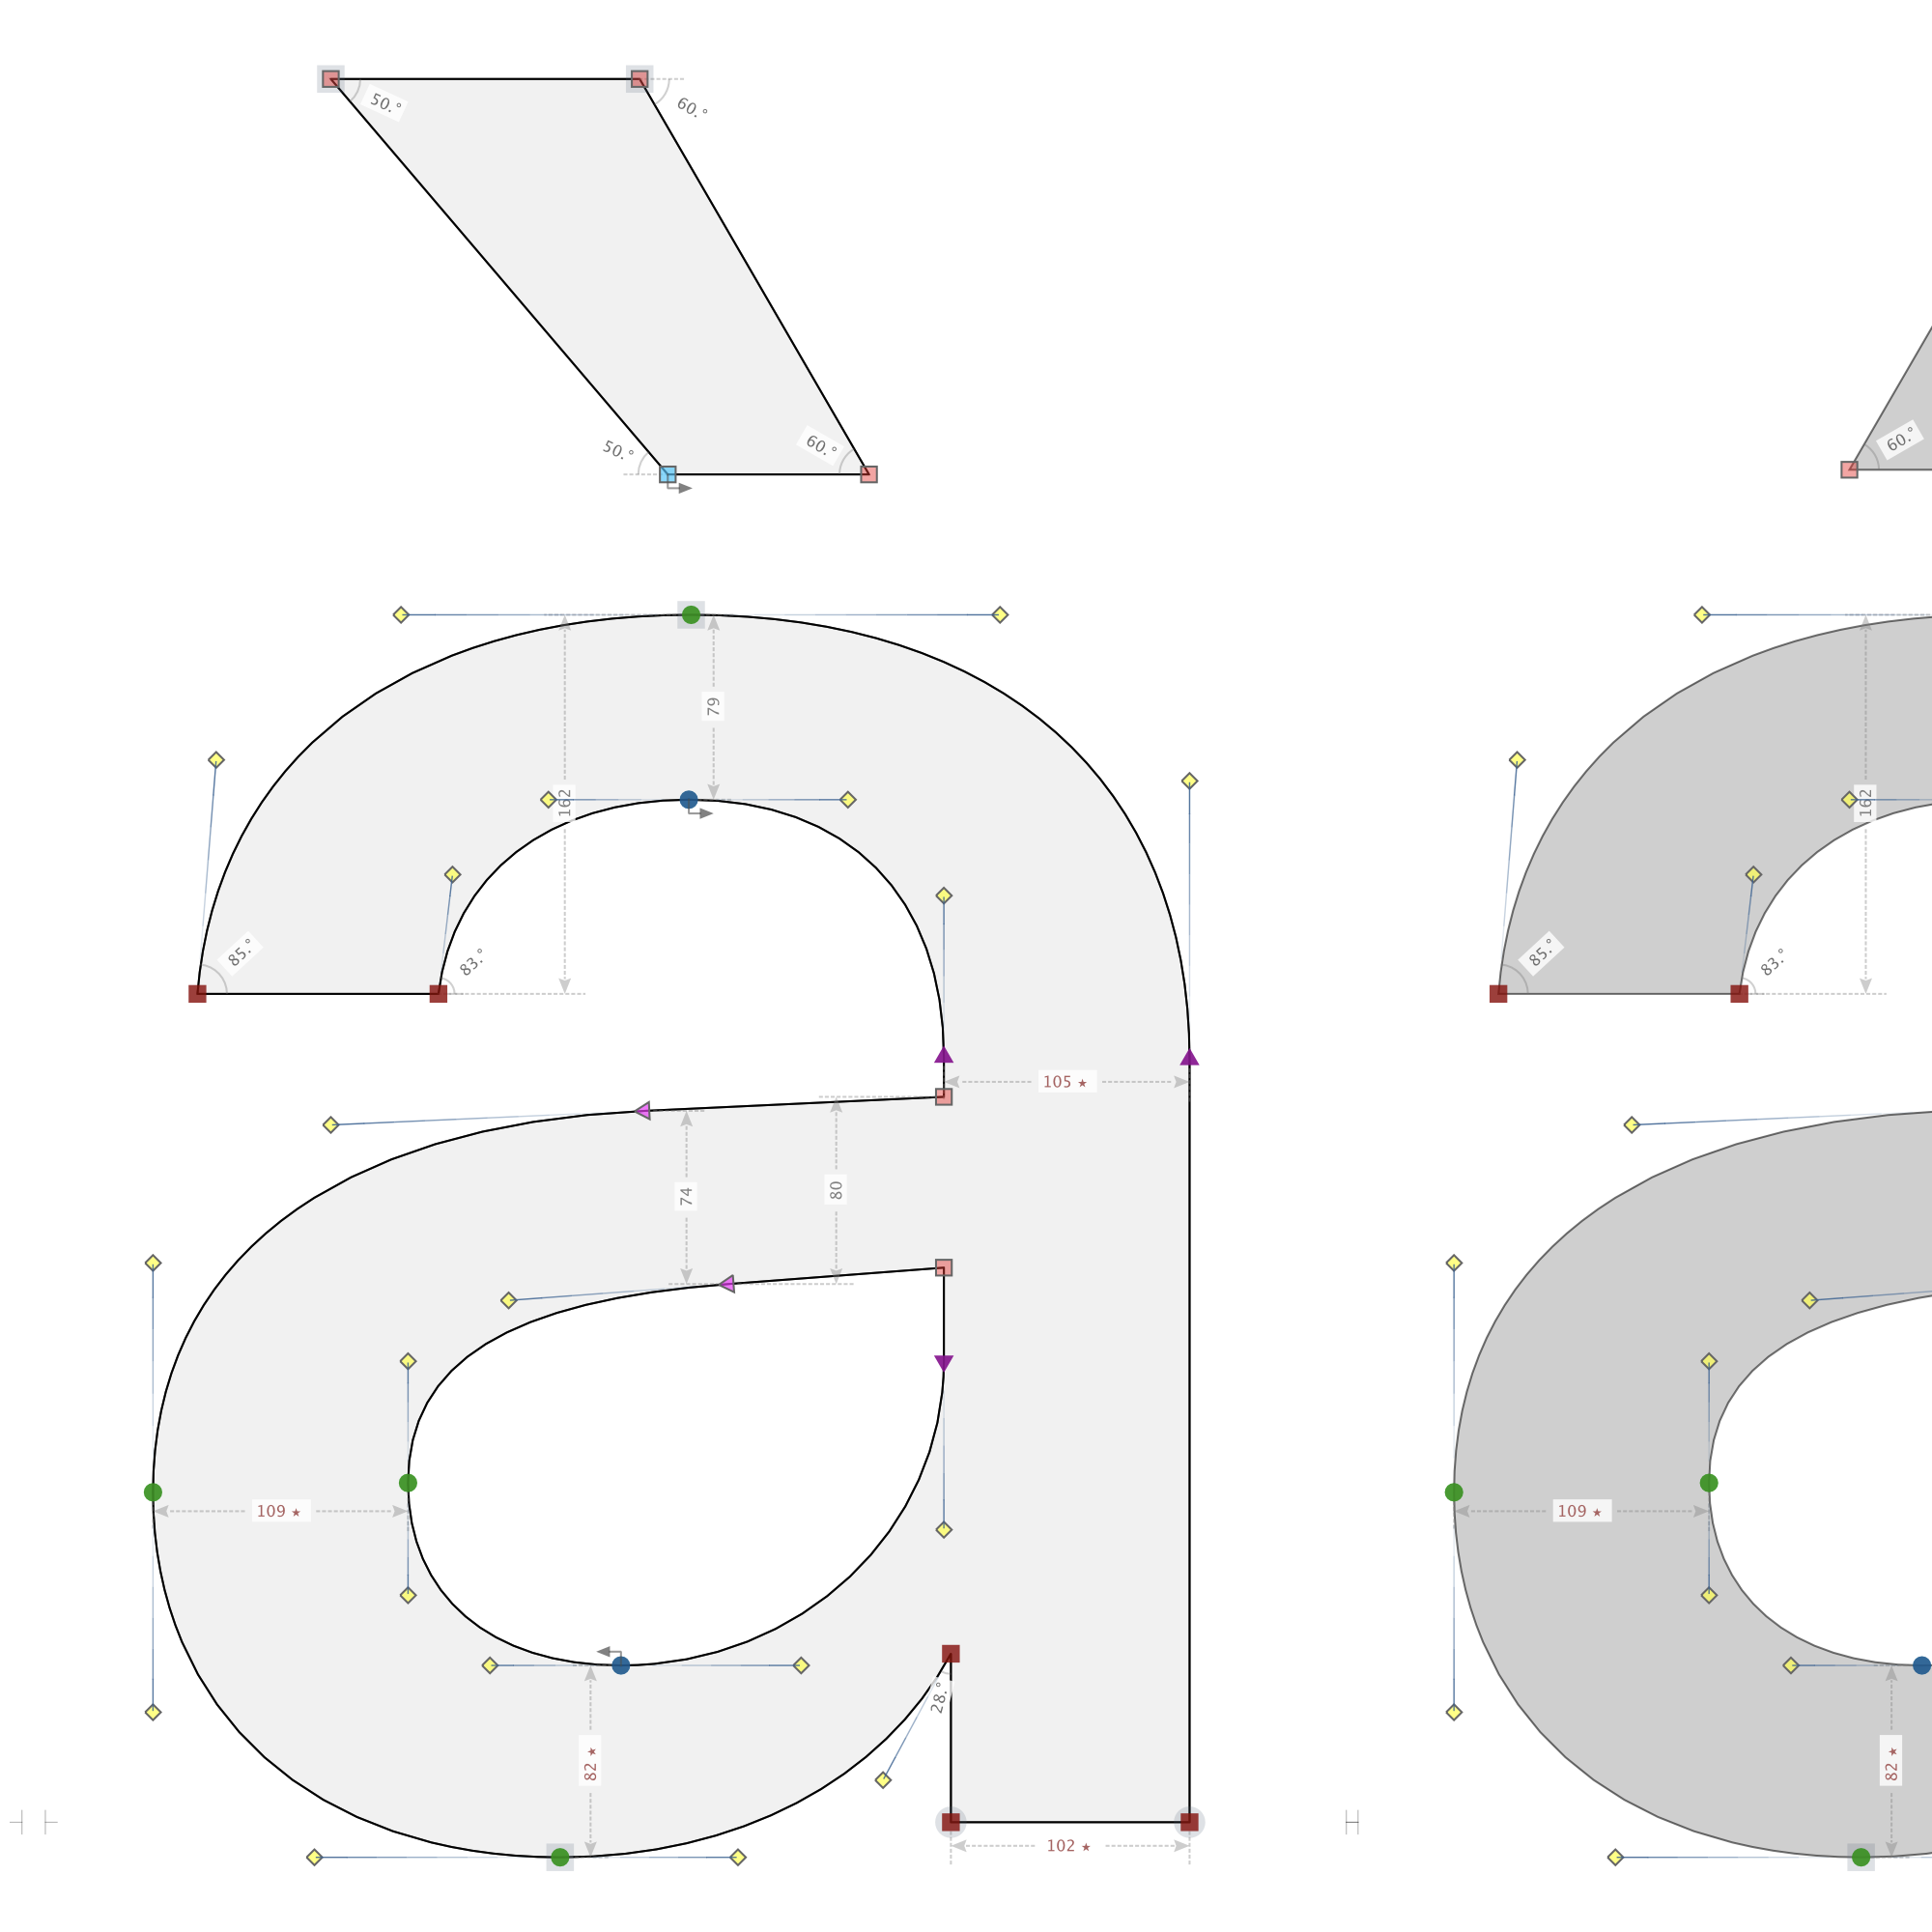
The measurement tools in FontLab help you find high frequencies.
#1 Automatically Check Sharp Corners NEW!
For whatever reason corners less than 90° have higher frequencies. These corners disappear at low sizes.
To find sharp corners in FontLab, We’re going to use the auto-meter angles.
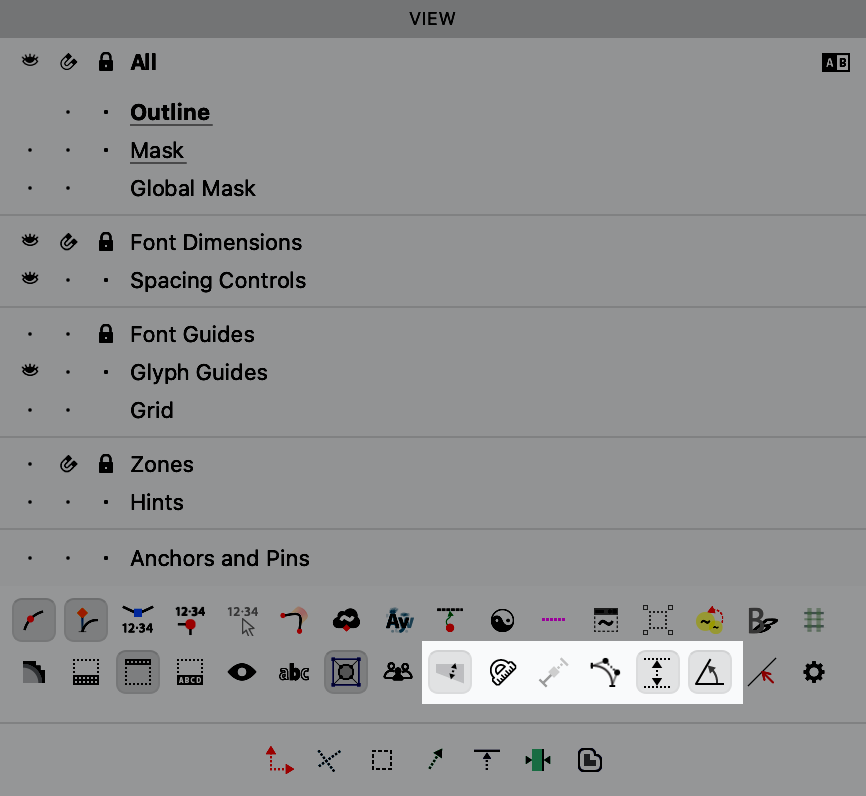
It’s easy to access through the View Panel. Go to menu: Window > Panels > View. Turn on these options.▼

FontLab will show you the acute angles.
If you want to lower the sharpness of these, grab the knife tool, hold down Ctrl, and cut.
PRO Tip
Go from bottom up, to see the correct slant of the knife.
FontLab will automatically highlight the small segment. Push A to go into the Contour tool. Hit Del.
#2 Automatically Check Widths
In general, thin spaces or contours have high spatial frequency.
To make this easier you can turn on different measuring tools.
In Preferences, go to Glyph Window.▼
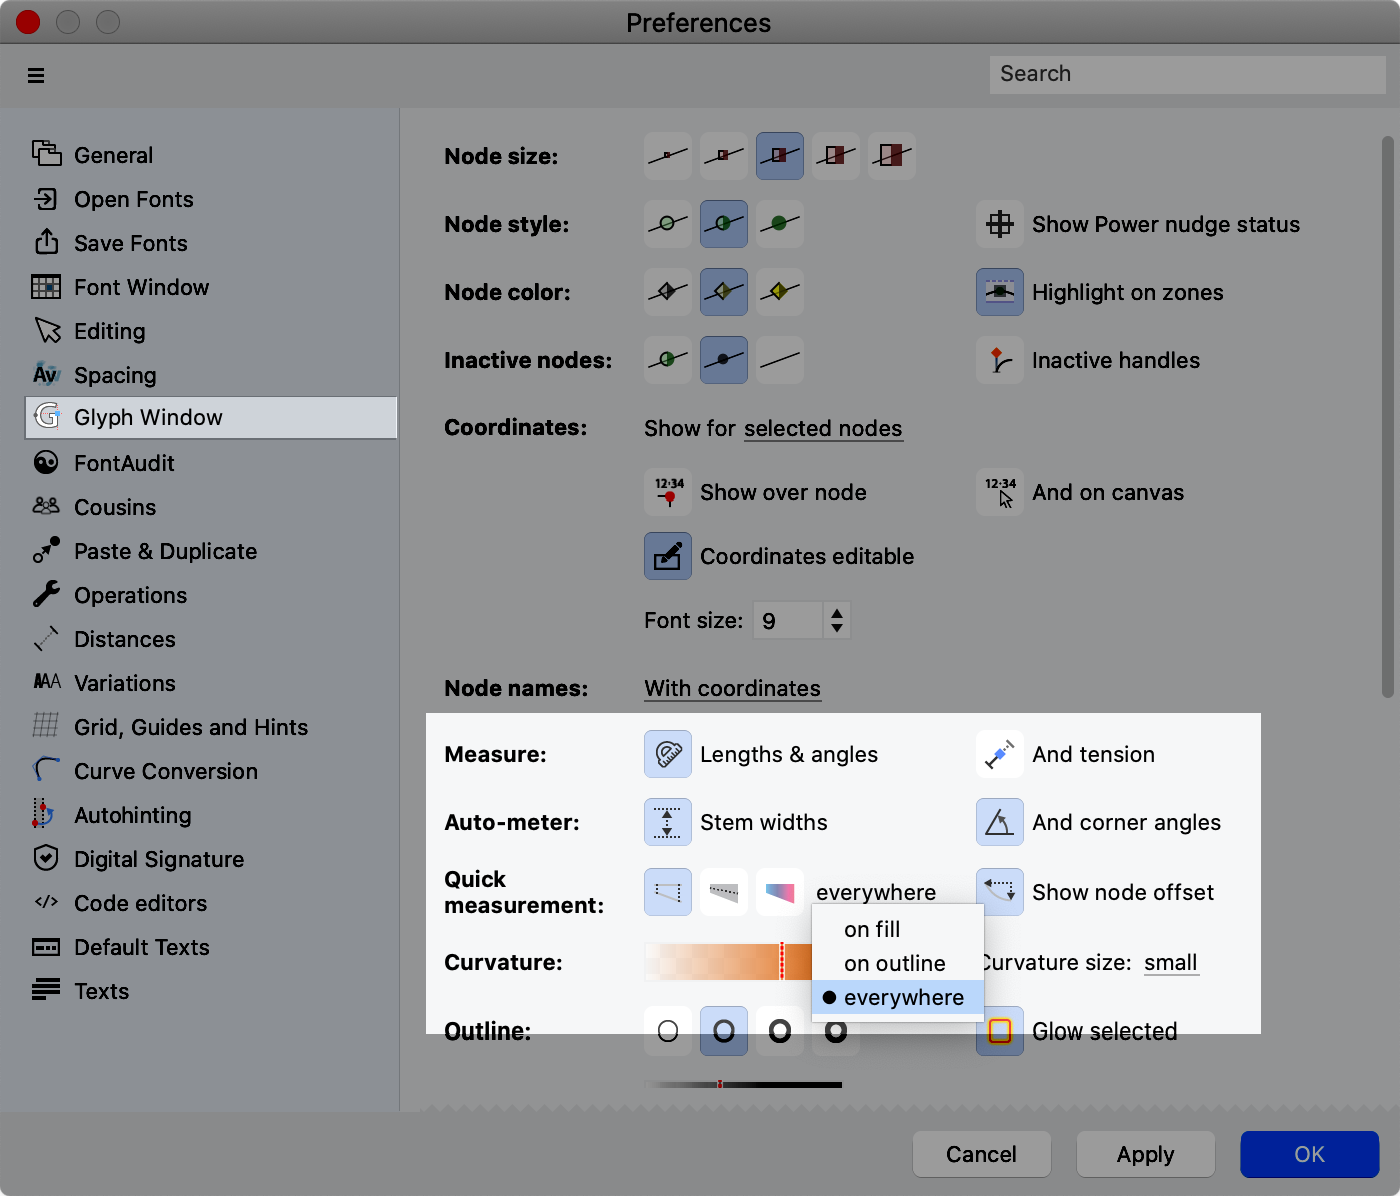
If you want to measure your spaces in addition to your contours, turn on “everywhere”.
In the View Panel, turn on these options.▼
Ok, let’s look at some more factors that will change your letter’s frequency.
Frequency Factors
Frequencies also depend upon:
Size of Type
We are talking about viewing size. That depends upon a couple things.
Viewing size is a mixture of viewing distance and physical size.
For example, caption/agate text (the smallest text) at large sizes is low frequency. Caption text at caption sizes is high frequency.
Check out this handy size calculator. https://sizecalc.com

Quality of Printing
Also these:
- Color of ink.
- Type of printing.
- Color of paper.
- Texture of paper.
- Dots per inch (DPI) or Pixels per inch (PPI)
Use this calculator to determine the font units to resolution.
There’s even more factors including lighting.
Next is another frequency we don’t want to forget.
Spacing Frequency
There’s high spatial frequency spacing (tight).▼

And low spatial frequency spacing (loose).▼

In general, tighter spacing works better for fonts at large point sizes. Loose works better for fonts at small point sizes.
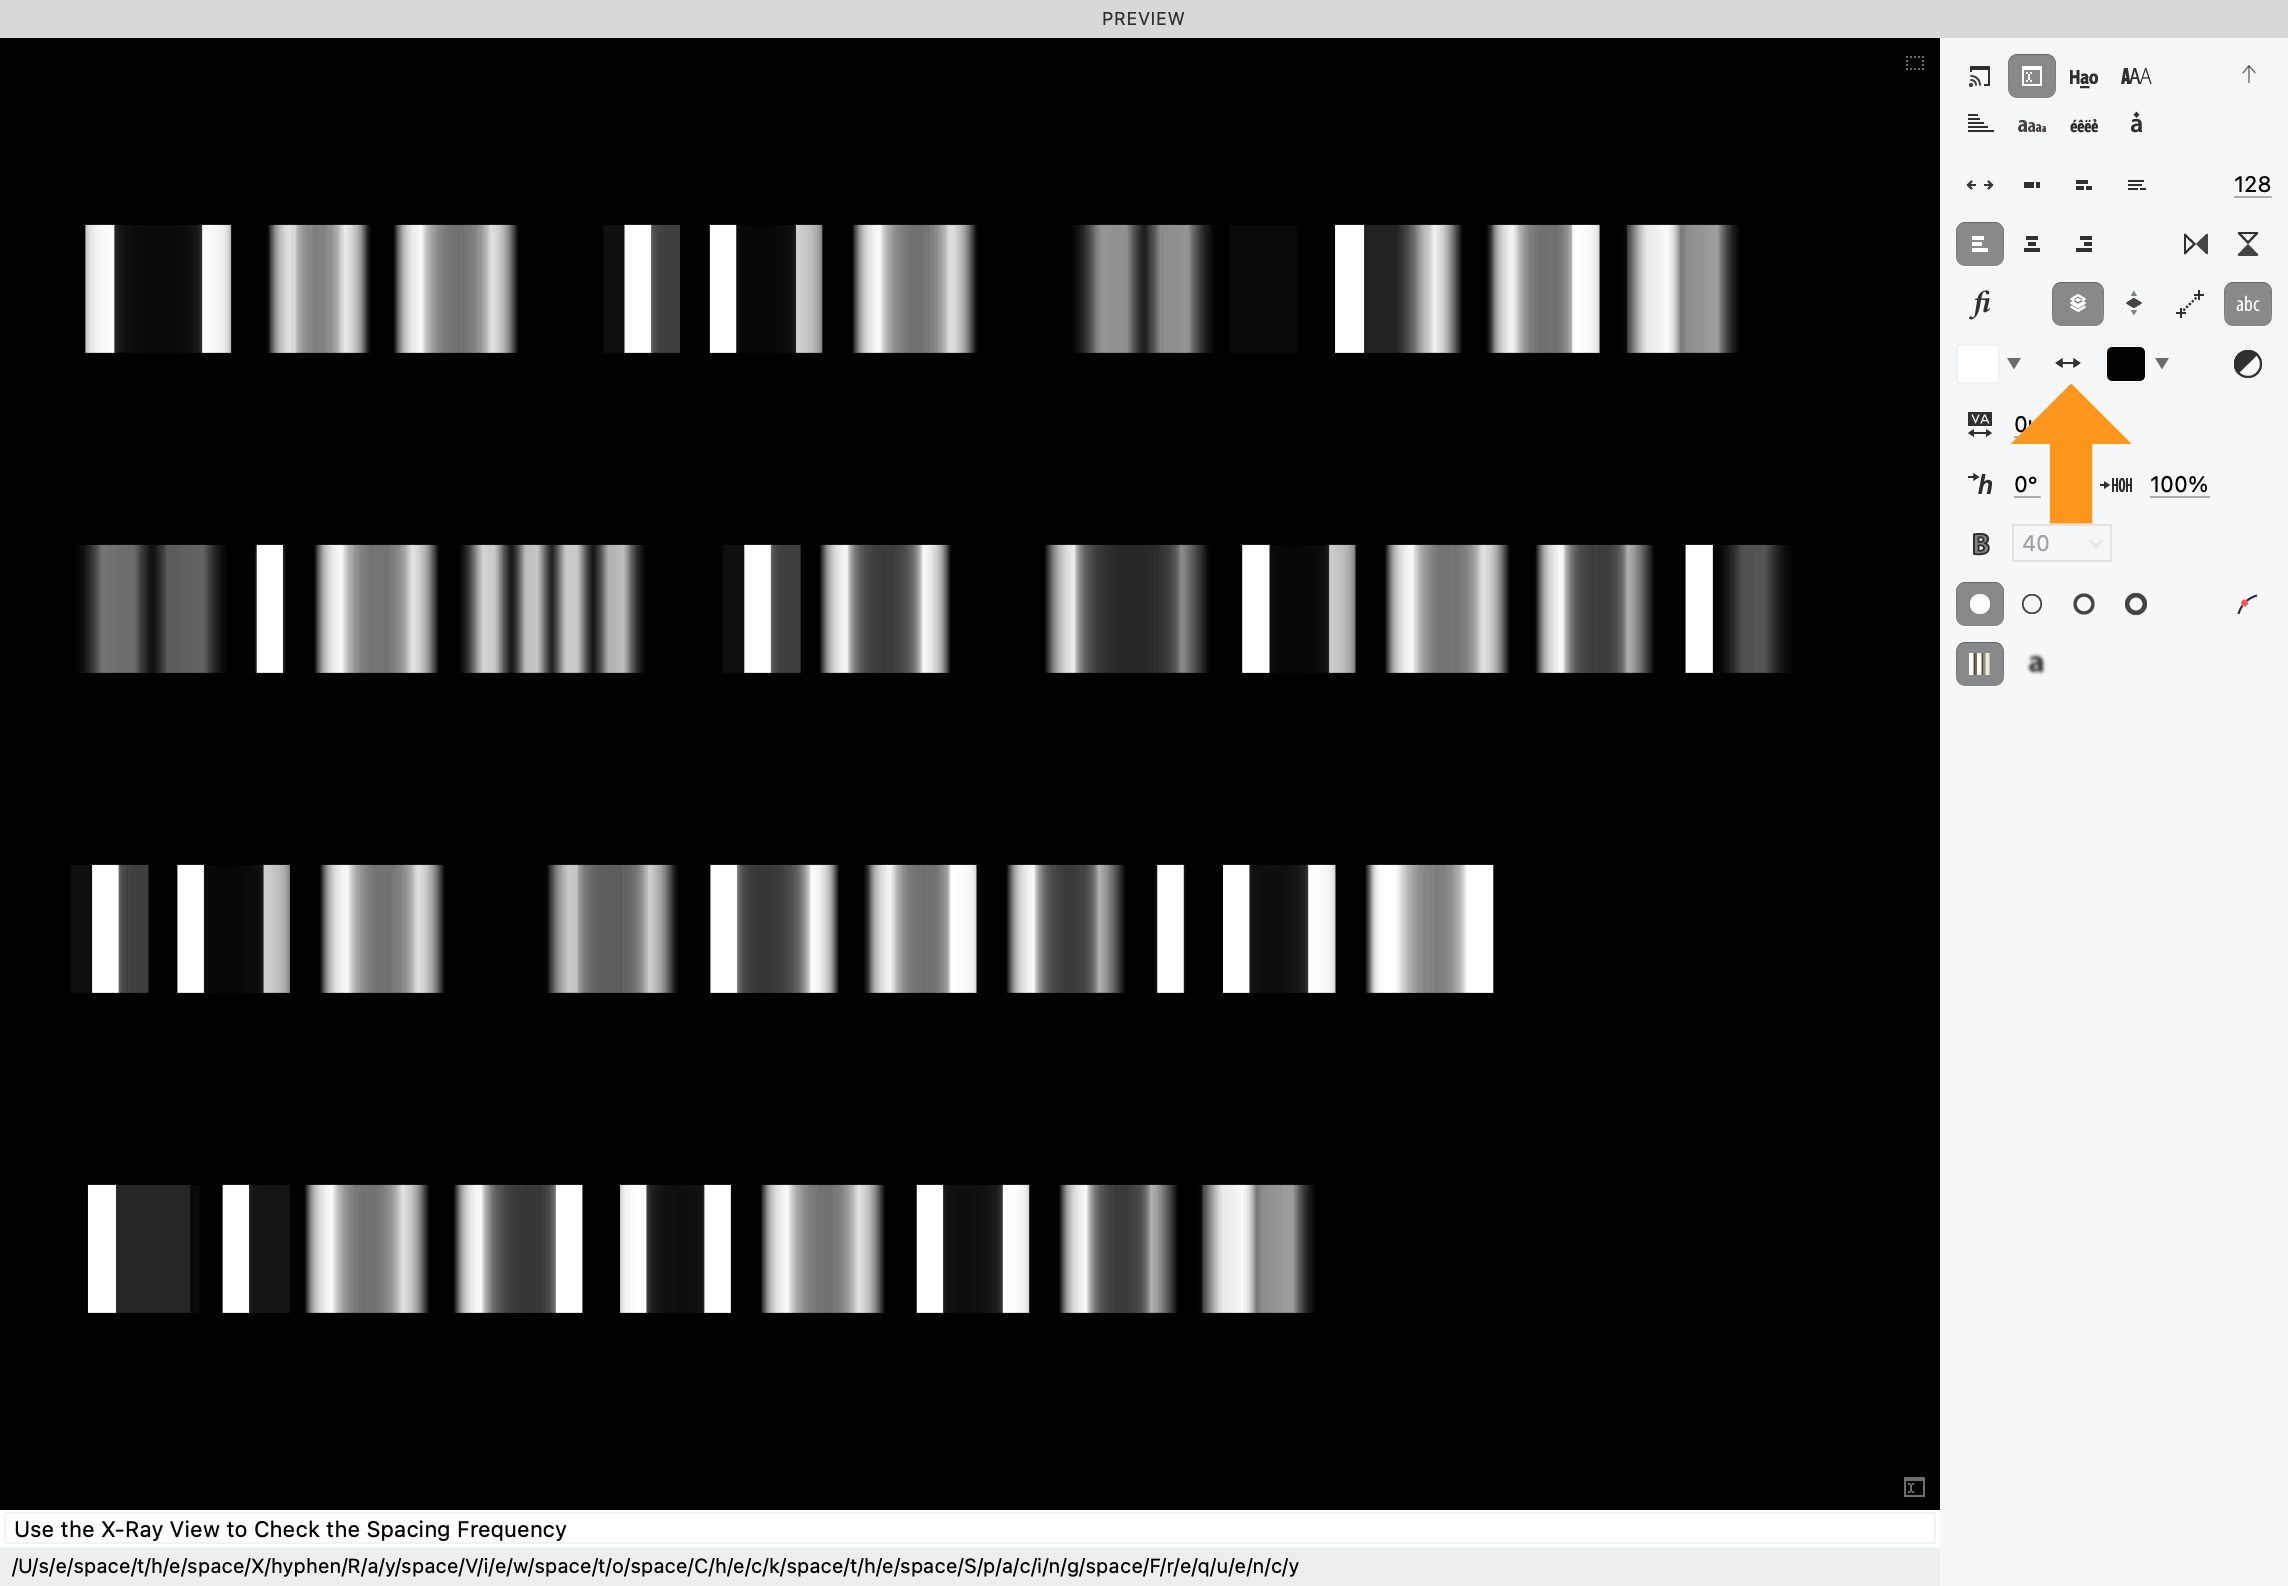
Checking Out Your Spacing Frequency in FontLab
FontLab has a tool to help you check out your spacing frequency.
This is called X-Ray. It’s like a top down view of your letters.
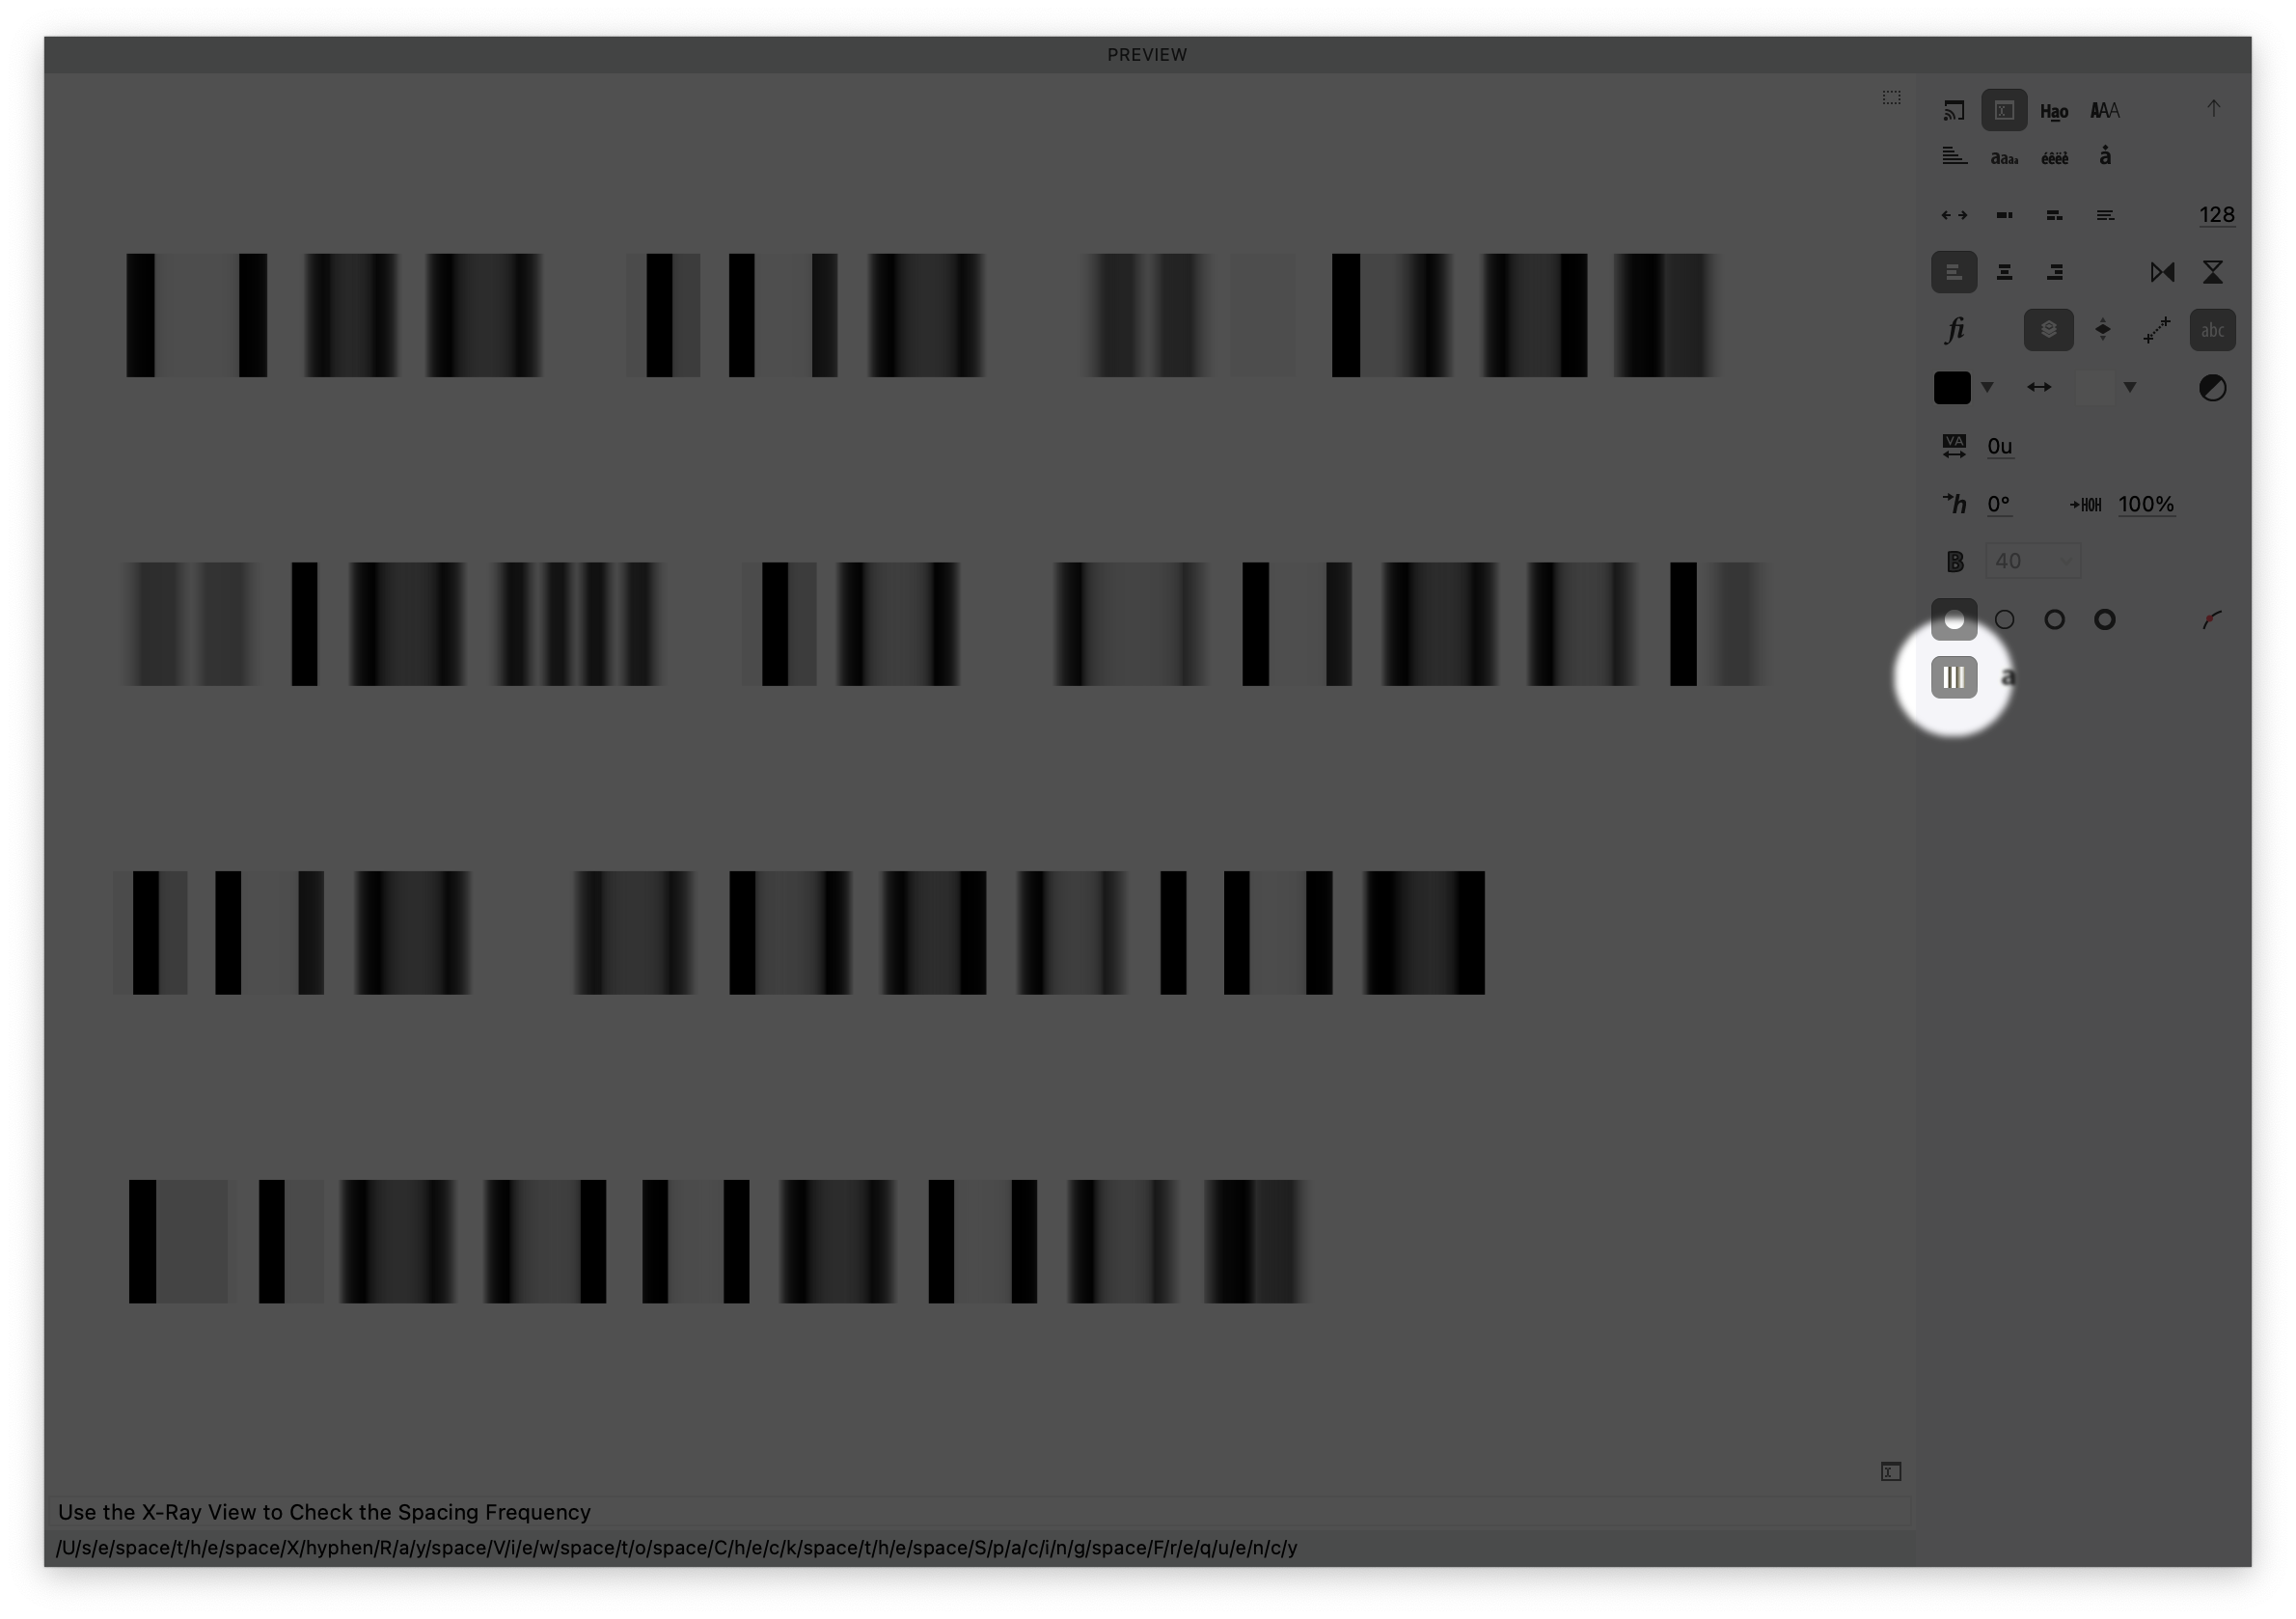
Here’s how letters look with it on and off.▼
This can also be combined with blur!
Letters with straight stems are going to appear as black. Letters with diagonal stems or round bowls will appear as gray.
However, if you want to make it look more like my examples above, flip the colors.▼
To Recap: we looked at spatial frequencies. We look at some problems impacting your letters and how to find them in FontLab.
In the next tutorial, I will show you some more solutions to the Size Problem. Then how to implement the solutions with FontLab tools.
This is one of my favorite topics. Thank you for allowing me to share this with you.