Release notes for FontLab 8.2.0.8620
8 August 2023
We have great news! After months of hard work, we’re introducing FontLab 8.2: a game-changing improvement over the original FontLab 8 release, which brings 250 new or expanded features and fixes. And better still, if you have a FontLab 8 license — it’s free!
In FontLab 8.2, we’ve supercharged the spacing & kerning workflow, added right-to-left kerning support, polished the user interface, and streamlined Undo & contour editing. We have improved our modulated Stroke, added exciting creative actions, and improved the variable design process. Plus you can import and export variable color fonts, and seamlessly convert right-to-left kerning between OpenType fonts, .glyphs files and UFO! More highlights:
- Kerning for right-to-left scripts like Arabic or Hebrew. Easy manual and automatic creation of kerning exceptions. Automatic kerning to distance. Easy adding of glyphs to kerning classes. Easy copying of kerning classes across masters. Import & export of RTL kerning from/to OpenType, .vfb, .glyphs, .ufo.
- Harmonize nodes or handles to G2 smoothness. Node sliding with arrow keys. Easier conversion between corner and smooth nodes.
- FontAudit detection and fixing of short segments. New Warp and Scribble & Strokes actions for playful creativity. Better grid snapping and power guides. Easy copying of Delta filter to other masters. Redesigned Preview panel.
- New drag-to-zoom experience. Undo retains selection. Separate undo of (de)selection. Knife slicing of contours on nodes. Easy selection of all Tunni lines.
- Smoother Stroke modulation. Snapping of Stroke and Brush thickness to distances, stems or guides. Segment & handle lengths and angles on Sketchboard.
- Fusion filter for live Boolean “pathfinding” operations between elements and components.
- One-click copying of auto layer recipes and dimensions to other masters. Smoother element switching. Case conversion in Font window and title case conversion in Glyph window.
- Dynamic numeric measurements for guides and anchors. Easy aligning of points to Mask, guides or grid.
- More uniform and streamlined user interface and menus in dark and light mode. Faster operation with large fonts.
- Refined spacing experience with Metrics line. Customizable one-tap auto-spacing. Optical bounds for better text line edge alignment.
- Fast adding of simple variation. Conditional glyph substitution with features other than
rvrn. - Import and export of variable color fonts with gradients.
- Easier stem adding. Easier autohinting range control. Easy comparison of glyph metrics and other glyph properties across fonts.
- Font installation on export. Export and import glyphs from/to a PDF, SVG or PNG file collection. Saving, importing, and exporting of Sketchboard content as SVG or PDF. Better feature decompilation and editing. 4–5× faster WOFF2 export.
- Bundled Python 3.11. Newest
fontToolsfor exporting variable fonts. New Python API for actions.
FontLab 8.2 has 700 improvements over FontLab 7, and more than 1,200 improvements over FontLab VI. It’s available as a discounted upgrade for all users of FontLab 7, FontLab VI, FontLab Studio 5, Fontographer 5, TypeTool 3, RoboFont and Glyphs. If you need an extended trial, or a tool for a single project: the FontLab 8 3-months starter license is just US$97!
Explore & prepare
FontLab 8 is an integrated font creation workhorse from start to finish. It offers you a smooth, complete, cross-platform environment for professional typeface designers, font engineers, and vector graphics designers.
Blaze through your workflow with unrivaled speed and fluidity, even with the most complex designs. The interface is supremely flexible, with customizable workspaces, dockable panels, and multiple views to suit your needs. Contextual help is always at your fingertips: just hover over any UI element and press F1 to instantly see how it works.
New FontLab 8.2 has more uniform and streamlined user interface in dark and light mode, and much faster operation with large fonts. You can assign the Enter key to keyboard shortcuts. Text and numeric fields in the UI are improved. FontLab 8.2 is faster and consumes less memory.
Better user interface
FontLab 8.2 refines the user interface in both dark and light mode:
- New The colors of the panels and UI areas is more uniform, to reduce visual noise.
- New The on/off toggle buttons now follow the same logic across the UI. For example, toggles on panels in dark mode were darker if they were turned on, and toggles in the Preferences dialog were lighter if they were turned on. Now they are always darker if turned on.
- New We have updated many UI icons to provide better uniformity and clarity.
- New We slightly rearranged the content of some panels like Node or Guide so the content fits better even if the panel is small.
- New If Preferences > Glyph Window > Rendering > Pixel-perfect is turned on, the rendering of contours in the Glyph window is now sharper.
- New The Glyph window toolbox has a new user interface. It has rounded sides, the Close icon is more subdued, and when you hover over it, a dotted icon appears that you can use to drag the toolbox around. If the toolbox is not visible, double-click a toolbar icon to show it.
- New If FontLab is running in the dark theme, the Preferences sidebar shows quick toggles that allow you to quickly choose the light or dark theme for the Font window glyph cells and for the Glyph window canvas.
Keyboard shortcuts
New When you choose Tools > Commands & Shortcuts and turn on the gear icon, you can assign the Enter key as a custom shortcut to any menu item. Use with care, since Enter also acts as a special keyboard shortcut for accepting certain operations such as free transformations.
You can also assign the Enter key with some shortcuts such as Alt or Ctrl.
Text and numeric fields
Many text and numeric fields in the UI (for example on panels or in the property bar) had an icon label next to them, which explained their function. But sometimes that icon was a button, and it was not easy to tell if the icon is a button or just a visual label.
New Now, label icons are inside the text field, and clickable buttons are outside the text field.
New If a text field is not active and you click its integrated label icon, FontLab now selects all text in the text field, so you can easily type a new value to replace it.
New In most numeric fields, you can now enter numeric expressions, and FontLab will convert them into an actual numeric value. For example, you can type 20*1.2 to get 24.
New If you enter a fractional value into a numeric field, FontLab will store it at the precision that you’ve entered it, and will show the full-precision value when you click the field, but if you exit the field, FontLab will show a simplified value with only one or two decimal places.
Reduced RAM memory usage
New FontLab 8.2 includes optimizations in speed and in memory consumption, so you can work with large fonts without issues.
Silent installation on Windows
If you run the FontLab installer on Windows from a script or the commandline, you can use command-line parameters to customize the installation process. For example, you can perform a “silent” installation that does not show any dialogs:
FontLab-8-Win64-Install-8457.exe /NOCANCEL /SP- /VERYSILENT /SUPPRESSMSGBOXES
New If you use the /VERYSILENT command line option and the installation finishes, FontLab no longer launches automatically.
Draft & draw
With FontLab, the creative freedom is truly yours. FontLab’s precise, powerful, professional typographic toolkit is at your complete disposal.
Sketch freely on the unlimited Sketchboard canvas, or dive right into drafting separate glyphs and icons. Effortlessly copy-paste or import SVG, PDF and bitmaps, and use them natively, or convert into editable vectors with customizable autotracing. Explore expressive, adjustable calligraphy with live Power Stroke and pressure-sensitive Power Brush. Masterfully draw with our uniquely efficient Rapid and traditional Pen tools, with versatile Pencil, and with precise geometric tools. All this in pixel-perfect integer coordinates or ultra-high fractional precision.
New FontLab 8.2 improves Stroke modulation, and lets you snap Stroke and Brush thicknesses to distances, stems or guides. On Sketchboard, you can view segment & handle lengths and angles.
Better Thickness tool
- The Thickness tool in the Toolbar has a redesigned icon.
- The thickness fields in the Glyph window property bar of the Thickness tool and in the Stroke panel are no longer limited to a maximum thickness of 300 font units. This is especially useful if you work on a font with a large UPM size.
#7341
Change thickness precisely or with snapping with Thickness lever
New With the Thickness tool, you can now use the Lever technique to make precise adjustments without zooming in, or you can make quicker adjustments and utilize snapping.
Power Brush: If you have an element active that has a Power Brush filter, click the Thickness tool on the toolbar or tap the 8 key to adjust the global (per element) or local (per node) thickness, and the global angle, of the Power Brush.
Drag a thickness control point to change the local brush thickness on both sides of the node. New The thickness control follows the mouse pointer directly, and the pointer snaps to all snapping items that are turned on in View > Snap and View > Suggest. To modify the behavior as you drag a thickness control point, hold:
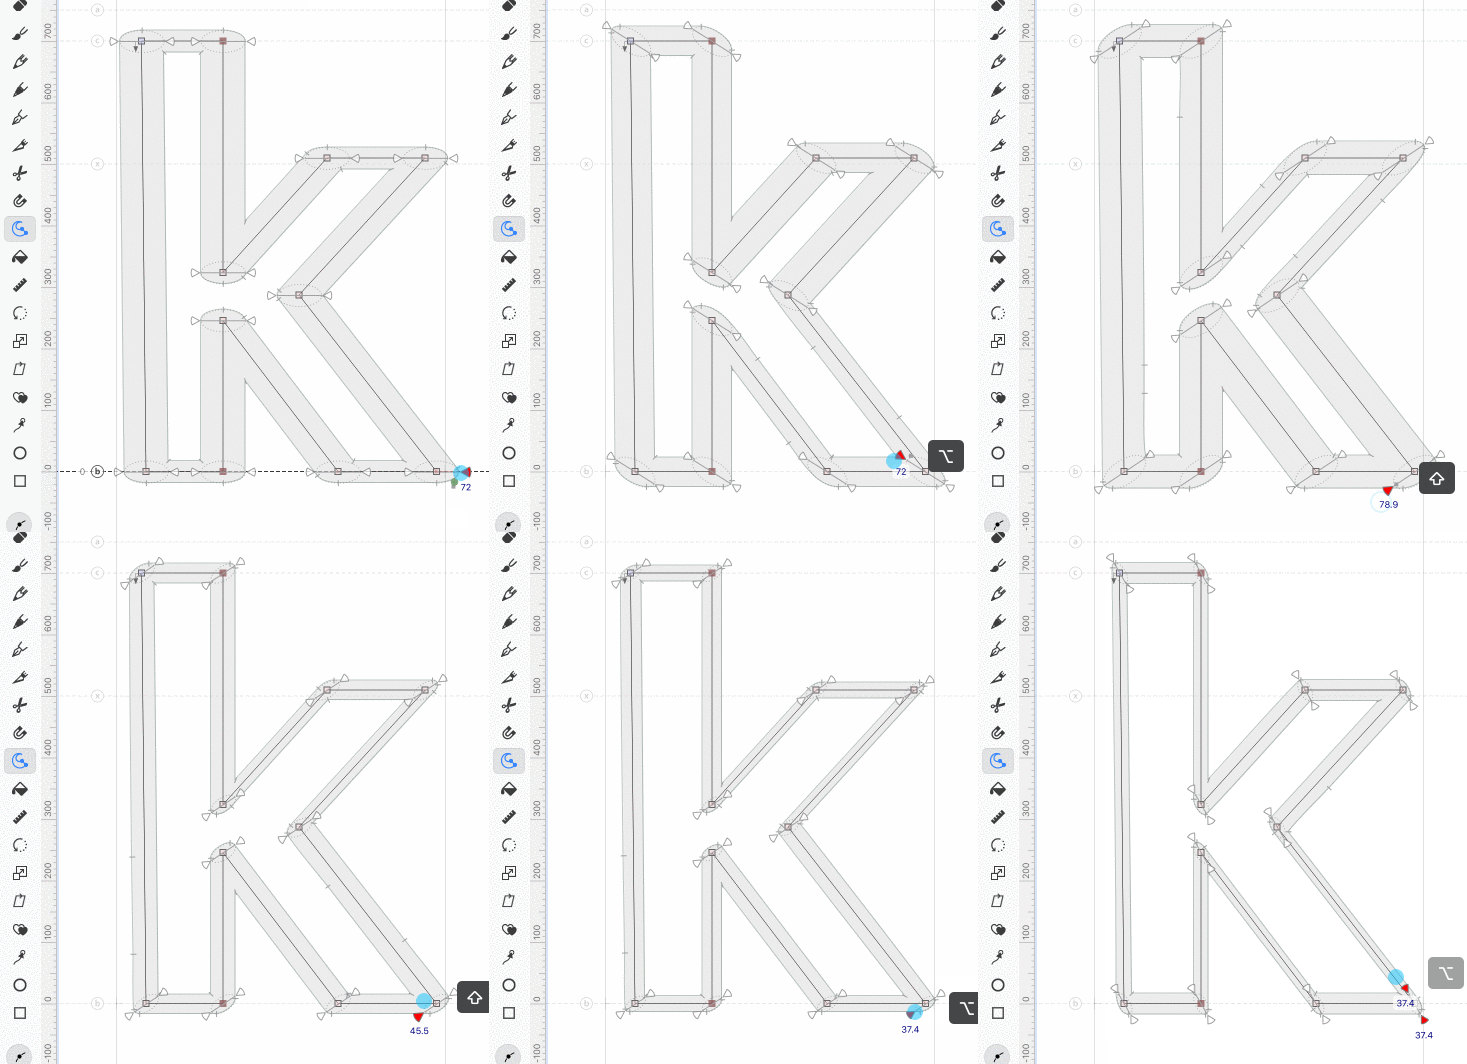
- Shift: changes brush thickness of the entire element
- Alt: changes rotation of the brush on the entire element
- ShiftAlt: changes rotation of the brush in 15° increments
- New Ctrl or Cmd in addition to the above modifiers: no snapping, the thickness control point moves precisely according to the Preferences > Distances > Contour lever moves point by setting. Default value of contour lever is
6, constant dragging speed is1, the highest precision at short drags is10.
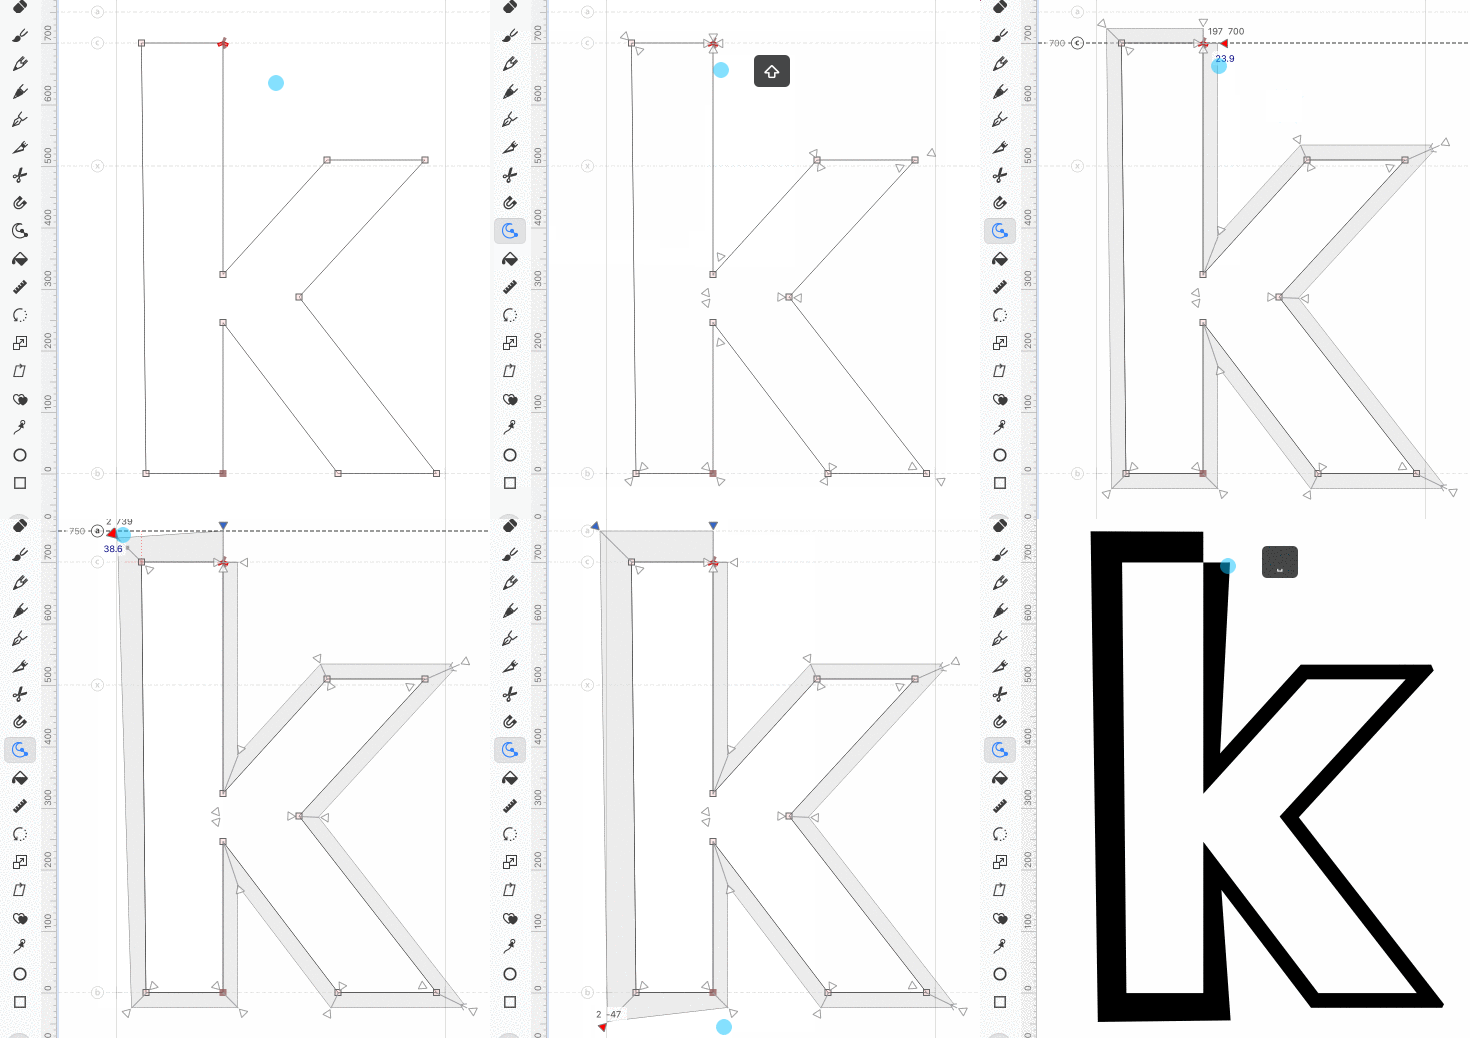
Stroke or Power Stroke: If you have an element active that does not have a Power Brush filter, click the Thickness tool on the toolbar or tap the 8 key to adjust the global (per element) or local (per node) thickness, and the global angle of the stroke. If the element has the Power Stroke filter, the change will affect the Power Stroke.
Drag a thickness control point to change the local stroke thickness on one sides of the node. New The thickness control follows the mouse pointer directly, and the pointer snaps to all snapping items that are turned on in View > Snap and View > Suggest. To modify the behavior as you drag a thickness control point, hold:
- Alt: changes the thickness on both sides of the node
- ShiftAlt: moves the stroke location on the node, keeping thickness the same: increases thickness on one side, decreases by the same amount on the other side
- Shift: changes stroke thickness of the entire element on one side
- New Ctrl or Cmd in addition to the above modifiers: no snapping, the thickness control point moves precisely according to the Contour lever moves point by preference.
New Stroke modulation
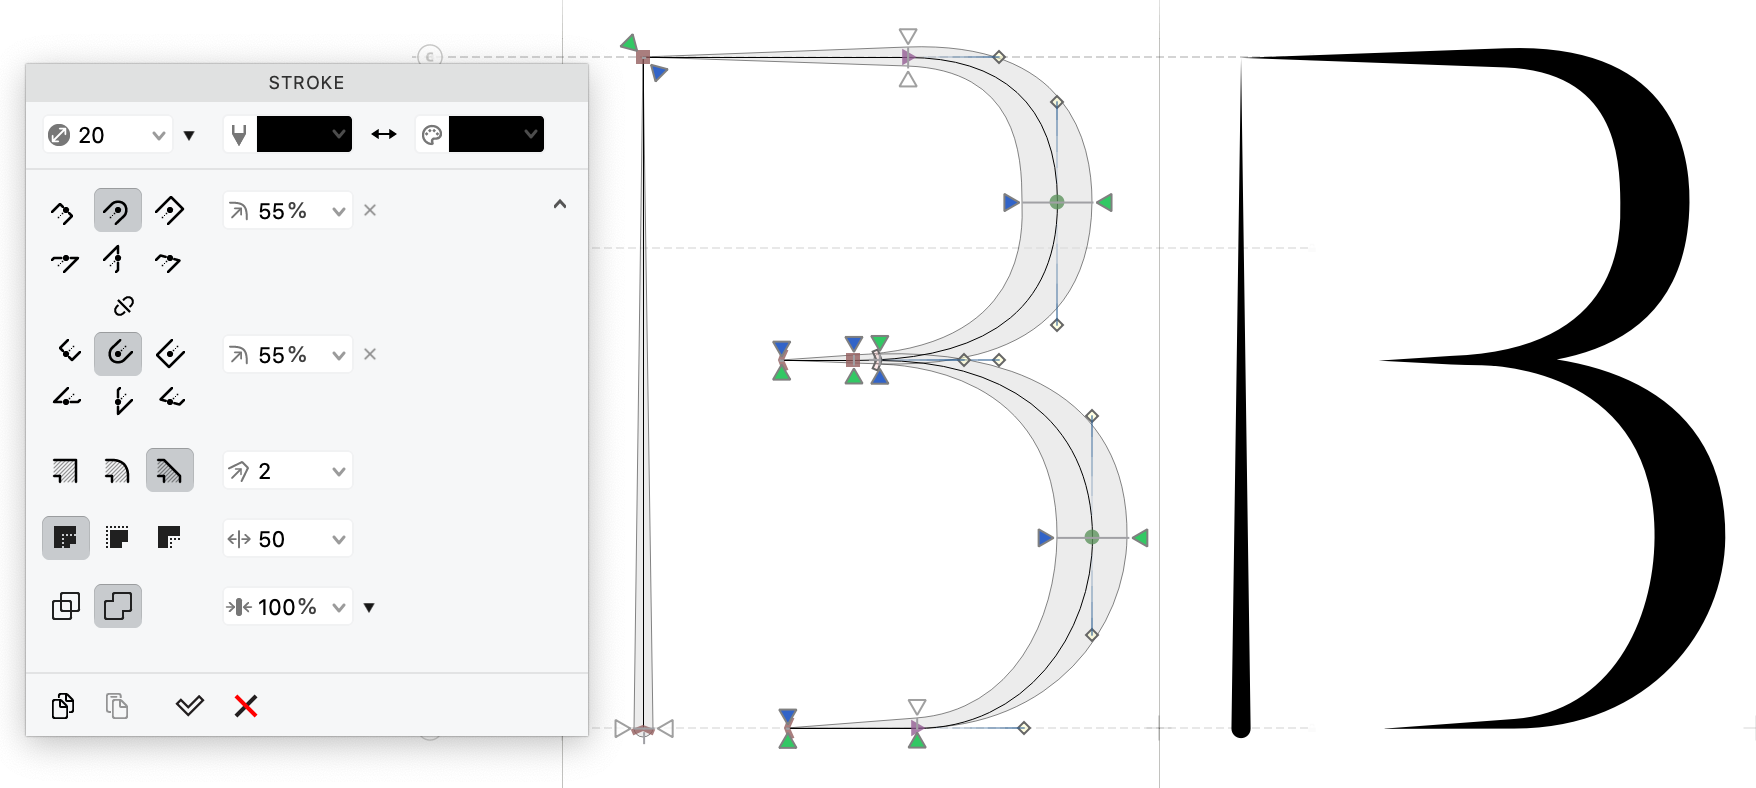
With FontLab’s stroke engine, you can add “outline strokes” for existing contours in a flexible way, and you can quickly create skeleton-based drawings. If you apply a global stroke or Power Stroke to an element, FontLab dynamically produces a new contour that is offset from the original contour by the specified thickness. You can control additional aspects of the stroke in the Stroke panel.
If you change the local stroke thickness with the Thickness tool, FontLab modulates the thickness of the stroke along the contour. New The stroke modulation is now smoother, works correctly over line segments and tangent nodes, and does not create unexpected changes in neighboring segments.
Note
If you’ve used stroke modulation in FontLab 8.0.1 and open the file in 8.2, the resulting contours will look different. Generally, they’ll be better, but you should check the results. If you want to keep the previous results, open the file in FontLab 8.0.1 and expand stroke.
Merge stroke into the body contour
If you add a stroke to closed contour (like a traditional monochrome glyph), the stroke dynamically expands the original (“body”) contour in two directions: outside and inside the filled (“black”/opaque) area. But FontLab keeps the body contour filled. Therefore, the inside part of the stroke is invisible, and the outside part of the stroke visually adds weight to the body contour.
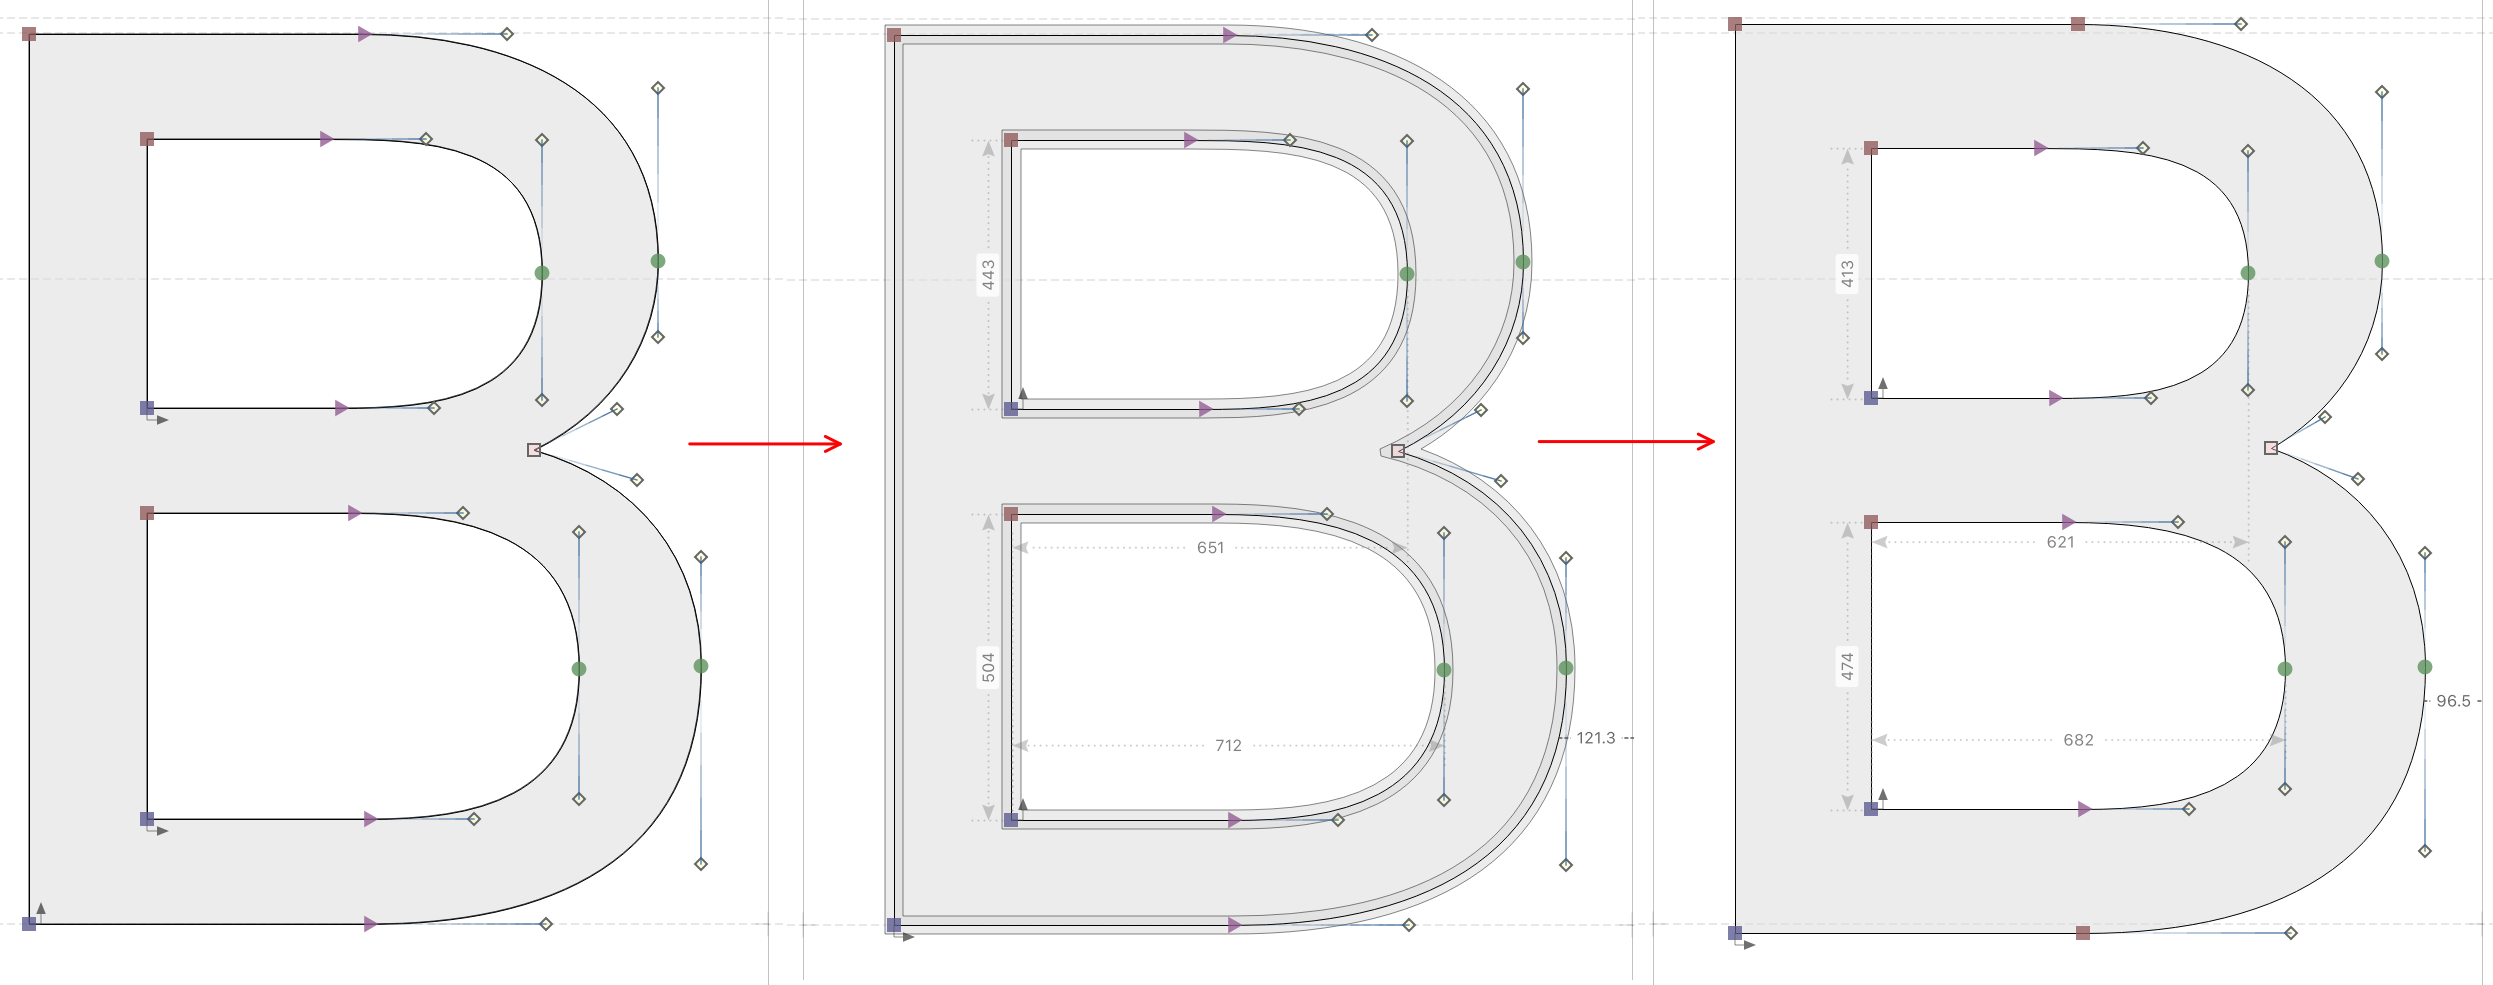
Here’s a great way to experiment with adding weight without changing the underlying drawing:
- Use the Thickness tool on some nodes to visually add weight in some parts of the body contour in a non-destructive way.
- New If you’re happy with the results, use Element > Merge Stroke. FontLab will add the outside stroke part to the original filled contour, and will disregard the inside part of the stroke.
Note
If you’ve applied a different stroke color and use Merge Stroke, the resulting contour will use that color as the fill. Don’t use a white stroke color to “remove weight” from the body contour, it will not work. Don’t use Merge Stroke if your contours have filters like Smart Corners, Power Stroke, or Delta. Merging the stroke will only work on the body contour, and will disregard the filter results.
Distance suggestions
New If you’re making a sanserif with some stroke modulation, Stroke and Power Stroke play very well with View > Suggest > Distance.
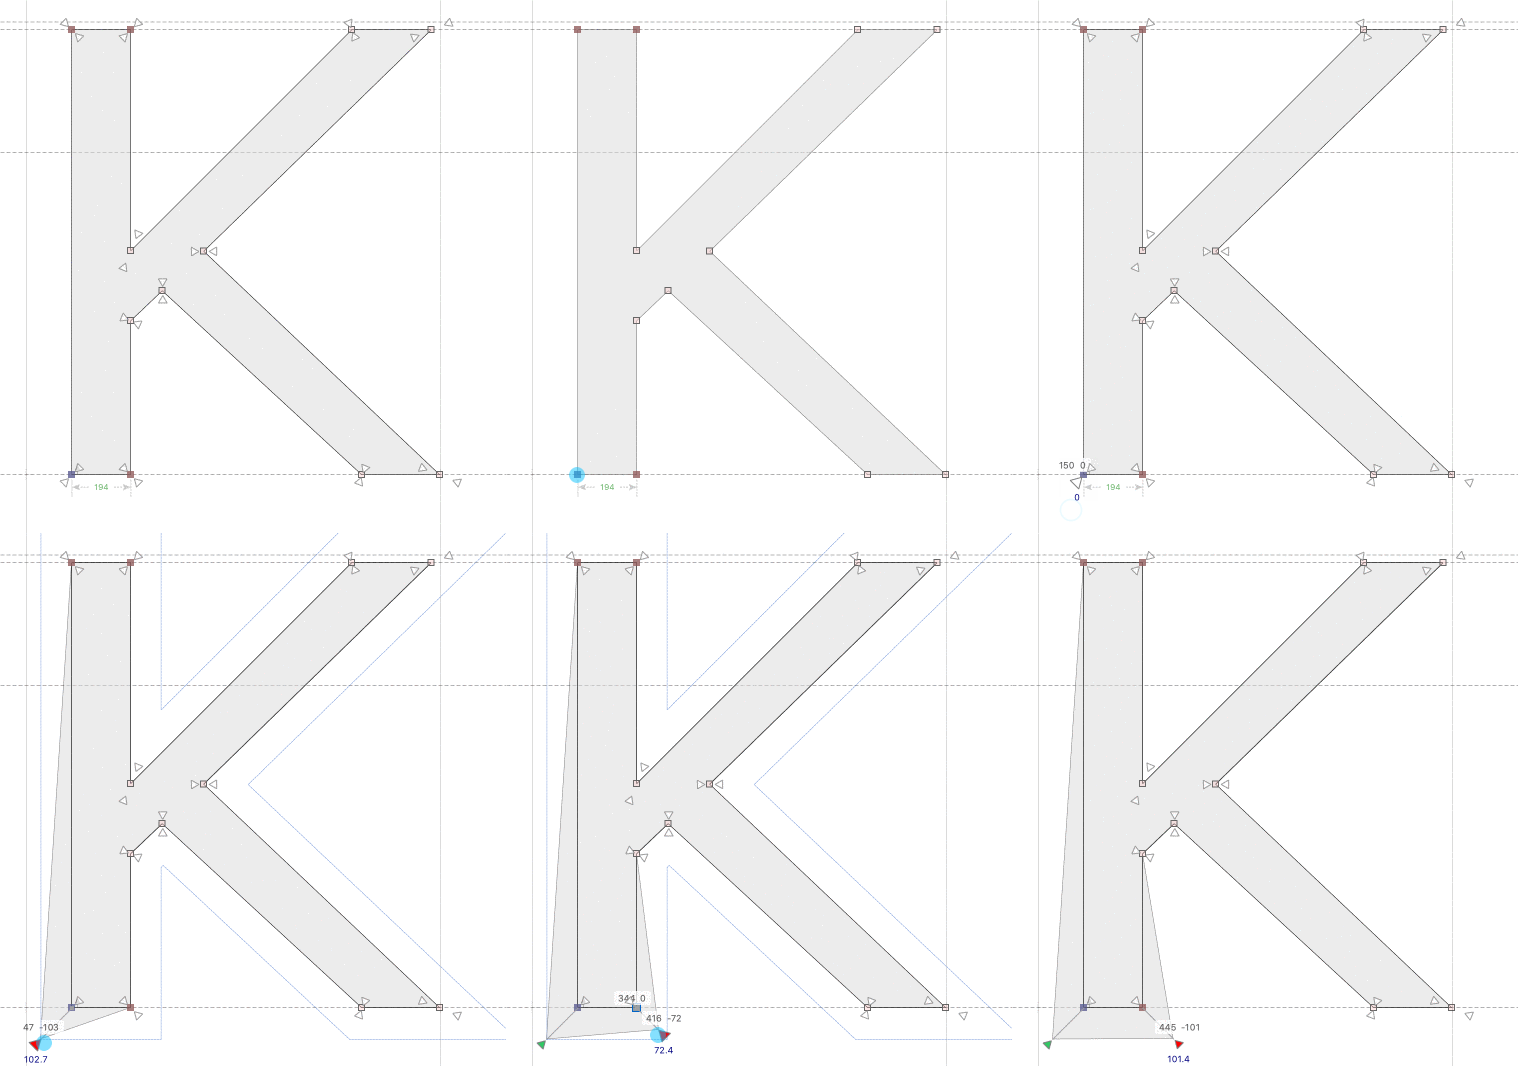
If you’ve drawn a skeleton, use the Stroke panel to assign a global stroke to your elements with the thickness that define the thickest vertical strokes (let’s say, 100 units). You should probably reduce the stroke contrast in the panel to e.g. 90%. This will produce optical compensation, so the horizontal strokes will have the same optical thickness.
Optionally, you can add Element > Make Power Stroke. If Power Stroke is assigned as a filter, FontLab starts treating the stroke as two virtual contours on their own, unfills the inside of closed contours, and considers the Power Stroke-generated virtual contours when calculating the sidebearings even if Preferences > Spacing > Ignore Stroke thickness is turned on.
Now, Turn on View > Suggest > Distance, and in Font Info > Other Values > Suggest distance, set the desired distance at which the snapping suggestions should appear:
- If you use simple strokes (no Power Stroke filter), enter absolute values for your thinnest horizontal and vertical strokes, because distance suggestions will appear from the skeleton. For example, if your global stroke is
100and the stroke contrast is90%, you can set Suggest distance X to90, and Y to81(which is90%of90). - If you have Power Stroke assigned, enter relative values, because distance suggestions will appear from the virtual contours produced by the stroke. For example set Suggest distance X to
-10(because100-10=90), and set Y to-9(because90-9=81).
Now comes the magic! Use the Thickness tool to reduce the thickness of the strokes on some nodes. As you move the thickness control points (without Cmd or Ctrl), the suggested distances will appear as a snappable outline, so you can consistently make your strokes thinner in the right places! Hold Cmd or Ctrl to suppress the snapping.
This technique also works great if you’re using the Thickness tool to “add weight” to a traditional monochrome glyph, as described above.
New The snapping suggestion that appears for Suggest > Distance now has miter (sharp) corners rather than rounded corners.
Stroke thickness and stem suggestions
If one set of distance suggestion values is not enough for you, you can instead turn on View > Suggest > Stems, and set up multiple horizontal and vertical stems in Font Info > Stems. New If you drag a thickness control point without Cmd or Ctrl, FontLab will suggest the stem thicknesses as snapping positions. This works well for changing thickness on extrema nodes, because stem suggestions are always horizontal or vertical, while distance suggestions work along segments.
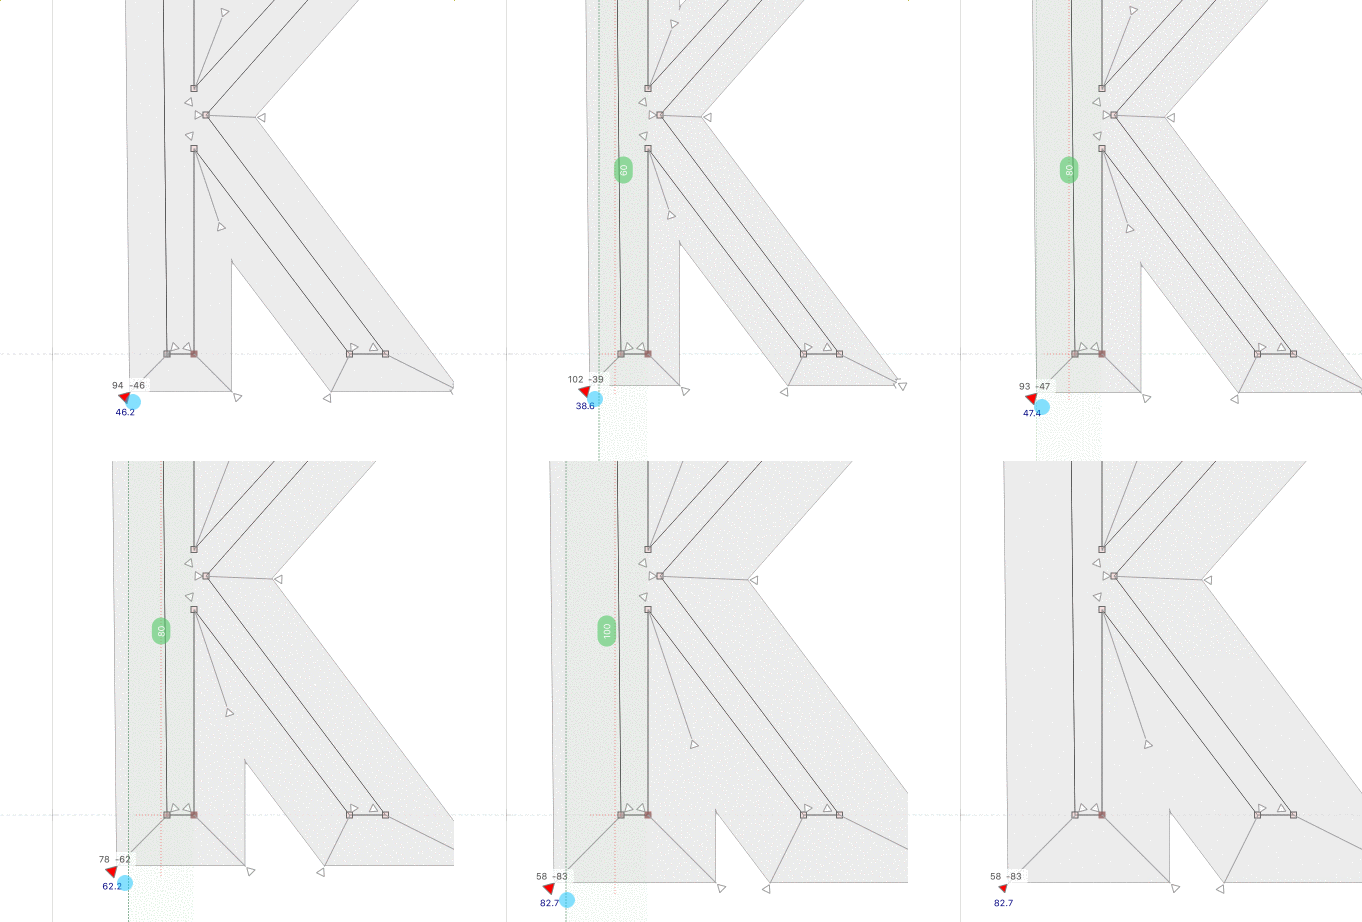
If you assign tags to the stems in Font Info > Stems, stem thicknesses will be suggested only in glyphs that have the same tags. You can assign a tag like uc to a stem in Font Info, and this stem will only be suggested in uppercase letters, because FontLab automatically assigns the uc virtual tag to all uppercase letters. Same works lc (for lowercase letters), sc (for small caps), fig (for figures / numerals), latn or cyrl (for scripts) etc. But you can also assign your own tags to any glyph, and the same tags to stems.
Better Sketchboard
Sketchboard is FontLab’s unlimited canvas (like a Glyph window without a parent font), where you can:
- import images, separate them into single glyph images, autotrace them and place them into a font
- sketch or draw artwork
- create text frames that show different texts in different fonts and sizes
Choose Window > Open Sketchboard to open the Sketchboard. If you turn on Preferences > General > Sketchboard > Open on startup, FontLab will open it automatically when it starts.
New Sketchboard now shows lengths and non-H/V angles of handles and line segments if you turn on Show lengths and non-H/V angles in the View panel, or you turn on Preferences > Glyph window > Measure > Lengths & angles.
FontLab automatically saves the content of the Sketchboard (customize the autosave frequency in Preferences > General > Sketchboard). FontLab restores the content of the Sketchboard if you close and reopen FontLab.
New Choose File > Export > Sketchboard… to save the content of the Sketchboard as a .vfj or .vfc file in a custom location, or to export it as a .svg or .pdf file. FontLab uses .vfj and .vfc to store the Sketchboard contents, but it’s not identical to a font .vfj/.vfc.
New Choose File > Import > Sketchboard and choose a saved .vfj or .vfc Sketchboard file.
Edit & refine
In FontLab, typeface-oriented vector editing is intuitive, fluid and delightfully smart. “Best vector engine,” they say. “Continues to impress,” they say. “Amazing”, “innovative”, “very addictive,” they say.
Reshape curves, splice contours and fill segments with clever Contour, Knife and Fill tools. Drag points while others follow intelligently with Nudge and Power Nudge. Move nodes precisely without zooming in using the innovative Lever. FontLab editing tools let your creativity flow.
New FontLab 8.2 brings new Harmonize Handles to G2 smoothness, new drag-to-zoom experience, node sliding with arrow keys, redesigned View menu, separate Undo for selection/deselection, better Knife slicing of contours on nodes, easy selection of all Tunni lines, and easier conversion between smooth and corner nodes.
Window zoom
Window zoom preferences
New The Preferences dialog has a new Zoom page. Previously the zoom-related settings were in Preferences > Distances.
Zoom tool
We’ve improved the Zoom tool, which allows free zooming in and out in the Glyph window.
- To activate the Zoom tool temporarily, hold CmdSpace / CtrlSpace.
- To activate it permanently, click the last Zoom icon in the bottom-right of the Glyph window.
When the Zoom tool is active, you can:
- Click the window to zoom in a step.
- Hold Alt and click the window to zoom out a step.
New In addition, the new setting Preferences > Zoom > Zoom with ⌘Space now offers two different types of zooming if the Zoom tool is active and you drag.
- If to marquee is turned on, drag in the Glyph window to “draw” a rectangular marquee, release to zoom to the marqueed area.
- New If with drag is turned on, drag in the Glyph window to the right to zoom in, and drag to the left to zoom out. Release to finish zooming.
Redesigned View menu
New We’ve reorganized the View menu to improve the clarity. The menu items now follow a logical structure:
Window zoom
Zoom submenu. Controls the zoom level of the Glyph window, or the cell size in the Font window.
Window add-ons
- Show/hide Control Bars, Rulers and the Metrics Table.
- Show/hide the Metrics Line. If it’s visible, FontLab shows numerical sidebearings at the intersection of the glyph and the line.
Non-numeric contour items
- New Contours submenu. Show/hide Nodes, Handles, Contour Direction, Node Links, Curvature, FontAudit. Turn Smooth Outline on/off.
- Show/hide Selection Frame, Tunni Lines.
More settings are in Preferences > Glyph window.
Numeric contour items
- New Measurements submenu. Show/hide Coordinates, Quick Measurement, Lengths & Angles, Tension, Stems, Counters, Corner Angles, Grid, Hints and Scoreboard.
- Show/hide Font Dimensions, Font Guides, Glyph Guides, Zones, and metrics/hinting Shadows.
Some of these items were previously accessible only in the View panel. Now they’re also in the menu, so you can assign shortcuts to them. FontLab stores their visibility per-window, and toggles them with View > Alternative View. More settings are in Preferences > Glyph window.
Additional items
- Layers & Glyphs submenu. Show/hide Mask, Global Mask, Master Relations, Cousins, Character Placeholders, Stickers.
- Metrics & Kerning submenu. Show/hide Spacing Controls and Kerning Classes.
- Anchors & Elements submenu. Show/hide Anchors & Pins, Anchor Cloud, Element Frame, Element References.
More settings are in Preferences: Glyph window, Spacing, Cousins.
Behavior of items
- Snap submenu. Enable/disable snapping to Outline and to items if they’re also visible: Mask, Global Mask, Font Dimensions, Spacing Controls, Font Guides, Guides, Grid, Zones, Hints, Anchors & Pins.
- Lock submenu. Disallow/allow manual editing of Outline and of visible Glyph window items: Mask, Font Dimensions, Spacing Controls, Font Guides, Glyph Guides, Hints, Zones, Anchors & Pins. (Even if an item is locked, operations such as Actions and Font Info can change it.)
- Suggest submenu. Enable/disable additional snapping suggestions for Nodes, Handles, Lines, Bounds, Tangents, Guides, Stems, Distance.
- Italic Angle submenu. Control how italic angle affects the grid and the display of sidebearings.
More settings are in Preferences: Distances and Grid, Guides and Hints.
Canvas
- Show/hide True Fill, Details Across Glyphs, and Alternative View.
- Control the Glyph window panning with Center Glyph or Pair.
View panel
New We’ve also adjusted the order of icons in the middle section of the View panel to match the menu.
Corner and smooth nodes
In typical font editors and in vector drawing apps, if two segments meet at a node, that node can have one of two types of connections: sharp or smooth. FontLab 8.2 can convert between the two types “eagerly” (affecting adjacent segments), or “lazily” (preserving them).
Sharp connection
With a sharp connection, two segments meet at the node, and you can change the direction of the node’s handles independently.
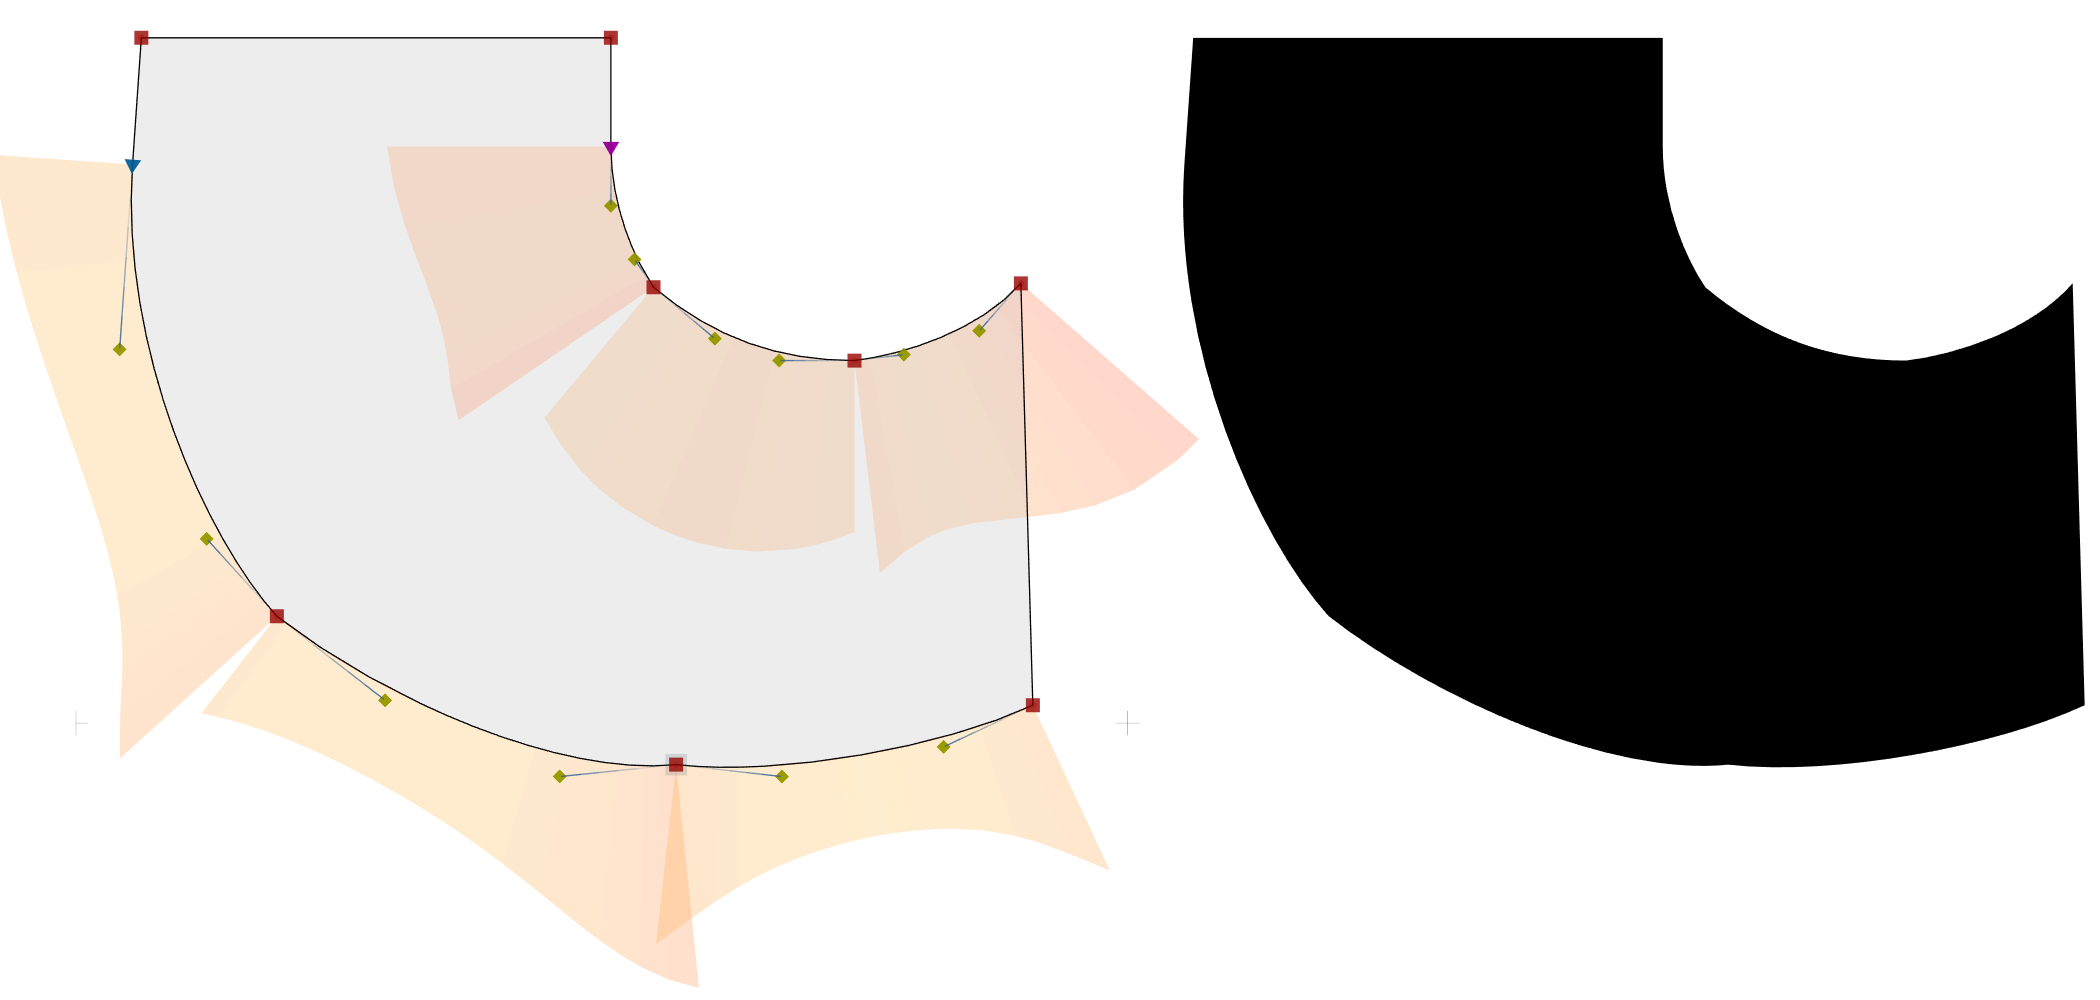
FontLab calls such a node a Corner node, and indicates it by a square. If you turn on View > Contours > Curvature, the curvature comb on a Corner node between two curve segments will have triangular gap or an overlap.
A node between two line segments is always a Corner node.
Smooth connection
With a smooth connection, two curve segments meet at a node, and the node’s handles always have the same direction. FontLab calls such a node a Smooth node, and indicates it by a circle if the node joins two curve segments.
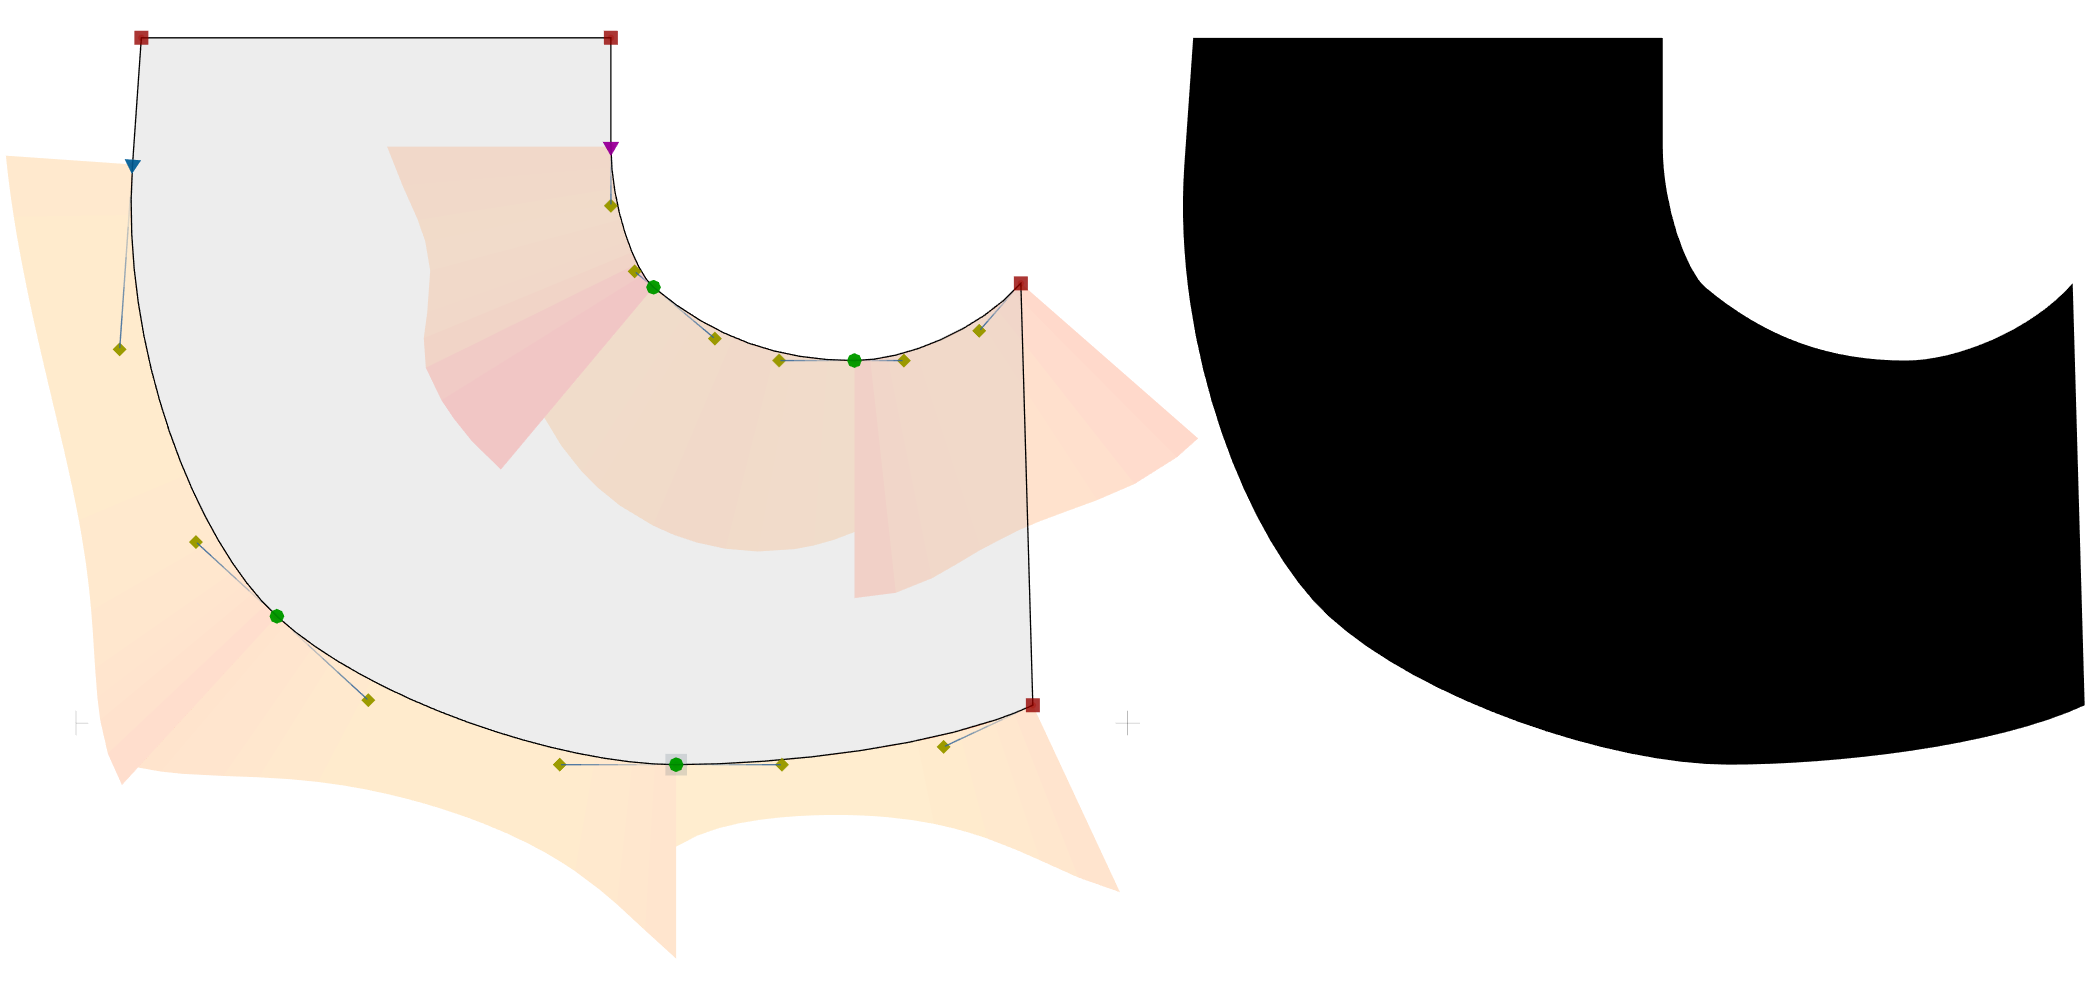
The curvature comb on a Smooth node between two curve segments has no gap or overlap.
A special type of Smooth node is called a Tangent node: it joins a curve segment and a line segment, it’s indicated by a triangle, and its curve handle has the same direction as the line segment.
Convert between smooth and corner nodes
There are several ways to convert nodes between Corner and Smooth. An “eager” conversion will also convert adjacent segments to curves or lines, while a “lazy” conversion will keep the segments as they are.
- To perform an “eager” conversion of one or more selected corners to Smooth nodes, click the Smooth button in the Glyph window property bar, or choose Contour > Nodes > Smooth. To convert just one corner node to smooth, double-click it. If you eagerly convert a corner node to smooth and back, FontLab will restore the original handle direction.
- To perform an “eager” conversion of one or more selected nodes to Corner nodes, click the Corner button in the Glyph window property bar, or choose Contour > Nodes > Corner. To convert just one Smooth node to Corner, double-click it.
- New To perform a “lazy” conversion of one or more selected nodes from corner to smooth, and from smooth to corner, choose Contour > Nodes > Toggle Smooth. This is most conservative operation: it will flip the corner/smooth status of nodes that are not between two line segments, and will not change the adjacent segment types.
If you prefer to work with the keyboard, you may want to map some of these menu commands to custom shortcuts (this is just a suggestion). Go to Tools > Commands & Shortcuts, turn on the gear icon, type Node: into the search box and then:
- choose Node: Toggle Smooth, click the shortcut box, press Enter and click Set
- choose Node: Corner and assign AltEnter
- choose Node: Smooth and assign CtrlAltEnter
Or you may just assign AltEnter to Node: Toggle Smooth, it’s up to you!
With Contour > Nodes > Detect Smooth, you can convert Sharp nodes that are have collinear handles into Smooth nodes.
Improve smoothness with Harmonize and Genius
A Smooth node ensures that there’s no abrupt change of direction between two curve segments, but there still can be visible “bumps” near the connection. In FontLab, you can increase the smoothness quality of any Smooth node to G2 or G3, which will usually often make the transition between two curve segments more visually pleasing. FontLab 8.2 can either move the node or its handles to increase the smoothness quality.
G2 smoothness
With G2 smoothness, a Smooth node has constant curvature.
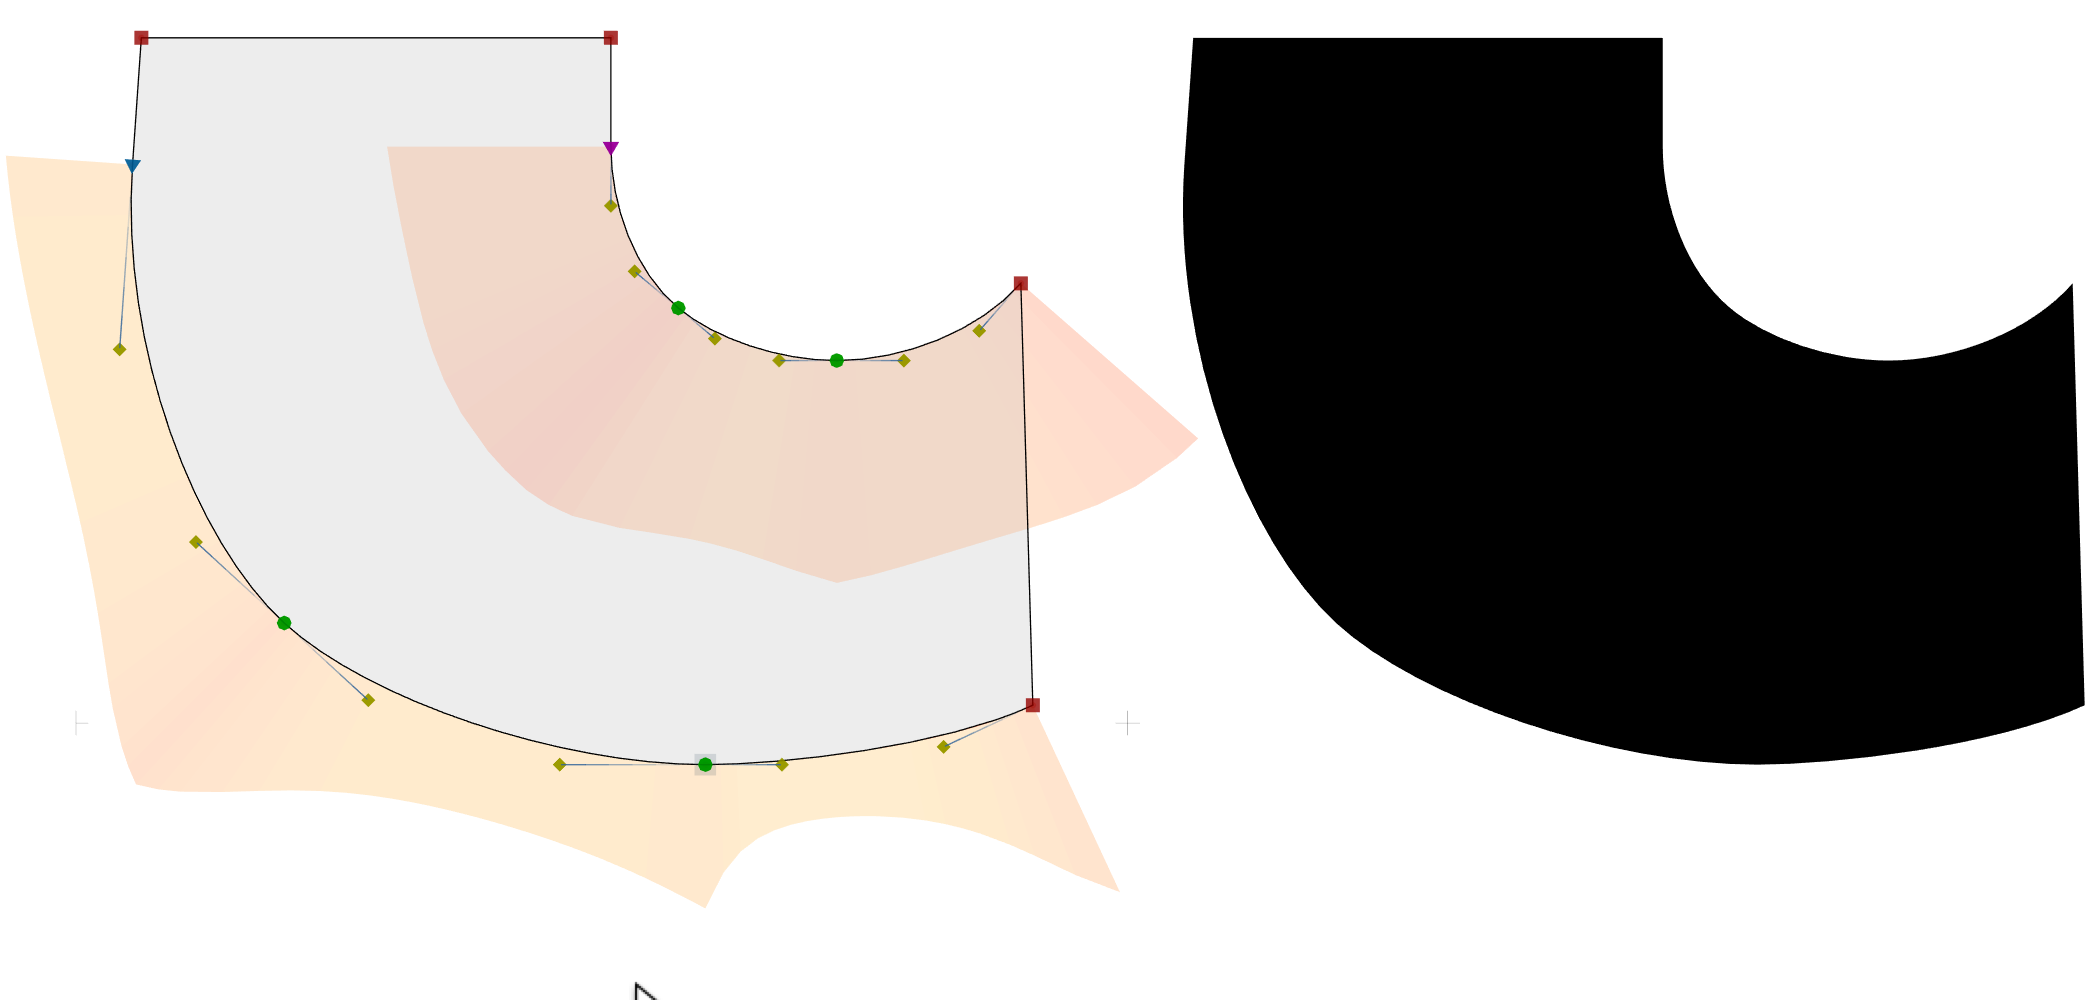
The smaller the difference in height between the curvature comb on both sides of the node is, the closer the Smooth node is to G2 smoothness. If there is no height difference, the node is G2-smooth.
A G2-smooth node typically results in a more fluent transition between the segments.
There are several ways to achieve G2 smoothness:
-
Alt-double-click a Smooth node, or select one or more nodes and choose New Contour > Harmonize Nodes, or choose Nodes > Harmonize from the context menu, or click the Make Genius button in the property bar. This will move the Smooth nodes to a new position where the curve segments will join G2-smoothly, and will keep the handles where they were. Previously, this operation was just called Harmonize in the Contour menu.
-
New CtrlAlt-double-click a Smooth node, or select one or more nodes, and choose Contour > Handles > Harmonize, or choose Handles > Harmonize from the context menu. This will move the handles of Smooth nodes to new positions where the curve segments will join G2-smoothly, and will keep the nodes where they were.
-
ShiftAlt-double-click a Smooth node, or select one or more nodes, and choose Contour > Nodes > Genius, or Alt-click the Make Genius button in the property bar. This will perform the convert the Smooth nodes to a new type of node: the Genius node, and move it to a G2-smooth position. A Genius node remains G2-smooth whenever you move the neighboring nodes or handles, as if you’d perform Harmonize Nodes every time on it.
You can also use the Node panel, and actions. With Contour > Nodes > Detect Genius, you can convert Smooth nodes that are already G2-smooth into Genius nodes.
G3 smoothness
With G3 smoothness, the curve segments that join at the Smooth node have smoothly changing curvature.
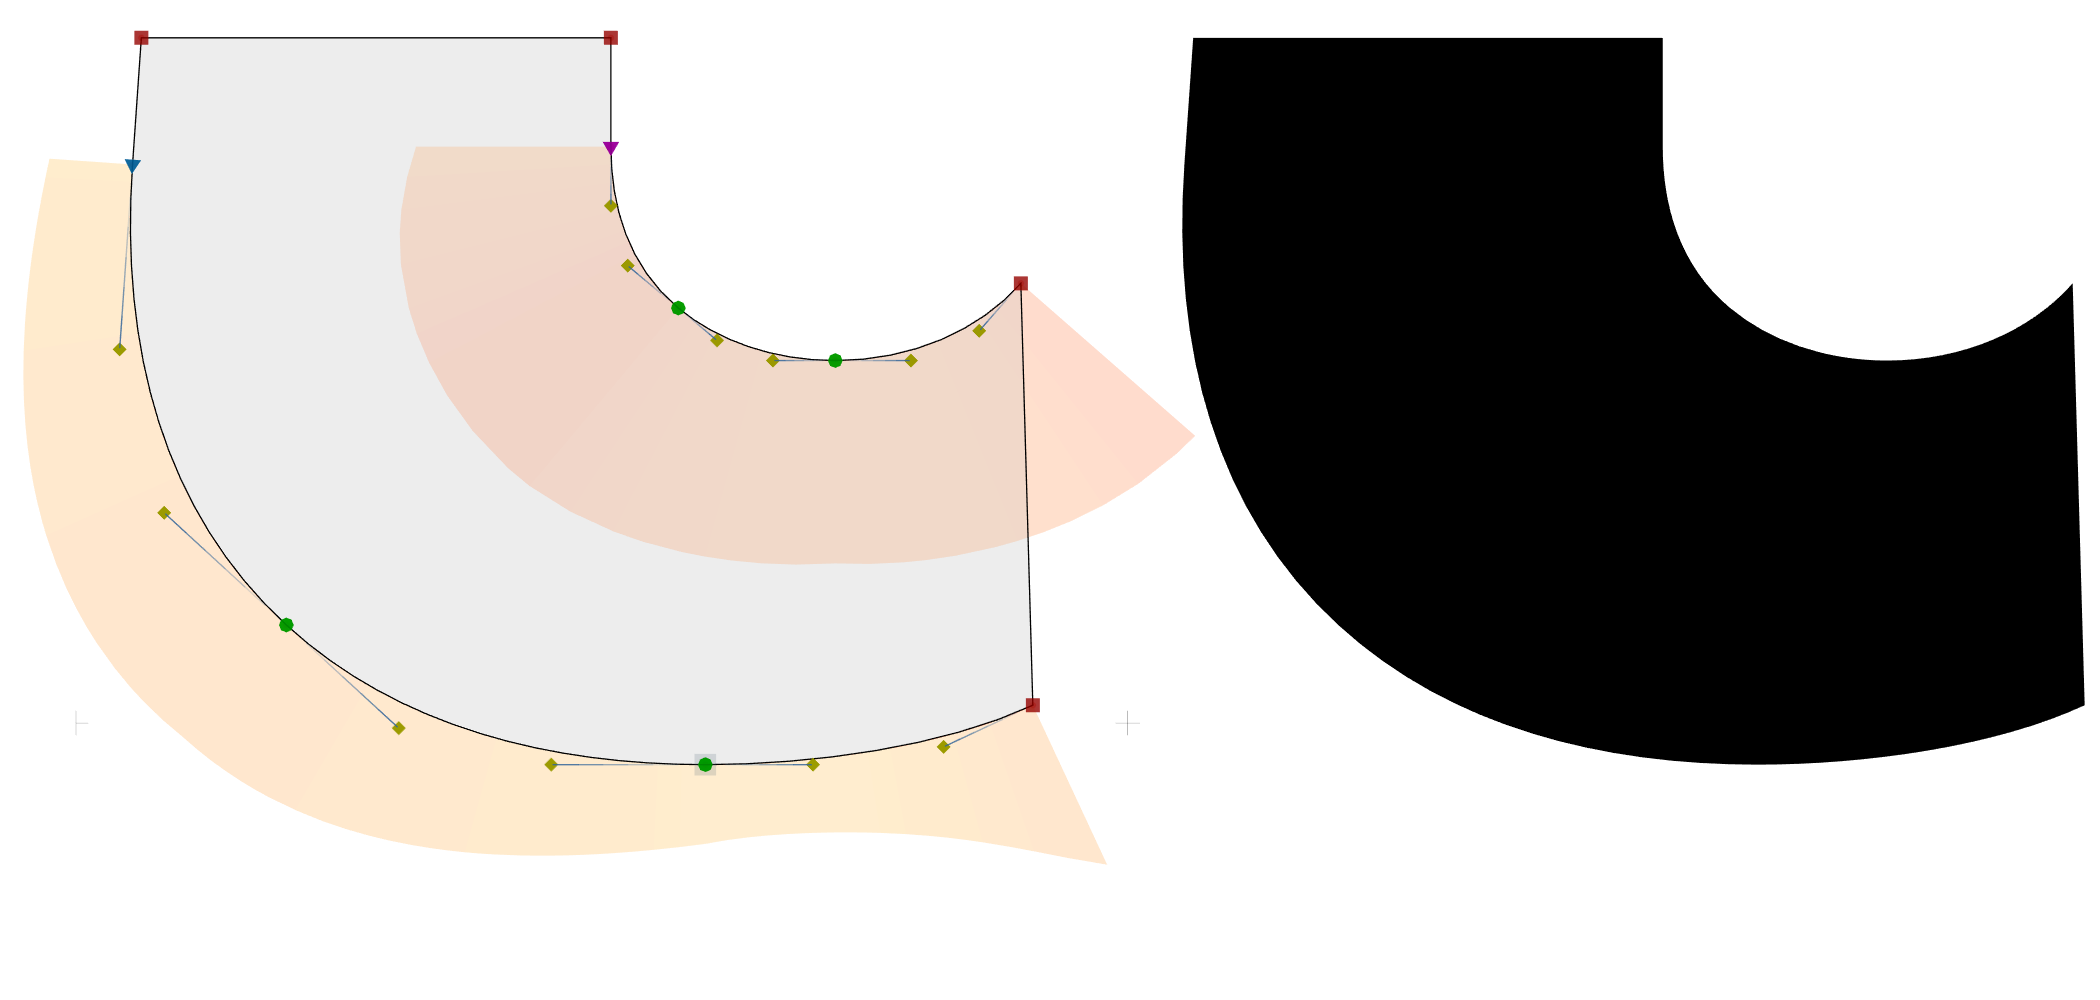
The more fluent the flow of the curvature comb is, the closer a Smooth node is to G3 smoothness. If there is no sharp kink in the curvature comb, the node is G3-smooth.
Select one or more nodes, and choose New choose Contour > Handles > Superharmonize, or Handles > Superharmonize from the context menu. This will move the handles of Smooth and Genius nodes to new positions where the curve segments will join G3-smoothly, and will keep the nodes where they were.
This will typically standardize the tension of the curve segments, and make them more “round”. Previously, this operation was called Harmonize Handles in the context menu, but now Harmonize Handles does G2-smoothing of an existing node by moving its handles.
Remember: these Harmonize and Genius operations give a certain “mathematical” local smoothness at and around a node. Think of them as quick short cuts, they are not a replacement for your eye. If you use the operations, check if the results are consistent with your design intentions, and use your eyes to judge the overall flow of the curves.
You may use them as a learning tool: harmonize a node or its handles, and see how FontLab places the nodes and handles. Move the nodes and handles, see how the curves change.
Often, a good way to achieve smoothness is to just remove the node — the longer curve segment will naturally flow smoothly. Also, not all typefaces need ultra-smooth curves! Many designs use abrupt changes or conscious bulges and kinks to express the design intent.
Redesigned Contour menu
New We’ve reorganized the Contour menu to improve the clarity. The menu items now follow a logical structure:
Nodes
Nodes submenu. New Includes some previous top-level items.
- Navigate between nodes.
- Convert between node types.
- Unlink Corner breaks and elongates the segments to make an open contour, and adds a Fill filter so it’s still filled
- Loop Corner makes a triangular loop that you can optionally unfill with Font Info > Other Values
- Add Smart Corner makes live rounded corners and inktraps.
Handles
New Handles submenu.
- Retract handles.
- New Equalize handles of a smooth node shifts the handles to make the handles the same length and keep their total length.
- New Harmonize handles makes a smooth node G2-smooth in-place.
- New Superharmonize (previously as Harmonize Handles in the context menu) makes a smooth node G3-smooth.
Convert
Convert submenu.
- Change segment types and curve types.
- New To Corner (previously top-level Replace with Corner) replaces a segment with two line segments: they extend the adjacent segment directions of the neighboring segments and meet at a new corner.
- Convert paths into new components or elements.
Coordinates
Coordinates submenu.
- Control integer / fractional coordinates.
- Follow Italic Angle slants “vertical” editing moves.
Common operations
- New Set Start Point and Reverse Contour are now together.
- Break and Join. Make contours open or closed.
- Align Points submenu. Align multiple nodes or contours vertically or horizontally.
- Edit Tunni Lines. Edit the Tunni lines for multiple segments at once.
- Create Parallel Contour…. Create parallel contour from selection.
- Expand Contour…. Create a simple stroke expansion. For live stroke expansion, use Power Stroke.
Contour improvement
- Simplify. Puts nodes at extremes, removes nodes that don’t contribute much to the shape. The shape may change slightly.
- Clean Up. Lightweight node removal without changing shape.
- Harmonize Nodes. Moves smooth nodes to new G2-smooth positions, keeps the handles. To adjust the handles to make a smooth node G2-smooth in-place, use Handles > Harmonize.
- Balance. Equalize the tension of both handles of a curve segment, keep the shape.
- Nodes at Extremes. Adds nodes at outmost horizontal and vertical coordinates of contours. The handles of the new nodes will be perfectly vertical or horizontal.
Boolean operations
- Overlap submenu. More boolean contour operations. New Smartly Make Overlap.
- Remove Overlap. Eliminate (merge) overlapping parts of contours or selections.
Context menus
- New We’ve shortened several context menus and put some operations into sub-menus.
- New The context menu for selected points is shorter, and items related to nodes and handles are in submenus.
- New The context menu for an element is shorter. You can now Expand Transformation, and in the Filters submenu add, expand and remove all FontLab filters.
Separate undo step for (de)selections
New If you select or deselect points and contours in the Glyph window, FontLab now records this as a separate Undo step.
For example, if you select nodes and move them, and then chose Edit > Undo, FontLab now moves the nodes back but keeps them selected. Previously, Undo caused FontLab to go back to the state before the selection.
Also, if you select some nodes and then click away to deselect, you can now choose Edit > Undo to get the selection back.
Select all Tunni lines
New If View > Tunni Lines is turned on, you click a Tunni line and choose Edit > Select All, FontLab now selects all Tunni lines in the current element. Previously, Select All selected the contours even if the Tunni line was active.
Slide node with arrow keys
New If you turn on the Slide sub-tool in the Contour toolbox and activate a single node, you can use the arrow keys to slide the node along the curve.
Transform a single node
New If you select a single node that has adjacent handles (so it’s between one or two curve segments), and you use Tools > Free Transform (CmdT CtrlT), FontLab will let you transform the node and the handles. Previously, you had to explicitly select the handles with Alt-marquee.
Number of nodes and points in a contour
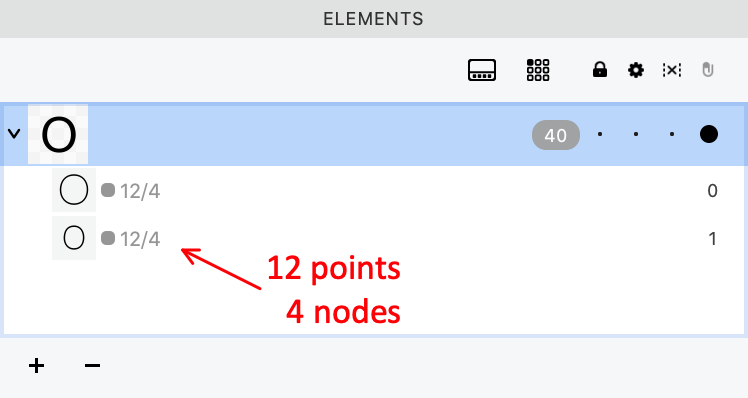
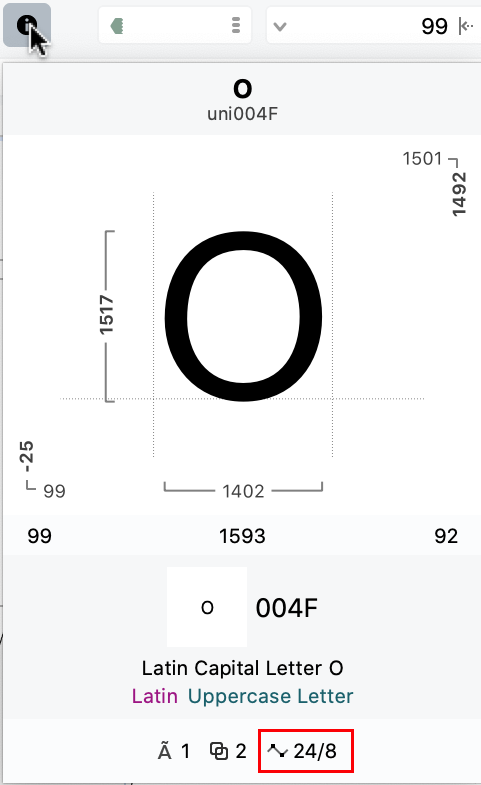
New Each contour in the Elements panel now shows the total number of points in the contour followed by the number of nodes (on-curve points). For example, a typical circle shows 12/4: the contour has 12 points in total, out of which 4 are nodes (and 8 are handles).
Slice contour with Knife tool (J key)
New With the Knife tool, if you hold Ctrl or turn on the Slice sub-tool in the toolbox, and you drag between two existing nodes, FontLab now slices the contour (splits it into two closed contours), and selects the shorter resulting contour.
Previously, this worked if you sliced through a segment, but not on existing nodes.
Cancel drag with Esc
New If you’re dragging a node or element in the Glyph window, and you press Esc during the dragging, FontLab now cancels the dragging operation, so the items revert to their original positions.
Warning
This does not work for all types of items in the Glyph window.
Consistency & precision
With FontLab, you can achieve remarkable accuracy at every step, across your entire glyph set.
Work on upright or slanted grids using flexible guidelines, measurement tools and smart snapping. See lengths, angles, curve tension, stem thickness and whitespace distance as you draw. Dynamically snap to zones, guides, hints, nodes, angles, stem distances, continuation lines, perpendicular lines and centerlines. Losslessly scale, rotate and slant with fractional precision.
New FontLab 8.2 adds dynamic numeric measurements for guides and anchors, easy aligning of points to Mask, guides or grid, and improves autohinting and handling of zones and stems.
Long and short guides
In FontLab:
- A guide can either be horizontal or vertical (“H/V”), or it can be diagonal (“vector”).
- Both types of guides can be either “long” or “short”.
- A guide can optionally have measurement markers. If you double-click a guide, automatic measurement markers appear. If you double-click a guide with automatic measurement markers, the measurement markers will become manual, and you can position them yourself.
Glyph and element guides
A “long” guide in FontLab is a guide that has an origin coordinate and a direction. Any element or glyph guide can be a long guide. FontLab displays them across the entire current glyph, and visually extends them a bit beyond.
You can also have a a “short” element or glyph guide. A short guide that is drawn only between two coordinates, and does not extend to the bounding box and beyond. To control the length of a short guide, use the explicit start and end point (if the guide is a vector), and use the positions of the outmost manual measurement markers (if the guide is H/V).
- New If you click a guide, you can now make it a short guide in the property bar. Previously you could do it in the context menu or Guide panel.
- If you create an element guide (Alt-drag with the Guides tool), the guide is short by default. New You can now make any element guide long.
A glyph guide with automatic measurement markers always measures the distances inside the glyph and to the current glyph sidebearings.
Font guides
A font guide is always “long”. With the Preferences > Grid, Guide and Hints > Show in current glyph only setting, you can control how FontLab displays font guides, and also font dimension lines and alignment zones.
If the setting is off, FontLab shows font guides in a “super-long” way: across the entire Glyph window, from edge to edge. If the font guide has automatic measurement markers, they measure distances inside the glyph, and they measure distance between glyphs. New For the first and last glyph in line, they measure distance to the sidebearings (respecting slanted sidebearings).
If the setting is on, in a all Glyph window modes except Metrics and Kerning, FontLab shows font guides across the entire current glyph, and visually extends them a bit beyond, just like long glyph guides. New If the font guide has automatic measurement markers, in non-Metrics modes, they only measure distances inside the glyph.
Quick measurement for guides and anchors
You can now easily see the relative position of a guide to the contour or the distance of an anchor to the sidebearings and closest font dimensions. New Turn on Preferences > Glyph Window > Quick measurement > Measure distance to guides and anchors, then in your Glyph window turn on View > Measure > Quick Measurement, and then:
- New If you hover over an anchor or drag it, the Glyph window shows the vertical distance of the anchor to the nearest font dimension (ascender, caps height, x-height, baseline or descender), and the horizontal distance of the anchor to the left and right sidebearing. The values will appear blue if they’re equal (that is, if the anchor is perfectly centered).
- New If you hover over a vertical guide or drag it, the window shows the horizontal distance of the guide to the “key” (extrema) nodes on the closest contour segments. As with basic Quick measurement, the distance is measured at your pointer position.
- New If you hover over a horizontal guide or drag it, the window shows the vertical distance of the guide to the “key” nodes on the closest contour segments.
View distance of dragged guides
New As you drag a horizontal or vertical guide, the Glyph window will show the distance by which you’ve dragged it if you turn on View > Measure > Quick Measurement, or if you turn on Auto-meter for stem widths or Auto-meter for counters in the View panel or in Preferences > Glyph Window. This also works if you’re duplicating a guide with Alt-drag.
Align points to Guides
New The Contour > Align Points menu has a the command To Guides. It aligns the selected points to the nearest guide. Previously, this command was available as Contour > Snap to Guides.
Align points to Grid
With Font Info > Family Dimension > Round coordinates, you can control the low-level technical “grid” that affects all coordinates: of nodes, handles, anchors, guides etc. If the setting is turned off, all coordinates are fractional, which gives you very high drawing precision. If it’s turned on, the coordinates are integer, so all nodes and handles snap to full units at the precision defined in Font Info > Family Dimensions > Units Per eM. That’s the low-level grid: if you have Round coordinates on, all your nodes, anchors and handles will snap to integer coordinates.
In Preferences > Grid, Guides and Hints, you can also set up a high-level grid that is much more flexible, and which affects nodes, guides and anchors, but not handles and TrueType off-curve points. Set the horizontal and grid line distances, and a slant angle, and customize what the grid will look like in the Glyph window if View > Measurements > Grid is turned on (you can make it fully transparent).
The Preferences > Grid, Guides and Hints page also has a very important Round nodes, guides and anchors to grid points setting, which decides how “greedy” the grid snapping is:
- If it’s turned off, the grid snapping is “soft”: a node, guide or anchor will snap to the closest grid point only if it’s within the distance defined in Preferences > Distances > Snap distance.
- If it’s turned on, the grid snapping is “hard”: a node, guide or anchor will always snap to the closest grid point.
But how do you get the items to snap? There are three ways:
- If you move the node, guide or anchor, it will snap to the grid if View > Measurements > Grid is turned on and View > Snap > Grid is turned on (if either of those is turned off, it will not snap).
- New The current Glyph window selection or all nodes, guides and anchors will snap to the grid if you choose Contour > Align Points > To Grid.
- New All nodes, guides and anchors in the affected glyphs and layers will snap to the grid if you choose Tools > Actions > Contour > Align to grid.
The snapping will always be soft or hard, depending on the Preferences > Distances > Snap distance setting.
Note
The handles and TrueType off-curve points will never snap to the high-level grid. This is by design, and it’s actually great. The nodes, guides and anchors are responsible for the visual consistency of your glyphs. But the handles and off-curve points are responsible for the precision of the curve shapes, and you almost never want the odd visual bumps that their snapping would cause. If you really want the handles to snap, change the Font Info > Family Dimensions > Units Per eM value to something much lower, with scaling.
Tip
Automatic grid snapping with Tools > Actions > Contour > Align to grid is a great way to “regularize” or “quantize” your design, whether you’re cleaning up autotraced glyphs or a making a small optical size.
Align points to Mask
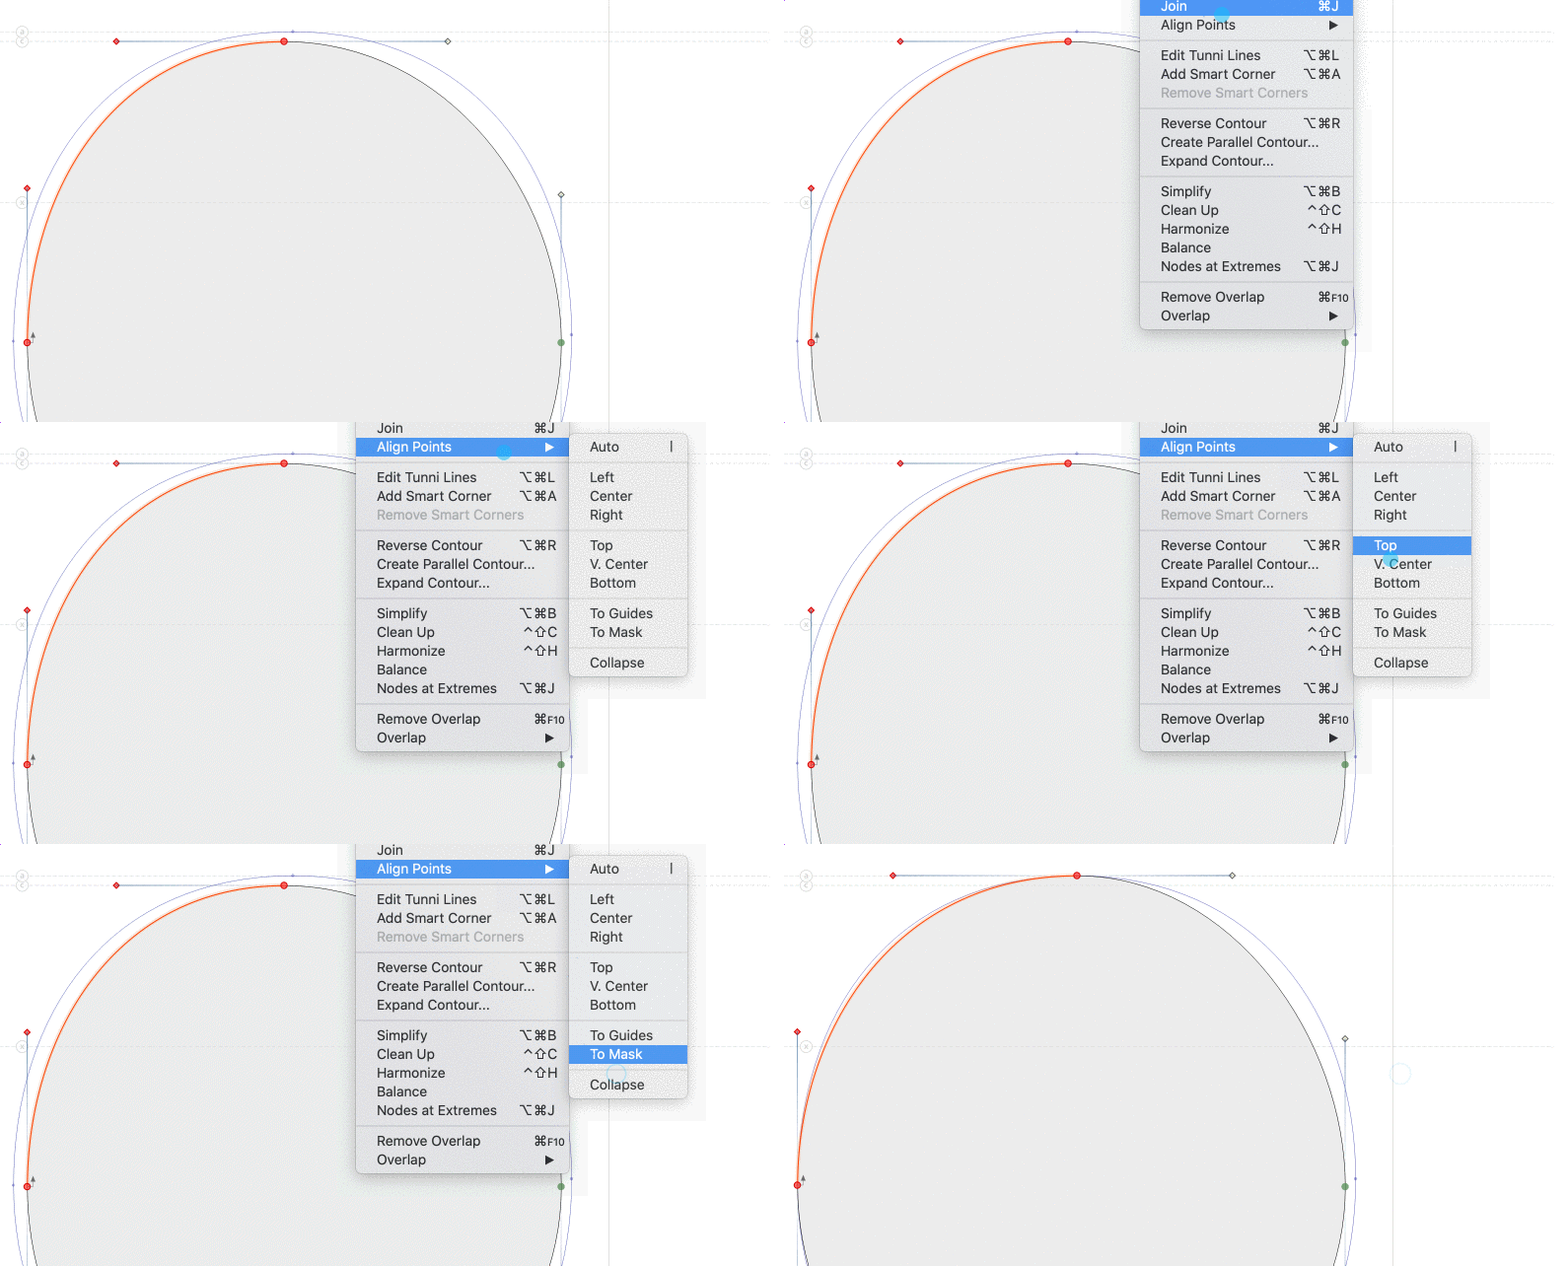
New The Contour > Align Points menu has a new command To Mask. It aligns the selected points to the nearest points in the Mask layer they’re within the distance of 50 units.
Distance suggestions with open contours
If you turn on View > Suggest > Distance, FontLab will show snapping suggestions at a specified distance from existing contours. In Font Info > Other Values > Suggest distance, you can specify the snapping suggestion distance for X and Y per master.
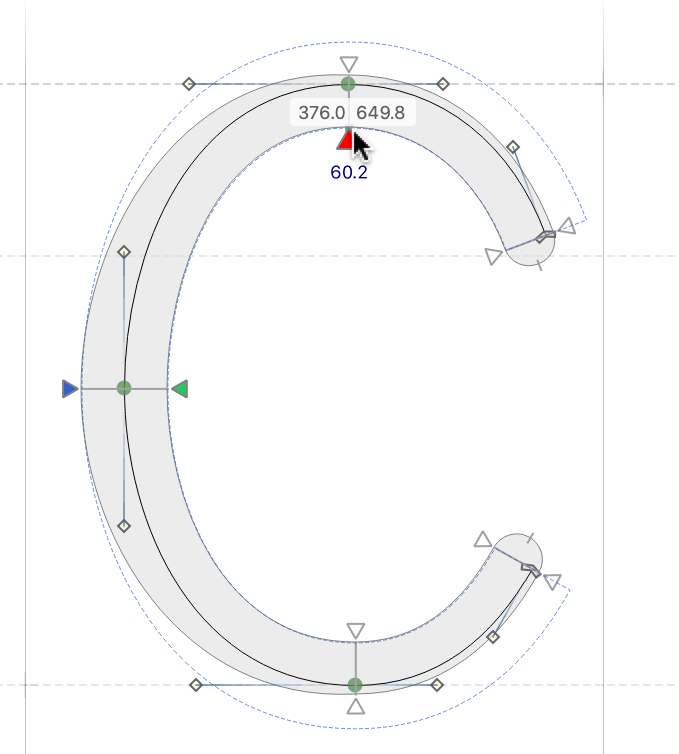
Distance suggestions are great for placing guides or anchors, for drawing parallel contours, and for positioning elements or contours at fixed distances from each other in a kind of grid.
New The distance suggestions now also appear around open contours.
Add stems quickly
New Font Info > Stems now has two new buttons: Add horizontal stem and Add vertical stem. Use them to quickly add multiple stems.
Better autohinting settings
If you autohint a font master, FontLab will only build hints that have a value larger than the minimum and smaller than the maximum stem width specified for each master in Font Info > Other Values > PostScript hinting > Autohint (H for horizontal stems, so the Y direction, and V for vertical stems, so the X direction).
New These settings now use UPM font units. Previously, they used in ‰ of the font size.
Number of stems and zones
New the Font Info sections list now shows how many Stems and Zones are defined in the current font master.
Expressions for zones
In FontLab, Zones are a special per-master structure. FontLab dynamically constructs the “thick guides”, which visualize zones in the Glyph window, and updates them. Expressions don’t work with Zones. Previously, you could assign an expression to a zone in the Glyph window, but these expressions did not save into VFC/VFJ, and could be “lost” after you change something in the Font Info dialog. New Now, the Expression field in the Guides panel and in the Glyph window property bar is disabled for Zones.
Build & assemble
Plant your creative seed with the essential building blocks of your design, and let FontLab handle your glyph set expansion.
Rapidly build glyphs from components or from always-editable element references. Automate complex glyphs with Auto layers. Join design parts and add flair with Skin and Glue. Convert drawing parts into components with one click. Use Fill to sculpt the whitespace off filled areas.
New FontLab 8.2 adds the Fusion filter for live Boolean “pathfinding” operations between elements and components, one-click copying of auto layer recipes to other masters, improves the Skin filter, the element switching, and the automatic conversion of simple contours to composites.
Redesigned Element menu
New We’ve reorganized the Element menu to improve the clarity. The menu items now follow a logical structure:
The element itself
- New submenu. Add elements, pins and the special Text Shape elements.
- New Locked Content (previously named Locked). If it’s on, you cannot edit the content of an element directly in the window. If the element is a reference and you double-click it, FontLab opens another reference in the Glyph window, which you then can edit. This toggle does not lock the position of the element within the glyph space.
- New Anchored (previously named Attached). Works with a component. If it’s is turned on, a
_-prefixed anchor in the component’s source glyph is used to attach the position of the component to a corresponding anchor in another component or in the current glyph layer. - Nonspacing submenu. Control if the element is used to calculate sidebearings. If an element or component is set to nonspacing, it becomes “invisible” to the spacing engine.
- New Reference submenu (previously named Element Reference). Contains items focused on reusable elements: references and components.
Relationships between elements
- Group. Attach elements or components to each other as a group, and create a higher-level element to which you can then apply filters. For example, use the Fill tool to perform contour boolean operations between contours that belong to separate elements.
- Arrange submenu. Organize and navigate through the element “stack” (the Z-axis, the order within the glyph layer).
- Align submenu. Arrange elements within the coordinate space.
- New Fusion submenu. Perform non-destructive, live “pathfinding” (Boolean operations) on elements or components.
- Contours submenu. Change the order of the contours within the element, combine multiple elements into one, and split one element into multiple elements by contour.
- New Convert to Glyphs submenu (previously named Place As Glyphs). Create new glyphs from existing elements, also from elements on the Sketchboard.
- Make Clipping Group. Use one element as a live clipping (cropping) mask for another element.
- Optically Separate. Split non-overlapping contours from one element into multiple elements. Often used after autotracing and before Convert to Glyphs.
Design with live filters
- New Brush & Stroke submenu. Add Power Brush and Power Stroke filters to an element, so you can apply live calligraphic or geometric stroke expansion to your contours. Convert these filters into final contours.
- Glue Selection and Add Skin Filter. Create smart live joins between glyphs and elements, or apply one glyph as a decoration for another glyph.
- Add Delta Filter. Apply live additive modifications to contours using the “delta” concept used in variable OpenType fonts.
- Expand Transformation. Convert live element transformations applied in the Elements panel into final coordinates, preserving the appearance.
- Expand Filters. Convert live filters like Clipping Group, Power Brush, Power Stroke, Glue, Skin, Delta, Smart Corners into simple contours, preserving the appearance.
- Remove Transformation and Remove Filters. Discard the live filters or transformations, and convert the contours into their basic forms.
Images and color
- Image submenu. Modify bitmap elements and SVG elements, autotrace images.
- Edit Gradient. Edit the gradient if an element has a gradient fill.
Boolean contour operations with the Fusion filter
Traditional font editors offered the “remove overlaps” functionality (sometimes called “merging contours”). If you remove overlaps between two circles that have the same contour direction, you’ll get one contour. The contour will have additional nodes at the points where the contours intersect, and the overlapping parts will be gone.
Many vector drawing apps offer operations that go beyond removing overlaps: Boolean contour operations, sometimes called “pathfinding”. The “remove overlaps” operation is equivalent to the Boolean “add” operation, but with a full set of Boolean operations, you can also subtract, intersect, or exclude parts of vector shapes.
FontLab 8.2 offers four ways to use Boolean operations: the Contour overlap operations, the Fill tool & filter, New the new Fusion filter, and its predecessor, the Clipping Group filter.
Contour overlap operations
The Contour menu has Remove Overlaps, and in the Overlaps submenu has Subtract, Intersect and Exclude. These operations work immediately (“destructively”), and they work on all or selected contours within one element.
The Contour menu Boolean operations always take the entire contour into account, so if two contours overlap in two places, a contour Boolean operation will affect both entire contours even if you only select some nodes in both contours.
Fill tool & filter
With the Fill tool, you can non-destructively fill (make opaque) or unfill (make transparent) each area that’s fully enclosed by segments, across all contours in one element — or, if you group multiple elements, across all contours in the group. If you use the Fill tool, FontLab creates a Fill filter if there are any overlaps, or simply reverses a contour if there are no overlaps.
Fill is very intuitive (click to fill, Alt-click to unfill), but it requires you to use the operation on every single enclosed area. The Fill filter is “live” (non-destructive), so you can move the contours around.
However, if you move the contours apart and then back together, the Fill filter won’t recreate the previous state of filled/unfilled areas. The Fill tool may be complex to use in variable fonts, and doesn’t work with components.
As with other filters, you can use Element > Expand Filters to apply the Boolean operations created with the Fill tool, or you can use Remove Filter to restore the original simple contours.
Fusion filter
New With the all-new Fusion filter, you can perform live, robust, non-destructive “pathfinding” (Boolean operations) between elements or components.
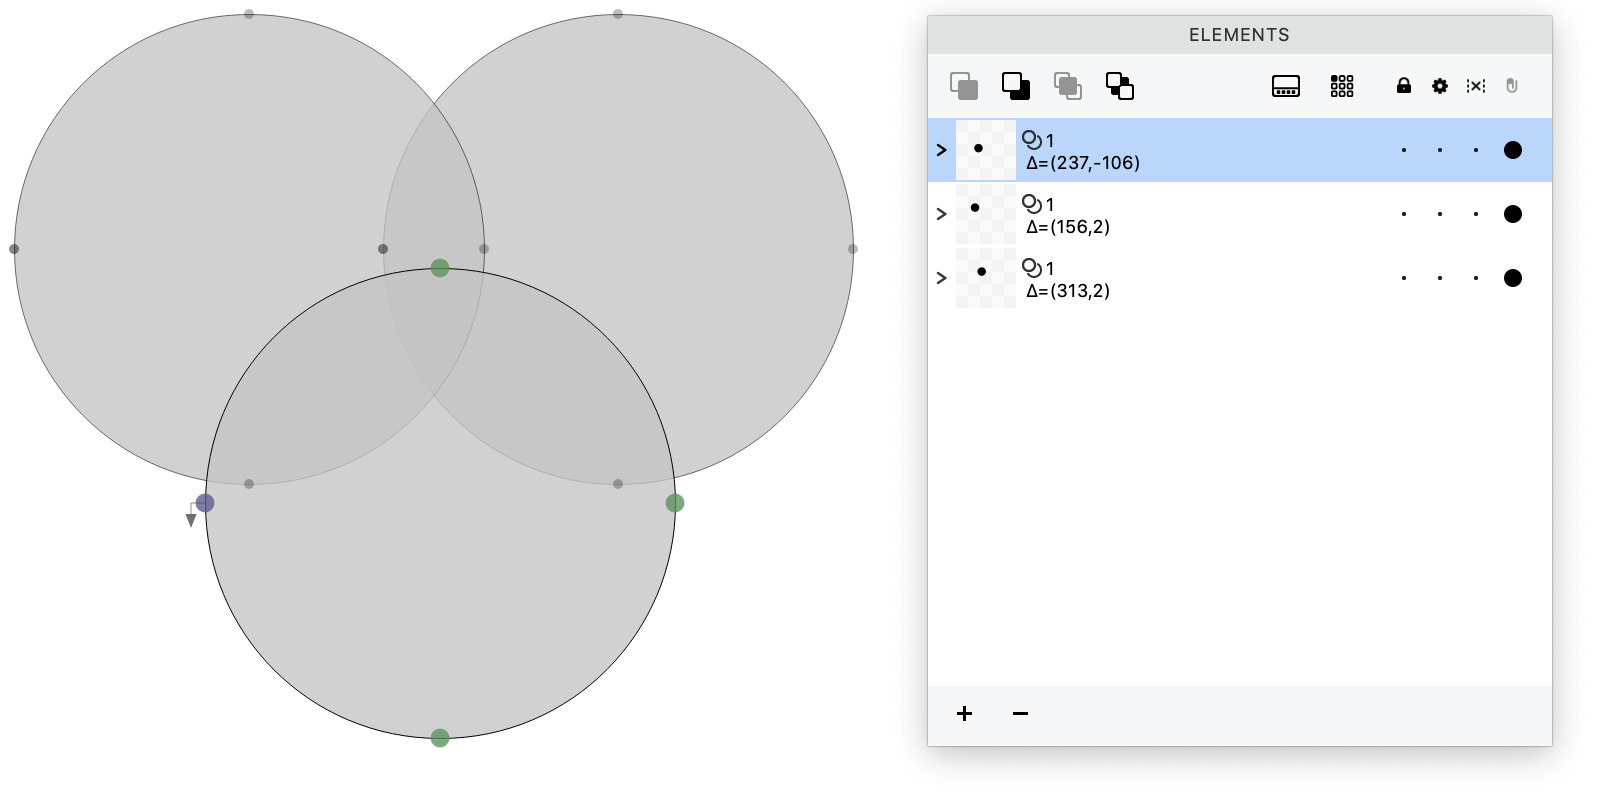
If you have multiple elements or components in a glyph layer, select an element with the Element tool, and choose a Fusion type from the Element > Fusion menu, from the Element tool Fusion context menu, or from the Fusion type dropdown in the Element tool property bar.
If you apply a Fusion type to an element:
- FontLab puts all elements into a “Fusion group”, which is a filter.
- The element or component which has a Fusion type applied becomes the “fusor”: the instrument that performs the live pathfinding.
- The fusor performs the fusion (live pathfinding) on the “fused” elements, that is: all elements or components that are below it.
If you select parts of a contour with the Contour tool and apply Fusion, FontLab converts the entire selected contour into a separate element, and then makes it a fusor.
Different Fusion types give you different results:
Fusion > Add
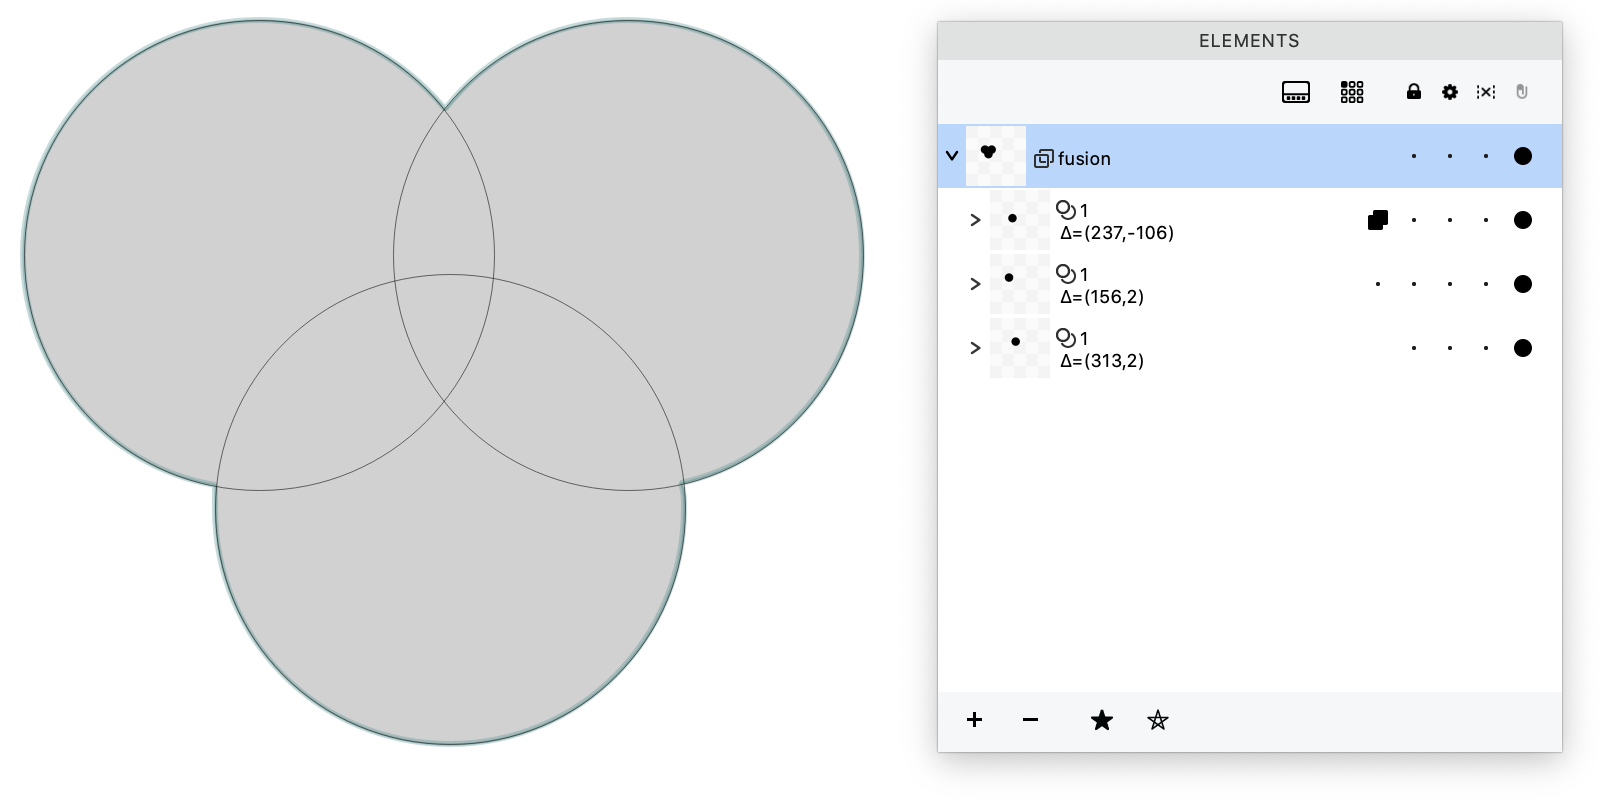
New Fusion > Add keeps all filled areas of the fusor of all the fused elements, and removes the overlaps between the fusor and the elements. Some apps call this “Union”.
Like the other Fusion operations, Add is a live, non-destructive operation, and works even between components. The analogical immediate operation between contours within the same element is Contour > Remove Overlap.
Fusion > Subtract
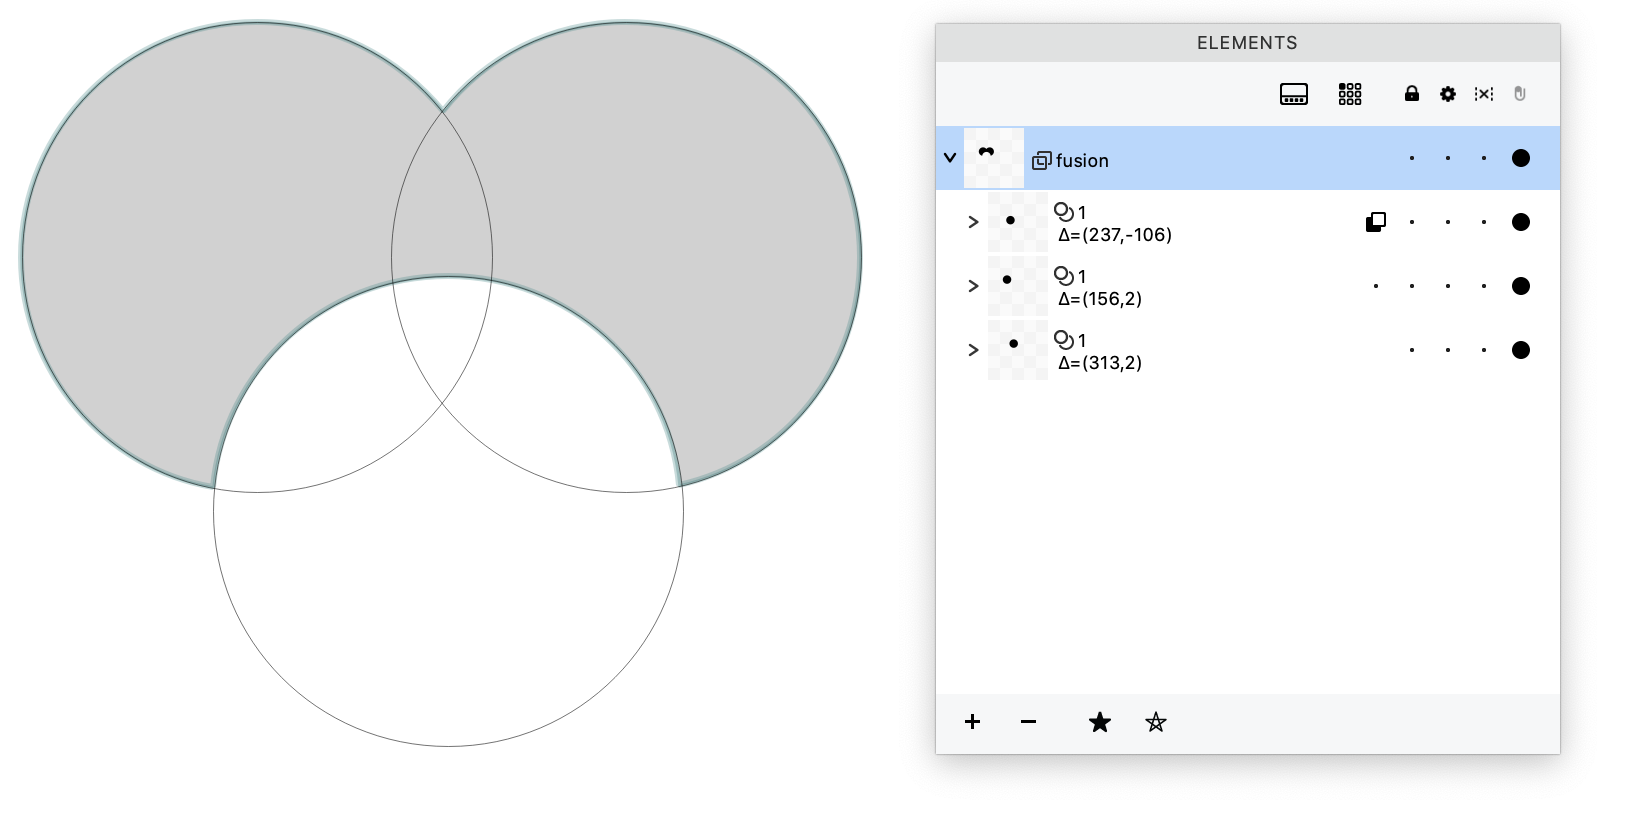
New Fusion > Subtract keeps only the areas of the fused elements that didn’t intersect with the fusor. The fusor’s contours are invisible and only act like a cutter. Some apps call this “Difference”.
The analogical immediate operation between contours within the same element is Contour > Overlap > Subtract.
Fusion > Intersect
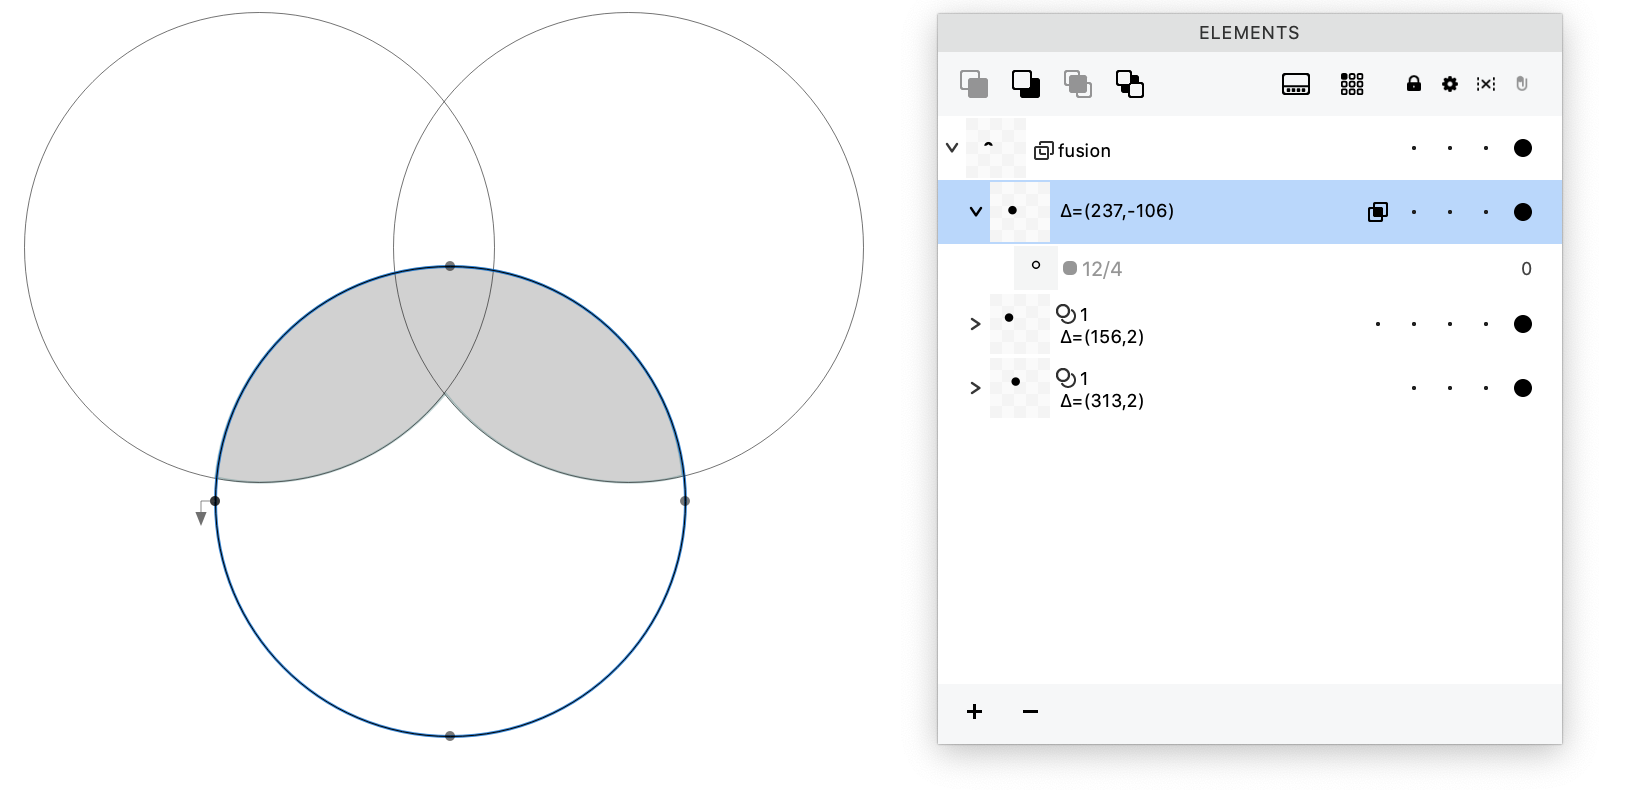
New Fusion > Intersect keeps only the areas where the fusor overlaps with the fused elements. The fusor element acts like a clipping/cropping mask.
The analogical immediate operation between contours within the same element is Contour > Overlap > Intersect.
Fusion > Exclude
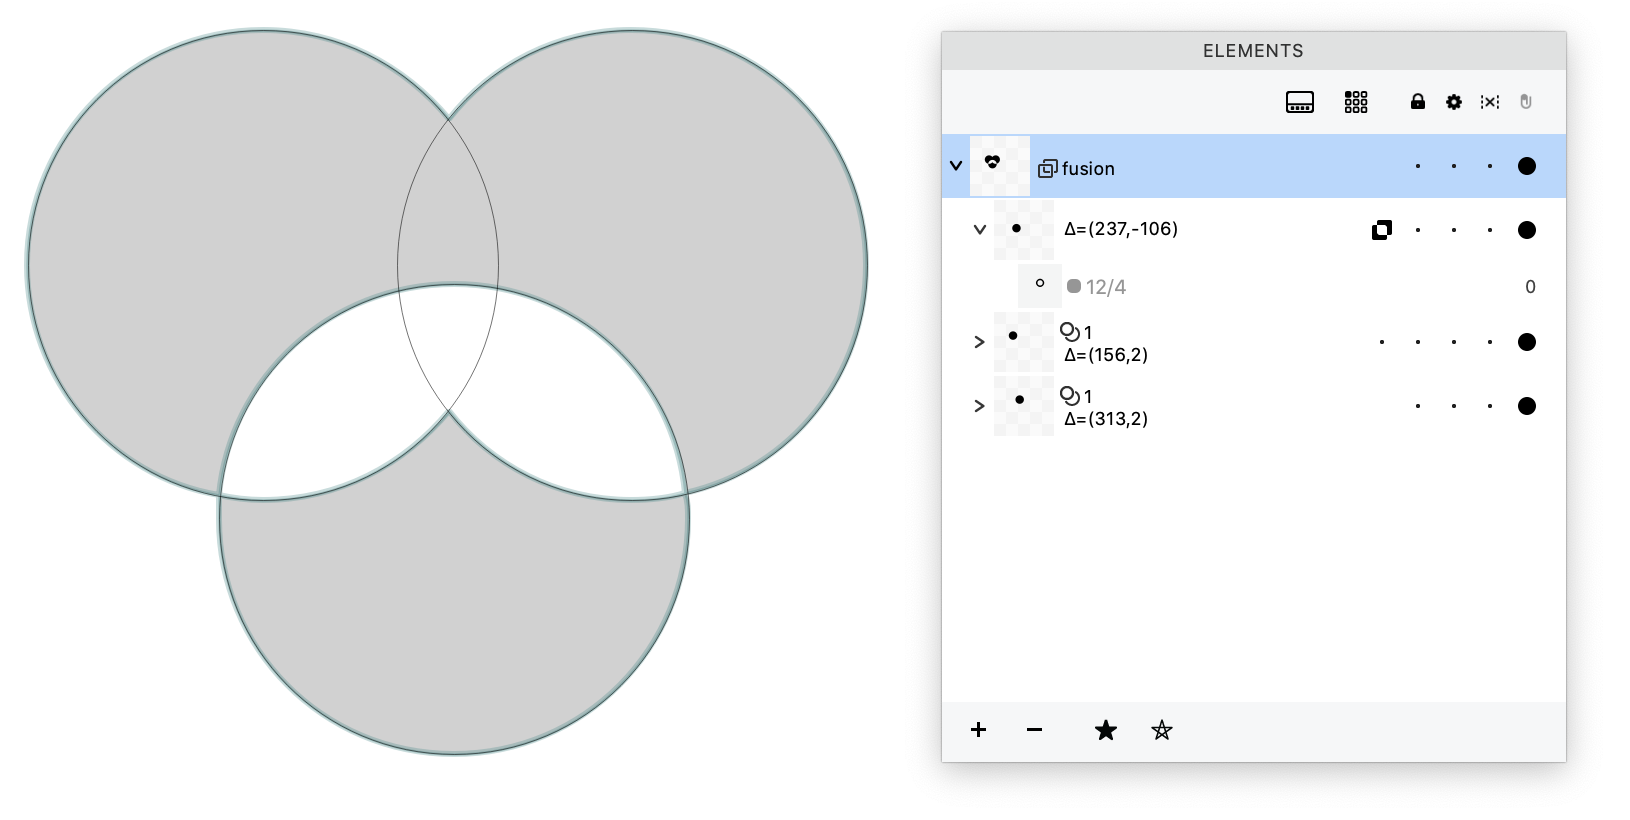
New Fusion > Exclude keeps only the area where the fusor didn’t overlap with the fused elements. In other words, keeps the unique parts of each element, but removes the part where they intersect. Some apps call this “XOR”.
The analogical immediate operation between contours within the same element is Contour > Overlap > Exclude.
Editing Fusion
Once you have applied Fusion to an element, you can change its Fusion type in the Element > Fusion menu, the Element tool Fusion context menu, the Fusion type dropdown in the Element tool property bar, or using the Fusion type button in the Elements panel.
To change which elements are fused with the fusor, you can drag them in the Elements panel or use the Element > Arrange menu. The Fusion group fuses the fusor element with all elements that are below (in the back of) it. It won’t do anything to elements above the fusor.
Applying Fusion
-
To apply the Boolean operations created with the Fusion filter, and get the resulting contours, use Element > Expand Filters.
-
To restore the original simple contours without applying the filter, use Element > Remove Filter .
-
If you declare any element or component as a fusor and export the font, FontLab will decompose and fuse the contours in the glyph layer. So an easy way to declare a composite glyph as “to be decomposed and overlaps to be removed” at export is to apply Fusion to the topmost component. This works even with scaled or variable components. FontLab will decompose and fuse such components on export even if they don’t overlap.
Clipping Group
With Element > Make Clipping Group, you can turn one element into a cropping/clipping mask for another element. This is very similar to Fusion > Intersect. Fusion allows more flexibility, but in FontLab 8.2, we’re also keeping Clipping Groups. In future, we may completely replace Clipping Groups with Fusion.
Copy auto layer recipes
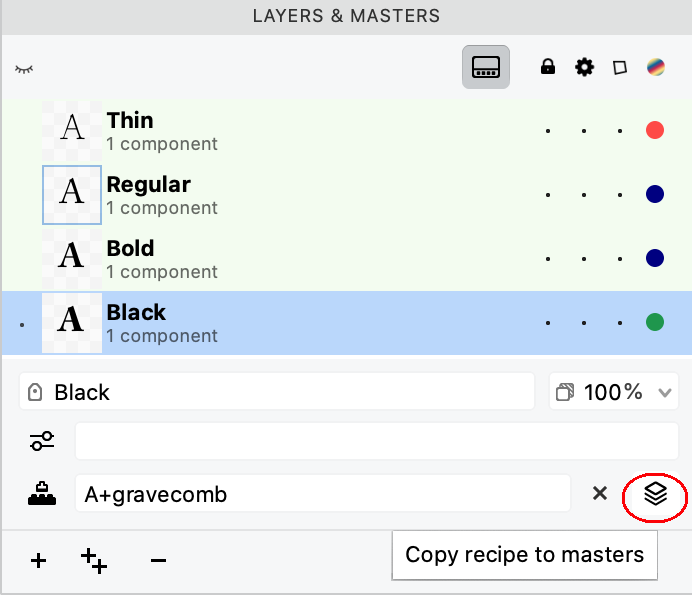
New If you show the Layer properties in the Layers & Masters panel, the Auto layer section at the bottom now has a Copy recipe to masters button.
Click it to copy the current layer’s auto layer recipe to all other masters.
Filter glyphs when you add a Skin filter
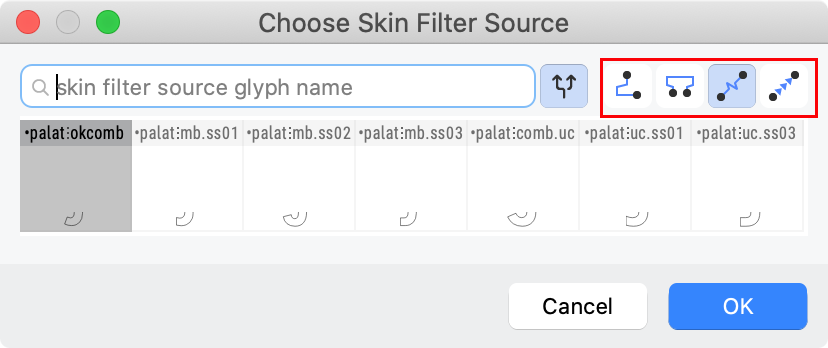
If your font contains a Skin-compatible glyph with the name prefix _segment, _dash, _corner or _cap, and you select some nodes in an existing glyph, and you choose Element > Add Skin Filter, FontLab opens the Choose Skin Filter Source dialog, where you can pick one of those Skin-compatible glyphs. New In this dialog, you can now use the Skin type buttons to only see glyphs with a particular name prefix.
New Cap skin fitting
Apply cap skin to a body segment, and FontLab will join the first open contour of the skin source so that its origin is the body segment’s 1st node.
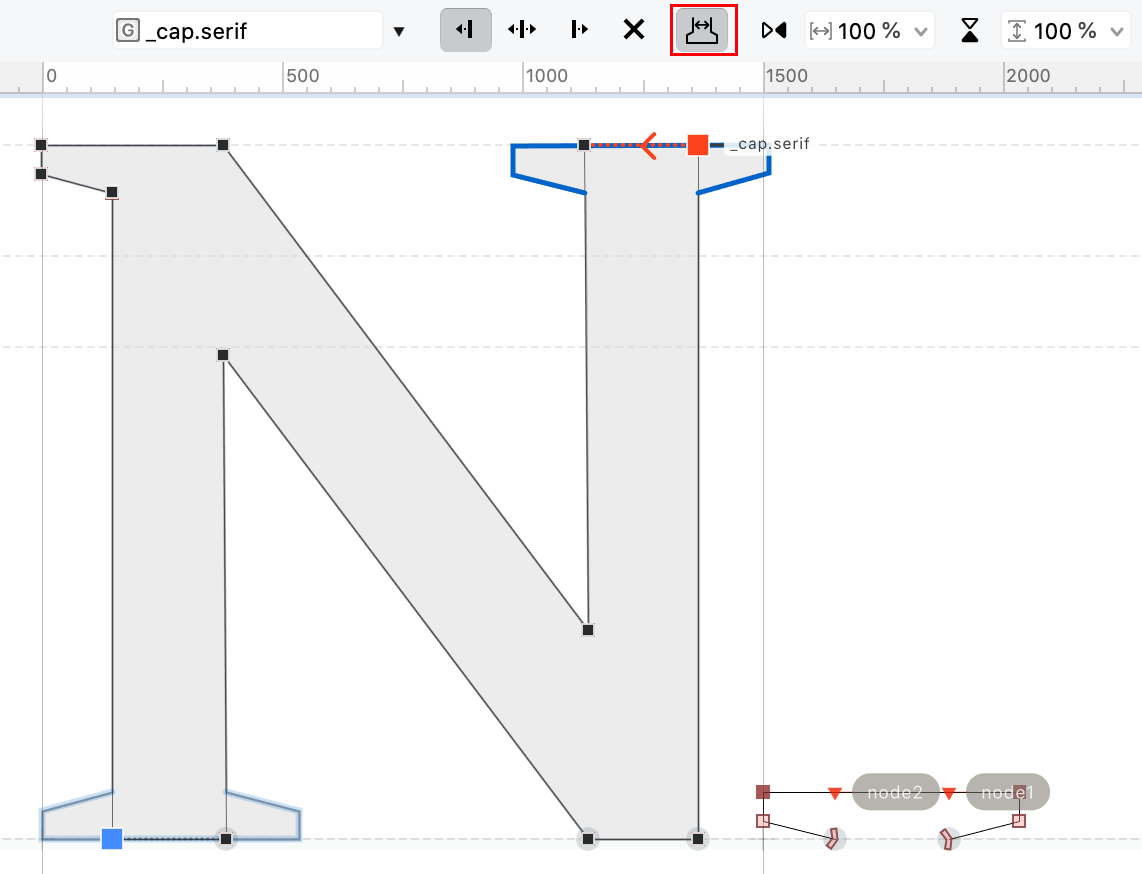
If the skin source has a node1 anchor and a node2 anchor, FontLab joins the first open contour of the skin source so that:
- The
node1anchor is on the 1st node. - New If the Fit cap toggle in the Skin filter property bar is turned on, the
node2anchor is on the 2nd node.
The cap skin source glyph must have a name that starts with _cap. It should contain one open contour. Both the source and body glyphs must contain a layer with the same name.
Cap skins work similarly to corner skins. The difference is that in corner skins, the skin source’s origin gets attached to a single body node, and in cap skins, the skin source’s two special anchors get attached to two body nodes. Other than that, alignment, scaling and flipping of the skin, and the left / right anchors in the skin source work similarly.
Note
Cap skins are compatible with cap components used in the
.glyphsformat.
New If you add a Cap skin to an element, the Glyph window property bar now has a Fit cap toggle. If you turn the toggle on, FontLab will scale the cap to match the size of the segment to which the cap is attached.
Easier switching of the active element
If you have multiple elements in the layer, and you want to switch to between elements, you can click the filled area of another element to make active.

New If you turn on Preferences > Editing > Activate element on double-click, simple click will keep the current element active, and to switch to another element, you need to double-click its filled area.
Better Elements panel
New The icons for open and closed contours in the Elements panel are updated, some icons are slightly larger.
New Some filters in the Elements panel are indicated by an icon, not by a text label.
New Click the downward arrow on the right side of the Live rotation or Live slant field to open a visual control. Drag the arrow in the control to adjust the transformation.
Automatic detection of composites and element references
If you choose Font > Detect Composites, FontLab will analyze the current master and will replace repeating contours (and contours enclosed in them) with either components (if it finds an appropriate standalone glyph) or element references (if the repeating portion does not occur by itself). New This operation now works more reliably.
If you don’t want element references, first go to any glyph where the contours occur, select them and choose Contour > Convert > To New Component, and give it a name. Then run Font > Detect Composites, and the same contours in all glyphs in the current master will be replaced by components that point to the new glyph.
To only replace a single selection with a component, use Contour > Convert > Detect Component.
Metrics & kerning
In FontLab, you can space and kern to perfection: from quick auto-spacing to ultra-detailed kerning.
Adjust metrics and kerning in a text-like editor, by planned phrases and pair lists. Apply tracking, modify widths, sidebearings and kerning globally or for selected glyphs. Automatically or manually build kerning classes and link metrics between glyphs using complex expressions. Auto-calc metrics and kerning, and audit kerning exceptions to find combinations that produce visual conflicts.
New FontLab 8.2 brings massive improvements to kerning: right-to-left kerning for scripts like Arabic or Hebrew, new Kern to Distance autokerning, better exceptions handling & auditing, improved handling of kerning classes. It improves the Metrics line spacing workflow, and adds support for optical bounds for better text line edge alignment.
Title Case text conversion
If you have multiple glyphs in your Glyph window, you can use Text > Change Case or the buttons at the top of the Glyph window sidebar to change the case of the text between UPPER CASE, lower case, and New now also Title Case.
This is very useful when checking spacing and kerning between uppercase and lowercase glyphs.
Spacing controls visibility
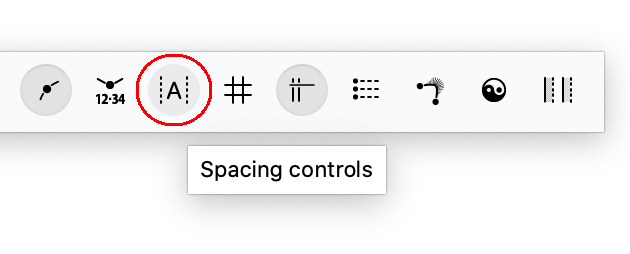
To show or hide the kerning line in Kerning mode of the Glyph window, or the sidebearing lines in other modes except Text, you can use:
- View > Metrics & Kerning > Spacing Controls
- the Spacing Controls toggle New which is now in the toolbar, and not in the property bar
Refined dragging of sidebearings
To change the spacing of the current glyph with your pointer:
- drag the sidebearing lines with the Metrics tool
- alternatively, if View > Metrics & Kerning > Spacing Controls is turned on and View > Lock > Glyph Metrics is turned off, drag the sidebearings with the Contour and Element tools
New You cannot drag the sidebearings with other tools. #7185
Larger sidebearing fields in Glyph window property bar
New If the Contour tool is active in a Glyph window, the sidebearing text fields in the property bar are now larger, so you can see long metrics expressions better.
Improved Metrics line
In FontLab, you can set numerical sidebearing values in two ways: using the bounding box or using the Metrics line.
-
Bounding box mode: If View > Metrics Line is turned off, the sidebearing text boxes in the Glyph panel, in the Metrics table and in the Glyph window property bar show sidebearings at the bounding box, calculated using all elements except the elements that are set to Nonspacing.
-
Metrics line mode: If you turn on View > Metrics Line, the background of the text boxes becomes violet, and the sidebearing values are calculated at the intersection of the Metrics line and the glyph content (excluding Nonspacing elements). Drag the dotted violet guide in the Glyph window to set the Metrics line position for the current master.
The Glyph panel and the Metrics mode property bar of the Glyph window show both the bounding box and the Metrics line sidebearing values in small text.
In metrics expressions, FontLab always uses bounding box sidebearing values, but ignores Nonspacing elements.
Sidebearing values on the Metrics line
New If View > Metrics and Kerning > Spacing Controls is turned on, and if Preferences > Grid, Guides and Hints > Font guide opacity is higher than 50%, the Metrics line now explicitly shows the sidebearings (thick bars and numeric values) on the glyph canvas.
To hide them, move the Preferences > Grid, Guides and Hints > Font guide selector to the left half of the slider. You can also use the slider to generally make the inactive Metrics line (and the font guides) more or less visually subtle.
Metrics line and Spacing controls
If you have View > Metrics & Kerning > Spacing Controls turned on, the Glyph window canvas shows the numeric sidebearing values at the bottom of the current glyph in Metrics mode, and also in other Glyph window modes if Preferences > Spacing > Spacing controls show sidebearing values in editing modes is turned on.
In Bounding box mode, the sidebearing values are shown in black. New In Metrics line mode, the values are shown in violet.
Use Metrics line with Set sidebearings action
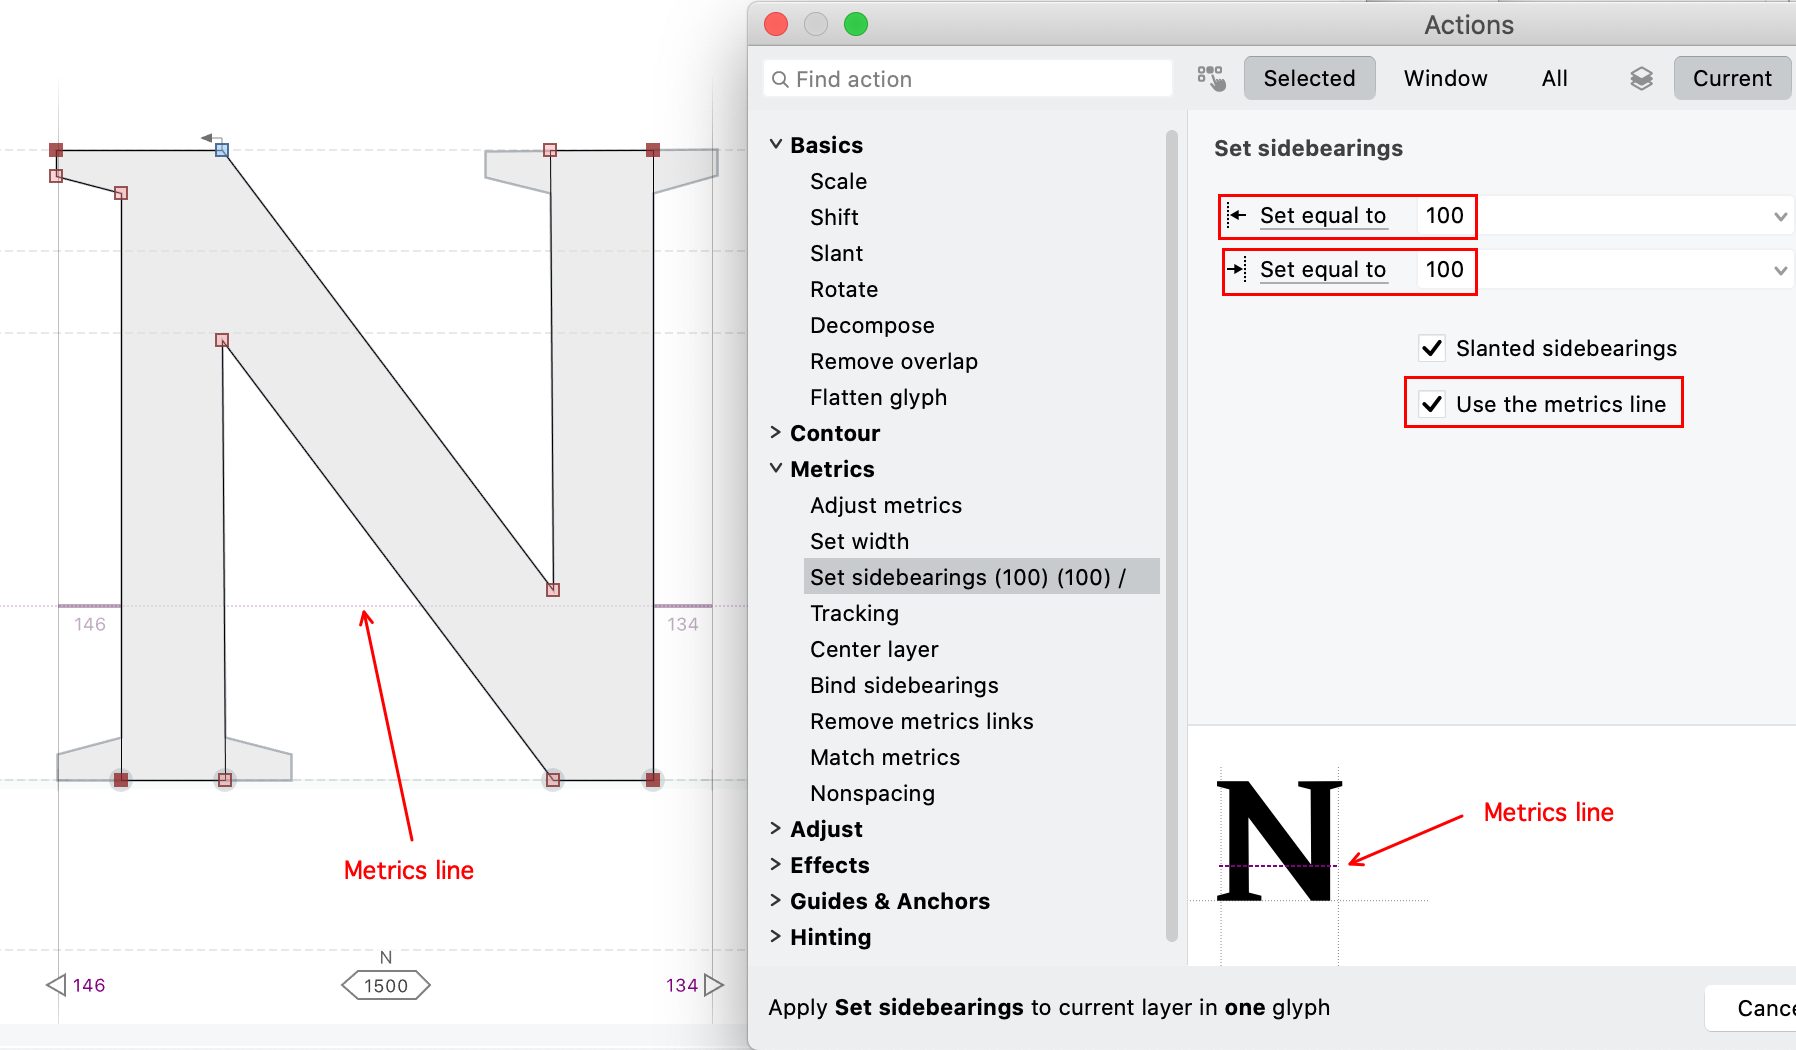
With Tools > Actions > Metrics > Set sidebearings, you can modify the sidebearings of multiple glyphs and layers: you can set a fixed value, adjust an existing value, or auto-space.
New If you choose Set equal to and turn on Use the metrics line, FontLab will apply the new sidebearing value at the intersection of the glyph content and the metrics line, regardless of whether the Metrics line is visible in the Glyph window or not.
Auto-spacing
In the Glyph window, if you tap the ; key (except in Kerning mode), FontLab will automatically calculate the sidebearings for the current glyph. With Font > Metrics > Auto Space, you can also do it for a Font window selection.
New In Preferences > Spacing > Autospace method, you can now choose the method which FontLab will use to automatically calculate the metrics:
- optical: FontLab analyzes the glyph shape and intelligently sets the sidebearings. This is mostly useful for the initial step of autospacing, which you may need to later refine.
- tight: FontLab sets both sidebearings to 0.
- custom: FontLab sets both sidebearings to the specified % of the UPM size.
The tight and custom methods always set the same fixed value. This is mostly useful if you are drawing, and tap ; to predictably set the initial sidebearings to a sensible value.
Whichever method you choose, FontLab always ignores elements and components that are set to Nonspacing in the glyph when it sets the sidebearings.
Editing of optical bounds
Sidebearings of a glyph are margins that are optimized so that as many glyph combinations as possible can be set without kerning. For example, the letter ”H” typically has relatively large (and often equal) sidebearings, so if you set two ”H”s next to each other, there is a clear gap between them. But if you set a large heading that starts with an ”H”, followed by a paragraph of small text that also starts with an ”H”, the left sidebearing of the heading will effectively be much smaller than the left sidebearing of the paragraph, so the heading appears indented.
To set the line edges in a more visually pleasing way, glyphs in a font can optionally have two additional margins, called optical bounds. These margins are intended to be used if a glyph is the first or last in a line. The optical bounds are usually much tighter than sidebearings. In OpenType, optical bounds are realized through the lfbd (left bounds) and rtbd (right bounds) features, which subtract a define distance from the sidebearing.
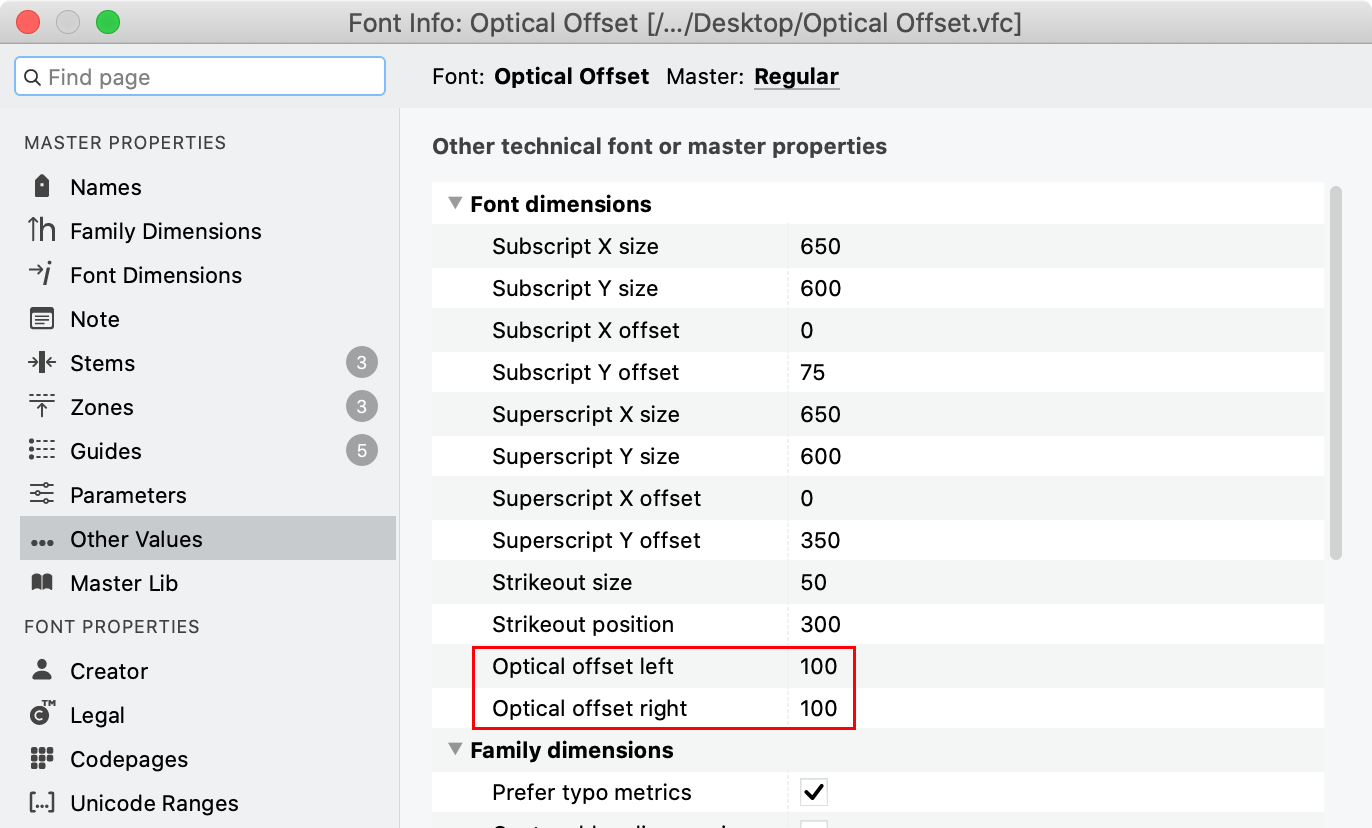
New In FontLab, you can now use Font Info > Other Values > Optical offset to define the left and right offset globally, for all glyphs in a master. The offset is the amoung of font units that are subtracted from each glyph’s left and right sidebearing. In many cases, the sidebearings of the letter ”H” measured without the serifs are a decent global value for sidebearings.
To override the left global optical offset in a glyph, place a vertical glyph guide named ol in the glyph at the position where the left optical bound should be. To override the right global offset, place an or glyph guide.
If the font includes these guides or the Optical offset values in Font Info are non-0, FontLab will generate the OpenType features lfbd and rtbd on export. If you open an OpenType font that includes these features, FontLab will import the values. If you open an AAT font that includes the opbd table, FontLab will also import these values, but FontLab won’t export an opbd table.
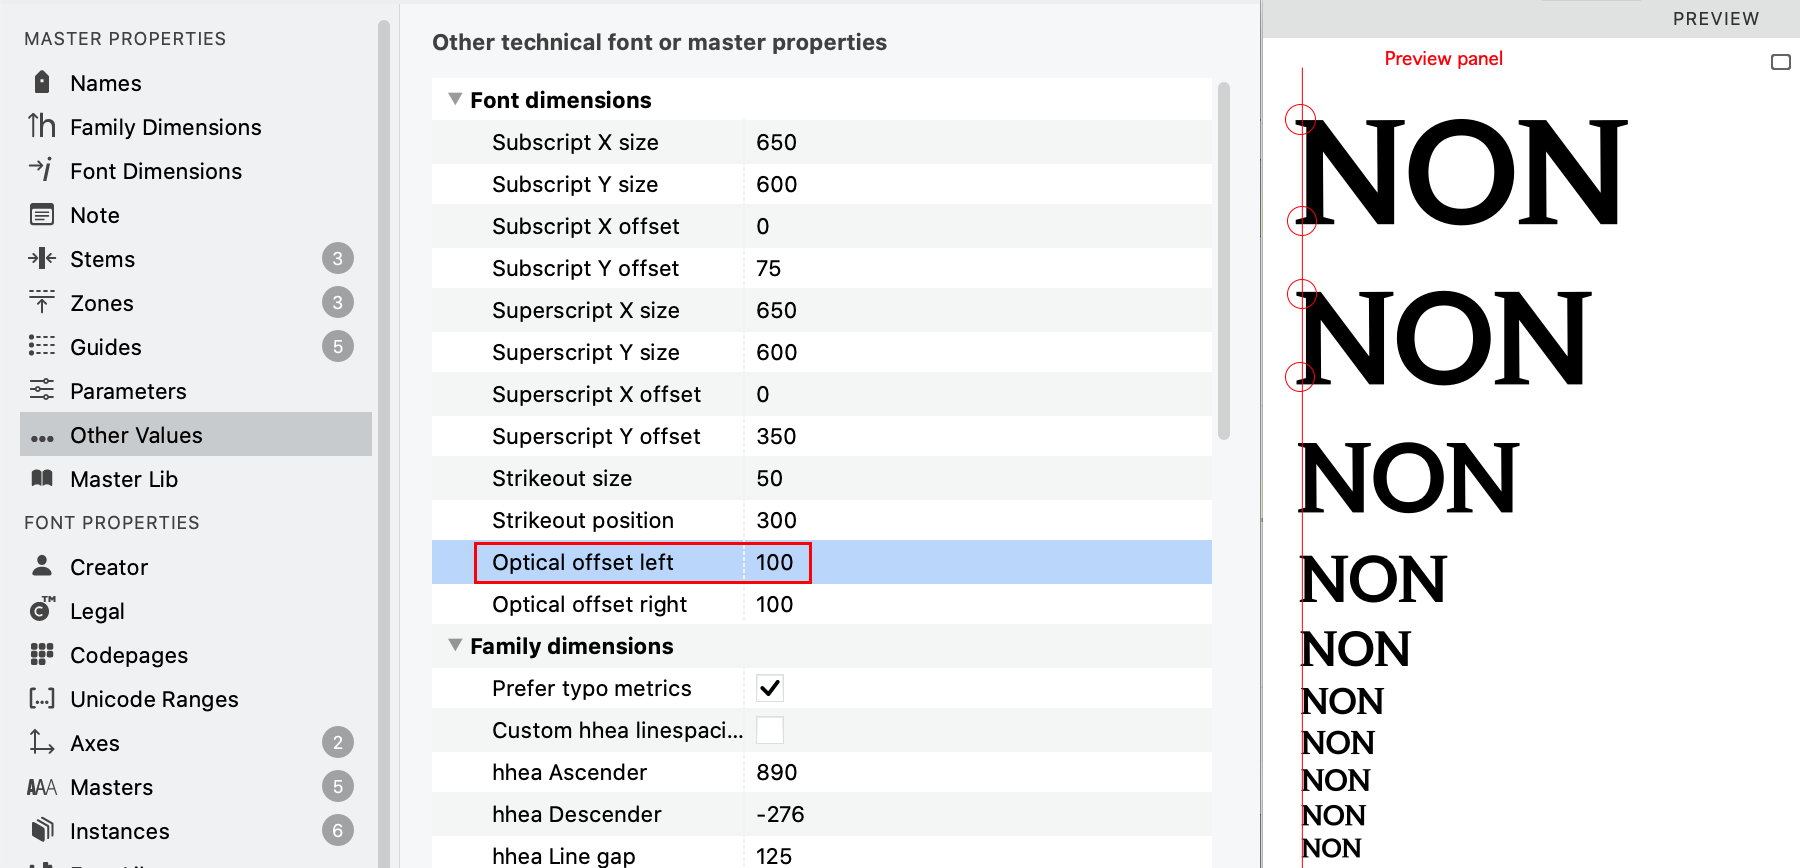
To preview the optical bounds in FontLab, open the Preview panel, choose Text waterfall in the sidebar, and align the preview text to the left or right.
Note
Most text layout apps don’t use the
lfbdandrtbdfeatures even if they’re defined in a font. But at the same time, very few fonts actually have these features, so it’s a bit of a chicken-and-egg problem. If more fonts have these features, app developers may be inclinded to add support for optical bounds.
New terminology and icons for kerning classes
New For kerning classes, FontLab now uses the terms Left class and Right class instead of 1st class and 2nd class.
A left class is used on the left side of the kerning pair, so it groups glyphs that share a similar design structure on their right side.
A right class is used on the right side of the kerning pair, so it groups glyphs that have their left side similar design-wise.
This change is necessary to properly support kerning in right-to-left (RTL) scripts like Arabic and Hebrew.
![]()
New The icons for left and right kerning classes are updated. They visualize two glyphs with a kerning pair between them:
- The icon for left kerning class has a small glyph drawing on the left side, and the right edge of that drawing has an irregular form.
- The icon for right kerning class has a drawing on the right, and its left edge has an irregular form.
Arrangement of kerning class assignment boxes
FontLab has a few places where you can edit the kerning class assignment for a glyph: in the Glyph panel, and in the Font window status bar. New By default, the UI arranges the kerning class assignment boxes by the design side similarity of the glyphs, analogically to sidebearings, but you can change this arrangement.
If Preferences > Spacing > Edit kerning classes by position in pair is turned off (default), FontLab follows the “design side similarity” logic: the class which groups glyphs with a similar left side (which was previously called “2nd class” and is now called “right class”) is shown on the left. The class called “left” which groups glyphs with a similar right side is shown on the right. This logically follows the glyph-centric display of the kerning class boxes. This arrangement should be familiar to users of font editors like Glyphs.
If Preferences > Spacing > Edit kerning classes by position in pair is turned on, FontLab follows the “position in pair” logic: the “right class” which is used on the right side of a pair is shown on the right. This arrangement should be familiar to users of FontLab 8.0 and earlier.
Our users have asked us to implement both approaches, so we have — but in the famous “ultimately customizable” FontLab fashion, you have the choice! The table below summarizes the settings:
| New name | Old name for LTR | Position in pair | Similar side | Shown if pref off | Shown if pref on |
|---|---|---|---|---|---|
| Left | 1st | left | right | right | left |
| Right | 2nd | right | left | left | right |
Kerning classes arrangement in Glyph panel
New In the Glyph panel, right and left kerning class are shown in one row.
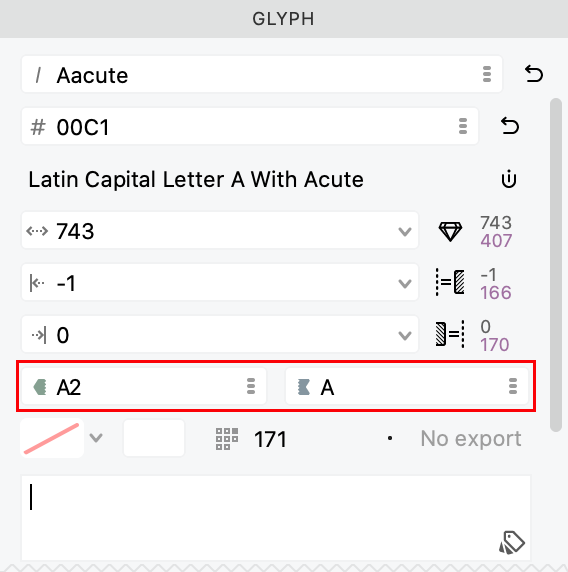
New By default, the Glyph panel uses the “design side similarity” logic, so the kerning class called “right” is shown on the left side. Turn on Preferences > Spacing > Edit kerning classes by position in pair to switch to the “position in pair” logic.
Kerning classes arrangement in the Font window

If View > Control Bars > Status Bar is turned on in the Font window, the bottom of the window shows info about the current glyph. New This status bar has a new layout, and by default uses the “design side similarity” logic for the kerning class assignment fields: editing field for the right kerning class is shown to the left of the right sidebearing, and the field for the left kerning class is shown to the right of the right sidebearing field.
The new default layout is decidedly glyph-centric. The class kerning fields are located at the side that corresponds to the side of the glyph which is similar to other glyphs in the same kerning class.
New Turn on Preferences > Spacing > Edit kerning classes by position in pair to switch to the “position in pair” logic.
Better editing of kerning classes
New You can now easily edit the assignment of glyphs to kerning classes in the Glyph panel and in the Font window status bar.
- New If the glyph is part of a kerning class, click the left or right kerning class icon in the panel or in the status bar to show the kerning class in the Classes panel.
- New To specify a kerning class for the current glyph in the current master, type a class name into the kerning class text field in the panel or in the status bar, and press Enter or click away the field. If the kerning class does not exist, FontLab will create a new left or right kerning class. If the glyph was assigned to another class, FontLab will remove it from that class and will assign it to the class you specified.
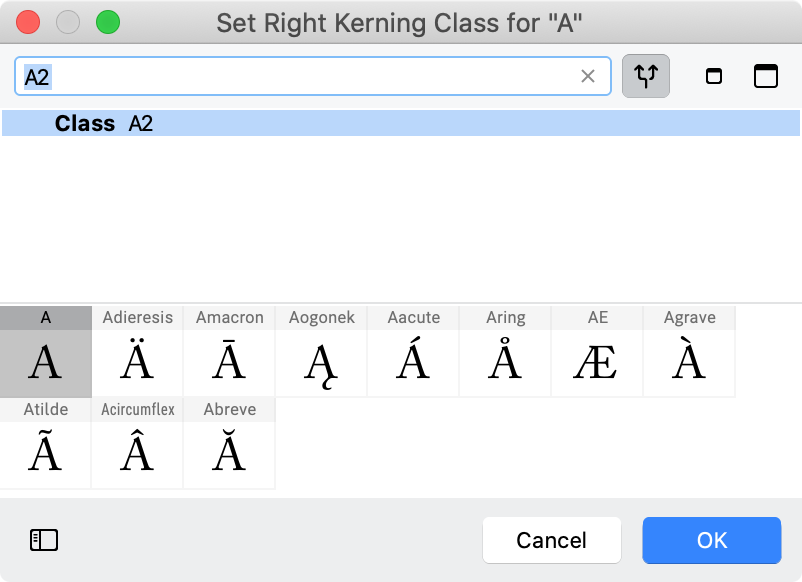
- New Click the … button in the panel, or click the class field in the status bar and then click the … button that appears, to open the Set Kerning Class dialog. In this dialog, you can add the glyph to a new or existing left or right kerning class.
- New The Set Kerning Class dialog now has a scrollable glyph map of glyphs that belong to a class, and you can change the cell size there.
If you create a new left kerning class, you cannot create a new right kerning class that has the same name, and vice-versa. Therefore, we recommend that you use a consistent naming scheme for your left and right kerning classes, for example L_A for the left class that groups A and glyphs that are similar on the right side, and R_A for the right class.
The kerning class fields in the Font window status bar only show kerning class assignments for the current glyph. The fields in the Glyph panel can show kerning class assignments for multiple glyphs that are selected in the Font window, and you can assign all selected glyphs to the same class in one go.
You can still use the Classes panel to edit kerning classes. There, you can also create left-and-right classes, which is not possible in the Glyph panel or in the Font window status bar.
Manually create class kerning exceptions
Note
This text follows the FEA feature syntax convention to use the
@prefix to denote a class. However, in the FontLab user interface, the@prefix is only shown in the Features panel.
If you have a kerning pair that has a class on either side (or both), you can create a class kerning exception for that pair.
Let’s say you have an @A kerning class that contains the glyph A and all accented derivatives of A, and you have an @Y kerning class that contains the glyph Y and all its derivatives. Type AY in the Glyph window, switch to Kerning tool and click the Y glyph.
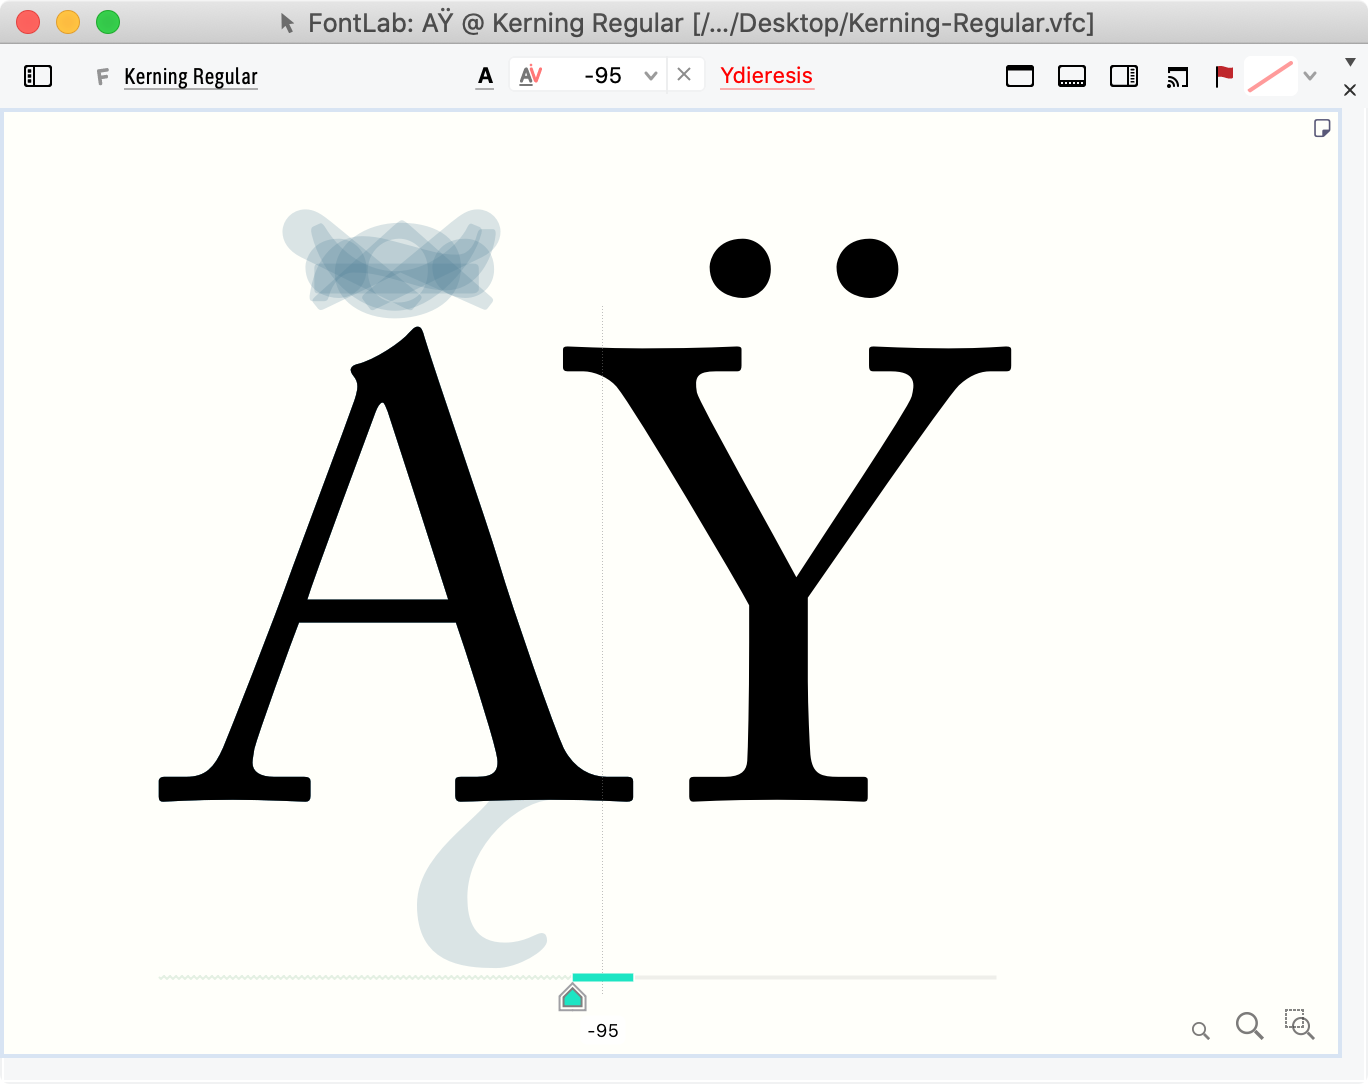
Since both glyphs belong to a kerning class, the AY pair that you see in the window represents the potential class-to-class kerning pair: @A @Y. In other words, the A glyph in the text represents the @A class, and the Y glyph represents the @Y class.
- Hold Ctrl and use the ↑/↓ arrow keys to switch the representative glyph for the left class.
- Hold Alt and use the ↑/↓ arrow keys to switch the representative glyph for the right class.
- Without Ctrl and Alt pressed, use the ←/→ arrow keys or drag the kerning control to change the class-to-class pair (
@A @Y). It doesn’t matter which representative glyph is in the text.
To create exceptions, use the Ctrl modifier for the left side of the kerning pair, and Alt for the right side, like so:
- Hold Ctrl and use the arrow keys or drag the kerning control create a glyph-to-class exception (
A @Y). New If you hold Ctrl and click, FontLab no longer shows the context menu if the Kerning tool is active. Right-click to open the context menu. - Hold Alt and use the ←/→ arrow keys or drag the kerning control create a class-to-glyph exception (
@A Y). - Hold CtrlAlt and use the ←/→ arrow keys, or drag the kerning control create a glyph-to-glyph exception (
A Y).
FontLab adds a new exception pair the moment you change the pair value while you’re holding Ctrl or Alt. If you do this, the new pair gets ”decoupled” from the class-based pair. Once you’ve added the exception pair, you can release Ctrl and Alt: drag or use ←/→ to change the value of the now-created exception pair.
Selective audit of kerning exceptions
Class-based kerning pairs may cause visual clashes in some combinations such as “Tî”. With Audit Exceptions, you can automatically find and fix these collisions.
- In Preferences > Spacing > Minimal distance for Audit kerning exceptions set the threshold value in % of UPM (so 1% is 10 units in a 1000 UPM font). A negative value means that the glyphs may overlap by a certain amount.
- Choose Font > Kerning > Audit Exceptions or New Alt-click the Kerning panel local menu (☰) and choose Audit Exceptions in All Pairs.
- New Alternatively, select some class-based kerning pairs in the Kerning, click ☰ in the Kerning panel and choose Audit Exceptions in Selection.
For all glyph combinations in all or the selected class pairs of the current master, FontLab will check if the smallest horizontal distance between the contours of both glyphs of the combination is less than the threshold. If FontLab finds any such combinations, it opens the Audit Kerning Exceptions dialog.
In the dialog, you can choose Review to open these combinations in a new Kerning window, so you can create some exceptions manually.
If you choose Add exceptions in the dialog, FontLab creates the new kerning exceptions and sets each kerning value so that the smallest horizontal distance between the contours of both glyphs is equal to the threshold.
Example: Let’s say you set the threshold to 10 units (1% of the UPM), and the @L_T @R_i class kerning pair has the value -30. If Audit Exceptions finds that the kerned glyphs T and icircumflex (Tî) overlap by 14 units (so their distance is -14), then Add exceptions will create a T icircumflex exception pair with the value -6.
Remove kerning pairs by specified criteria
In the Remove Kerning Pairs dialog, you can remove some kerning pairs from the current font master according to criteria you specify. To open the dialog:
- Choose Font > Kerning > Remove Pairs… to apply the criteria to all pairs in the current master. If you
- New Select some kerning pairs in the Kerning panel, and choose Remove Pairs… from the panel local menu to apply the criteria to the selected pairs, or turn on Apply to all pairs to apply the criteria to all pairs in the current master.
New To remove kerning exceptions that differ insignificantly from the class pair, open the dialog and use the new option Remove exceptions that differ from class pair by n units or less.
Kern to distance
New You can now add kerning pairs that ensure that the distance between two glyphs are equal to a defined number of units.
Select pairs or phrases in the Pairs & Phrases panel, Cmd/Ctrl-click the Auto button in the panel, and in the Kern to Distance dialog, specify the distance. FontLab will add or change the kerning value so that the smallest horizontal distance between the contours of both glyphs of the pair is equal to the specified distance. A negative value means that the glyphs may overlap by the specified amount.
Copy kerning class assignment between glyphs
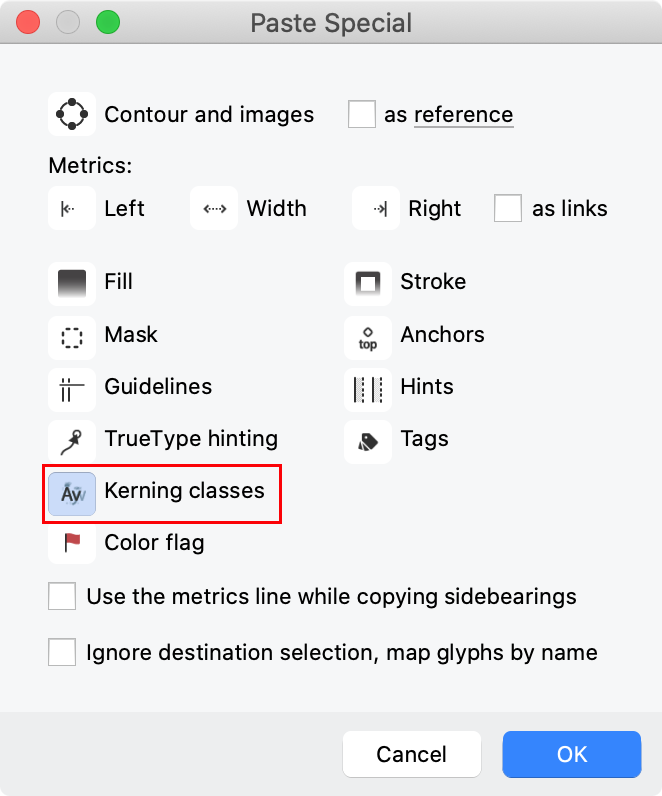
If you copy one or more glyphs in Font window, select other glyphs, then choose Paste Special…, turn on New Kerning classes and click OK, then for any source glyph that is part of any left and right kerning classes, the target glyph will also be placed in the same kerning classes.
If the source glyph is not in any kerning class, the duplicated glyph will not be placed in any kerning class.
Copy kerning classes between masters
New In the Classes panel local menu, you can now choose Copy Kerning Classes to Masters to copy all kerning classes of the current master to all other masters.
You can also click the new Copy to Masters button below the classes list to copy the selected kerning classes of the current master to all masters.
Better kerning matching across masters
If you have multiple masters, each master has its own set of kerning classes. If you use Font > Kerning > Match Kerning, FontLab makes the kerning multiple-master-compatible:
- Converts all class kerning into flat kerning.
- Synchronizes kerning classes: copies kerning classes from the main master (blue dot in Font Info > Masters).
- Equalizes the number of kerning pairs: adds 0-value kerning pairs in masters which don’t have a pair but another master has a given pair.
- Converts the flat kerning into class kerning using the synchronized classes.
New If you use Font > Kerning > Match Kerning for the first time, FontLab shows an explanatory dialog. If you use it again, FontLab no longer shows the dialog.
Right-to-left and bidirectional kerning in OpenType
OpenType fonts store kerning in GPOS table lookups. Each lookup for horizontal kerning has a flag that specifies the writing direction of the kerning pairs: left-to-right (LTR) or right-to-left (RTL).
Scripts that use the same writing direction may store kerning in the same lookup or in separate lookups. For example kerning for LTR scripts like Latin, Cyrillic and Greek may be stored in just one lookup. But kerning for RTL scripts like Arabic and Hebrew may not be stored in that same lookup, and needs a separate lookup that has the lookupflag RightToLeft enabled.
Kerning for scripts that use the same writing direction may be split into multiple lookups, each having the appropriate flag, but kerning for scripts that use different directions must not be mixed within one lookup.
So an OpenType font that has kerning for Latin, Cyrillic and Hebrew glyphs will need at least two kerning lookups: one for Latin and Cyrillic, and one for Hebrew.
Bidirectionality in Unicode
In Unicode, only some characters are associated with just one writing direction: Latin letters are always LTR, and Hebrew letters are always RTL, but digits or punctuation signs may be used in either direction.
The Unicode Standard categorizes characters used in horizontal writing into four directionality types:
| Type | Example |
|---|---|
| Strong | LTR or RTL: letters, characters that are used in one script only |
| Weak | LTR or RTL: numbers, some math signs, currency signs, nonspacing marks, some punctuation |
| Neutral | spaces, some separators, most symbols and punctuation |
| Formatting | small set of explicit directionality control codes |
Read more about Unicode directionality:
- Unicode Bidirectional Algorithm
- Unicode Character Database
- Unicode Script Property
- Bidirectionality in Microsoft apps
Visual vs. logical order of kerning pairs
Type design apps and font development tools have two competing paradigms for storing kerning pairs:
- Logical order is derived from the order in which the Unicode characters are written in the text.
- Visual order is the order in which the glyphs appear on the screen.
In early days of digital type design, not much thought was given to bidirectional kerning, and the “logical order” was implicitly the same as visual order.
Today:
- Logical order is still the same as visual order for the left-to-right scripts.
- For strong right-to-left characters, the visual order is the opposite of the logical order.
- For weak and neutral character types, the visual order is ambiguous.
Some source font formats store kerning in logical order, some store it in visual order. Apps and tools that convert between OpenType fonts and source formats need to take this into account, but some don’t.
This is a non-extensive summary of how formats store kerning:
| Format | Storage |
|---|---|
| OpenType | Separate storages by direction |
.vfj, .vfc |
Single visual storage |
.ufo 4 |
(Planned) single visual storage |
.ufo 3 |
Single logical storage, which is ambiguous for neutrals |
.ufo 2 |
Single visual storage |
.glyphs 3 |
Separate storages by direction |
.glyphs 2 |
Single logical storage, which is ambiguous for neutrals |
.vfb |
Single logical storage, which is ambiguous for neutrals |
The OpenType format has separate kerning storages by direction. In theory, it’s possible to define the AV pair with one value for LTR, and another value for RTL. In practice, the RTL AV pair would never be used, because both A and V are glyphs that represent strong LTR script, so only the LTR storage (lookup) would be used by a typesetting app.
The .vfb, .glyphs 2 and .ufo 3 formats use one storage in logical order. It’s easy to convert the kerning into OpenType kerning for strong glyphs. Pairs with weak and neutral glyphs are ambiguous: it’s not completely clear which order should be assumed in the single storage.
New If you open files in .vfb, .glyphs 2 or .ufo 3 format, FontLab applies certain heuristics (guesswork) to detect pairs that should be RTL, and converts them from logical to visual order.
New If you export files into .vfb, .glyphs 2 or .ufo 3 format, FontLab converts the RTL pairs from visual to logical order.
The .glyphs 3 format uses separate storages by direction. This makes it easy to convert the kerning into OpenType kerning for all glyphs, but requires designers to pay attention to the directionality of the glyphs when they define the kerning pairs, and makes it necessary to define the weak and neutral glyph pairs twice: once for LTR and once for RTL. It’s easy to make a mistake and define the visually same pair twice, but with different values.
New If you open files in .glyphs 3 format, FontLab converts the RTL pairs (stored in the kerningRTL key) from logical to visual order. If the same visual pair is defined in both LTR and RTL .glyphs storage, FontLab favors the LTR pairs.
New If you export files into .glyphs 3 format, FontLab converts applies heuristics to determine which pairs are RTL, converts them from visual to logical order and stores them in the RTL .glyphs 3 storage.
In late 2022, the topic was widely discussed among font technology professionals. The majority agreed that visual order is more predictable and easier to handle, especially for glyphs representing characters with weak and neutral directionality type.
FontLab follows this agreement, and stores all kerning in one storage, in visual order. The planned .ufo 4 format will also store kerning in visual order, like the .ufo 2 format did.
Right-to-left text in Glyph window
If you enter Arabic or Hebrew text into the Glyph window siebar or Text Bar, then by default, Glyph window will show the text in left-to-right order.
New If you turn on Text > Right to Left, FontLab will perform a live on-the-fly reversal of the Glyph window text, so the input text will be shown in the right-to-left order. This is independent of the script of the text: if you enter the text TYPO and turn on Right to Left, the Glyph window will show OPYT, and if you turn Right to Left off, the window will show TYPO.
If you turn on feature processing and enter text in a script like Arabic, the text will be shown right-to-left regardless of the Text > Right to Left setting.
Right-to-left kerning support
New FontLab 8.2 adds support for kerning in RTL scripts like Arabic and Hebrew.
The Glyph window and the Kerning panel display the pairs in visual order. The left side of a pair always shows the glyph or class that will be visually on the left side in typeset text, and the right side of the pair shows the visually right glyph or class.
If you enter Arabic or Hebrew text into the Glyph window, the glyphs will be rendered in the left-to-right direction by default. To display the text in right-to-left order:
- Turn on Text > Right to Left. This will reverse the sequence of the glyphs in the Glyph window, for any writing system.
- Alternatively, turn on Apply OpenType features and Unicode script processing in the Glyph window sidebar or in the Text mode property bar. This activates full Unicode and OpenType text processing for the Glyph window text. When this setting is turned on, FontLab renders scripts like Latin in left-to-right direction, and scripts like Hebrew in the right-to-left direction.
If you have a font that has kerning for scripts that run in different horizontal directions, and you export it into OpenType, FontLab will produce two kerning lookups: one for left-to-right and one for right-to-left. If you export the font into other formats like .glyphs or UFO, FontLab will export the right-to-left kerning in the most suitable form for the format.
Families & variation
FontLab is uncompromisingly variable-first.
Easily create large font families and variable OpenType fonts, interpolate and extrapolate fonts, create intermediate weights and styles, and add conditional glyph substitutions. Work on multiple masters at once, and perform automatic masters matching for point-compatible outlines. Dynamically preview interpolation with sliders, variations map and play/pause buttons — right in FontLab, without extra tools or plugins.
New FontLab 8.2 makes adding of simple variation easier, and extends support for conditional glyph substitution to features other than
rvrn.
Apply Glyph menu operations to current master or all masters
If Edit > Match when Editing is turned off and you enter the Glyph menu, the menu will have three commands:
- Auto Layer: click to toggle the auto layer status (automatic building of composites) of the current layer
- Decompose Layer: click to convert all components in the current layer into simple contours
- Flatten Layer: click to convert all components and filters in the current layer into simple contours
If you hold Alt and enter the Glyph menu, these commands will have the suffix Glyph, not Layer, and will affect all masters.
New If you turn on Edit > Match when Editing and enter the Glyph menu, the menu will have Auto Glyph, Decompose Glyph, Flatten Glyph by default, and these commands will affect all masters.
If you hold Alt and enter the Glyph menu, these commands will have the Layer suffix and will affect the current layer only.
Copy dimensions to other masters
New In the Font Info dialog, the Family Dimensions and Font Dimensions pages now have Copy to masters buttons next to all dimensions, like Ascender, Line gap, Caps height, Caret offset etc.
Change a dimension in one master, and click Copy to masters next to it, and all masters get the same value.
Better automatic panning of Glyph window
With View > Center Glyph or Pair, you can control how FontLab automatically pans (horizontally scrolls) the Glyph window to ensure that your current glyph or selection is visible. This works depending on the zoom level, and is especially important when your Glyph window text has more than one glyph.
-
If View > Center Glyph or Pair is turned on, the panning is “eager”. The Glyph window scrolls left/right whenever you switch to a different glyph. If the zoom level allows for entire glyphs to fit, the Glyph window will center around the new current glyph. This ensures that your current glyph is always as visible as possible, but results in more “jumpy” experience.
-
If View > Center Glyph or Pair is turned off, the panning is “lazy”. If the zoom level allows for entire glyphs to fit, the Glyph window only scrolls left/right if you switch to a glyph that’s not fully visible. If the zoom level is closer, the Glyph window only scrolls if you switch to a glyph that’s not visible at all.
If the Contour tool is active and you make a contour selection, and you switch to a different matching master, or you change the current #instance layer with the Variations panel, the Glyph window tries to keep the corresponding selection, and New horizontally pans to make sure that the selection is visible.
Add variation quickly
With Font > Add Variation, you can quickly add another master as the duplicate of the current master, and add a variation axis.
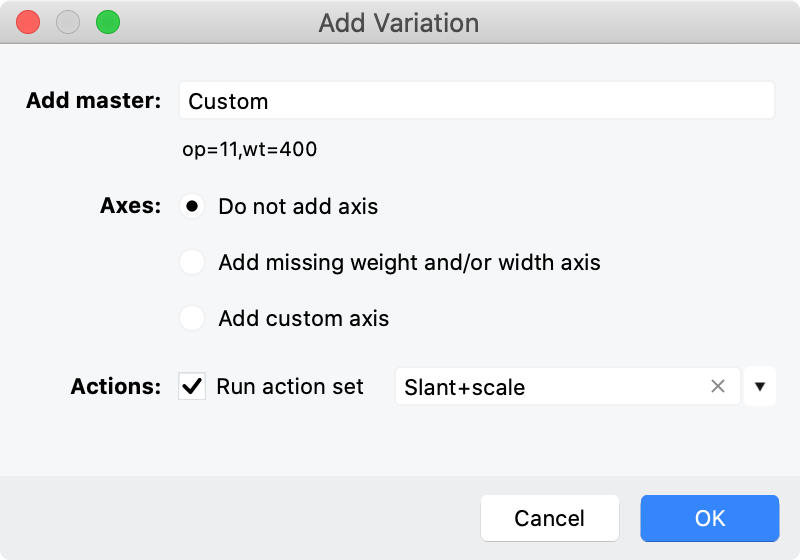
New If you first create and save some action sets in Tools > Actions, and then choose Font > Add Variation, you now turn on Run action set and choose any of the saved action sets. If you click OK, FontLab will run the action set on the new master.
Conditional glyph substitution with features other than rvrn
In variable font projects, you may want to use different glyphs in different regions of the design space. For example, you may want to use a fundamentally different glyph design for the dollar sign in the lighter weights, and a different glyph for bolder weights.
You can achieve this with conditional glyph substitution. For this, you need at least a default glyph and a conditional glyph. The default glyph (for example dollar) will be used the part of the design space which includes the default instance. The conditional glyph (for example dollar.bold) will be used in some other part of the design space.
Both glyphs that participate in conditional glyph substitution must be present in your font, and you can use them in other OpenType features. If you want kerning, you need to assign them to kerning classes, and kern them as you wish. You can only specify conditional glyph substitutions where one glyph is replaced by another glyph. To use ligature substitutions, you need to manually write the conditions into the GSUB table using the TTX notation in the Tables panel.
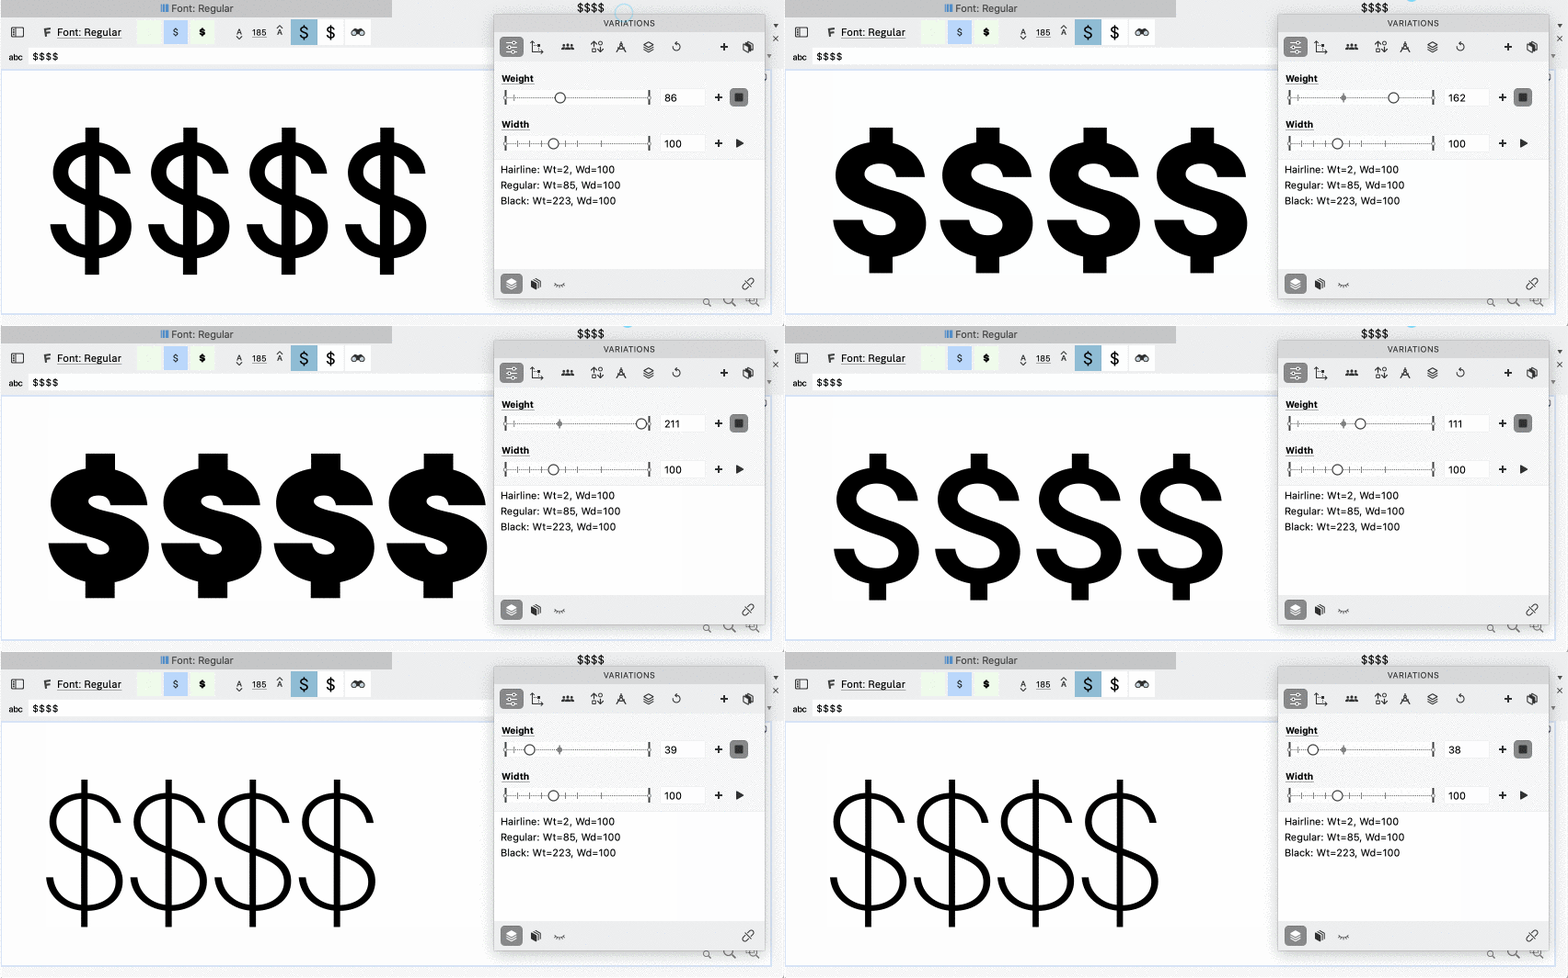
You need to assign conditional tags to each conditional glyph. Select the conditional glyphs in Font window, then:
- Open the Classes panel, switch to Tags, add a tilde tag that describes the condition (see below) and drag-drop the selected glyphs from the Font window.
- Alternatively, open the Glyph panel, and in the Glyph tags field, type the title tag prefixed by
+to assign the tag to the selected conditional glyphs.
A conditional tag is a concatenation of three parts: defaultglyphname, prioritymarker and conditionset. For example, the tag for the conditional glyph dollar.bold could be dollar~wt>820&wd<110 or ~wt>820.
defaultglyphname is the name of the default glyph (for example dollar). If it’s absent, the conditional glyph’s name without the suffix will be used. So if you assign the tag ~wt>820&wd<110 to the glyph dollar.bold, FontLab will replace the glyph dollar with the glyph dollar.bold if the Weight axis value is 820 or more and the Width axis value is 110 or less.
prioritymarker can be:
~if the substitution should be done before all other substitutions (we sometimes call such conditional tags “tilde tags”)- New
^if the substitution should be done after other substitutions (see below).
conditionset is one or more condition expression, concatenated with &, so: condition&condition..., for example wt>820&wd<110.
Each condition can have the form either ax>min or ax<max or min<ax<max or max>ax>min, where:
axis the axis code (likewtfor Weight),minandmaxare axis locations expressed in design coordinates, same as master and instance locations.>and<actually inclusive, so they are equivalent to the mathematical ≥ and ≤ operators.
To specify a conditionset for multiple axes, so that the conditional substitution happens only in a region enclosed by multiple axes (logical “and”), concatenate (glue) multiple condition expressions (one per axis) with &. One axis code can only appear once in a tilde tag, so use the 200<wt<700 form rather than wt>200&wt<700.
To specify a conditional substitution that happens if one conditionset is met or if another other conditionset is met, add multiple space-separated conditional tags, one per conditionset.
For example, to replace e with e.ss04 if the weight axis is 820 or more and the width axis is 110 or less, or if the weight axis is 750 and the width axis has any value, enter +~wt>820&wd<110 +~wt>750 in the Glyph tags field of the Glyph panel for the e.ss04 glyph.
If the prioritymarker is ~ (“tilde tag”):
- If you export static fonts (instances), FontLab performs the conditional substitution by remapping Unicode codepoints in the affected instances, but does not rename the glyphs.
- If you export DesignSpace + UFO, FontLab converts the conditional tag into the
ruleselement. - If you export a Variable TT or Variable PS font, FontLab converts the conditional tag into the
rvrnfeature. OpenType engines apply this feature before all other substitutions, so the default glyph of a~conditional tag must have a Unicode codepoint.
New If the prioritymarker is ^ (“caret tag”):
- If you export instances, FontLab does not perform any conditional substitution
TO TEST. - If you export DesignSpace + UFO, FontLab converts the conditional tag into the
ruleselement with theprocessing="last"attribute. - If you export a Variable font, FontLab converts the conditional tag into the
rcltfeature.
You can specify a different feature to be used for ^ conditional tags. For example, if you’d prefer the ^ conditional substitutions to work in the calt, add "com.github.fonttools.varLib.featureVarsFeatureTag": "calt" to Font Info > Font Lib.
Some OpenType engines apply the rclt feature after other substitutions, so default glyph for a ^ conditional tag could be any glyph, for example a glyph that is the result of another substitution.
However, some OpenType engines only apply conditional substitutions associated with the rvrn feature. The ~ conditional substitutions work in more environments, and work with static instance fonts.
Set variation location when you add a new layer
FontLab has several ways to create a new layer in one or more glyphs, and to optionally also add a font master, which will hold separate Font Info data and kerning.
With the following techniques, you can add a new font master, and optionally fill its glyph layers with the content of another font master:
-
Font > Add Variation is the fastest way to duplicate the current font master (including all its font master data, and its glyph layers). Here, you can also quickly run a predefined action set.
-
The + button in the bottom-left of the Font Info dialog gives you a few more choices. Here, you can add a new font master, and you can specify how to create the layers in the new glyphs. You can create a new font master with default font master data, and copy the glyph layers from the current master, or create glyph layers with no content, or not create any glyph layers. Or you can copy an existing font master (even from another font), including all its font master data, and its glyph layers.
With these techniques, you can create new glyph layers, and optionally a font master, which will contain interpolated content that will reflect the current dynamic instance (the #instance layer):
-
With the Add glyph master (+) button in the Variations panel, you can add glyph layers (but no font master) to the selected glyphs. The layers will contain the current dynamic instance selected in the panel. This is useful to create intermediate glyph masters in only a few glyphs.
-
With Font > Generate Instance or with the Add current instance as font master button in the Variations panel, you can add a font master that will reflect the current dynamic instance selected in the panel, including interpolated kerning, interpolated Font Info data, and the interpolated variation location.
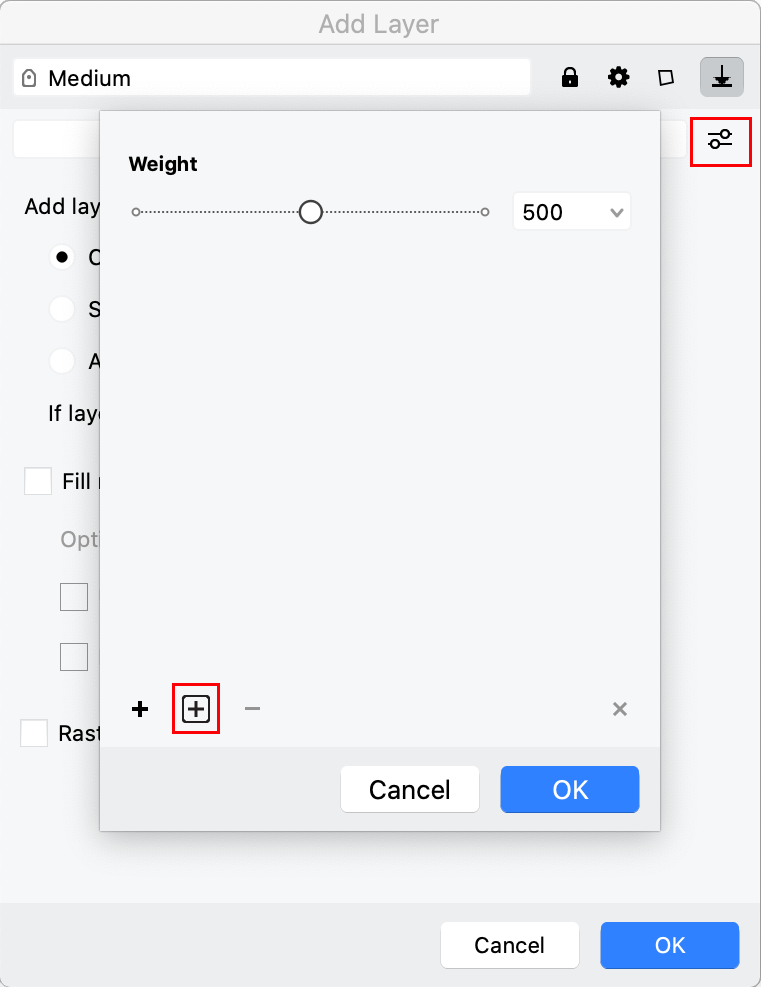
Finally, the most advanced way to create new glyph layers and font masters is to use Glyph > Layer > Add…, or the Add layer button in the Layers & Masters panel. This offers all choices available in the methods described above. It opens the Add Layer dialog, where you can:
- specify the name of the new layer (and optionally font master)
- set the lock, service and wireframe properties of the new layer
- New can specify the location of the new layer in the variation space
- choose to add the new layer in the current glyph, selected glyphs, or all glyphs and optionally to also add a font master
- decide what should happen if the same-named layer already exists in a glyph
- optionally fill the new layer with the content of another master from the same or different font, or with the currently selected dynamic instance
- if you use element references, and you’re adding the new layer to some glyphs but that layer already exists in other glyphs, you can change the references to point to elements that already exist in the layer
- create a bitmap layer that will contain rasterized content at a specified PPM
Better Layers & Masters panel
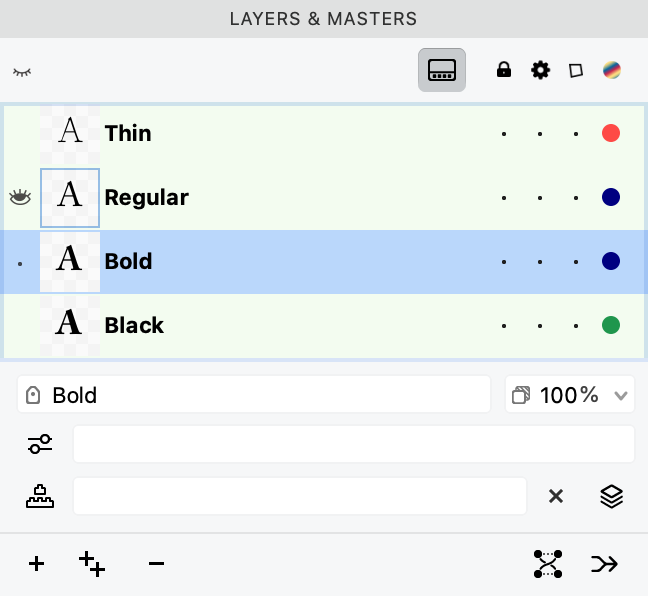
New If a layer is not set to visible, the visibility column in the Layers & Masters panel shows a blank space instead of a closed eye, to minimize visual noise.
New If you turn on the Block reordering and removal of layers toggle, you will not be able to change the order of the layers in the panel, or remove them.
New The icons in the panel are slightly larger.
Test & adjust
FontLab helps you rapidly iterate your projects towards the ideal, and test-drive them in real-world environments.
Automatically find and fix problems, optimize contours, tweak tension and curvature, overlap & merge paths, and apply non-destructive tweaks like rounded corners and Delta adjustments. Change weight, convert contours, or creatively transform glyphs. Preview current or custom text in multiple masters and multi-size waterfalls. With FontLab’s built-in genuine HarfBuzz and Microsoft ClearType, complex-script features and Windows screen rendering are the real deal. In FontLab, any glyph map, glyph or custom text can be printed or exported to PDF.
New FontLab 8.2 has new FontAudit detection and fixing of short segments, new creative Warp and Scribble & Strokes actions, redesigned Preview panel, improved power guides, and easier copying of Delta filter to other masters.
Better Transform panel
In the Transform panel:
- New Click the downward arrow on the right side of the Rotate, Horizontal slant or (if you make the panel wide enough) Vertical slant fields to open a visual control. Drag the arrow in the control to adjust the transformation.
- Click the % dropdown to change how the Horizontal scale and Vertical scale works. Choose % to use relative scaling in percent, or u to use absolute scale in font units. New The panel now has a single %/u dropdown that applies to both horizontal and vertical scale.
Multiple-master actions
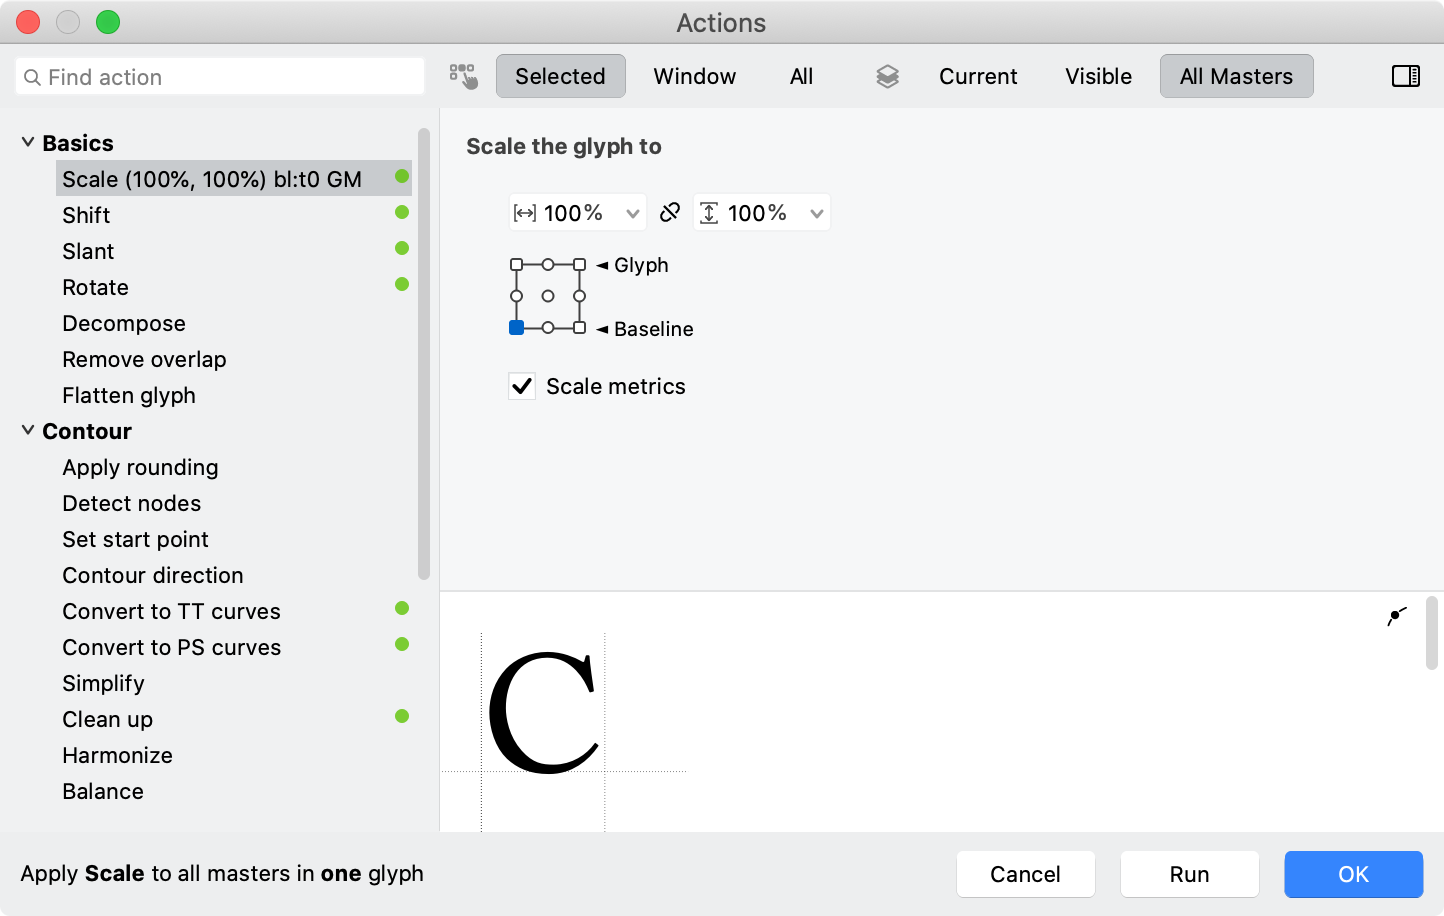
New If you open Tools > Actions, and as layers you choose All Masters, some actions in the list will have a green dot.
Each of these actions is “multiple-master-compatible”: if the current masters are matching, the results of running the action will also match.
New Scribble & Strokes effect action
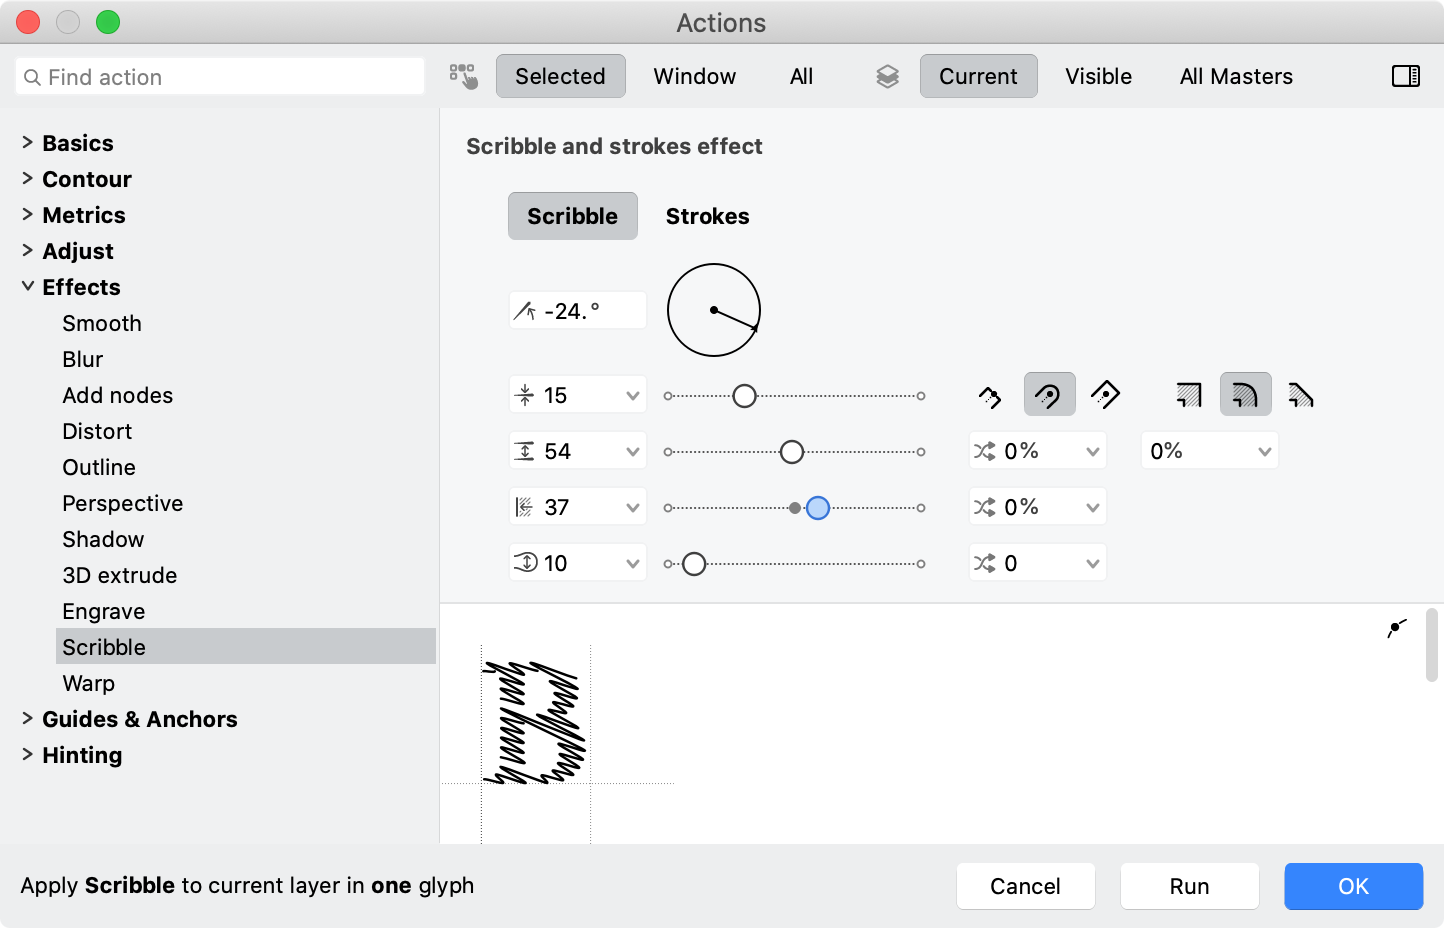
New With the Scribble & Strokes action, you can replace the existing glyph contours with open contours that have an editable Stroke applied.
The action has two modes: Scribble and Strokes.
- Scribble draws an open contour in the shape of a “slalom curve” inside each closed contour.
- Strokes draws a set of “halftone lines” inside each closed contour.
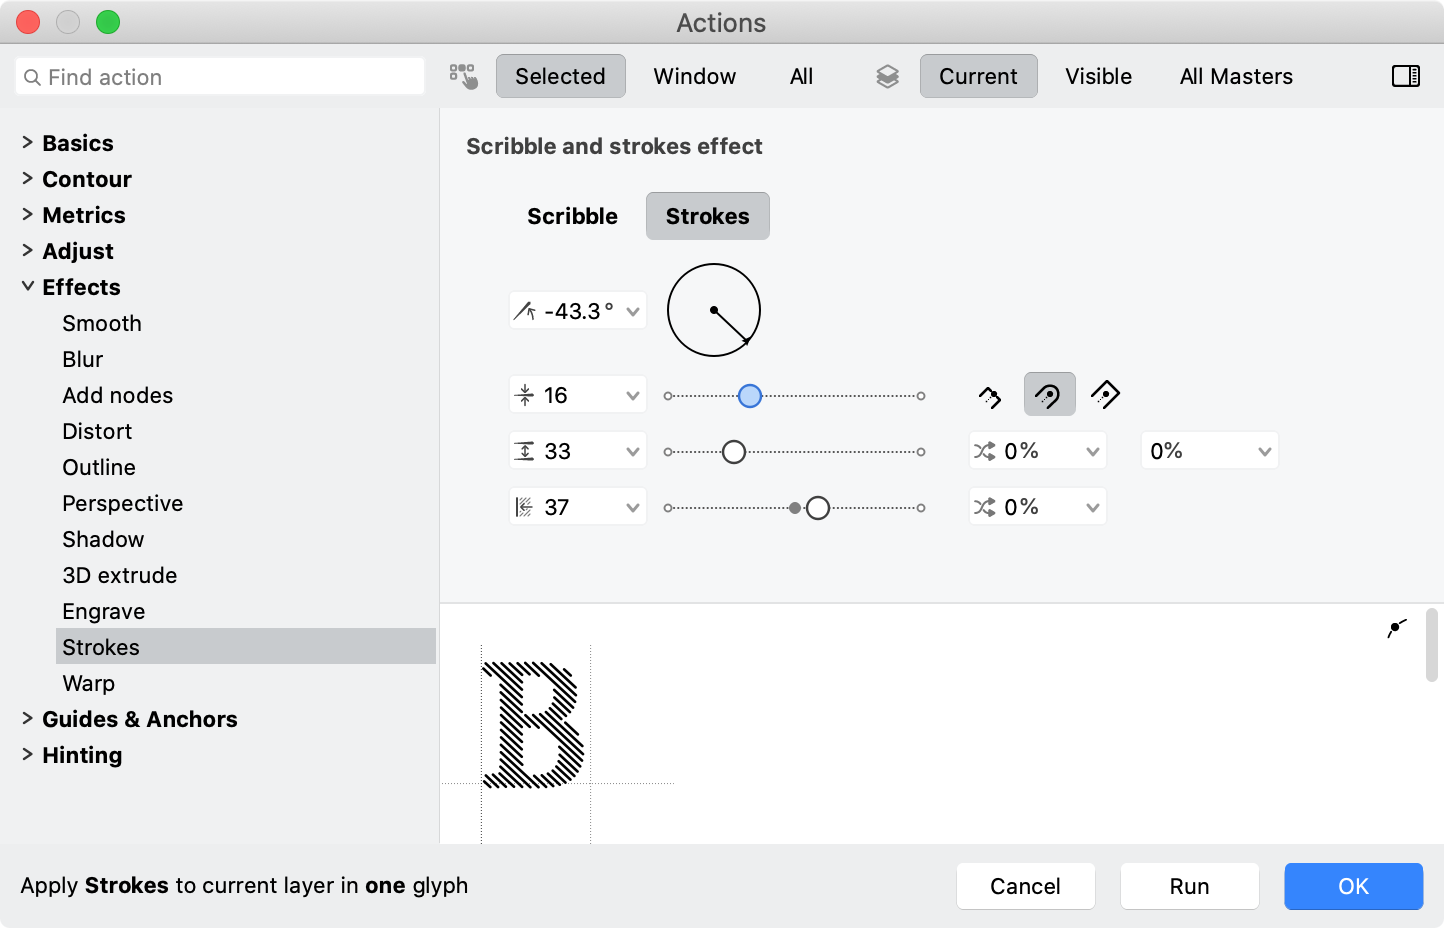
You can set the Angle, stroke Thickness, Gap and Indent of the new contours.
The action removes the original contours. The new contours are open, and they have a Stroke applied. You can edit the Stroke, and you can edit the contours.
New Warp effect action
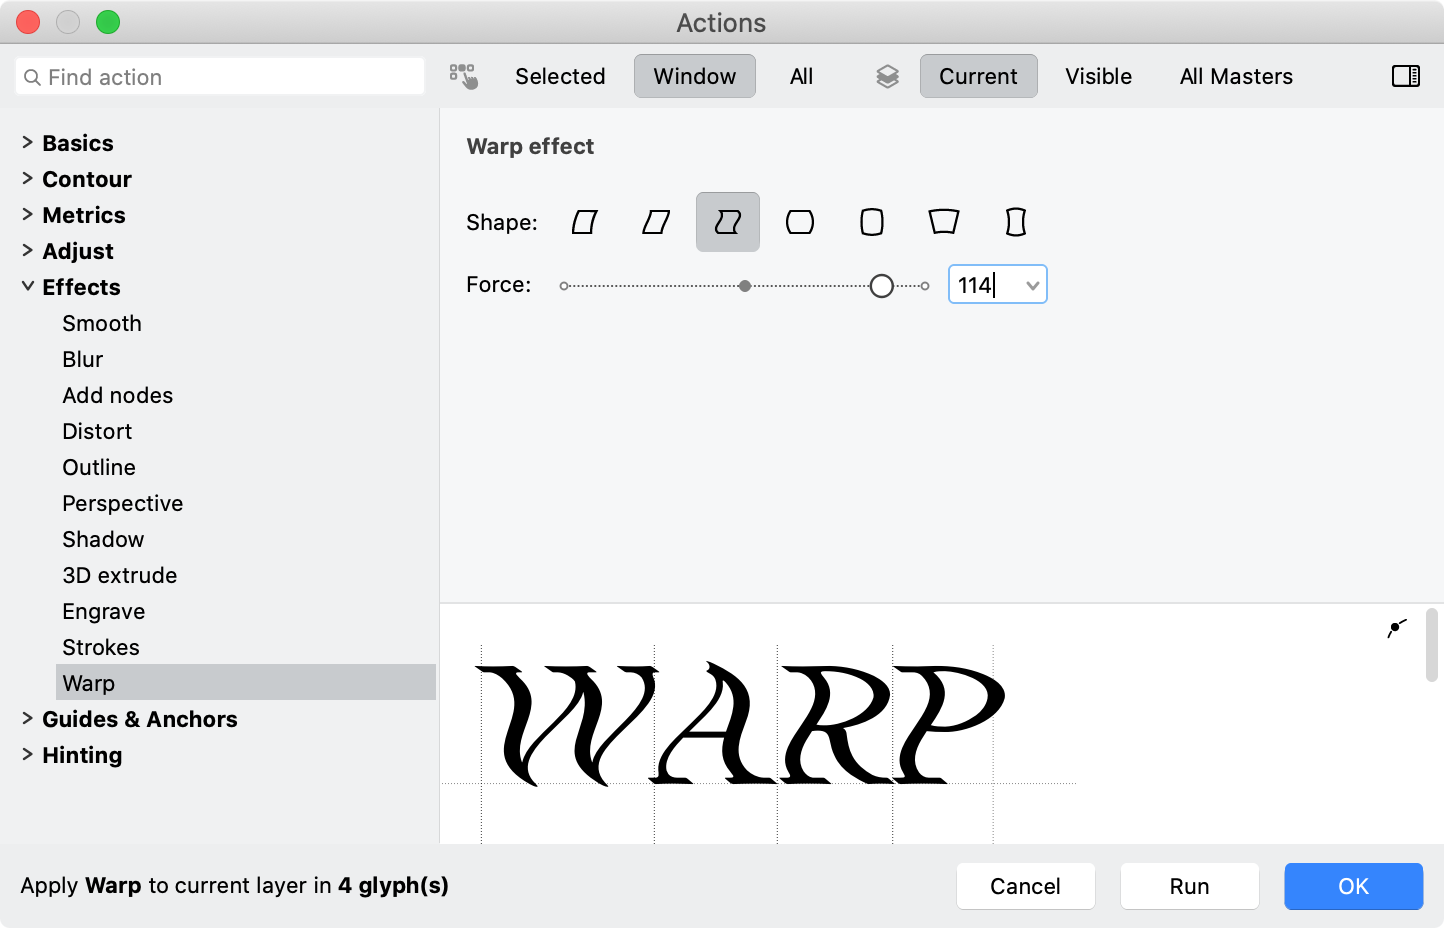
New With the Warp action, you can apply a geometric bending effect to the contours. Warp is similar to Perspective but the warp box uses curved edges.
Better FontAudit
New FontAudit now has a new Short segment test, which detects segments that are shorter than the per-master Font Info > Font Dimensions > Ink trap width value.
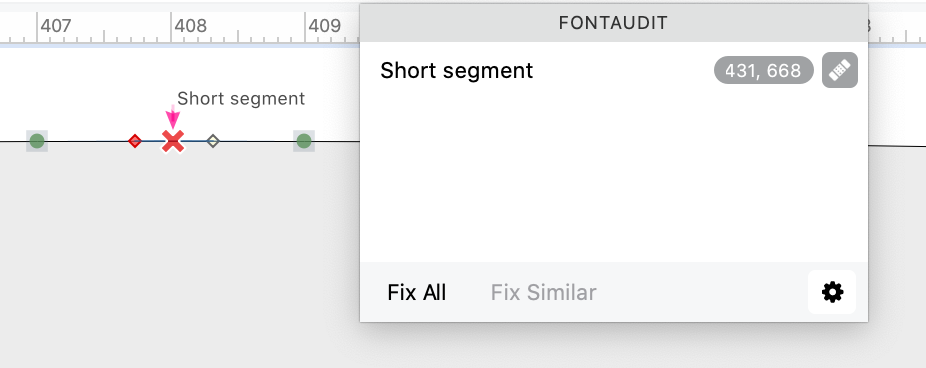
If you turn on Short segment in Preferences > FontAudit or in the gear menu of the FontAudit panel, FontLab shows the results of the test for the current glyph window in the FontAudit panel, and if you also turn on View > Contours > FontAudit, also in the Glyph window.
If you Fix the Short segment problem, FontLab collapses the short segment nodes (moves them into the same location).
New Use Tools > Actions > Contour > FontAudit fixes to fix the problems in many or all glyphs and masters.
Various UI places show a list of currently active FontAudit tests: the Glyph window FontAudit popups, the Select tests dropdown in the FontAudit panel, the Preferences > FontAudit section, and the Tools > Actions > Contour > FontAudit fixes page. New Those lists of tests now have a search box that you can use to filter the tests shown. Click the Sort tests alphabetically button to change the order of the tests.
Better power guides
If you link some nodes to a guide, the guide becomes a “power guide”: if you drag the guide, the linked nodes follow the move, and unlinked nodes adapt their position. You can make any FontLab guide into a power guide: an element guide, a glyph guide, a hint, a font guide, or a zone. New If a guide is a power guide, it has a rhombus indicator.
To make power guides (link nodes to guides):
- Drag a node to an existing guide with the Magnet tool to manually link it to the guide.
- New Choose a guide and choose Make Power Guide from the context menu, or click the Make Power Guide button from the Glyph window property window, to link nearby nodes to the guide.
- New Double-click a guide with the Magnet tool (U) to link nearby nodes to the guide.
- New Select one or more guides and choose Tools > Guides > Make Power Guides to link nodes to the nearby selected guides.
- Choose Tools > Guides > Add Power Guides to automatically create element guides in the current glyph layer or in the selected Font window cells, and to link nearby nodes to them.
- Choose Tools > Actions > Guides & Anchors > Add Power Guides to automatically create guides in the specified glyphs and layers, and to link nearby nodes to these guides, or to existing glyph guides, font guides, or zones.
To unlink nodes from power guides:
- Drag a node to the canvas with the Magnet tool to unlink that node from a power guide.
- New Double-click a power guide with the Magnet tool to unlink all nodes from it.
- Choose Tools > Guides > Unlink Power Guides to unlink nodes from power guides in the current glyph layer.
- Use Tools > Actions > Guides & Anchors > Unlink Power Guides to unlink nodes from power guides in one or more glyphs and layers.
New As you drag a horizontal or vertical power guide, the Glyph window will show the distance by which you’ve dragged it (and the linked nodes) if you turn on View > Measurements > Quick Measurement, or if you turn on Auto-meter for stem widths or Auto-meter for counters in the View panel or in Preferences > Glyph Window.
Better Delta filter
The Delta filter is a new way to non-destructively transform contours that goes beyond simple scale, rotate or slant. With the Delta filter, you can move a few nodes in a contour to new positions and have all other nodes adapt (interpolate) their positions accordingly. This is a non-destructive transformation: you can still make edits to the underlying contour, and FontLab applies the Delta transformations on top of those edits.
If your glyph has a Delta filter and it is active:
- You can use the Glyph window property bar to edit the relative value of the delta on any point (how many units the point is shifted) or New the absolute position of the final point.
- New You can click the Copy to masters button in the Glyph window property bar, and then choose Copy to all compatible masters. FontLab will apply a delta filter with the same settings to all other matching masters for the glyph.
Wrap text in Glyph window
New In Preferences > Glyph Window > Text layout, you can now set the defaults for Glyph window text wrapping.
Note
See the “Exporting artwork” section of this document for more info about previewing and printing.
Redesigned Glyph window sidebar
Click the Content sidebar icon in the Glyph window property bar (the leftmost icon) to open the sidebar. In the Glyph window sidebar, you can edit the Glyph window text (using the “glyphtext” notation), perform case conversion, choose from predefined texts, change the text point size.
New Click the Layout toggle, to show or hide fields that you can use to:
- Change the visual tracking and linespacing of the text, which only applies to the text shown in the window, so it simulates tracking and linespacing changes made in end-user apps.
- Toggle the right-to-left rendering of the Glyph window text.
- Switch between the wrapping modes of the Glyph window (same as Text > Wrap).
Click the Features toggle to activate OpenType features and Unicode script processing. This activates full Unicode and OpenType text processing for the Glyph window text. When this setting is turned on, FontLab renders scripts like Latin in left-to-right direction, and scripts like Hebrew in the right-to-left direction. If you click Compile features, you can apply OpenType features to the text. New If the toggle is turned off, the features selector is hidden.
Better Text tool
If you enter Arabic or Hebrew text into the Glyph window sidebar or Text Bar, then by default, Glyph window will show the text in left-to-right order.
New If you turn on Text > Right to Left, FontLab will perform a live on-the-fly reversal of the Glyph window text, so the input text will be shown in the right-to-left order. This is independent of the script of the text: if you enter the text TYPO and turn on Right to Left, the Glyph window will show OPYT, and if you turn Right to Left off, the window will show TYPO.
New The current glyph in the Text mode is now the glyph to the right of the text cursor. Previously, it was the glyph to the left of the cursor, but this was causing some issues.
New The Text mode cursor is visible even if the Glyph window canvas does not have focus.
Redesigned Preview panel
The Preview panel lets you see a real-time, accurate representation of your design as you make changes. Simulate various scenarios and design contexts by viewing different text arrangements at different sizes and colors, with dynamic transformations and graphic filters like blur. Enter custom text and apply OpenType features to evaluate how your font performs in specific words, phrases, or sentences.
If the Preview panel is open, click the Show / hide Sidebar button in the top-right corner to open or close the sidebar.
If the sidebar is closed, use the buttons on the the right edge to quickly change what the panel shows:
- Click Content mode multiple times to switch between text, glyph waterfall and text waterfall.
- Click Align multiple times to switch between left-aligned, centered and right-aligned text.
- Click Size multiple times to switch between fit size, 1, 2 or 3 lines, and custom size.
- Click Invert preview to switch between a light and dark view of the content.
- Click Echo / Custom text in the bottom-right corner to toggle between custom text or Echo text. If Echo text is on, the panel shows the text of the Glyph window or the glyphs selected in the Font window. If you type your own text, the panel switches to Custom text.
If the sidebar is open, you have a much more detailed control of what the panel shows. New We have fully redesigned the Preview panel sidebar. We introduced text labels for sections of the settings, and integrated the feature selection widget right into the sidebar (it was a separate dialog).
New If you turn on Options > Show glyph names in the Preview panel sidebar, the Previewed glyph names field now correctly shows the glyph resulting from conditional glyph replacement.
Color
FontLab is rock-steady in monochrome, and truly shines if you wish to add a splash of color vibrance to your fonts.
Paste, import and edit color vectors, gradients and images in many formats. Apply colors and visually-designed gradients to fills and strokes. Overlay monochrome layers and export to all OpenType color fonts.
New FontLab 8.2 adds support for the trending OpenType COLRv1 format, and lets you export individual glyphs as individual SVG, PDF or PNG artwork assets.
See the Formats section below for details.
Glyphs & fonts
With FontLab, you’re the director of your glyph orchestra.
Go from standard to pro with one-click glyph set expansion and automatic OpenType features. Analyze each lookup visually, add custom OpenType tables. Find differences between font versions in Font Map. Fine-tune for the screen with powerful visual hinting. Find, filter and rename glyphs.
New FontLab 8.2 brings case conversion in Font window and title case conversion in Glyph window, easier glyph renaming, better autohinting control, improvements for OpenType features, and improved comparison of glyph metrics and other glyph properties across fonts.
Better renaming of glyphs
When you rename glyphs in FontLab:
- You can also choose to update other structures: classes, feature definitions, kerning pairs, auto layer recipes and metrics expressions to reflect the glyph name change.
- You can also rename alternates (glyphs with suffixes) if you’re renaming a glyph without a suffix.
- If you’re changing the name of a glyph to a name that is already used by another glyph, you can choose to replace the existing glyph, and to change the name of the existing glyph to a unique name.
To rename a single glyph:
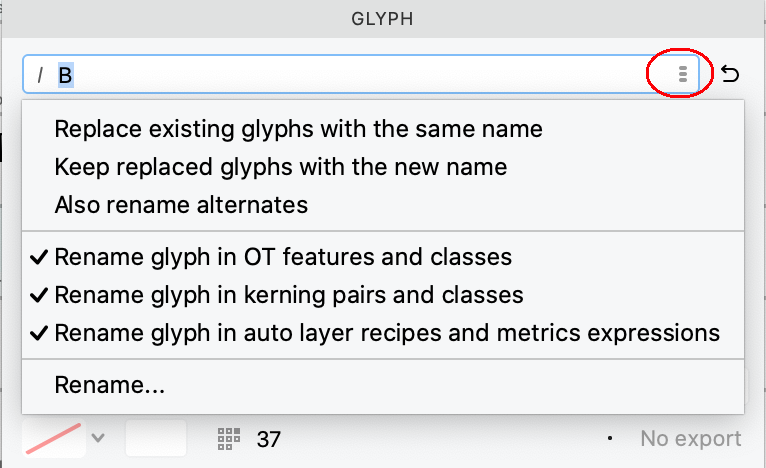
- Open the Glyph panel, which will show info about the current glyph in Glyph window or in Font window. New Click the Rename glyph icon in the panel to set the renaming options. Then enter the new name into the name field and press Enter. Note: in older versions, changing the name in the Glyph panel did not update classes etc.
- Choose Glyph > Rename Glyph, or click the name Unicode icon in the Glyph panel, or New click the Rename glyph icon in the panel and choose Rename… to open the Rename Glyph dialog. Set the options as needed.
To rename all glyphs in the font, use any of the Font > Rename Glyphs commands. These commands always update classes, feature definitions, kerning pairs, auto layer recipes and metrics expressions.
Note
If you turn on Preferences > Font Window > Caption > Editable, and change name in the Font window cell, FontLab only renames the glyph, but does not update classes etc.
Better duplication of glyphs
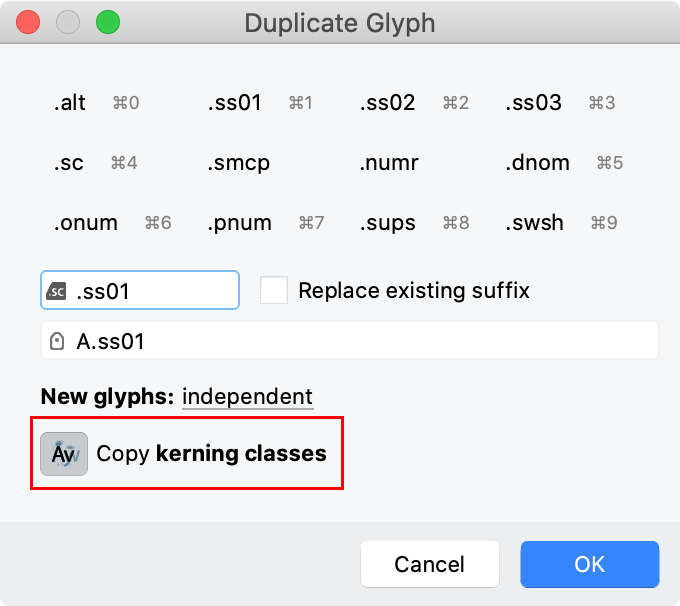
With Glyph > Duplicate Glyph…, you can copy one or more existing glyphs and add duplicate versions of these glyphs as independent glyphs, as components or as element references. You can specify a glyph name suffix for the new glyphs.
- New If you turn on Copy kerning classes in the dialog, then for any source glyph that is part of any left and right kerning classes, the duplicated glyph will also be placed in the same kerning classes. If the source glyph is not in any kerning class, the duplicated glyph will not be placed in any kerning class.
- New If you’re duplicating only one glyph, you can use the New glyph name field to specify the complete glyph name of the new glyph (not just the original name + suffix). For example, you can duplicate the
Aglyph and name the new glyphAlpha.
Case conversion of the Font window selection
New If you select some glyphs in Font window, and those glyphs include letters, you can choose Text > Change Case and choose UPPER CASE or lower case, and FontLab will select the uppercase or lowercase counterparts of the selected letters.
Better classes
-
Kerning classes are now called “left” and “right” instead of “1st” and “2nd”. See Kerning section for details about improved support for class kerning.
-
If you select glyphs in Font Window and choose Edit > Delete, the Delete Glyphs dialog box has a Classes: Clean Up checkbox even if the selected glyphs contain component sources. New If this is turned on, FontLab will now clean up the classes in all masters, not just in the current master.
Refined Features panel
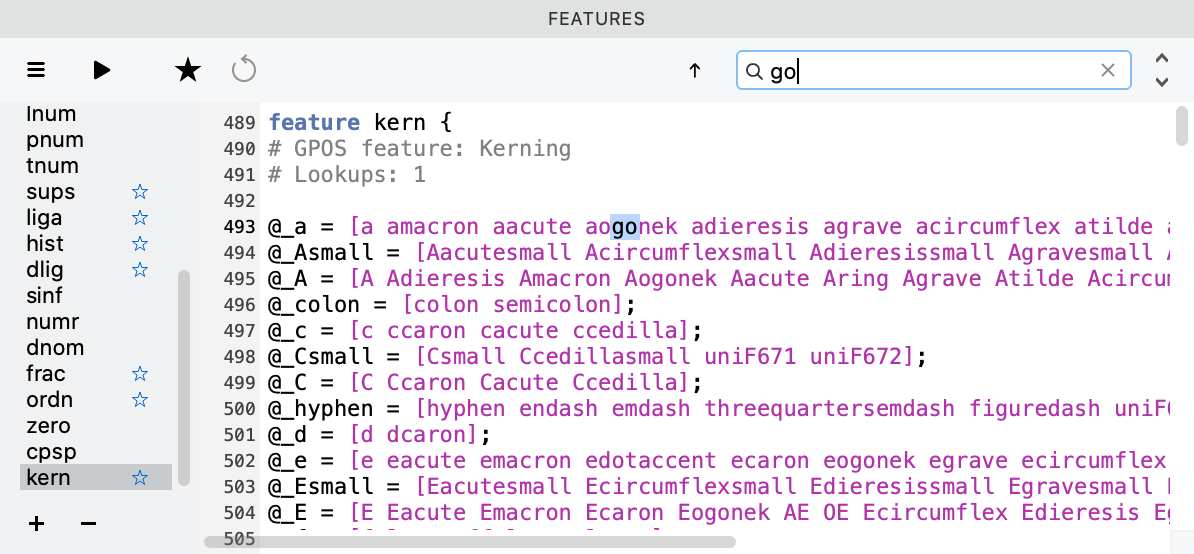
If you’re in the Features panel:
- New Press Cmd[ Ctrl[ to go to the previous feature definition, or the Prefix section.
- New Press Cmd[ Ctrl[ to go to the next feature definition.
- New Press CmdF CtrlF to jump to the panel search box.
- New Type a string (part of a glyph name, class or keyword) and press Enter to find the first occurrence of the string.
- New Press CmdG CtrlG to find the next occurrence.
Better Fonts and Font Map panels
In FontLab, you can open several fonts and easily compare their Unicode codepoints, advance width, left or right sidebearings, kerning class assignment, glyph index, number of elements, or the OT Glyph Definition class:
- Select multiple fonts in the Fonts panel.
- Open the Font Map panel, then open its list view.
- In the Font Map panel property bar, choose the property that you want to compare in the cell caption dropdown.
The list view now shows the values for each font in its own column. New If you assign a font color flag in Font Info > Names > Color flag, the columns that represent each font will use that color. The rendering of these columns in dark mode is overall better.
Better Font window filters
New The Font window property bar Codepages filter now supports double-byte codepages. If you select a double-byte codepage, an additional selector appears next to the codepage name. Use it to switch between the planes of the double-byte codepage.
Formats
With FontLab, you can ship in a breeze & deliver with confidence.
Open and export any OpenType flavor: desktop, web, color, variable. Integrate into any workflow by seamlessly interchanging with fontmake, Glyphs.app, RoboFont, Fontographer, FontLab Studio, and FontForge.
New With FontLab 8.2, you can temporarily install a font on export, export glyphs and Sketchboard content as PDF, SVG or PNG files, open and export variable COLRv1 fonts, and open installed variable fonts. FontLab 8.2 improves the support for the
.glyphsfile format, OpenType feature decompilation and editing, and import/export of right-to-left kerning between various formats.
Recover autosaved files
If you have Preferences > Save Fonts > Autosave turned on, FontLab automatically saves the open fonts that have some modification in its special Autosave folder:
~/Library/Application Support/FontLab/FontLab 8/Autosaveon macOS%userprofile%\AppData\Local\Fontlab\FontLab 8\Autosaveon Windows
New If FontLab experiences a crash and you re-open it, FontLab now shows a redesigned Restore Autosaved Fonts that offers you three choices:
- Remove: FontLab moves the autosaved files to the trash bin
- Open: FontLab opens the autosaved files but moves their autosaved versions to the Trash Bin. You should save the opened files in a folder of your choice.
- Keep & Open: FontLab moves the autosaved files into the
Keepsubfolder inside theAutosavefolder, and opens the files. If FontLab crashes again, you will find the files in theKeepfolder
Temporarily install exported fonts
New If you choose an “OpenType” or “Variable” export profile in File > Export Font As, you can turn on Install fonts until FontLab quits in the bottom-left of the dialog.
FontLab then exports the font(s) and temporarily installs them on your system. The exported fonts are available to other apps as long as FontLab is running.
Note
If you export the fonts again, with the option turned on, some running apps may update the fonts to the newest versions, but other apps may require a restart of the app. This is largely due to the specific app implementation.
Open variable installed fonts
New If you open File > Open > Installed Fonts and you have variable fonts installed on your system, they are now listed with the word Variable appended to the name, and with a variable icon. If you select them any choose OK, FontLab now opens the variable fonts as variable. Previously, FontLab listed each predefined instance of the installed variable fonts in the dialog, and opened them as static fonts.
Open variable COLRv1 fonts
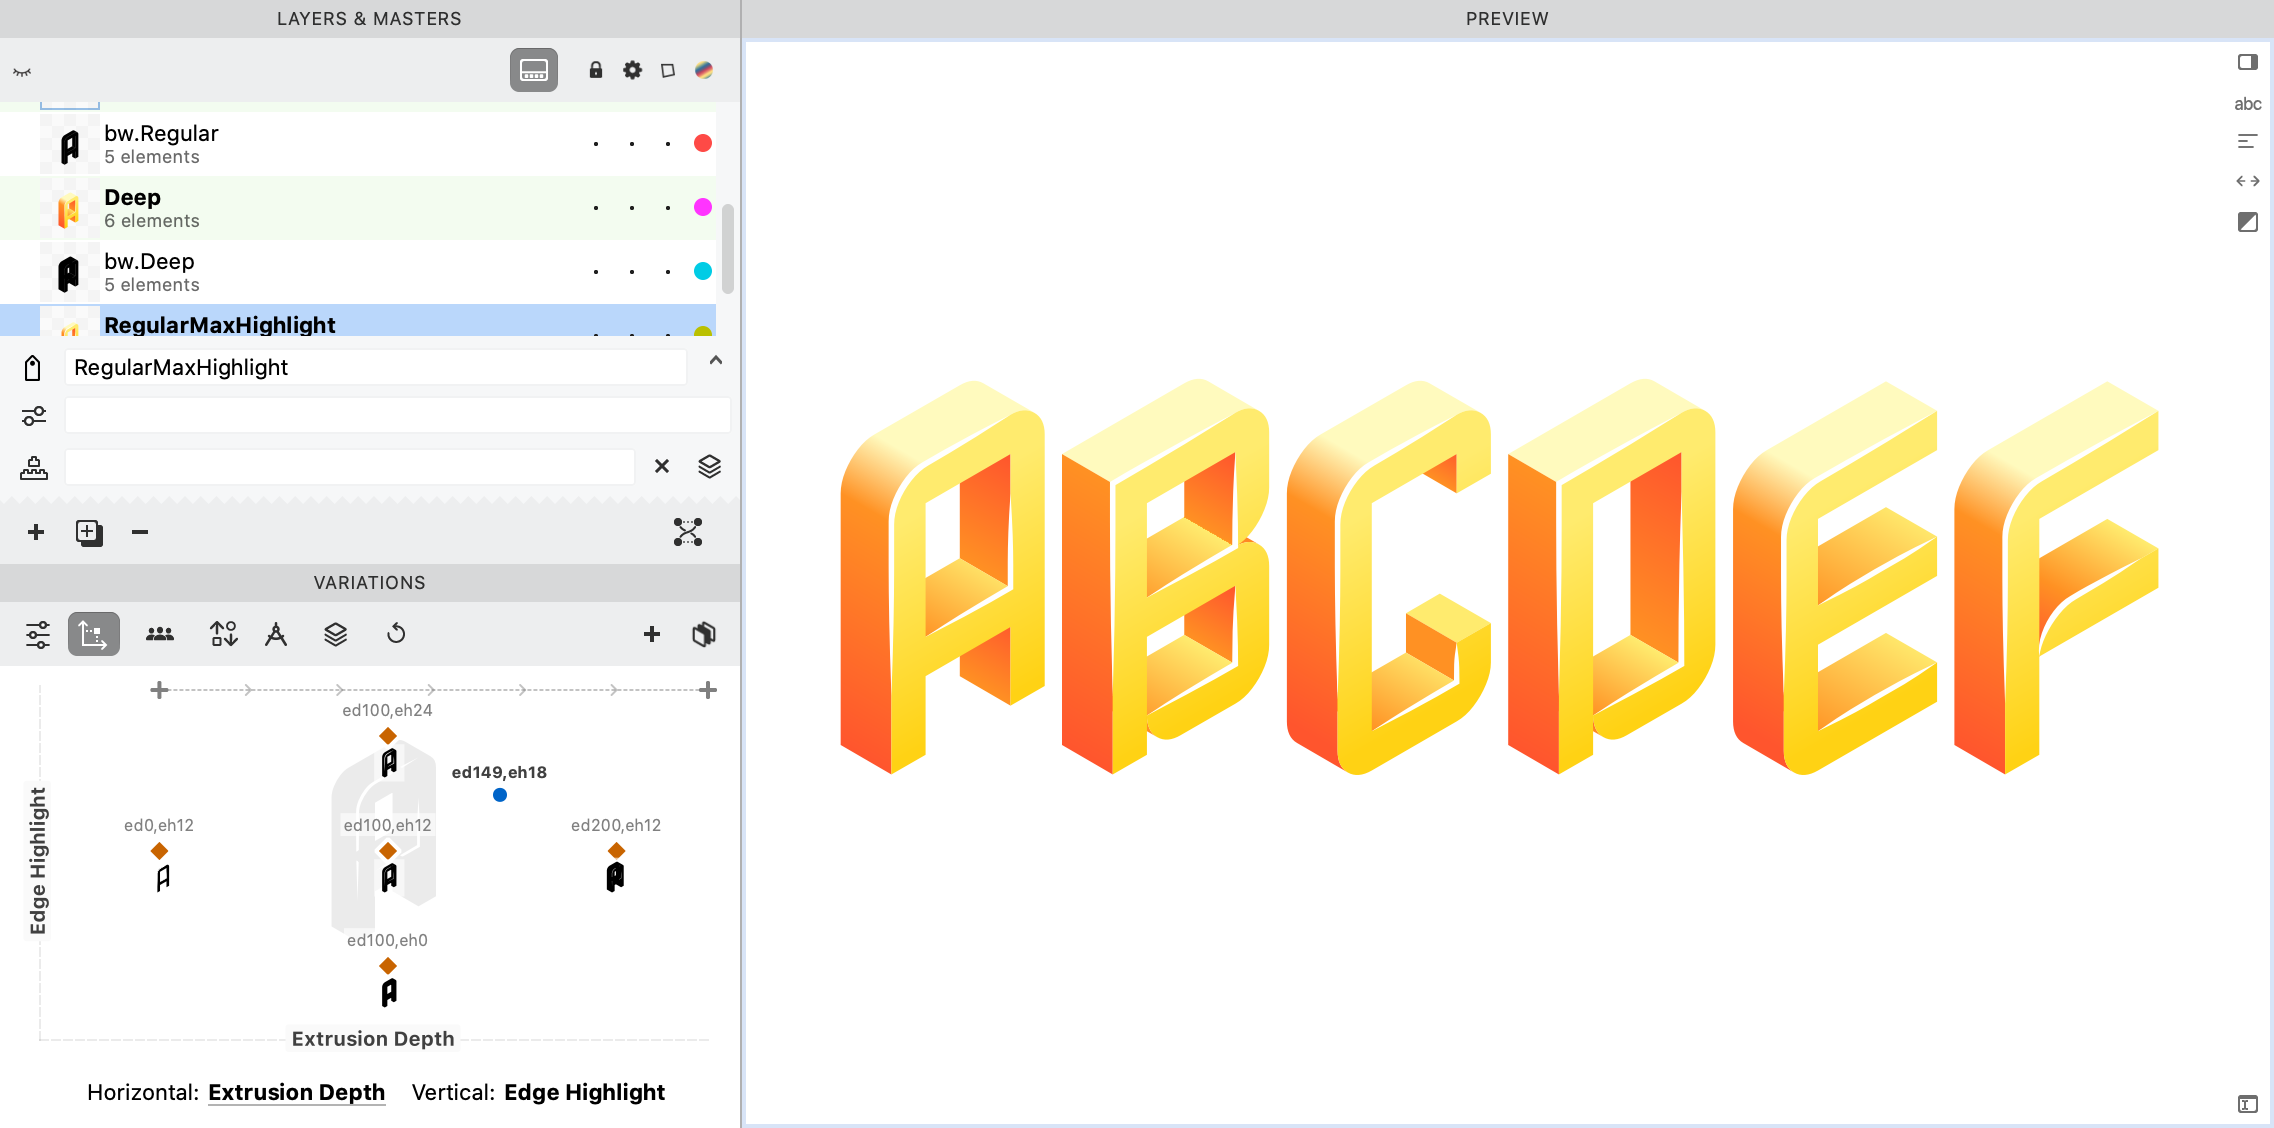
New You can now open some variable color OpenType TT+COLR fonts with the COLR v1 table, so you can have variable glyphs with gradients and other more advanced color fills. For example, try opening Nabla by Arthur Reinders Folmer and Just van Rossum.
Warning
This functionality is in beta. If you open some variable OT+COLR v1 fonts in FontLab, the glyphs will not look as intended.
Export variable COLRv1 fonts
New You can now export many color variable fonts in the COLRv1 flavor, so they can include gradients. You need to turn on this ability:
- Open Nabla by Arthur Reinders Folmer and Just van Rossum.
- Choose File > Export Font As….
- Choose the Variable TT profile, click Customize….
- Change the Profile name to Variable TT color and turn on OT+COLOR: Chrome, Windows in the Export color font files section, click OK.
- Choose the Destination and click Export.
Better decompilation of contextual OpenType features
If Preferences > Open Fonts > OT features > All lookups to Prefix is turned on and you open an OpenType font that contains contextual GSUB substitutions, FontLab decompiles the substitutions into the FEA syntax in the Features panel as follows:
- In the Prefix section of the Features panel, FontLab writes the lookup definition for the simple substitution:
lookup calt_2 {
  sub D by D.ss01;
} calt_2;
- In the feature section of the panel (e.g.
calt), FontLab writes the contextual substitution that references the simple substitution:
sub D' lookup calt_2 C;
Note
Previous versions of FontLab always used this notation. It closely follows the internal structure of the OpenType font, many users don’t find it readable.
New If turn off Preferences > Open Fonts > OT features > All lookups to Prefix and open the font, FontLab now produces a simpler, more intuitive FEA notation for contextual lookups, like:
sub D' C by D.ss01;
Decompilation of Apple AAT features
New If you open an OpenType font that contains Apple AAT layout features in the morx or mort table, FontLab now converts these features into OpenType Layout people, and decompiles them into the FEA notation in the Features panel.
Note
This functionality is somewhat limited. Not all
morxfeatures can be expressed in OpenType Layout. Also, FontLab does not export AAT features.
Open OpenType fonts with cubic glyf table
New You can now open static and variable fonts that have the experimental glyf table version 1, which can describe the glyph geometry using PostScript (cubic Bézier) and TrueType (quadratic) curves. This works even for fonts in which both types of curves are mixed within one glyph.
Warning
Currently, this format is experimental. It hasn’t been accepted into the official OpenType format yet. See the Export static OpenType fonts with a cubic
glyftable section below for details.
Export static OpenType fonts with a cubic glyf table
The OpenType font format can describe the glyph geometry using two kinds of curves:
PostScript (cubic Bézier) curves: PostScript curves, or cubic Bézier curves, are the curves that most typeface designers use to draw their glyphs. These are also the curves that are natively supported in vector graphics apps. In 1985, Adobe introduced the Type 1 font format that used PostScript curves. The OpenType format introduced around 2000 added the CFF table, which is used to express glyph geometry with cubic curves, and the Type 1 format was declared obsolete. In 2016, OpenType added the CFF2 table, which is used to describe variable cubic glyphs.
TrueType (quadratic) curves: TrueType curves, or quadratic curves, were introduced in 1991 by Apple and Microsoft as part of the TrueType font format. Quadratic glyph descriptions reside in the glyf table, which was later incorporated into the OpenType format. Since 2016, the overwhelming majority of variable OpenType fonts has been using quadratic curves. Most typeface designers use cubic curves for drawing, and then use automated tools to convert them to quadratic curves when they export the final fonts.
Geometrically speaking, quadratic and cubic curves are related, but inside the OpenType font format, they’re stored in fundamentally different ways. Very few applications support the new variable CFF2 table, while support for TrueType-based variable fonts is widespread. The glyf table that is used for quadratic glyphs has abilities that the CFF tables lack, such as the ability to use components. The technical structures of the glyf table are simpler than those of the CFF tables, and support for TrueType-based fonts is easier to implement correctly in apps and systems.
The problem has been that TrueType-based OpenType fonts can only use quadratic curves, which are not the types of curves the designs are created with. In a sense, TrueType-based OpenType fonts are like lightly compressed JPEG images — the quadratic curves produced by the conversion are usually close, but not identical, to the original designs.
In 2022, Behdad Esfahbod has proposed several extensions to the OpenType font format. One of them includes a new backwards-compatible version of the glyf table, which has the ability to describe glyphs using PostScript (cubic Bézier) curves, in addition to TrueType (quadratic) curves. The new table even allows mixing cubic and quadratic curved in one glyph.
FontLab has allowed mixing cubic and quadratic curves in the font sources for years. As of February 2023, the HarfBuzz library has experimental-api support for the new glyf table, and the fontTools library also has support for the new table. The new table is not yet supported in FreeType or other font renderers.
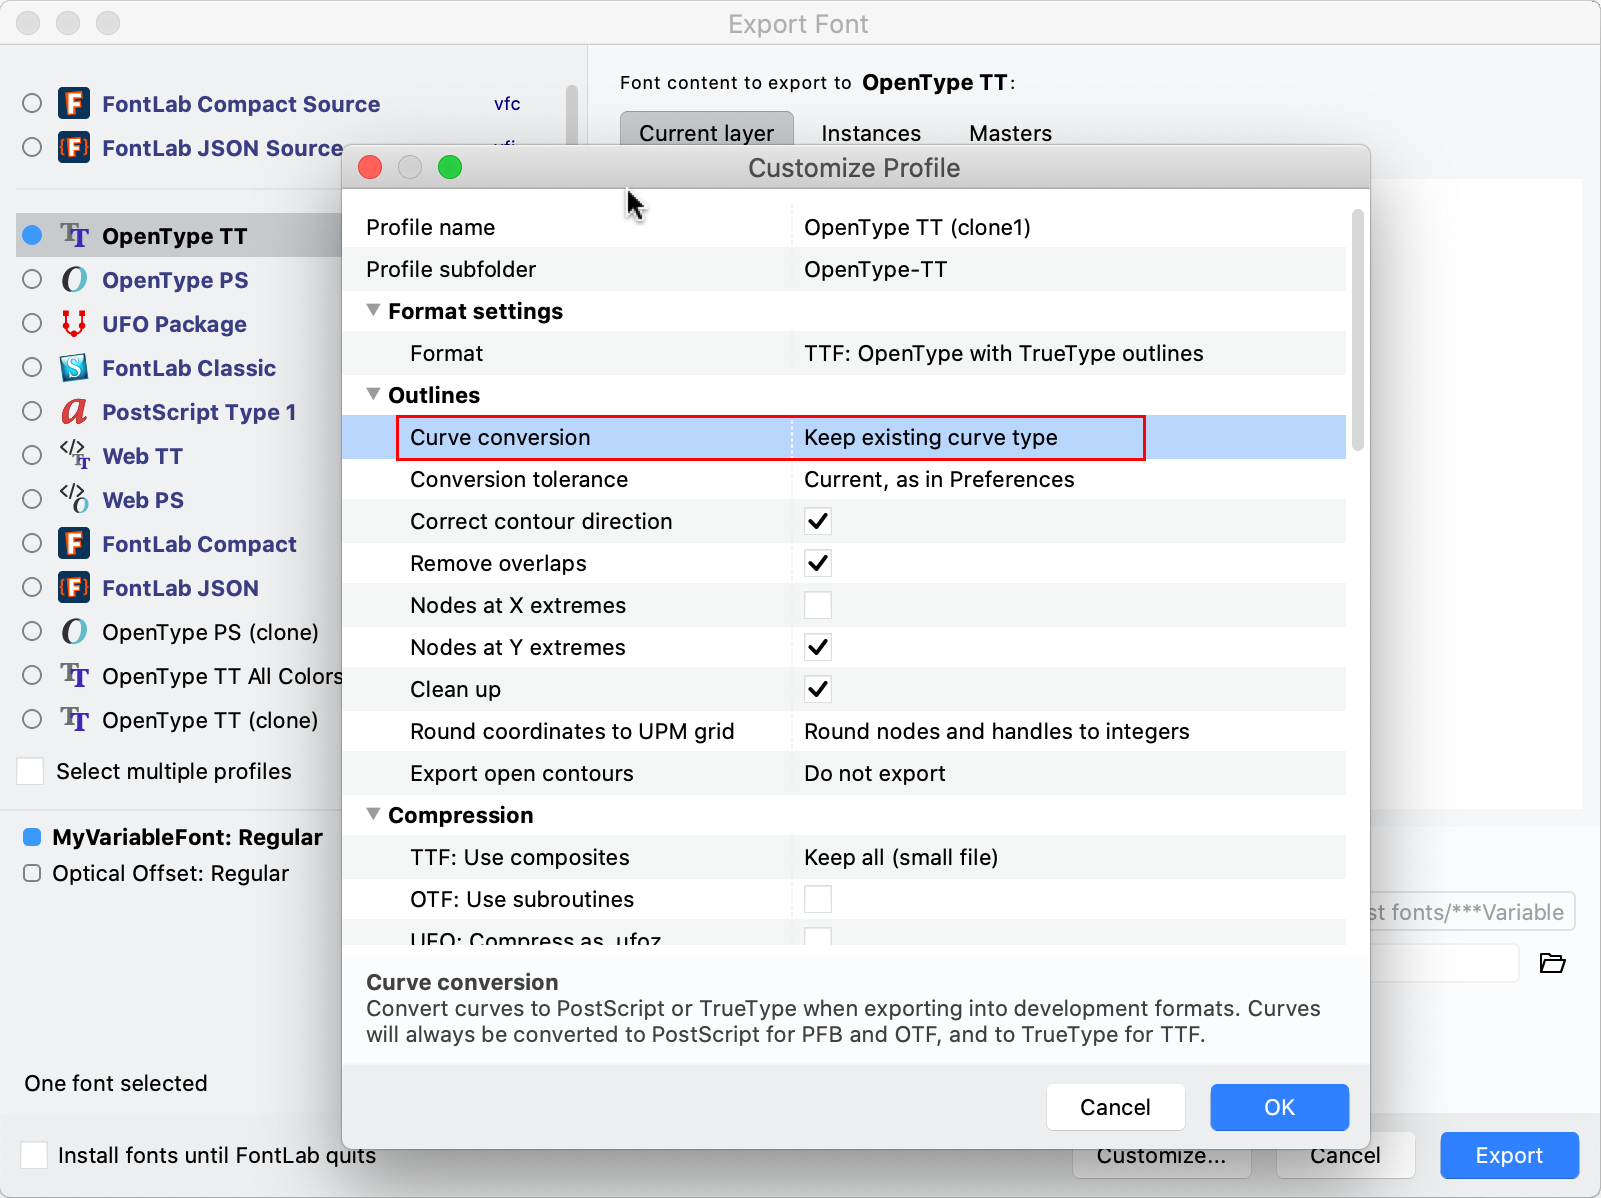
New FontLab can now export static OpenType fonts with the new glyf table. You need to turn on this ability:
- Choose File > Export Font As….
- Choose the OpenType TT profile, click Customize….
- Change the Profile name to OpenType TT cubic and set Curve conversion > Keep existing curve type, click OK. This will export the curve types as they are in the font, so you may have mixed flavors of curves.
- Choose the Destination and click Export.
Warning
Currently, this format is experimental. It hasn’t been accepted into the official OpenType format yet.
Export large Asian OpenType fonts
New If you export an OpenType font with the post v2 table, which uses cidXXXX glyph naming, FontLab now exports the names using the _XXXX naming scheme.
Export WOFF2 web fonts faster
New If you export your font with he built-in Web PS or Web TT profile or with any custom profile that has the Export Web font files > WOFF2 setting turned on, the export is now 4–5× faster, and uses most up-to-date WOFF2 libraries.
Import multiple images
In Font window, you can drag-drop multiple images (SVG, PDF, PNG etc.) into the window or New use File > Import > Artwork Collection… and choose the image files. FontLab will create a new glyph for each image, and will place and scale the images according to Preferences > Paste & Duplicate settings.
New FontLab now correctly imports files that contain a hyphen in the file name, and converts the hyphen into an underscore.
Export multiple glyphs as single PDF, SVG or PNG images
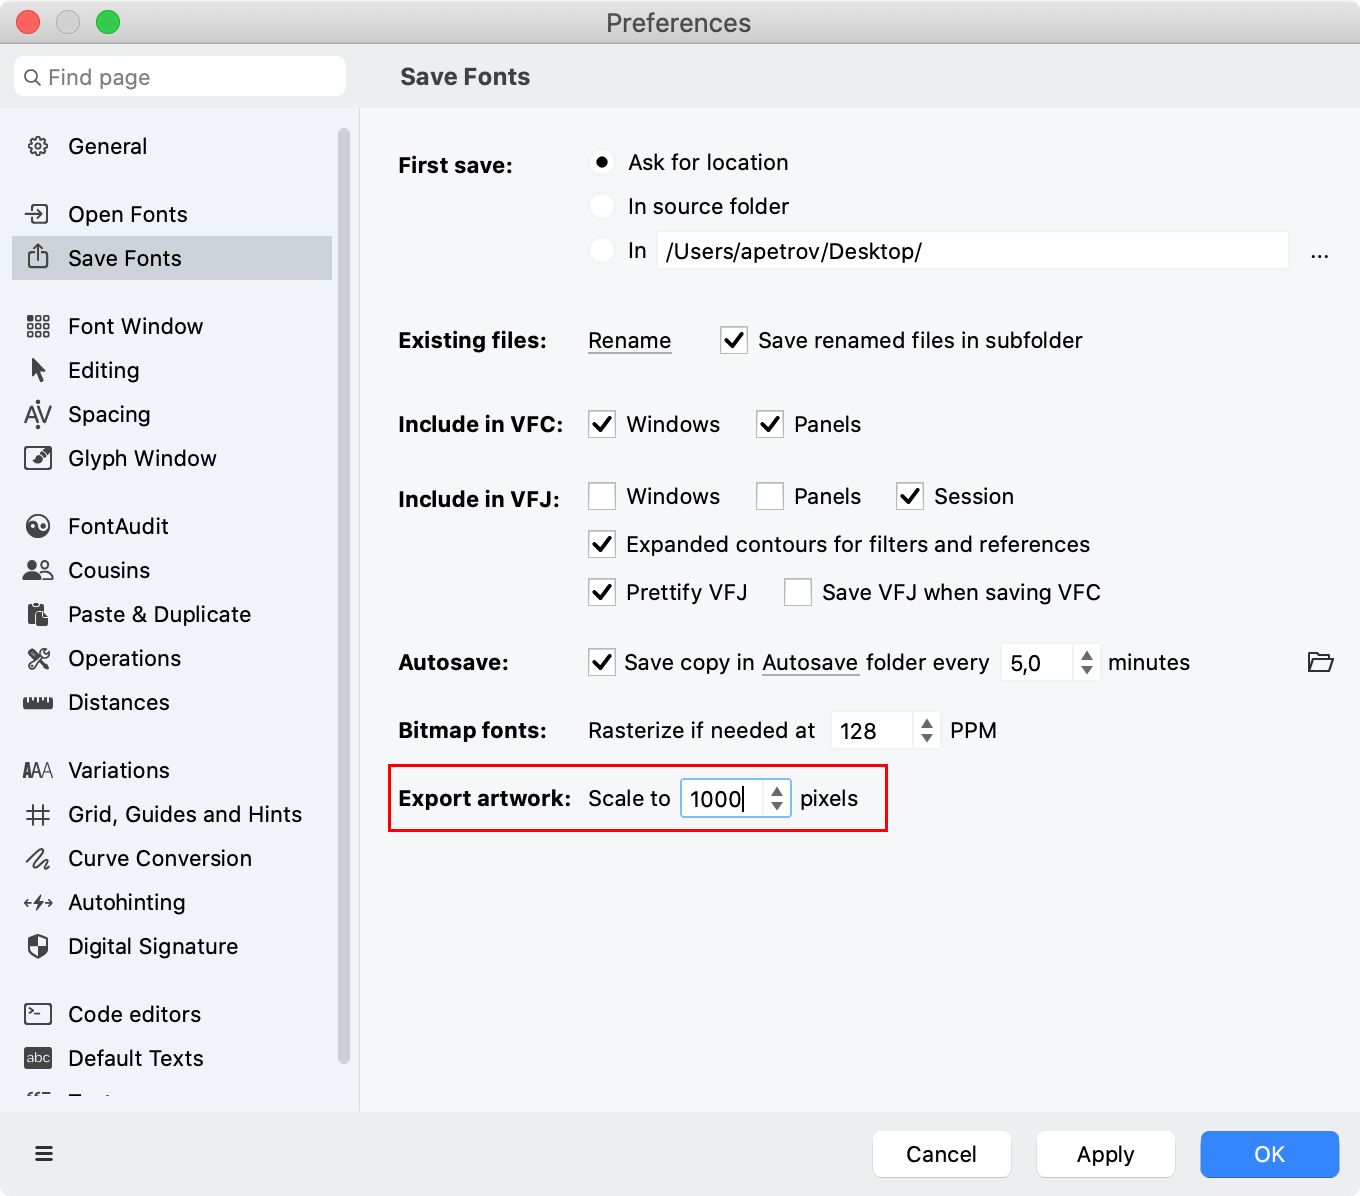
New Set the pixel-per-em (PPM) size in Preferences > Save > Export artwork. In the exported images, FontLab will scale the UPM size to the specified pixel size. For example, if your UPM size is 1000, you set the export size to 100, and export the A glyph that is 700 units tall to PNG, the resulting image will be 70 pixels tall.
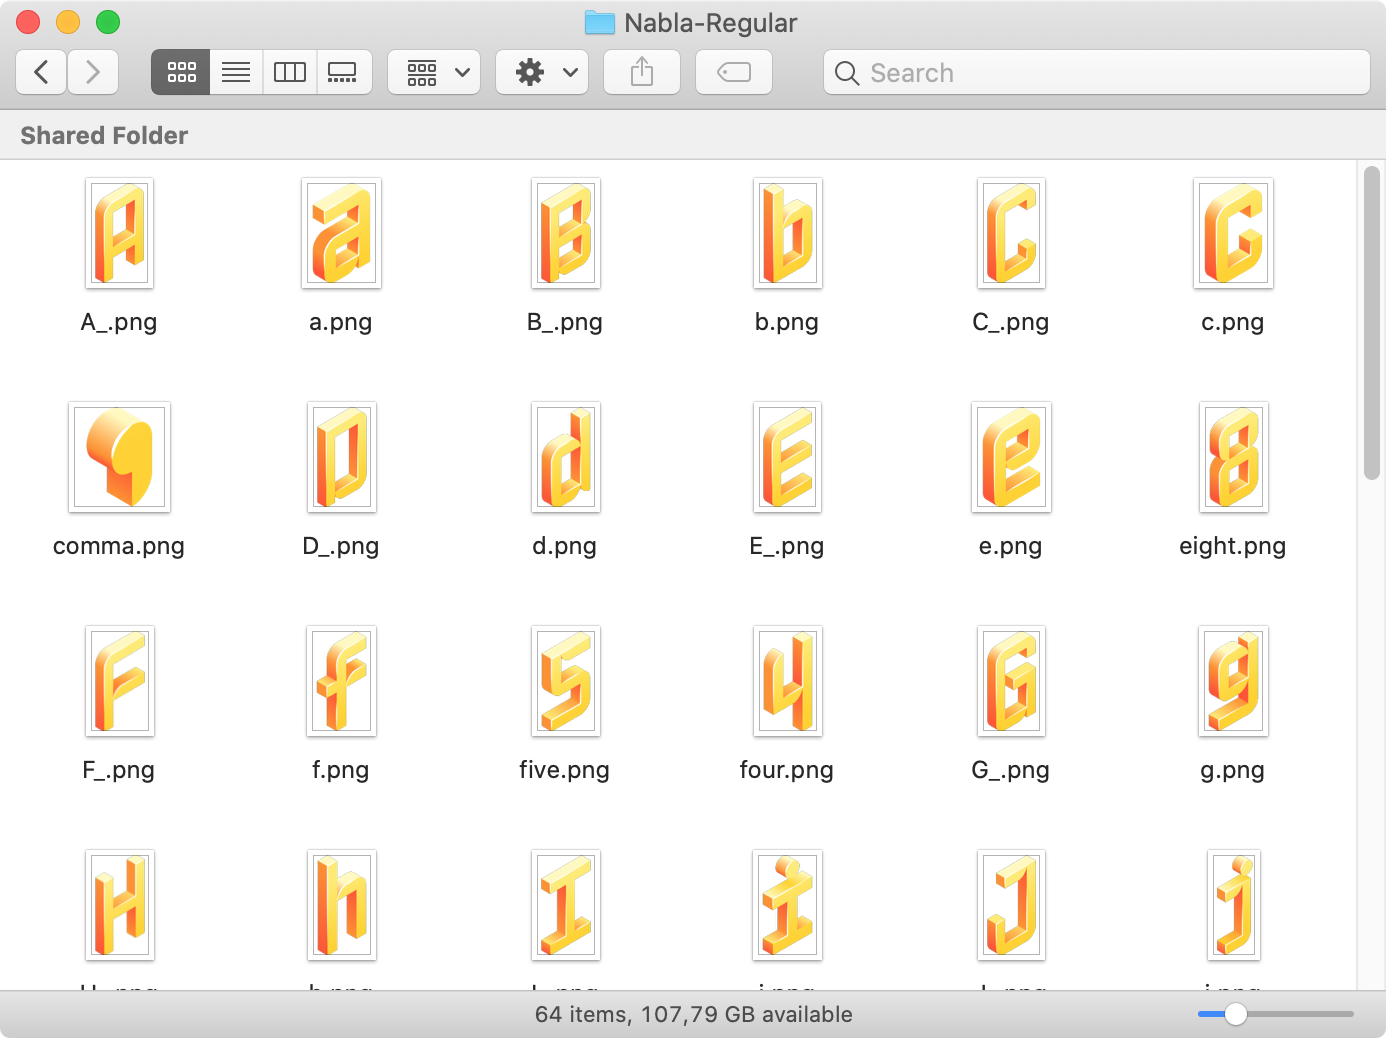
New To export the current layer of one or more multiple glyphs, one PDF, SVG or PNG image per glyph:
- Select the glyph(s) in Font window.
- Choose File > Export > Artwork Collection….
- Choose the format.
- Choose the output folder.
- In the filename field, enter the subfolder name. FontLab will create the subfolder in the output folder, and will name the glyph images automatically.
New To export the current layer of the current glyph, you can also choose File > Export > Artwork… in the Glyph window. Here, you can specify the actual filename of the exported image.
Export Glyph window text as PDF or SVG
Set the text size in the Glyph window sidebar or Text mode property bar. This affects glyph size in the exported PDF or SVG files.
To export the full content of the current Glyph window or Font window (the entire text), choose File > Export > Window Contents…. Here, you can choose one of two formats:
- Choose PDF (*.pdf) to export the contents of the window preview mode into a PDF file. For a Glyph window, the PDF will show all glyphs filled, as if you were using Text mode.
- Choose SVG (*.svg) to export the contents of the window editing mode into an SVG file. For a Glyph window, the SVG will show all currently visible view details like nodes, handles, guides, so you get a “vector screenshot” of the window.
Export Preview as PDF
To export the Preview panel contents as PDF:
- Open the panel sidebar to specify the content (masters, waterfalls etc.) and size.
- Right-click or Ctrl-click the panel canvas, and choose Export as PDF….
Export Font window (glyph table) as PDF
FontLab doesn’t currently offer a native way to export the Font window as PDF, but you can export a PDF using the printing functionality.
On macOS:
- Switch to the Font window.
- Choose File > Print Font….
- Choose Save as PDF… from the dialog dropdown and save the PDF.
On Windows:
- Install a virtual PDF printer such as Microsoft Print to PDF, PDF24 Creator, CutePDF Writer or PrimoPDF.
- Then in FontLab, switch to the Font window, choose File > Print Font…, and choose the virtual PDF printer.
Note
This method also works from the Glyph window.
Import Sketchboard content
If you open the Sketchboard with Window > Open Sketchboard, you can now choose File > Import > Sketchboard and choose a saved .vfj or .vfc Sketchboard file.
FontLab uses .vfj and .vfc to store the Sketchboard contents, but it’s not identical to a font .vfj/.vfc.
Export Sketchboard
If you open the Sketchboard with Window > Open Sketchboard, you can now choose File > Export > Sketchboard… to save the content of the Sketchboard as a .vfj or .vfc file, or to export it as a .svg or .pdf file.
FontLab uses .vfj and .vfc to store the Sketchboard contents, but it’s not identical to a font .vfj/.vfc.
Scripts & extensions
Tired of click-click-click? Automate excellence with FontLab’s comprehensive scripting.
Write simple Python 3.11 scripts, or perform complex batch work and flexible glyph transformations with powerful extensions like the TypeRig package.
New FontLab 8.2 bundles the newest Python 3.11.3, which offers 10–60% faster scripting performance. TypeRig also has numerous improvements and new dark-mode support.
Updated built-in libraries
New FontLab now uses the Qt Framework version 5.15.13. It contains dozens of minor fixes compared to the previously used 5.15.9 version of the Qt Framework.
New Python 3.11
New FontLab 8.2 bundles Python 3.11.3. Previous versions had 3.10.1. Python 3.11 is 10-60% faster than 3.10 and contains various improvements.
If you want to install additional Python packages, we recommend that you install the standalone Python 3.11 distribution:
- on macOS, install Homebrew and then in Terminal run
brew install python@3.11. - on Windows, install the Python 3.11.3 installation from Python.org (Windows installer 64-bit if you have FontLab 8 64-bit, or Windows intaller 32-bit if you have FontLab 8 32-bit).
Choose the monospace UI font
FontLab uses a monospace font in the Scripting, Features, Source, Output, TrueType Hinting Tables panels, and in the Scoreboard.
In Preferences > Code editors, you can choose the font size used in the panels, New and a different monospace UI font (installed on your system).
Built-in vs. custom-installed fontTools
New FontLab 8.2 now has its own built-in copy of the fontlab_private.fontTools package in version 4.39.4 (previously it used 4.29.1). FontLab uses fontlab_private.fontTools to export variable OpenType fonts and to compile/decompile TTX table data from/to the Tables panel.
You may use import fontlab_private.fontTools for your own scripting from within FontLab. Alternatively, if you’ve installed a standalone Python 3.11 distribution, you can run python3.11 -m pip install --upgrade fontTools[ufo,lxml,woff,unicode,interpolatable,plot,symfont,type1,pathops,repacker], and then use import fontTools.
FontLab will always use its own built-in copy of fontTools, but you can use the pip-installed version.
Run actions and action sets in Python
The code below shows a way of running action sets (same as in Tools > Actions) from Python, using the native FontLab Python API.
This Python code defines a function run_actions() that runs FontLab actions on specified glyphs and layers of a specified or current font, or on all glyphs and masters of a specified or current font. The function takes in a list of action names or dict of action names and parameters, and optionally: a specified fgFont font, a list of glyph names or objects, a list of layer names (or False if current layer, or True if all masters), plus a boolean value for whether the actions will be undoable.
The function calls flPackage.runActions() to run the actions, using the get_fl_action_syntax() function to create a list of JSON strings that contain dictionaries in the format compatible with the JSON action set notation, and the get_fl_glyphs() function to build a list of flGlyph objects from a list of glyph names or objects.
Finally, the function performs actions on current layer, specified layers or all masters of the specified or current font. In this example, the function is called with a list of actions, which flatten and decompose all masters in all glyphs, and remove overlaps in them.
A more pythonic method will be incorporated into the TypeRig package in the future.
from collections.abc import Iterable, Mapping
from json import dumps
from typing import List

from fontgate import fgFont, fgGlyph
from fontlab import CurrentFont, flGlyph, flPackage

def get_fl_action_syntax(actions: Mapping | Iterable) -> list():
    """
    Creates a list of JSON strings that contain dictionaries in the format used by `flPackage.runActions`.

    `actions_list` will contain dictionaries where the `id` key is the action name and additional keys specify
    parameters. For syntax specifics, export an Action set from Tools > Actions and check the saved JSON file.

    Args:
        actions (Mapping | Iterable): List or dict of action names to be performed.

    Returns:
        list: A list of JSON strings that contain dictionaries in the format used by `flPackage.runActions`.
    """

    # Create list of actions to run
    actions_list = []

    # If `actions` is a dictionary, creates `actions_list` with parameters
    if isinstance(actions, Mapping):
        for action, params in actions.items():
            action_rec = {"id": action}
            if isinstance(params, Mapping):
                action_rec |= params
            actions_list.append(dumps(action_rec))

    # If `actions` is a list of simple actions without parameters, creates simple `actions_list`
    elif isinstance(actions, Iterable):
        actions_list.extend(dumps({"id": action}) for action in actions)

    return actions_list

def get_fl_glyphs(font: fgFont, glyphs: List[str | fgGlyph | flGlyph] = None) -> list():
    """
    Builds a list of `flGlyph` objects from a list of glyph names, `flGlyph` objects or `fgGlyph` objects.

    Args:
        font (fgFont): FontGate object to be acted upon.
        glyphs (List[str | fgGlyph | flGlyph], optional): List of names, fgGlyph or flGlyph objects to be acted upon. All glyphs if absent. Defaults to None.

    Returns:
        list: List of `flGlyph` objects.
    """

    # If `glyphs` are specified, builds a list of `flGlyph` objects
    if glyphs:
        glyphs_fl = []
        for glyph in glyphs:
            if isinstance(glyph, flGlyph):
                glyphs_fl.append(glyph)
            elif isinstance(glyph, fgGlyph):
                glyphs_fl.append(flGlyph(glyph, font))
            elif isinstance(glyph, str):
                glyphs_fl.append(flPackage(font).findName(glyph))
    else:
        glyphs_fl = [flGlyph(glyph, font) for glyph in font.glyphs]
    return glyphs_fl

def run_actions(
    actions: Mapping | Iterable, # List of action names or dict of action names and params to be performed
    font: fgFont = None, # `fgFont` font or `CurrentFont()` if absent
    glyphs: List[str | fgGlyph | flGlyph] = None, # List of glyph names, fgGlyph or flGlyph objects, all glyphs if absent
    layers: bool | List[str] = False, # List of layer names, or True if all masters, or False (default) if current masters
    undo: bool = True, # Will actions be undoable? True by default
) -> None:

    """
    Runs a list of FontLab actions on specified glyphs and layers, or on all glyphs and masters
    of a specified or current font. Action specs use the same syntax as action sets exported from Tools > Actions.

    Args:
        actions (Mapping | Iterable): List of action names or dict of action names and params to be performed
        font (fgFont, optional): `fgFont` font or `CurrentFont()` if absent
        glyphs (List[str | fgGlyph | flGlyph], optional): List of glyph names, fgGlyph or flGlyph objects, all glyphs if absent
        layers (List[str] | bool, optional): List of layer names or False if current master or True (default) if all masters
        undo (bool, optional): Will actions be undoable? True by default
    """

    # `font` is current font or specified fgFont object
    font = font or CurrentFont()

    actions_list = get_fl_action_syntax(actions)
    glyphs_fl = get_fl_glyphs(font, glyphs)

    # If `layers` were specified, makes them visible and stores their previous visibility
    if isinstance(layers, Iterable):
        # Stores the previous layer visibility of each layer
        layer_visibility = {key: -1 for key in flPackage(font).fontLayerOrder}
        # Sets layer_scope for `flFont.runActions` to 1 (visible layers)
        layer_scope = 1
        for glyph in glyphs_fl:
            for layer in glyph.fgGlyph.layers:
                if layer_visibility[layer.name] == -1:
                    layer_visibility[layer.name] = int(layer.visible)
                if layer_visibility[layer.name] > -1:
                    layer.visible = layer.name in layers
    elif layers:
        # Sets layer_scope for `flFont.runActions` to 2 (all masters)
        layer_scope = 2
    else:
        # Sets layer_scope for `flFont.runActions` to 0 (current master)
        layer_scope = 0

    # Calls `fontlab.flPackage.runActions()` to run the actions
    flPackage(font).runActions(glyphs_fl, actions_list, layer_scope, undo)

    # If a `layers` list was specified, restores previous layer visibility
    if layer_scope == 1:
        for glyph in glyphs_fl:
            for layer in glyph.fgGlyph.layers:
                layer.visible = bool(layer_visibility[layer.name])

# Expands filters and transformations, decomposes components and removes overlaps in all masters
run_actions([
    "flatten_glyph", # Expands filters and transformations.
    "decompose", # Decomposes components.
    "remove_overlap" # Removes overlapping portions of contours
], layers=True)
Bug fixes
FontLab is smooth & stable.
New With numerous fixes for issues reported by users, FontLab 8.2 achieves a new level of reliability, and enhance the editing experience across the board. You can work with peace of mind knowing FontLab 8.2 has your back.
-
Fix If you tap / to open the Quick Find Glyph pop-up, or # to open the Quick Find Unicode pop-up, and then try to open Edit > Find Glyphs, the previously open pop-up closes, and the Find Glyphs pop-up appears. Previously, both pop-ups appeared.
-
Fix If the current glyph is off-screen in Glyph window, and you tap / to open the Quick Find Glyph pop-up, or # to open the Quick Find Unicode pop-up, the pop-up no longer appears off-screen.
-
Fix Copy to masters in Guides panel now correctly copies the selected Font guide or Zone into the other master (unless the master already has the same-named Font guide or Zone). Previously, this operation produced duplicates of the Font guide or Zone in the current master.
-
Fix In Glyph window Metrics mode, the Edit > Cut command is disabled. Previously, it didn’t really do anything.
-
Fix The exported COLRv1 fonts had problems rendering glyphs with conical gradients. This is fixed now. The conical gradients are not supported in OpenType-SVG though.
#7485 -
Fix Element > Align > Distribute Horizontally works correctly now.
#7504 -
Fix FontLab no longer converts curves to lines when you apply Contour > Simplify to the contours in the font with small UPM value (e.g. 180). Now it takes the UPM value into account.
#7464 -
Fix The Cut command in the Edit menu is now correctly listed as “Cut Glyphs” when you switch from the Glyph to the Font window.
#7505 -
Fix If you export a Variable TT or PS font, the font creation date stored in the OpenType font is now correct.
-
Fix FontLab no longer loses the mask layer when it exports the current layer to the VFB font format.
#7467 -
Fix FontLab now correctly exports stroked fonts as instances.
-
Fix Sorting of the mask layers in the Layers & Masters panel is improved.
-
Fix Disconnecting contours and creating loops with the Scissors tools now respect the font UPM, so in high-UPM designs the Scissors-created distances will no longer be tiny.
-
Fix FontLab now correctly exports the
posttable in fonts that have 65,278 glyphs or more. -
Fix If you have an active temporary license (like 3-month or 1-day), you switch your hardware configuration, then temporary license expires and then you activate FontLab with another temporary or lifetime license, FontLab no longer shows an error message on startup.
#7340 -
Fix If you run FontLab by drag-dropping a font file on the FontLab app icon, FontLab now always correctly shows the feature definition code in the Features panel.
#7288 -
Fix The Apply kerning toggle in the Glyph window property bar now is consistently hidden in the Kerning mode and shown in all other modes.
#7330 -
Fix If you flag a glyph cell in Font window, you can now undo this operation.
#7206 -
Fix If you export an OpenType+CBDT font, FontLab now exports the
CBLCtable correctly.#7170 -
Fix If you run FontLab by drag-dropping the vfc file onto FontLab icon, FontLab no longer opens two Font windows for one font.
#7342 -
Fix FontLab no longer crashes if you input expressions for linked metrics in the Metrics panel right after performing the Tools > Actions > Contour > Contour Direction > Set TT direction action.
#7327 -
Fix If you save a
.vfj, FontLab now correctly saves the per-node changes to the Stroke thickness. Previously this only worked for the.vfcformat. -
Fix Fractional values in the Font Lib or Master Lib are now stored correctly in both
.vfcand.vfj.#7315 -
Fix Tools > Actions > Autohint now works correctly on all masters.
#7312 -
Fix If you have Power Brush applied to an element and apply a live transformation to the element, FontLab transforms the Power Brush accordingly. If you choose Element > Expand Transformation, FontLab retains the transformed Power Brush. Previously, Power Brush reverted to an untransformed appearance.
-
Fix If you apply a stroke to an open contour and export to OpenType TT, FontLab now exports a single-stroke OpenType+SVG font in addition to the traditional OpenType TT font.
#7316 -
Fix The Erasing Rectangle tool now works correctly in elements that have live transformation applied.
#7049 -
Fix If you create auto layers that have circular references (e.g.
acuteis an auto layer ofacutecombwhileacutecombis an auto layer ofacute), FontLab no longer crashes, but outputs a warning as intended.#7286 -
Fix If you change the font’s UPM size with scaling, FontLab now automatically updates linked metrics. Previously, you had to choose Font > Update Glyphs.
#7235 -
Fix FontLab no longer crashes if you align Preview panel content to to the right.
#7290 -
Fix FontLab no longer crashes if you paste a layer, then move a node, and then Undo.
#7248 -
Fix FontLab no longer crashes if you open a FontForge SFD file.
#7224 -
Fix If you paste a transformation, you can now Undo it.
-
Fix You can no longer close the font during the saving or exporting operation. Previously, If you closed a font during save or export, FontLab could crash.
#7199 -
Fix If you choose Edit > Select All with the Element tool, FontLab now selects all elements/components correctly.
#7174 -
Fix In the Duplicate Glyph dialog box, the option Replace existing suffix works correctly now. FontLab no longer replaces custom glyph name suffixes if the option is turned off.
#7194 -
Fix If you slice a part of a glyph using the Knife tool with Ctrl, FontLab now selects the sliced contour so you can copy-paste it. Previously FontLab pasted the whole element, not the selection.
#7195 -
Fix In the Font Info dialog, if you use the Copy Page button to copy Font Info > Creator page, and then paste the info to other open fonts, FontLab now correctly pastes the font creation date and time stamp.
#7196 -
Fix The captions in Font Info > Overview > Autohint are now corrected. Previously, they were swapped.
-
Fix FontLab now keeps the order of elements if you ungroup them.
#7151 -
Fix On Windows, if you digitally sign your font, FontLab no longer incorrectly shows the “invalid password” message with certain
.spc-.pvkpairs. You can sign the fonts now.#7287 -
Fix On Windows, Element > Optically separate works again.
#7197 -
Fix On Windows, ShiftCtrlF now toggles FontAudit as intended.
-
Fix On Windows, FontLab now correctly pastes drawings copied in Adobe Illustrator into the Font window cells.
#7184