New in FontLab 8: Color
Paste, import and edit color vectors, gradients and images in many formats. Apply colors and visually-designed gradients to fills and strokes. Overlay monochrome layers and export to all OpenType color fonts.
New in FontLab 8: Fill elements with gradients or solid colors. Copy-paste color fill and stroke between glyphs. Import drawings with gradients. Open and export better OpenType+SVG and new OpenType+COLRv1 fonts. Export an automatic dark-mode color palette. Overlay multiple layers into color fonts.
New in FontLab 8.2: support for the trending OpenType COLRv1 format, export of glyphs as individual SVG, PDF or PNG artwork assets.
Color
New In FontLab 8, you can assign color to contours and fills in a fully new way.
Colors panel
New The Colors panel is fully redesigned, and now has palettes (formerly in separate Swatches panel), and support for gradients. Keep in mind: colors are assigned on a per-element basis. To have an object of different color, you need to create a separate element.
Color type selector
The top row of the panel is the color type selector. Here, you can:
- Click the Stroke or Fill portion to choose if you’re assigning color to the stroke or to the fill of the element. Also click the double arrow to swap the stroke and fill color.
- Choose the color type: Solid color, Linear gradient, Radial gradient, Conical gradient.
- Click Set black color to assign the standard black color.
- Click Reset color to set transparent color.
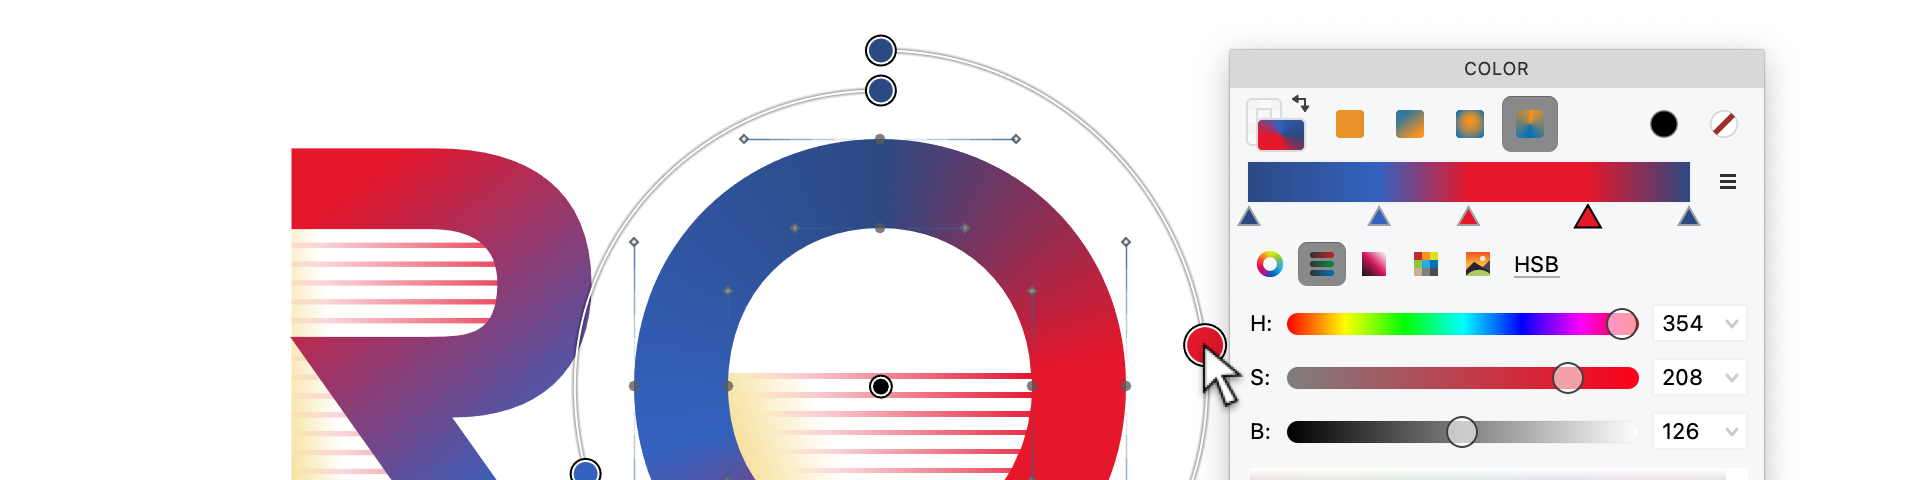
Color and gradient bar
The color and gradient bar is below the color type selector. If the color type is Solid color, the bar shows a rectangle filled with the flat (solid) color. If the color type is a gradient, the bar shows the gradient, and the gradient points below.

If the bar shows a gradient:
- Below the bar, the panel shows the gradient points.
- Click a gradient point to edit its color in the color editor below.
- Double-click a gradient point to remove it.
- Double-click the empty space in the gradient point area to add a gradient point.
- Click the ☰ menu to choose the spread method of the gradient (Pad, Reflect and Repeat) and to reverse the gradient.
- Click the gradient bar, or click the Stroke/Fill portion, or choose Element > Edit Gradient to open the visual gradient editor in the Glyph window.
Visual gradient editor

If the visual gradient editor is visible, you can edit the gradient directly in the Glyph window:
- Click a gradient point to edit its color in the color editor in the Color panel.
- Click a gradient point and tap BkSp to remove it.
- Click the gradient line to add a gradient point.
To open the visual gradient editor, activate one of the gradient types in the Color panel, then choose Element > Edit Gradient, or click either the gradient bar or the Stroke/Fill portion of the Color panel. #6953
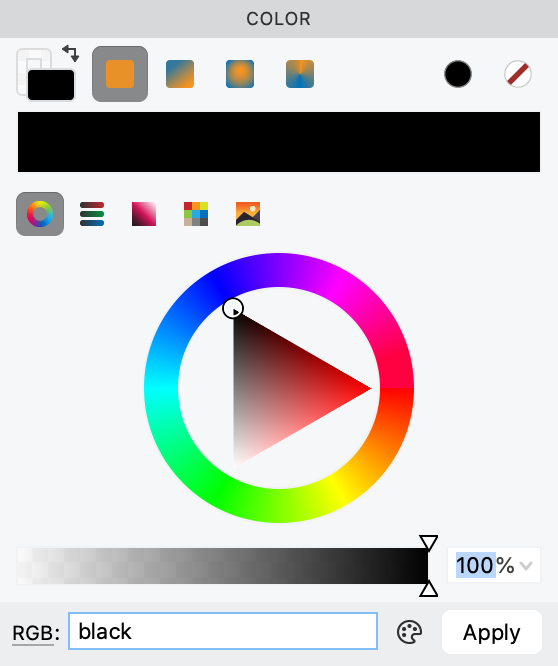
Color editor
The color editor is below the color bar. Here, you can change the current flat color or the current color of the active gradient point.
In the first row of the color editor, you can choose the color selection method:
- Wheel selector: you can visually choose the color using a wheel and a triangle.
- Sliders selector: you can choose the color using sliders. On the right, you can change the sliders type (RGB, HSB, Grayscale).
- Box selector: you can choose the color using a box and a vertical bar. On the right, you can choose what the vertical bar shows (Saturation, Hue, Lightness).
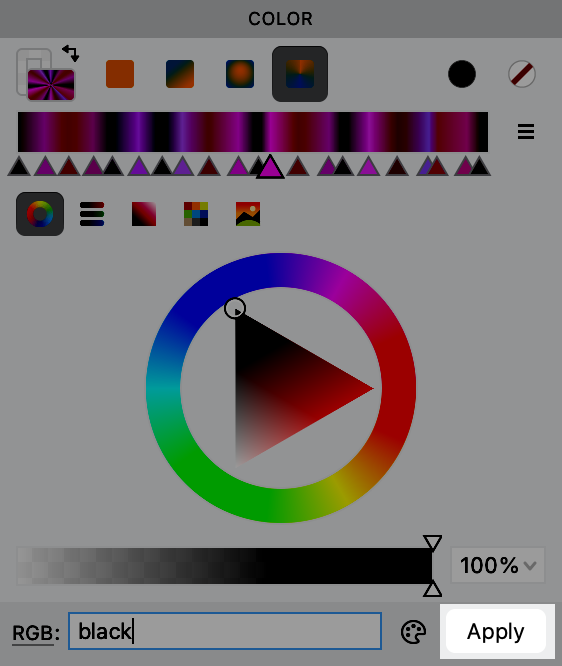
- Swatches selector: you can choose the color from the current palette. Below the palette, you can open a predefined palette, add the current color to the current palette, remove it from the current palette, and open the ☰ menu, where you can toggle between the Table and List view of the palettes, and open the Palettes dialog.

- New Image selector: you can open, drag-drop or paste your own image and use it as a selector. Click any pixel of the image to choose the color, resize the Color panel to change the size of the selector. FontLab stores your image as
Data/color_picture.pngwithin the user data folder.
Palettes dialog

New In the Palettes dialog within the Swatches selector, you can edit the predefined palettes:
- add a new palette
- duplicate the current palette
- remove a predefined palette
- import a palette from a file
- export a palette to a file
- reset the predefined palettes to default
Transparency selector
At the bottom of the color editor, you can set the transparency of the color.
Text color selector
Below, you can specify the current color using a text definition:
- RGB: three decimal numbers separated by comma for
red,green,blue, optionally followed by a comma and a fourth decimal number for transparency in percentage (0–100) - HSB: three decimal numbers separated by comma for
hue,saturation,brightness, optionally followed by transparency - Lab: three fractional numbers of the Lab color model, optionally followed by transparency
- #: a hexadecimal RGB definition (
#rrggbb)
In the text box, you can always enter a hex RGB definition if you prefix it with #. New You can also enter a predefined name of a named color. If you start typing a name such as transparent, black or red, the text box shows name suggestions. Open Help > Help Panel and click the Colors panel for the full list of 140 named colors. These names are used in the CSS and SVG specifications.
System color selector
New If you click the palette button next to the text color selector, FontLab opens the system color dialog. There, you can use the screen color picker and specify the color using various methods available in your operating system (different between Windows and macOS).
Apply button
New When you’re in the Font window, select multiple glyph cells and click the Apply button at the bottom of the panel to apply the same color to all elements in the current layer of the selected glyphs.
Copy-paste of stroke & fill
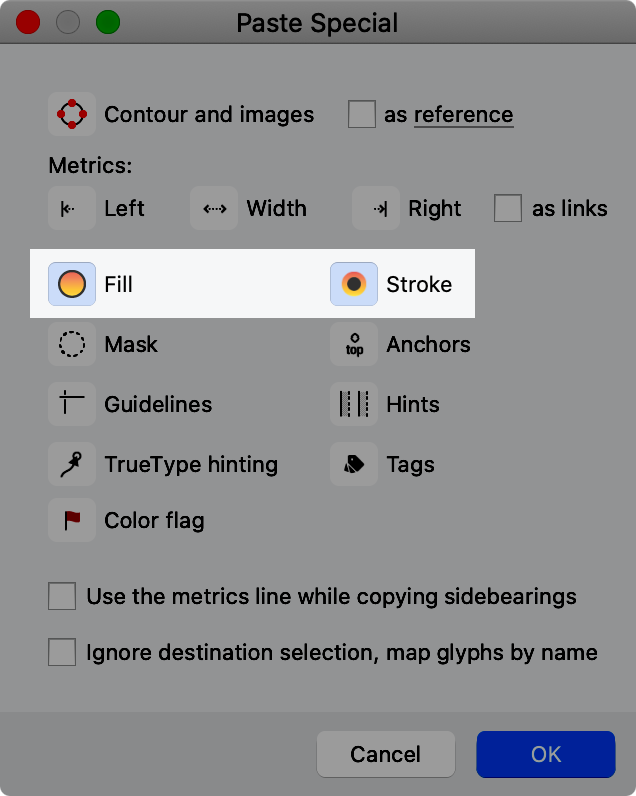
New If you have an element that has stroke and/or fill, you can choose Edit > Copy Element’s > Stroke & Fill, then Edit > Paste Stroke & Fill, or you can copy an element and choose Edit > Paste Special > Stroke or Fill.
Overlay Fonts
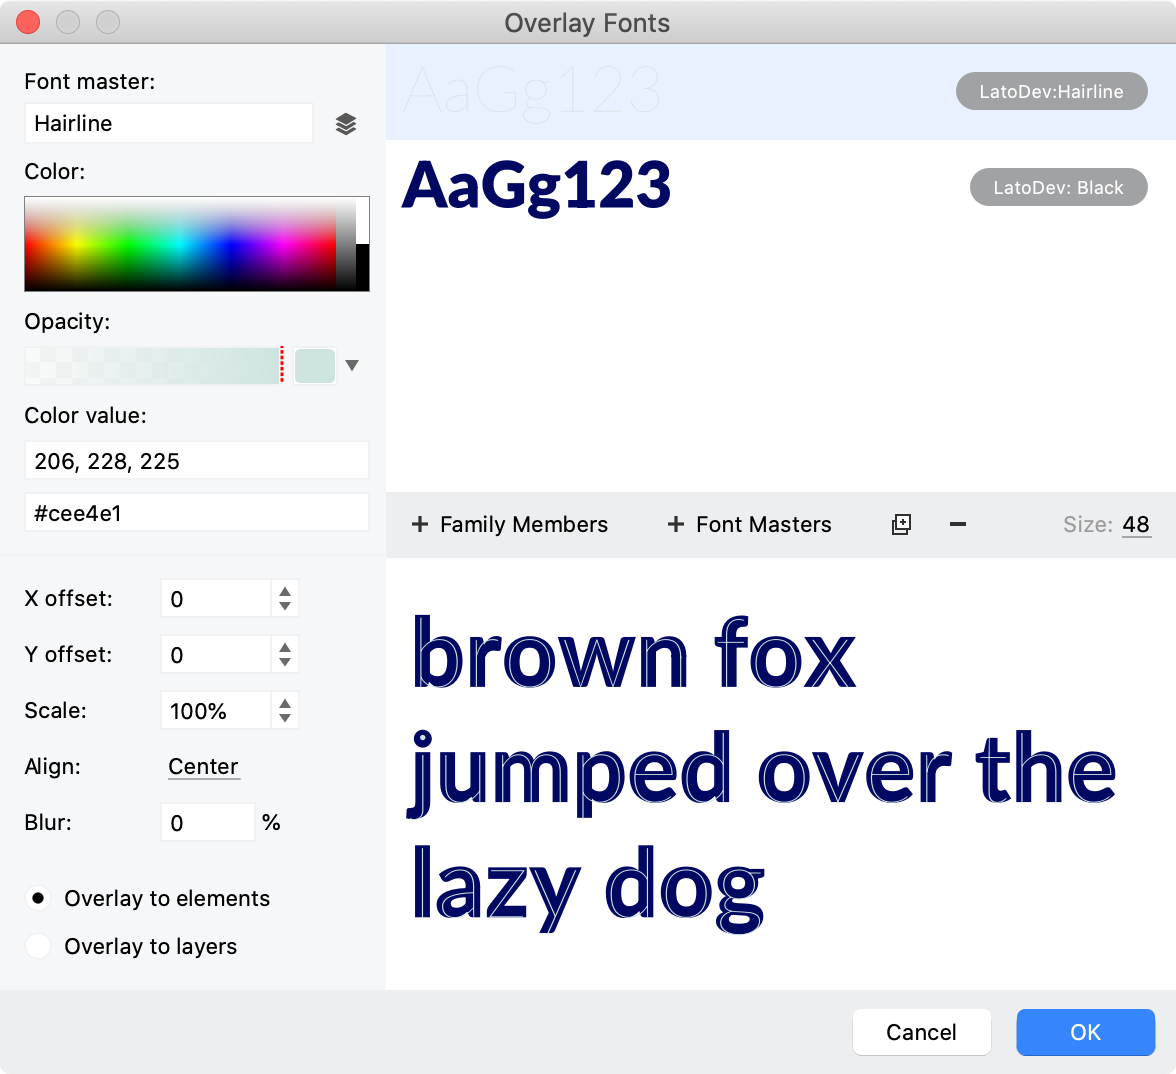
With Font > Overlay Fonts, you can create a multi-color “layered” (chromatic) font. Previously, you could combine separate single-master fonts into a multi-color font. New Now you can also combine font masters from one or more fonts.
For each layer that you are overlaying, you can specify a color and opacity, offset, scale and blur. For the overlaid font, FontLab will use the metrics and kerning of the layer at the very bottom. You can specify Overlay to elements to combine all colored elements in a single layer (master), or Overlay to layers to put each colorized layer in a separate master.
If you chose Overlay to elements, you can export the font as a color OpenType font.