New in FontLab 8: Explore & prepare
Blaze through your workflow with unrivaled speed and fluidity, even with the most complex designs. The interface is supremely flexible, with customizable workspaces, dockable panels, and multiple views to suit your needs. Contextual help is always at your fingertips: just hover over any UI element and press F1 to instantly see how it works.
New in FontLab 8: Relax your eyes with the new dark or refined light interface theme. Group panels into a vertical infinite, scrollable panel dock, and intuitively navigate between the panels. Adjust numeric values with sliders and calculations. Boost your productivity with up to 8× improved performance.
New FontLab 8.3 is the only pro font design tool that works on macOS (macOS 10.15 Catalina or later), Windows (8.1 and later), and even Linux (via CrossOver or Wine). On new Macs, FontLab 8.3 runs at native Apple Silicon speed (up to 2× faster). The Glyph window widgets let you easily edit sidebearings, advance width, kerning pairs and classes, and other properties of elements, anchors, guides, nodes and handles. You can now adjust scrolling speeds in the Glyph and Font window.
System requirements
macOS
FontLab 8.3 for Mac runs on macOS 10.15 Catalina or later, including macOS 14 Sonoma or later. FontLab 8.3 for Mac is a “universal” app. On Apple Silicon Macs, it runs at native speed, up to 2× faster than FontLab 8.2!
Note
To run FontLab 8 on on macOS 10.13.6 High Sierra or macOS 10.14 Mojave (in a limited way), use FontLab 8.2 or earlier.
Windows
FontLab 8.3 for Windows runs on Windows 8.1, Windows 10, and Windows 11 or later. We strongly recommend that you use 64-bit Windows and install the 64-bit version of FontLab 8. If you have a 32-bit system, you must install the 32-bit version of FontLab 8.
FontLab 8 can run with limited functionality of Windows 7, but exporting variable fonts and Python scripting is not possible. To export variable fonts on Windows 7, install Python 3.8.10 for Windows 7 and fontmake, then export DesignSpace+UFO from FontLab 8 and use python -m fontmake -m path_to_designspace.designspace -o variable. We don’t provide technical support for this configuration.
If you run the FontLab installer on Windows from a script or the commandline, you can use command-line parameters to customize the installation process. For example, you can perform a “silent” installation that does not show any dialogs:
FontLab-8-Win64-Install-8762.exe /NOCANCEL /SP- /VERYSILENT /SUPPRESSMSGBOXES
New If you use the /VERYSILENT command line option and the installation finishes, FontLab 8.2 no longer launches automatically.
Linux, older systems
If you use CrossOver or Wine, FontLab 8.3 for Windows also may run on macOS 10.12 Sierra, on macOS 10.13 High Sierra, on Intel-based ChromeOS, and on Intel-based Linux systems. Those configurations don’t offer full functionality. We don’t provide technical support for these configurations.
Help, commands, shortcuts
Quick Help and Help panel

New Quick Help is updated for many user interface items.
Hold F1 (or FnF1) over any UI item, such as toolbar, panels or the property bar, to see the Quick Help text. Release F1 to hide Quick Help.
Tap F1 to permanently turn on Quick Help. Move over UI items to see Quick Help.
Before you click any menu, tap F1, then click a menu, and move over menu items to see Quick Help.

Tap F1 again to hide Quick Help.
Press ShiftF1 to open the Help panel. Place it so that you can conveniently read the text. New Then open Tools > Commands & Shortcuts. If the Help panel is not open, turn on ☰ > Open Help Panel. Then, type a partial name of a command. Click the command, and the Help panel shows its Quick Help text. Press ↑/↓ to navigate the list of commands and see the Quick Help text in the Help panel.
New The panel options are now at the bottom of the panel. Click the F1 icon to toggle Quick Help (same as tapping the F1 key). When Quick Help is active, click the ? icon to choose the Quick Help location.
- If the toggle is off (default) or if the Help panel is not visible, Quick Help is shown as balloons near the pointer when you hover over user interface items.
- New But if you turn on the toggle, FontLab shows Quick Help in the Help panel, together with the mini-articles. If you move your mouse over a user interface item that has Quick Help, the panel shows it, otherwise it shows the mini-article for the last active item.
Note
If Help panel is visible and both Quick Help-related options are turned on, FontLab won’t show the balloons, but instead, the Help panel will be more “animated” (will change its content more quickly). You can still tap F1 to reduce the activity in the panel (it only shows the mini-articles). Tap F1 again to make the panel more animated.
Help font size
To enlarge or reduce the Help panel font size, toggle the the Larger Help panel text button at the bottom of the panel.
To enlarge or reduce font size in the Quick Help balloons, toggle Preferences > General > Large help.
Commands & Shortcuts dialog
New When you choose Tools > Commands & Shortcuts or press ShiftCmdP ShiftCtrlP, the Commands & shortcuts dialog now opens as a compact popup, so you can type a substring of a menu command, choose it from the list, and press Enter to run the command.
Click ⚙️ (the gear button) to turn the compact Commands & shortcuts popup into a full dialog, where you can customize the keyboard shortcuts.
New We’ve restructured some menus, so some of your custom keyboard shortcuts will no longer work. Reassign them in the full Tools > Commands & Shortcuts dialog.
If a shortcut is occupied by another command, choose the command and click Clear. If you want to change a shortcut for a command that has a shortcut already, click Clear.
To assign a shortcut, click the empty text box at the bottom of the dialog, press your desired shortcut, then click Set.
New In FontLab 8.2, if you choose Tools > Commands & Shortcuts and turn on the gear icon, you can assign the Enter key as a custom shortcut to any menu item. Use with care, since Enter also acts as a special keyboard shortcut for accepting certain operations such as free transformations. You can also assign the Enter key with some shortcuts such as Alt or Ctrl.
Custom keyboard shortcuts with Alt and ShiftAlt
New If you open Tools > Commands & Shortcuts dialog and click the gear button, you can now assign custom keyboard shortcuts that use only the Alt modifier key plus some normal key, or a key with the ShiftAlt modifiers. For example, you can assign AltB or ShiftAltB to Contour: Balance.
The custom Alt-key shortcuts work in the Glyph and Font window, but if the Text tool is active or if your cursor is in a text field, the Alt key works as it normally does and inputs additional characters.
Note
In FontLab 8 for Windows, you cannot assign custom shortcut to Alt combinations with the letters C, E, F, G, H, M, S, T, V, W, X. FontLab uses these combinations to open the menus in the menu bar, for example, AltC opens the Contour menu. Also, on some Windows keyboard layouts, the custom keyboard shortcuts assigned to Alt-key combinations only work with the left Alt key. The right Alt key is used to enter special characters.
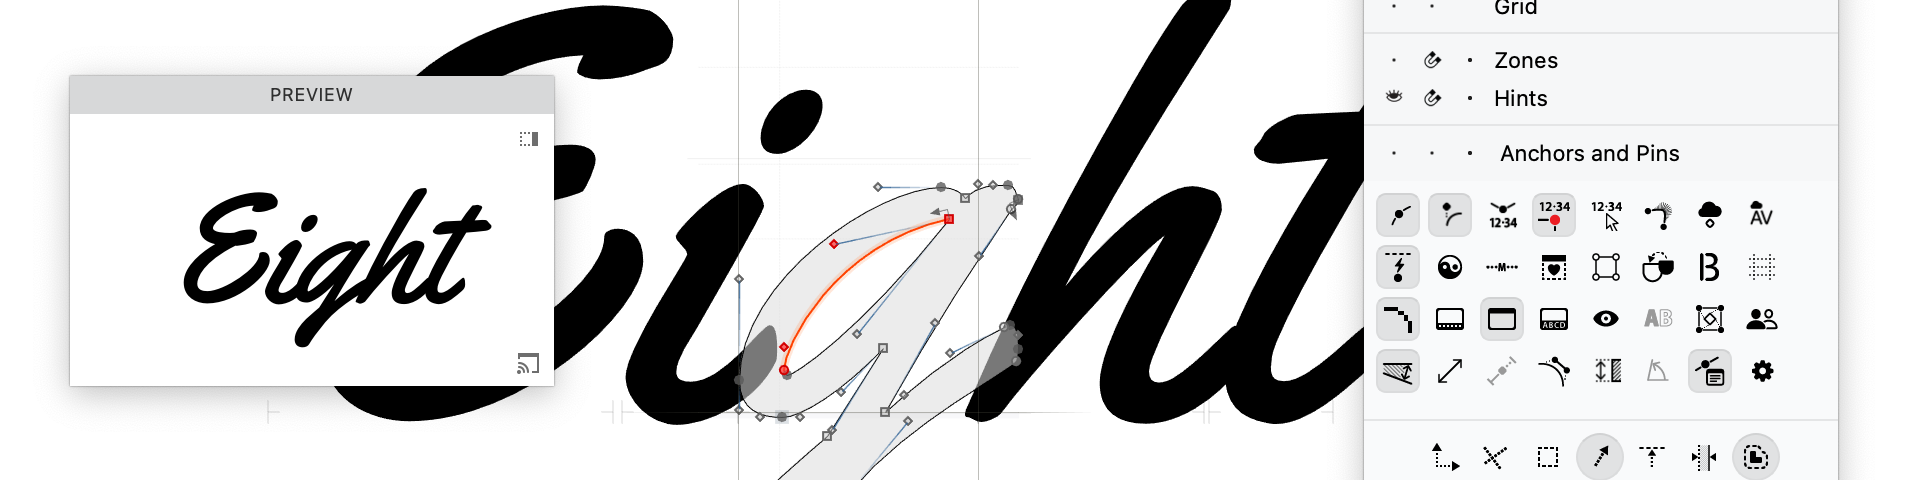
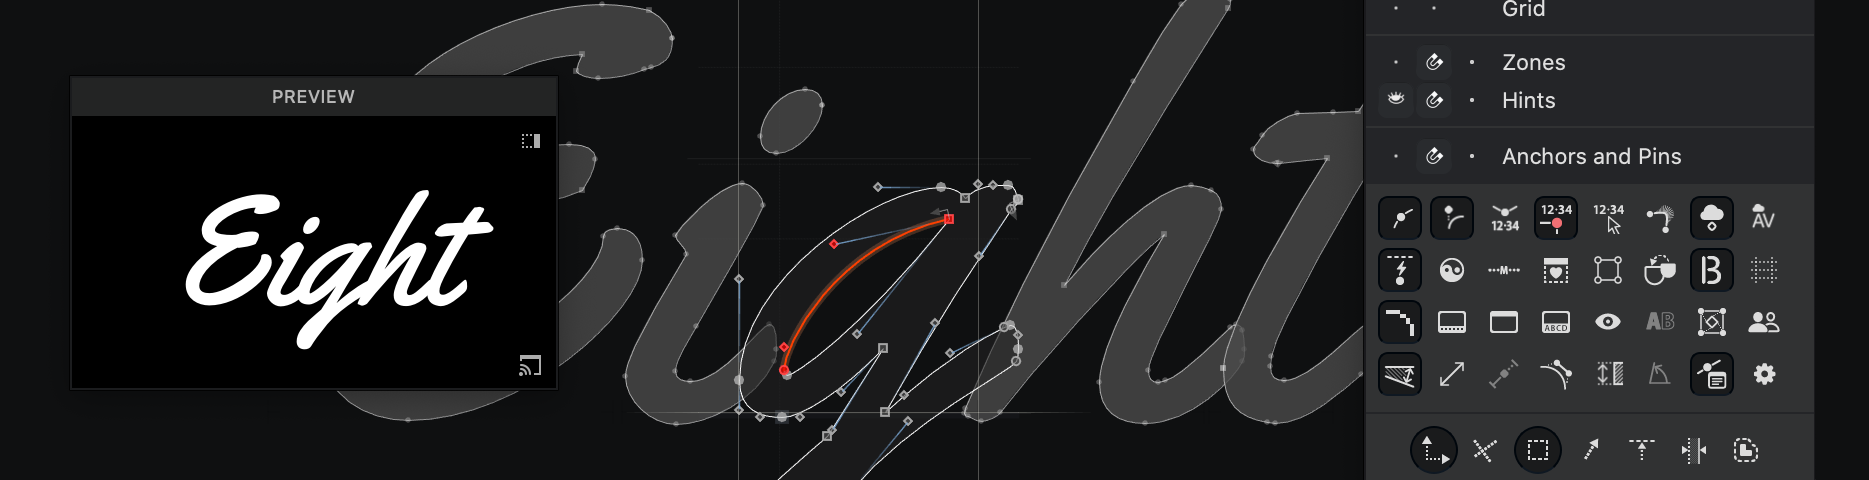
Dark or light theme
New FontLab 8 has a redesigned user interface, which now has two color themes (modes): dark or light. You can choose the theme in Preferences > General > Color theme.

By default, FontLab uses the System theme, so it starts with the dark or the light theme depending on your system setting:
- on macOS: System Preferences > General > Appearance
- on Windows 10 or newer: Settings > Personalization > Colors > Choose your color
Choose Light theme or Dark theme to always start FontLab with the given theme. You need to restart FontLab after you change its Color theme to see the change.
New FontLab 8.2 refines the user interface in both dark and light mode:
- New The colors of the panels and UI areas is more uniform, to reduce visual noise.
- New The on/off toggle buttons now follow the same logic across the UI. For example, toggles on panels in dark mode were darker if they were turned on, and toggles in the Preferences dialog were lighter if they were turned on. Now they are always darker if turned on.
- New We have updated many UI icons to provide better uniformity and clarity.
- New We slightly rearranged the content of some panels like Node or Guide so the content fits better even if the panel is small.
Dark theme
If FontLab runs with the dark theme:
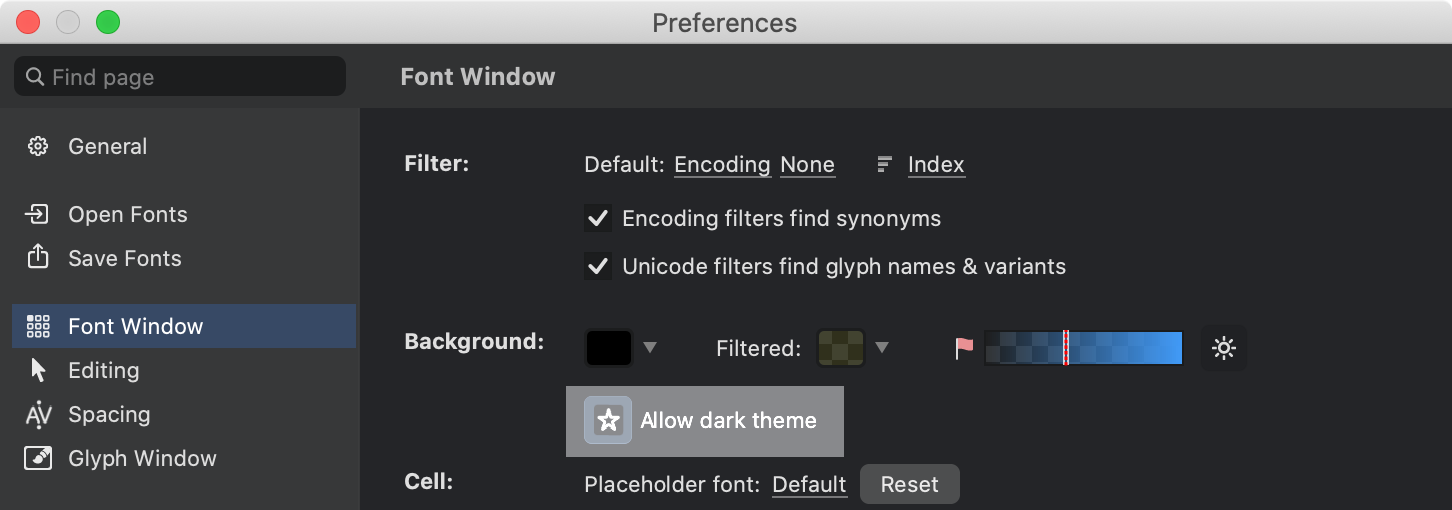
New The Font window glyph cells use the dark theme by default. Turn off Preferences > Font window > Allow dark theme, and the Font window glyph cells will use the light theme.
New The Glyph window content uses the light theme by default. The Glyph window will use the dark theme if the Preferences > Glyph window > Background section:
- has Allow dark theme turned on and the Background color is a light color such as white
- New or has Allow dark theme turned off and the Background color is a dark color such as black (this works on macOS only)
New On macOS, you can set the Glyph window background color separately for the Metrics and Kerning modes (in Preferences > Spacing), for the Mask layer, and for all other editing modes (in Preferences > Glyph window > Background). If the background brightness is dark, the Glyph window will use the dark theme.
If you hold Space or `, the Quick preview of the Glyph window uses the light theme by default. Turn on Preferences > Glyph window > Also on preview, and Quick preview will use the dark theme.
- New In FontLab 8.2, if FontLab is running in the dark theme, the Preferences sidebar shows quick toggles that allow you to quickly choose the light or dark theme for the Font window glyph cells and for the Glyph window canvas.
Light theme
If FontLab runs with the light theme, the Font window glyph cells and the Glyph window content is always rendered with the light theme.
New In the light theme, the colors within the user interface are more consistent than in the previous version:
- dialog boxes and panels use a slightly lighter gray than in FontLab 7
- text boxes use a white background, also in large dialogs like Font Info and Preferences
- toggles that are turned off have transparent background rather than white, but the background of a toggle becomes white if you hover over it
- checkboxes are monochrome
User interface icons
New FontLab has updated user interface icons in many places, including the View panel, the Transform panel, the Elements panel, the Panels List panel, in the Font Info and Preferences dialogs, in the Font and Glyph window property bars, and in the toolbar.
The updated icons are less colorful, more visually consistent, and are more aligned with the design language of the newest versions of macOS and Windows.
Menus
New We have reorganized several menus to reduce clutter, accommodate additions, prioritize commonly-used entries, and move items closer if they are logically related.
Edit menu
- In the Copy Element’s submenu, you can:
- New Use the new Transformation command to copy the current element’s live transformation (position, live scale, live rotation and live slant). You can then select another element and choose Edit > Paste to apply the copied transformation to that element.
- New Use the new Copy Stroke & Fill command to copy the stroke and fill attributes of some elements, and later paste (apply) them onto other elements.
- Select All and Invert Selection are moved down.
Font menu
- Generate Glyphs is now called Build Glyphs.
- Add Glyphs is now called Add Glyphs from Catalog.
- Detect Composites is moved up.
- Metrics submenu has metric-related commands, including the new Auto Space.
Glyph menu
- The Flag submenu is moved down.
- The Layer submenu contains items that were previously directly in the menu, and are also accessible in the Layers & Masters panel: for adding/removing layers and switching between them.
- Auto Layer / Auto Glyph is moved up so it’s together with component-related items.
- Add Anchor is moved down, and Remove Anchors is moved from the Tools menu.
- New You can use the new Set PS Direction command to set the direction of all contours in the glyph layer to PostScript (counterclockwise). Use Tools > Actions > Contour > Contour direction > Set PostScript direction to perform this on multiple layers.
- Create Overlaps is moved up so it’s together with other contour-related commands.
- FontAudit and Power Guides items are now in the Tools menu.
- New The Add Sticker submenu is now at the end of Glyph menu, followed by the new Remove Stickers command.
Element menu
New We’ve reorganized the Element menu to improve the clarity. The menu items now follow a logical structure:
The element itself
- New submenu. Add elements, pins and the special Text Shape elements.
- New Locked Content (previously named Locked). If it’s on, you cannot edit the content of an element directly in the window. If the element is a reference and you double-click it, FontLab opens another reference in the Glyph window, which you then can edit. This toggle does not lock the position of the element within the glyph space.
- New Anchored (previously named Attached). Works with a component. If it’s is turned on, a
_-prefixed anchor in the component’s source glyph is used to attach the position of the component to a corresponding anchor in another component or in the current glyph layer. - Nonspacing submenu. Control if the element is used to calculate sidebearings. If an element or component is set to nonspacing, it becomes “invisible” to the spacing engine.
- New Reference submenu (previously named Element Reference). Contains items focused on reusable elements: references and components.
Relationships between elements
- Group. Attach elements or components to each other as a group, and create a higher-level element to which you can then apply filters. For example, use the Fill tool to perform contour boolean operations between contours that belong to separate elements.
- Arrange submenu. Organize and navigate through the element “stack” (the Z-axis, the order within the glyph layer).
- Align submenu. Arrange elements within the coordinate space.
- New Fusion submenu. Perform non-destructive, live “pathfinding” (Boolean operations) on elements or components.
- Contours submenu. Change the order of the contours within the element, combine multiple elements into one, and split one element into multiple elements by contour. New It has the new Sort Vertically and Sort Horizontally commands.
- New Convert to Glyphs submenu (previously named Place As Glyphs). Create new glyphs from existing elements, also from elements on the Sketchboard.
- Make Clipping Group. Use one element as a live clipping (cropping) mask for another element.
- Optically Separate. Split non-overlapping contours from one element into multiple elements. Often used after autotracing and before Convert to Glyphs.
Design with live filters
- New Brush & Stroke submenu. Add Power Brush and Power Stroke filters to an element, so you can apply live calligraphic or geometric stroke expansion to your contours. Convert these filters into final contours.
- Glue Selection and Add Skin Filter. Create smart live joins between glyphs and elements, or apply one glyph as a decoration for another glyph.
- Add Delta Filter. Apply live additive modifications to contours using the “delta” concept used in variable OpenType fonts.
- Expand Transformation. Convert live element transformations applied in the Elements panel into final coordinates, preserving the appearance.
- Expand Filters. Convert live filters like Clipping Group, Power Brush, Power Stroke, Glue, Skin, Delta, Smart Corners into simple contours, preserving the appearance.
- Remove Transformation and Remove Filters. Discard the live filters or transformations, and convert the contours into their basic forms.
Images and color
- Image submenu. Modify bitmap elements and SVG elements, autotrace images.
- Edit Gradient. Edit the gradient if an element has a gradient fill.
Contour menu
New We’ve reorganized the Contour menu to improve the clarity. The menu items now follow a logical structure:
The Power Nudge toggle is no longer in the Contour menu. Instead, it’s in the Contour tool toolbox. To toggle Power Nudge, double-click the Contour tool icon in the toolbar to open the toolbox, and turn on the first icon, or press ShiftC.
Nodes
Nodes submenu. New Includes some previous top-level items.
- Navigate between nodes.
- Convert between node types.
- Unlink Corner breaks and elongates the segments to make an open contour, and adds a Fill filter so it’s still filled
- New Loop Corner makes a triangular loop that you can optionally unfill with Font Info > Other Values.
- Add Smart Corner makes live rounded corners and inktraps.
Handles
New Handles submenu.
- Retract handles.
- New Equalize handles of a smooth node shifts the handles to make the handles the same length and keep their total length.
- New Harmonize handles makes a smooth node G2-smooth in-place.
- New Superharmonize (previously as Harmonize Handles in the context menu) makes a smooth node G3-smooth.
Convert
Convert submenu. New It has new commands, see the “Build & Assemble” chapter for more details.
- Change segment types and curve types.
- New To Corner (previously top-level Replace with Corner) replaces a segment with two line segments: they extend the adjacent segment directions of the neighboring segments and meet at a new corner.
- Convert paths into new components or elements.
Coordinates
Coordinates submenu.
- Control integer / fractional coordinates.
- Follow Italic Angle slants “vertical” editing moves.
Common operations
- New Set Start Point and Reverse Contour are now together.
- Break and Join. Make contours open or closed.
- Align Points submenu. Align multiple nodes or contours vertically or horizontally.
- Edit Tunni Lines. Edit the Tunni lines for multiple segments at once.
- Create Parallel Contour…. Create parallel contour from selection.
- Expand Contour…. Create a simple stroke expansion. For live stroke expansion, use Power Stroke.
Contour improvement
- Simplify. Puts nodes at extremes, removes nodes that don’t contribute much to the shape. The shape may change slightly.
- Clean Up. Lightweight node removal without changing shape.
- Harmonize Nodes. Moves smooth nodes to new G2-smooth positions, keeps the handles. To adjust the handles to make a smooth node G2-smooth in-place, use Handles > Harmonize.
- Balance. Equalize the tension of both handles of a curve segment, keep the shape.
- Nodes at Extremes. Adds nodes at outmost horizontal and vertical coordinates of contours. The handles of the new nodes will be perfectly vertical or horizontal.
Boolean operations
- Overlap submenu. More boolean contour operations. New Smartly Make Overlap.
- Remove Overlap. Eliminate (merge) overlapping parts of contours or selections.
Tools menu
- The Guides submenu collects commands for adding a guide between nodes, removing guides of a certain type, and the Power Guide commands, moved from the Glyph menu.
- The Hints submenu collects commands related to hints. TrueType Hinting is moved to the Tools > Tools submenu. For common operations like Autohint, we recommend that you use the keyboard shortcut.
- The FontAudit submenu collects commands related to FontAudit, moved from the Glyph menu.
View menu
New We’ve reorganized the View menu to improve the clarity. The menu items now follow a logical structure:
Window zoom
Zoom submenu. Controls the zoom level of the Glyph window, or the cell size in the Font window.
Window add-ons
- Show/hide Control Bars, Rulers and the Metrics Table.
- Show/hide the Metrics Line. If it’s visible, FontLab shows numerical sidebearings at the intersection of the glyph and the line.
Non-numeric contour items
- New Contours submenu. Show/hide Nodes, Handles, Contour Direction, Node Links, Curvature, FontAudit. Turn Smooth Outline on/off.
- Show/hide Selection Frame, Tunni Lines.
More settings are in Preferences > Glyph window.
Numeric contour items
- New Measurements submenu. Show/hide Coordinates, Quick Measurement, Lengths & Angles, Tension, Stems, Counters, Corner Angles, Grid, Hints and Scoreboard.
- Show/hide Font Dimensions, Font Guides, Glyph Guides, Zones, and metrics/hinting Shadows.
Some of these items were previously accessible only in the View panel. Now they’re also in the menu, so you can assign shortcuts to them. FontLab stores their visibility per-window, and toggles them with View > Alternative View. More settings are in Preferences > Glyph window.
Additional items
- Layers & Glyphs submenu. Show/hide Mask, Global Mask, Master Relations, Cousins, Character Placeholders, Stickers.
- Metrics & Kerning submenu. Show/hide Spacing Controls and Kerning Classes.
- Anchors & Elements submenu. Show/hide Anchors & Pins, Anchor Cloud, Element Frame, Element References.
More settings are in Preferences: Glyph window, Spacing, Cousins.
Behavior of items
- Snap submenu. Enable/disable snapping to Outline and to items if they’re also visible: Mask, Global Mask, Font Dimensions, Spacing Controls, Font Guides, Guides, Grid, Zones, Hints, Anchors & Pins.
- Lock submenu. Disallow/allow manual editing of Outline and of visible Glyph window items: Mask, Font Dimensions, Spacing Controls, Font Guides, Glyph Guides, Hints, Zones, Anchors & Pins. (Even if an item is locked, operations such as Actions and Font Info can change it.)
- Suggest submenu. Enable/disable additional snapping suggestions for Nodes, Handles, Lines, Bounds, Tangents, Guides, Stems, Distance.
- Italic Angle submenu. Control how italic angle affects the grid and the display of sidebearings.
More settings are in Preferences: Distances and Grid, Guides and Hints.
Canvas
- Show/hide True Fill, Details Across Glyphs, and Alternative View.
- Control the Glyph window panning with Center Glyph or Pair.
Context menus
- New We’ve shortened several context menus and put some operations into sub-menus.
- New FontLab 8.4 adds context menus to most tools. This makes accessing the sub-tools and tool-specific operations even easier. You can access the context menu right where your pointer is, and you have access even if the toolbox is not visible. Previously, the Contour, Element, Metrics, Kerning and TrueType Hinting tools had dedicated context menus. Now many more tools have context menus! If you activate the tool and right-click the Glyph window, you can:
| Tool | Key | Context menu |
|---|---|---|
| Text | T | perform important text operations (also accessible from the Text menu) |
| Eraser | 2 | activate the Eraser, Simple Eraser, Lasso Eraser or Simplify Path sub-tool |
| Brush | B | activate the Brush, Simple Brush, Power Brush or Erasing Brush sub-tool, toggle the Soft Brush option, and open relevant panels |
| Pencil | N | activate the Simple Pencil or Smart Pencil sub-tool, and toggle the Existing Contour is Editable and Soft Pencil options |
| Knife | J | activate the Knife, Drag to Add Nodes, Drag to Break or Drag to Slice sub-tool |
| Scissors | Q | activate the Scissors, Disconnect, Loop Corner or Ink Trap sub-tool |
| Magnet | U | perform operations on hints and Power Guides |
| Thickness | 8 | perform operations on Stroke and Brush, open relevant panels |
| Guides | G | perform operations on anchors and guides, open relevant panels |
| Rotate | R | perform rotation and flipping |
| Scale | S | perform scaling and flipping, including the new Same Width, Same Height, and in contour mode, Same Width Only and Same Height Only |
| Slant | D | perform slanting, including the new Slant By Italic Angle |
| Oval | O | activate the geometric Ellipse or the Oval with Tension sub-tool |
| Rectangle | I | activate the Rectangle, Polygon, Star and Erasing Rectangle sub-tool |
Note
For most tools, the context menu appears when you “start a right click”: you press the right mouse button or, on macOS, you also hold Ctrl and press the left mouse button. The Eraser, Brush and Guide have special functionality associated with right-dragging, so for them, the context menu appears when you “finish the right click”: you press and release the right mouse button, or on macOS you also hold Ctrl and then press and release the left mouse button. In practice, you’ll barely notice this subtle difference.
Panels
Scrollable panels dock
New The vertical panel stacks are now scrollable docks for panels. If you dock panels to the edge of the screen and the total height of the panels exceeds the vertical size of the screen, the entire stack of panels becomes scrollable.
So now, you can dock as many panels as you wish vertically, and you can enlarge the height of any of the docked panels. This now simply pushes down the panels docked below. You can even stack additional panels and dock them to the side of a scrollable dock, and the new dock also becomes scrollable.

New If the height of the docked panels exceeds the screen height, a zigzag appears at the top and/or bottom of the dock, which indicates that there is more content. Click the arrow on the zigzag to scroll dock by one full panel up or down, Shift-click to scroll to the top or bottom of the stack.
You can also use the wheel or trackpad to scroll the panels dock. If you move your pointer over a panel that has scrollable content itself (like the Kerning panel), scrolling within it takes precedence.
If you have docked the panels to the right edge of the screen, you can move your pointer over the left edge of the panel dock: a blue scroll bar appears, and you can always use it to scroll the entire dock. If the panels are docked to the left screen edge, the blue scroll bar appears over the right edge of the dock.
Opening, closing and activating panels
Previously, if a panel was open, you could close it by:
- clicking the × button in its corner
- right-clicking any panel header and choose the panel’s name
- choosing the panel in the Window > Panels menu
- pressing the keyboard shortcut assigned to the panel in Tools > Commands and Shortcuts
New Now, the system is more refined. If a panel is open, and you choose its name from the panel header context menu or from Window > Panels, or you press the panel’s shortcut:
- If this panel has focus, its name in the Window > Panels menu is prefixed with “Hide”, and then FontLab closes (hides) the panel
- If another panel or a window is active, FontLab brings the panel to the front and scrolls to it.
#5906
New So if you press a panel’s shortcut twice, FontLab moves the focus to the panel, and then closes the panel. For example, you can press AltCmdP to show the Preview panel if it’s not visible or to go to it if it is visible, and then press the shortcut again to hide the panel.
New If a panel has focus, and you press Esc or CmdEnter CtrlEnter, FontLab moves the focus to the window.
If you turn on Preferences > General > Glyph window > Activate panels on object selection, and you select a particular type of object in the Glyph window (like a node, a guide or an anchor), the corresponding panel will become visible if it was open, but was outside the visible portion of the panel dock, or was in the back of a panel group. New This preference is off by default so that the scrollable dock does not “jump” up/down as you select various objects.
Edit > More Info: Open the right panel depending on current tool, selection or highlight
New With Edit > More Info AltCmdI CtrlAltI, you can open and go to the appropriate panel depending on what window, tab or panel you’re in, what tool you have selected, and what item you have selected or highlighted.
If you’re in a Font window, and you choose Edit > More Info, FontLab opens and goes to Font Info panel.
If you’re in a Glyph window and the Contour tool is active, and you select an item and choose Edit > More Info, FontLab opens the appropriate panel and goes to it depending on the selected item. If another tool is active, FontLab opens and goes to the appropriate panel depending on the active tool. If you’re in a panel you choose Edit > More Info, FontLab opens and goes to another panel.
| Selected item | To panel |
|---|---|
| point | Node |
| guide, dimension, hint, zone | Guides |
| anchor, pin | Anchors and Pins |
| element, component | Elements |
| From tool | To panel |
|---|---|
| Element | Elements |
| Metrics | Metrics |
| Kerning | Kerning |
| Text | Preview |
| Eraser | Glyph |
| Brush | Brush |
| Pencil | Stroke |
| Rapid | Stroke |
| Pen | Stroke |
| Thickness | Stroke |
| Fill | Color |
| From tool | To panel |
|---|---|
| Scissors | Glyph |
| Magnet | Glyph |
| Guide | Guide |
| Rotate | Transform |
| Scale | Transform |
| Slant | Transform |
| Matchmaker | Variations |
| TrueType Hinting | TrueType Hinting |
| Ellipse | Color |
| Rectangle | Color |
| From panel | To panel |
|---|---|
| Classes: kerning | Kerning |
| Classes: OpenType | Features |
| Classes: tags | Glyph |
| Elements | Layers |
| Features | Classes |
| Font Info | Fonts |
| Font Map | Glyph |
| Fonts | Font Map |
| Gallery | Elements |
| Glyph | Layers |
| Guide | Measurements |
| From panel | To panel |
|---|---|
| Image | Elements |
| Kerning | Pairs and Phrases |
| Layers | Elements |
| Lookups | Features |
| Measurements | Font Info |
| Metrics | Pairs and Phrases |
| Node | Elements |
| Pairs and Phrases | Metrics or Kerning |
| Scripting | Output |
| Source | Tables |
| Tables | Scripting |
| Variations | Layers & Masters |
Tip
You can press AltCmdI CtrlAltI in succession to progressively see more info on a given topic. For example in Font window, press the shortcut to open the Font Info panel, press again to open Fonts, press again to open Font Map. Or when you’re in the Metrics mode of Glyph window, press the shortcut to open the Metrics panel, press again to open Pairs and Phrases panel, press again to go back to Metrics panel, and so on.
Window > Panels List
New In the Window > Panels List panel, you can click a panel’s icon to show/hide any panel.

New The panel now has Selections and TrueType Hinting. See below for information about the new Selections panel. The Window > Panels menu also shows all panels, including Selections and TrueType Hinting.
Hold F1 over any panel icon to see the updated Quick Help info.
The Panels List panel works great if you dock it to the right edge of the screen and resize it to one column. Then, dock the other panels to the left of it.
The last icon in the Panels List panel is a gear icon. Click it to choose which icons are shown in the Panels List panel. You can turn off the panels you use less and keep the Panels List visible at all times.
Collapsed panels

Normally, each panel is expanded and shows its content. You can resize the panel horizontally and vertically to make room for more content.
If the panel is not grouped with other panels, you can click the ⋁ icon in the panel header. The panel then collapses, and only shows its header and, optionally, compact content in one line. Click the > icon to expand the panel again.
New Many more panels now show meaningful compact content if they are collapsed.
Monospace font & font size in code editors

FontLab uses a monospace font in the Scripting, Features, Source, Output, TrueType Hinting Tables panels, in the Lib areas of Font Info, and in the Scoreboard.
To change the global default font size used in these panels, New or choose a different monospace UI font (installed on your system), use Preferences > Code editors and restart FontLab.
To individually change the font size in any of these code editors, click the editor area, hold Cmd Ctrl and press + to increase or - to reduce the size. New This now also works in the Features panel. FontLab keeps the individual font size adjustments until you restart the app, then it reverts to the global default font size.
Tools and the toolbox
Toolbox for the Contour, Eraser, Brush, Rapid, Pen, Knife, Scissors, Rectangle, and Ellipse tools
New Whenever you activate the Contour, Eraser, Brush, Rapid, Pen, Knife, Scissors, Rectangle, or the Ellipse tool, a small floating toolbox appears on the screen. This toolbox gives you single-click access to additional operations within each tool, often operations that are otherwise accessible with a modifier key.

If the toolbox is not visible for a given tool, double-click the toolbar icon to open the toolbox.
Click the × on the right side of the toolbox to close the toolbox for the given tool. Drag the toolbox to move it around (this changes the toolbox position for all tools).
New In most toolboxes, you can tap the tool’s shortcut key multiple times to toggle the mutually exclusive sub-tools. The last tap turns all sub-tools off, so the tool works in the default way.
- New In FontLab 8.2, the Glyph window toolbox has a new user interface. It has rounded sides, the Close icon is more subdued, and when you hover over it, a dotted icon appears that you can use to drag the toolbox around. If the toolbox is not visible, double-click a toolbar icon to show it.
Windows and tabs
Sketchboard is always optional
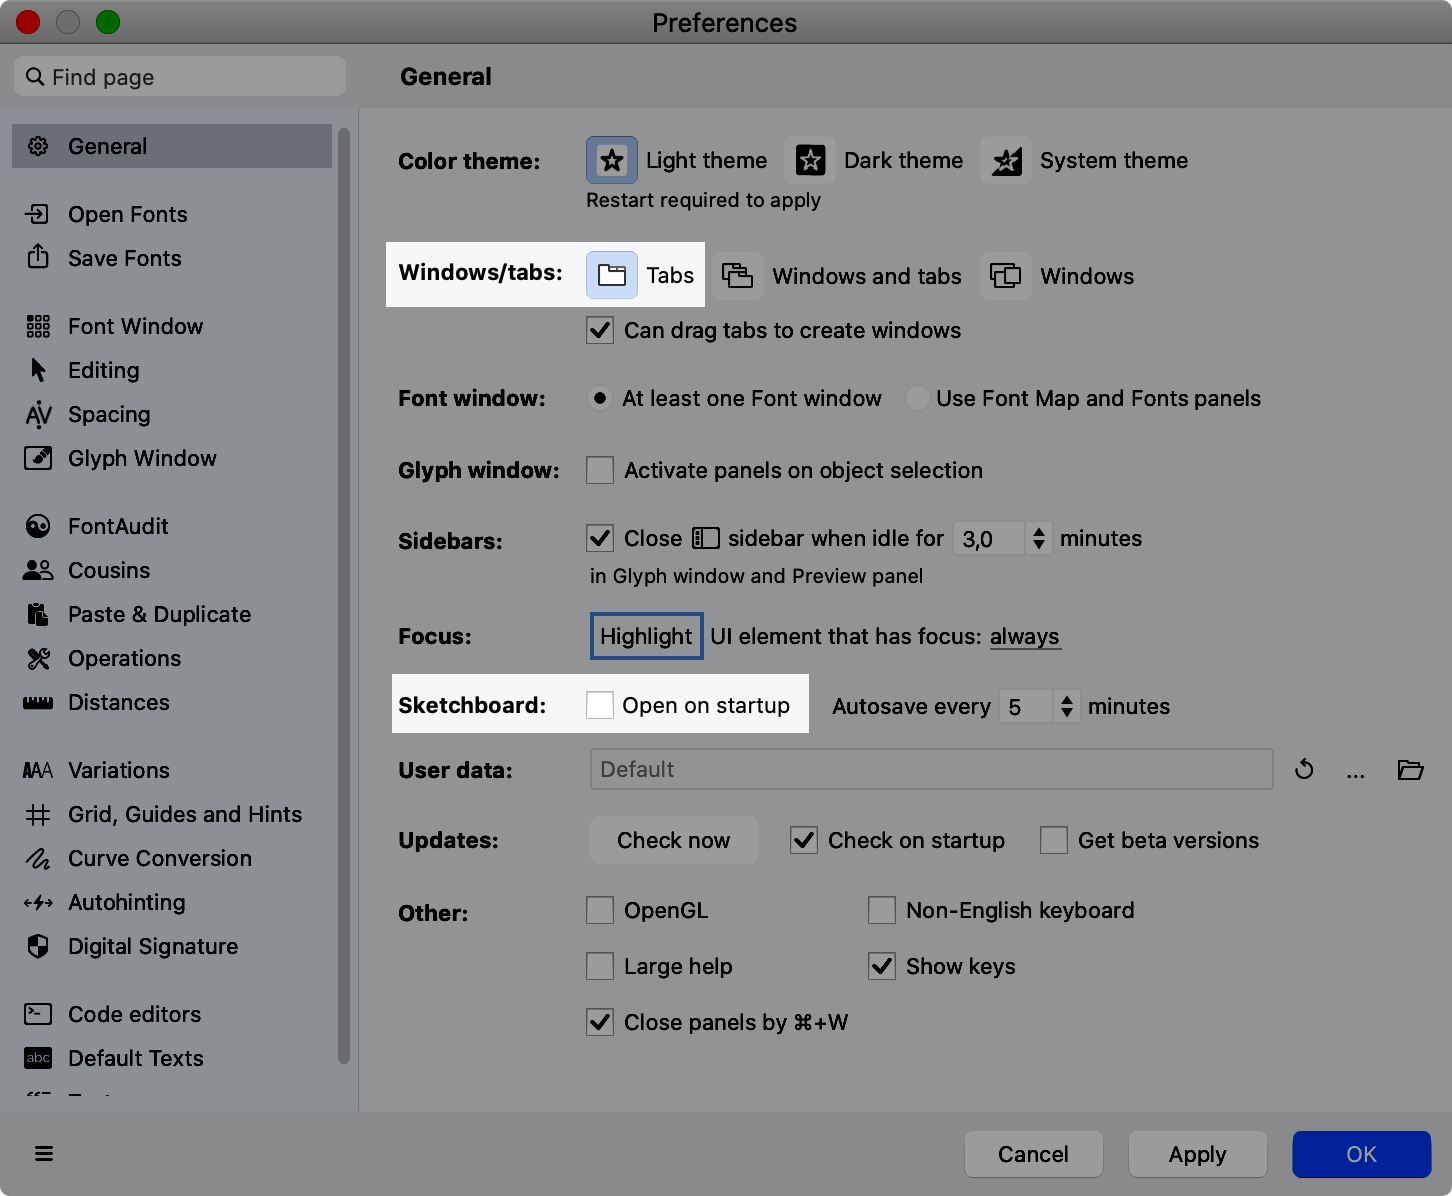
New If you work with only one window (Preferences > General > Windows/Tabs is set to Tabs), the Sketchboard is now optional. It only opens on startup if Preferences > Sketchboard > Open on startup is turned on, like in the other Windows/Tabs modes.
Right-click or Ctrl+click window title opens path dropdown on macOS
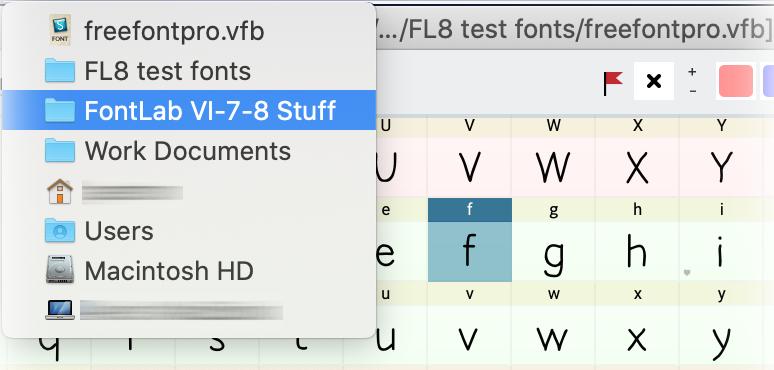
New In many macOS apps, if you right-click or Ctrl-click the window title, a dropdown opens that shows the filename and, beneath it, each folder portion. You can click any of these path components to open the folder in the Finder. FontLab 8 lets you do the same, so it’s easy to open Finder with the location of the current font file.
As in previous versions, you can also Cmd-click (Mac) or Ctrl-click (Windows) the Font tab heading to open a similar dropdown. This dropdown works on both macOS and Windows. This works only if the Font window is a tab, and works only with the Font tab (not a Glyph tab).
Unified controls for window bars
Previously, you could use the small, vertically arranged buttons on the rightmost side of the Glyphs bar to move the bar to the top or bottom of the Glyph window, and to close the bar.
New Now, other UI items have similar small buttons:
- The rightmost side of the Glyph window property bar now has a button to close the property bar, and to move it to the top or bottom of the window.
- The rightmost side of the Font window property and status bars now have a close button.
- The rightmost side of the Metrics table now has the move, close and wrap buttons arranged vertically.
Note
Visit the Font window chapter to read about the changes to the Font window.
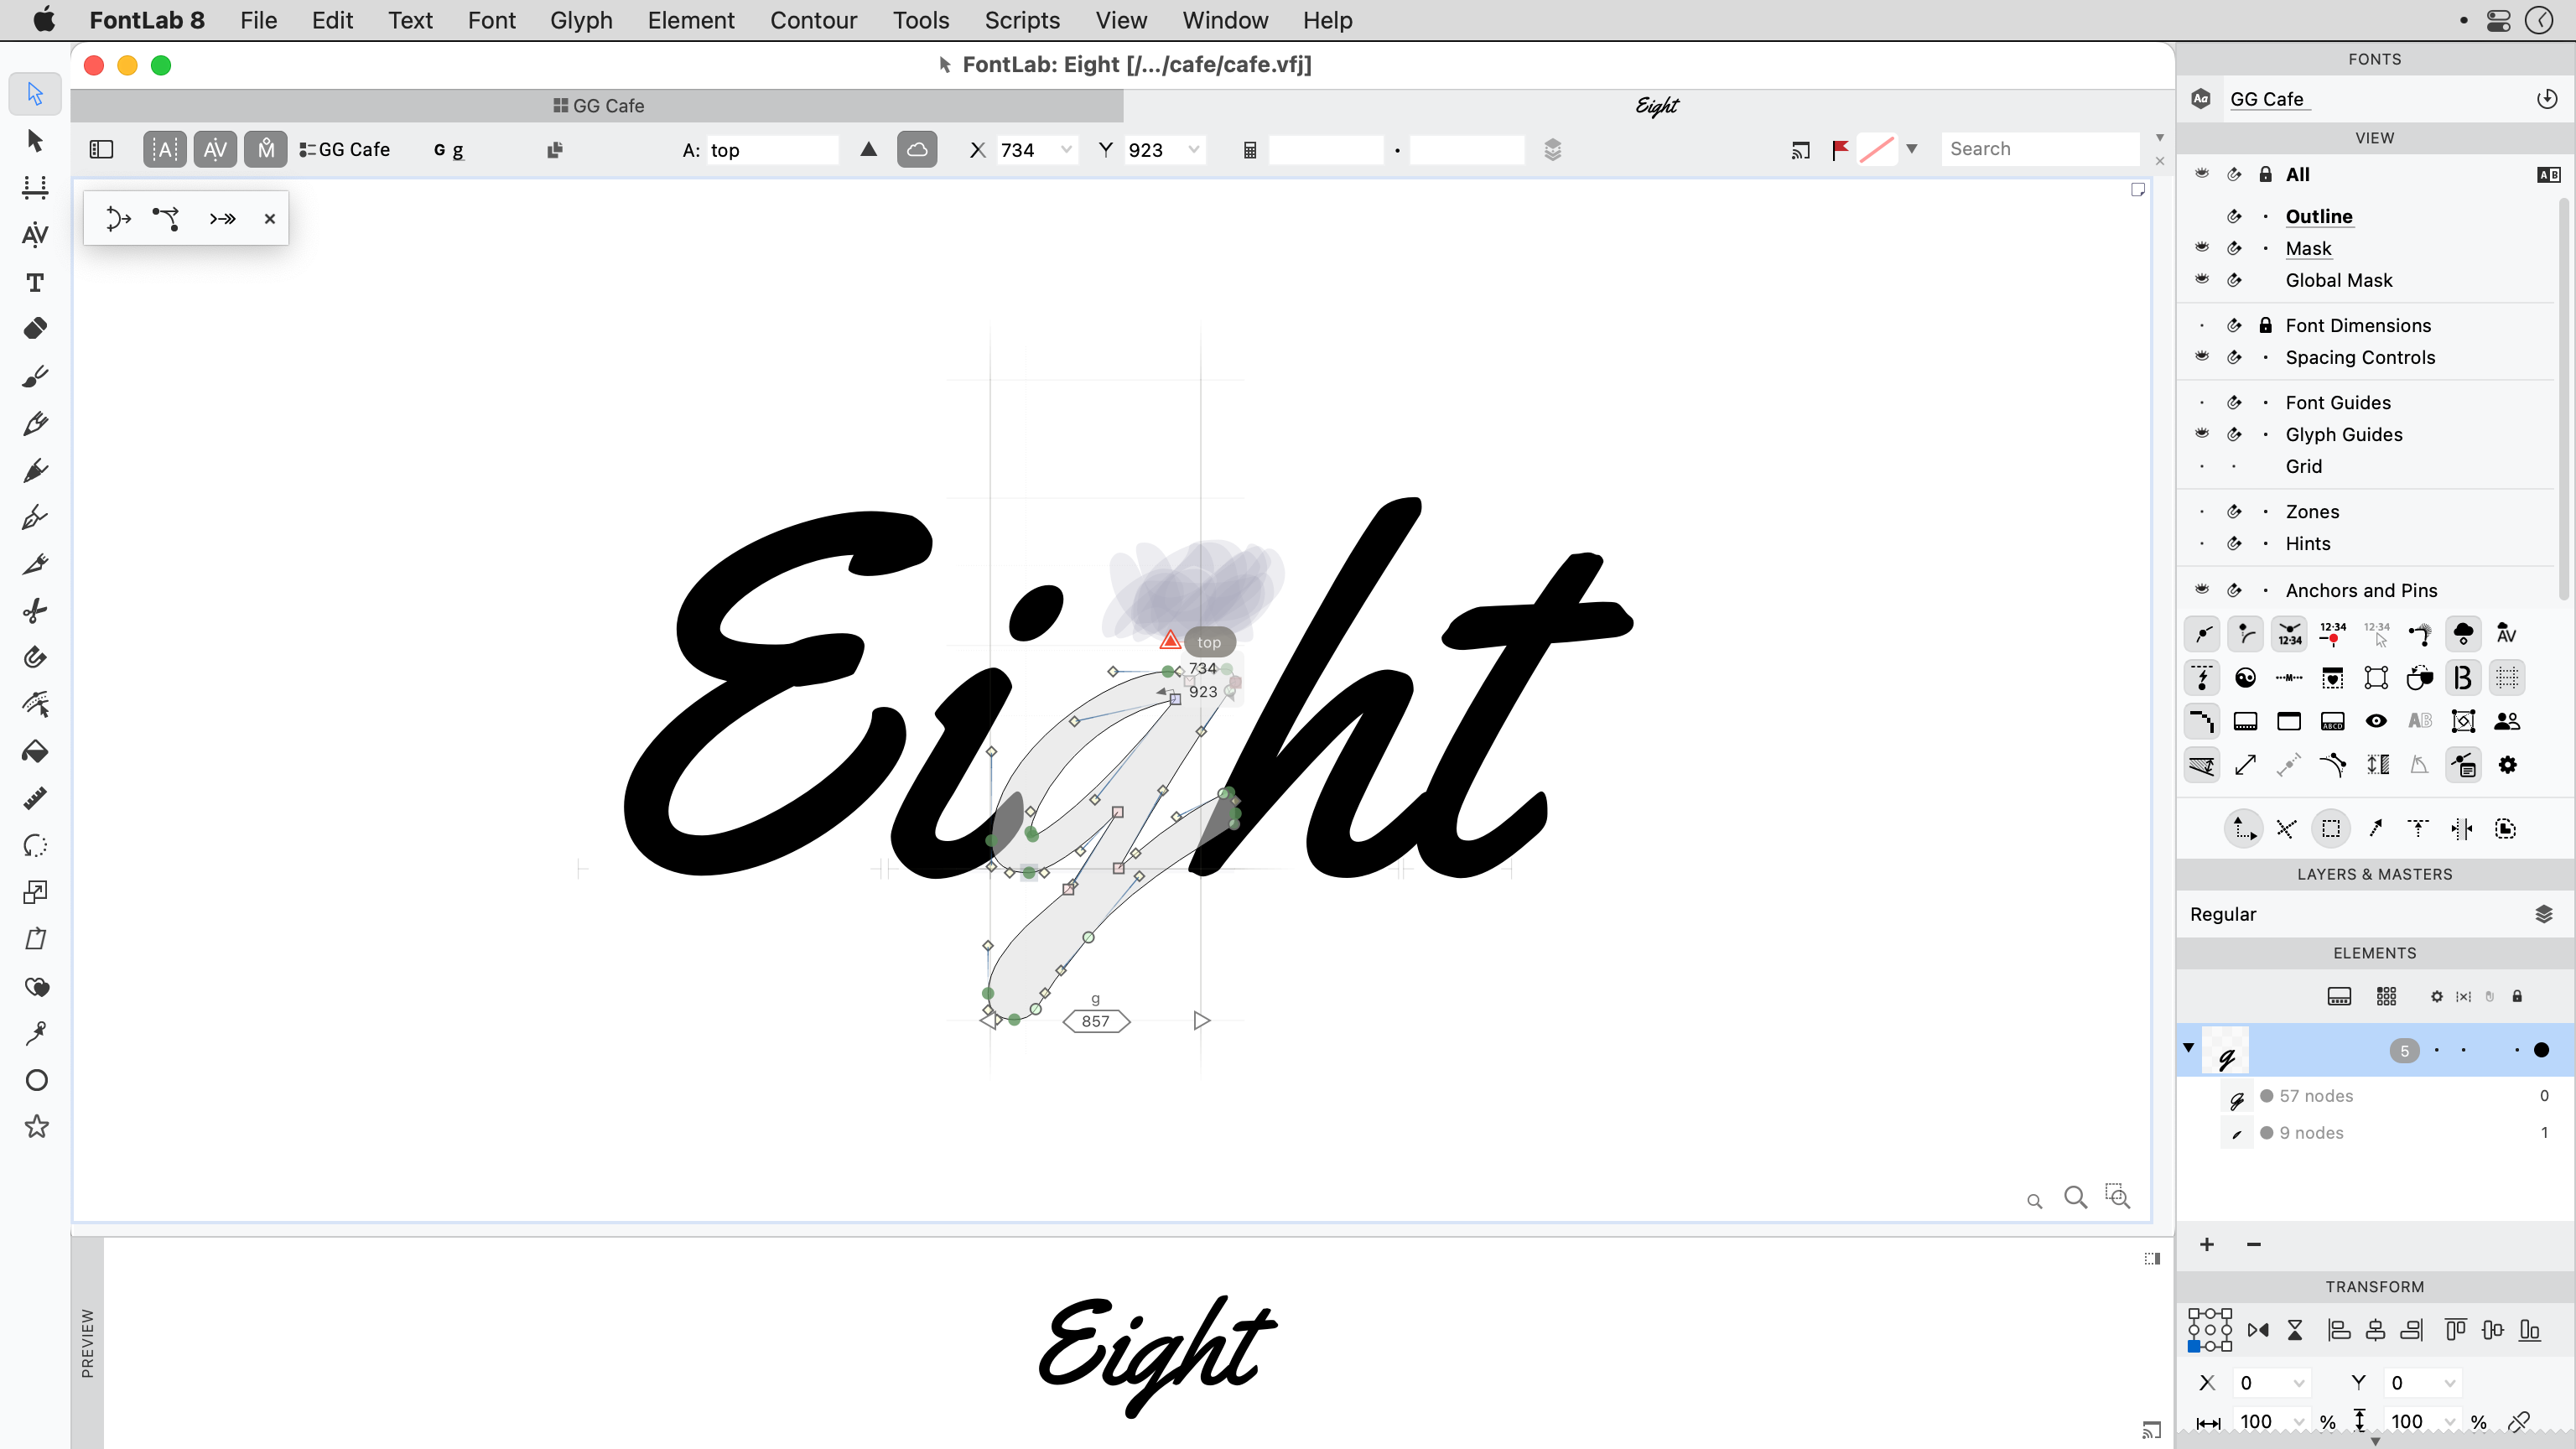
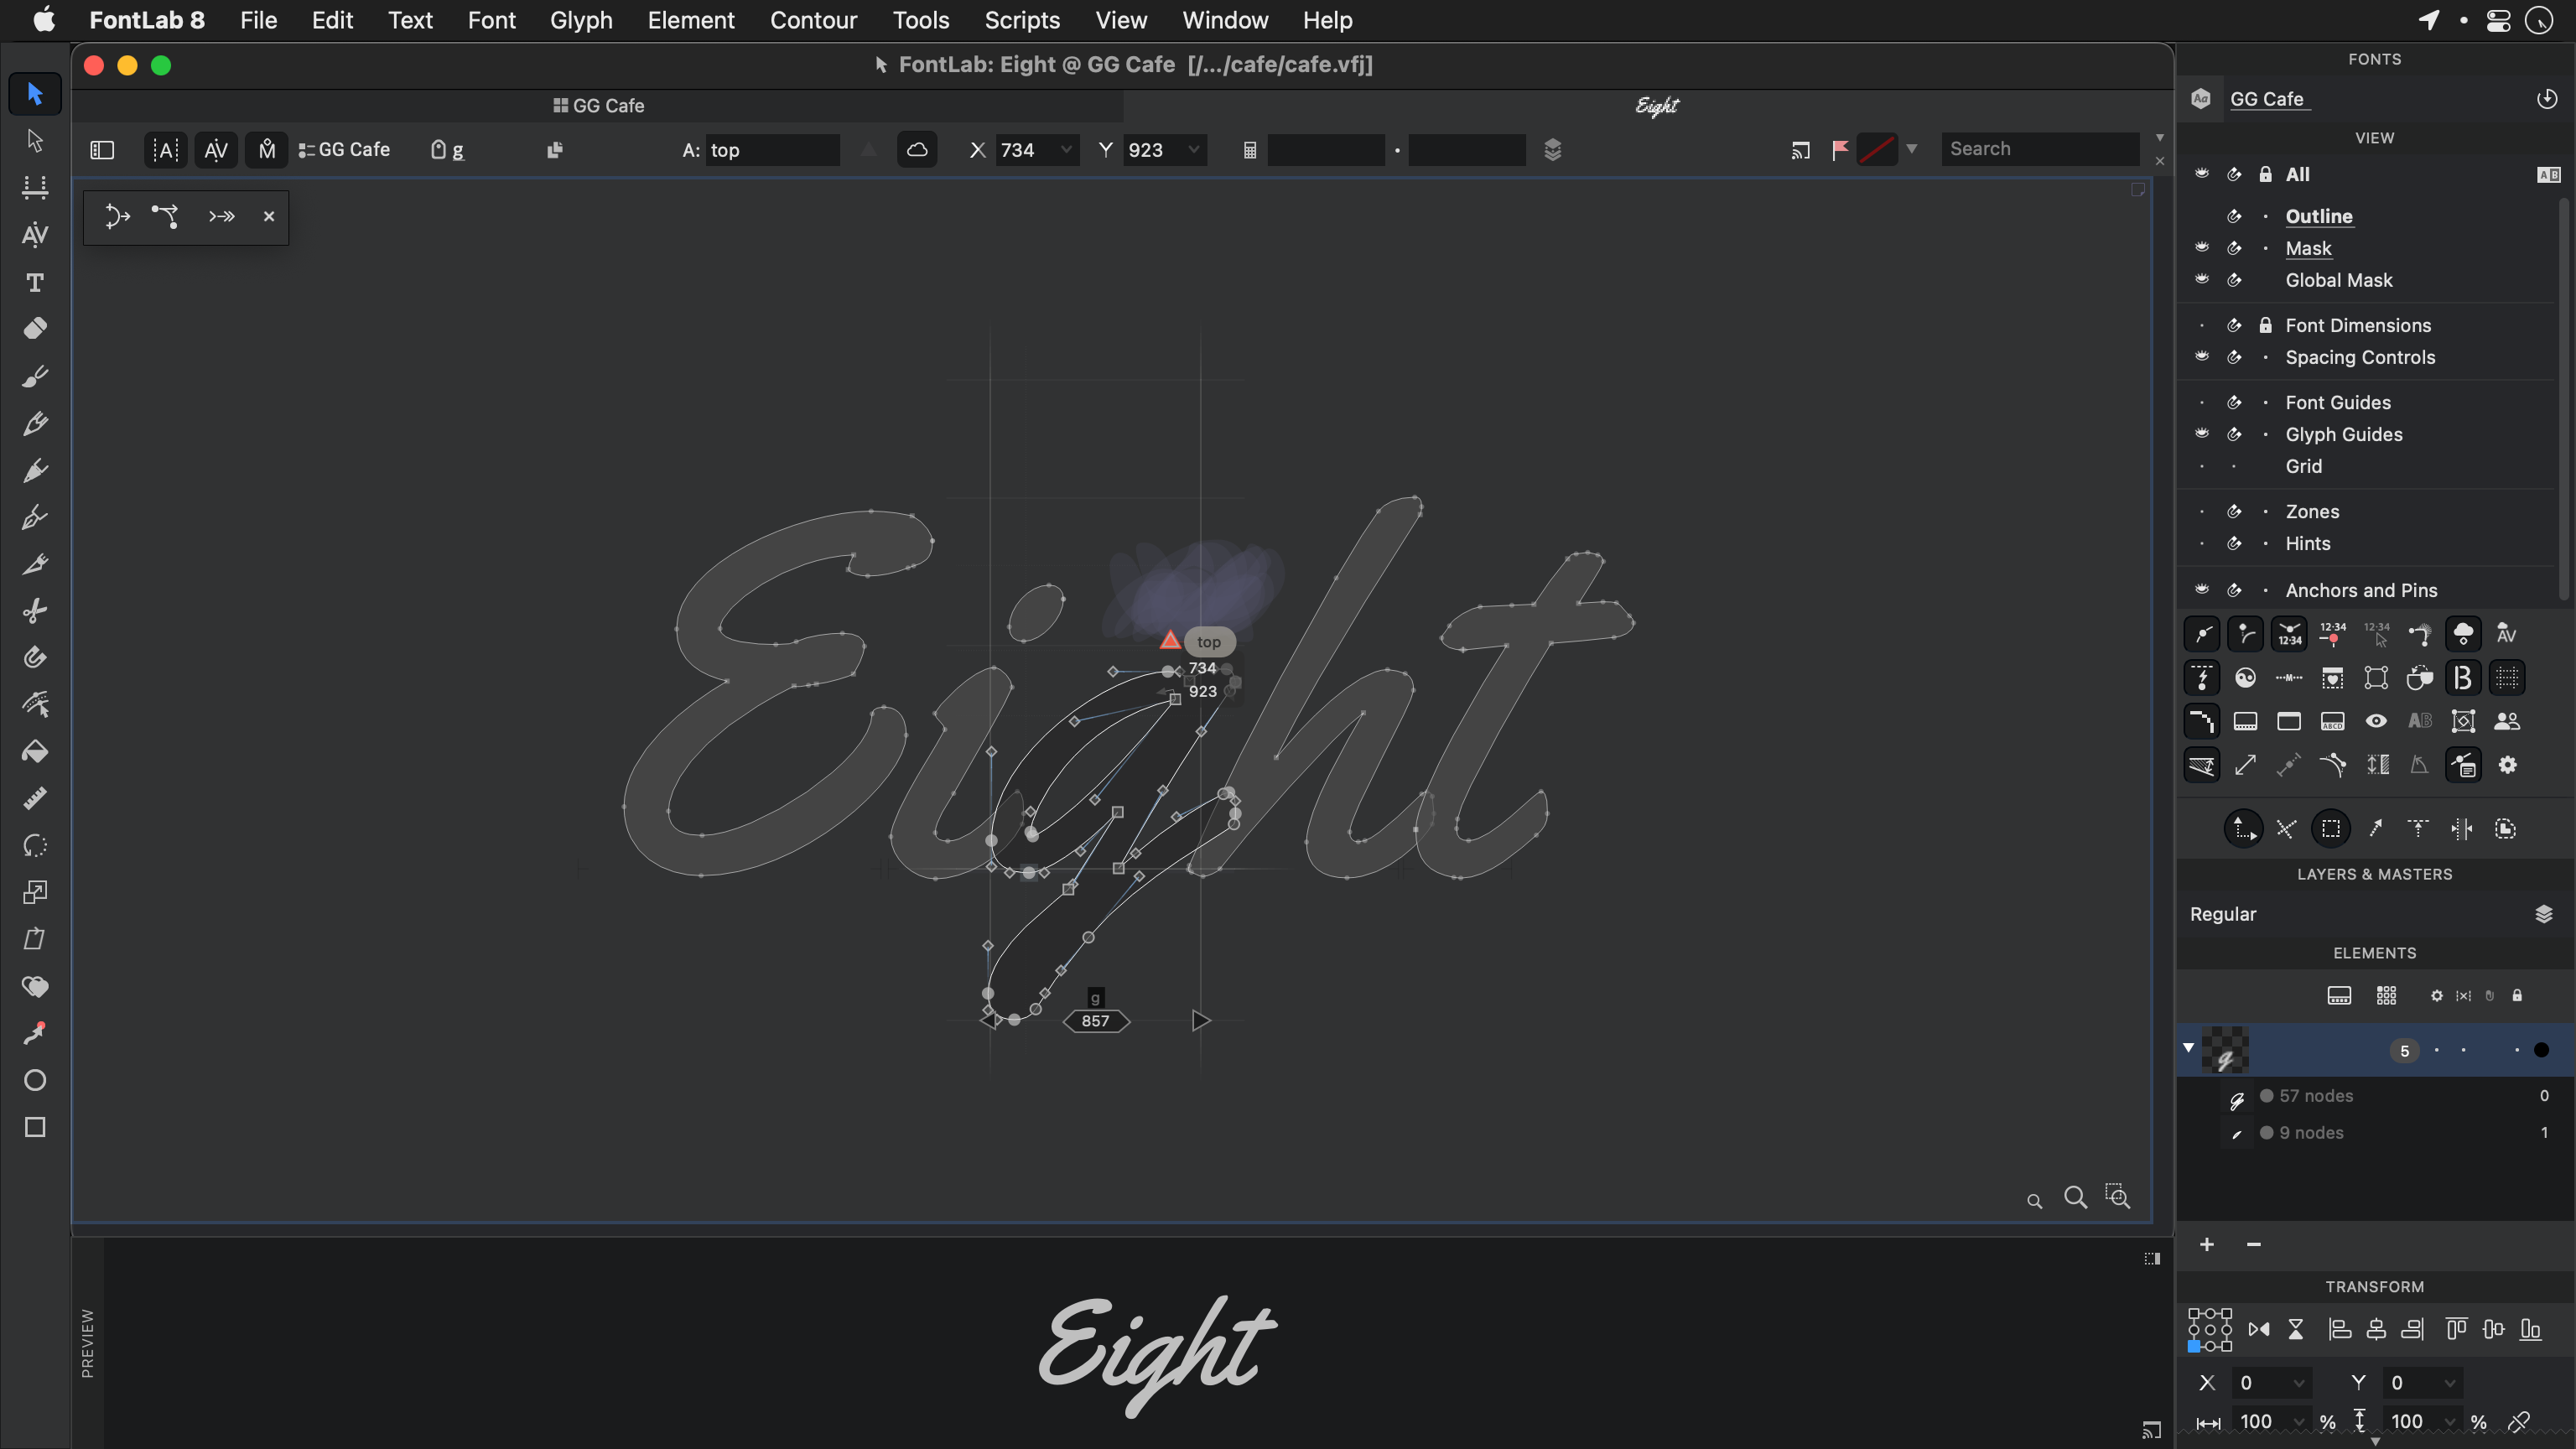
Glyph window
Widgets
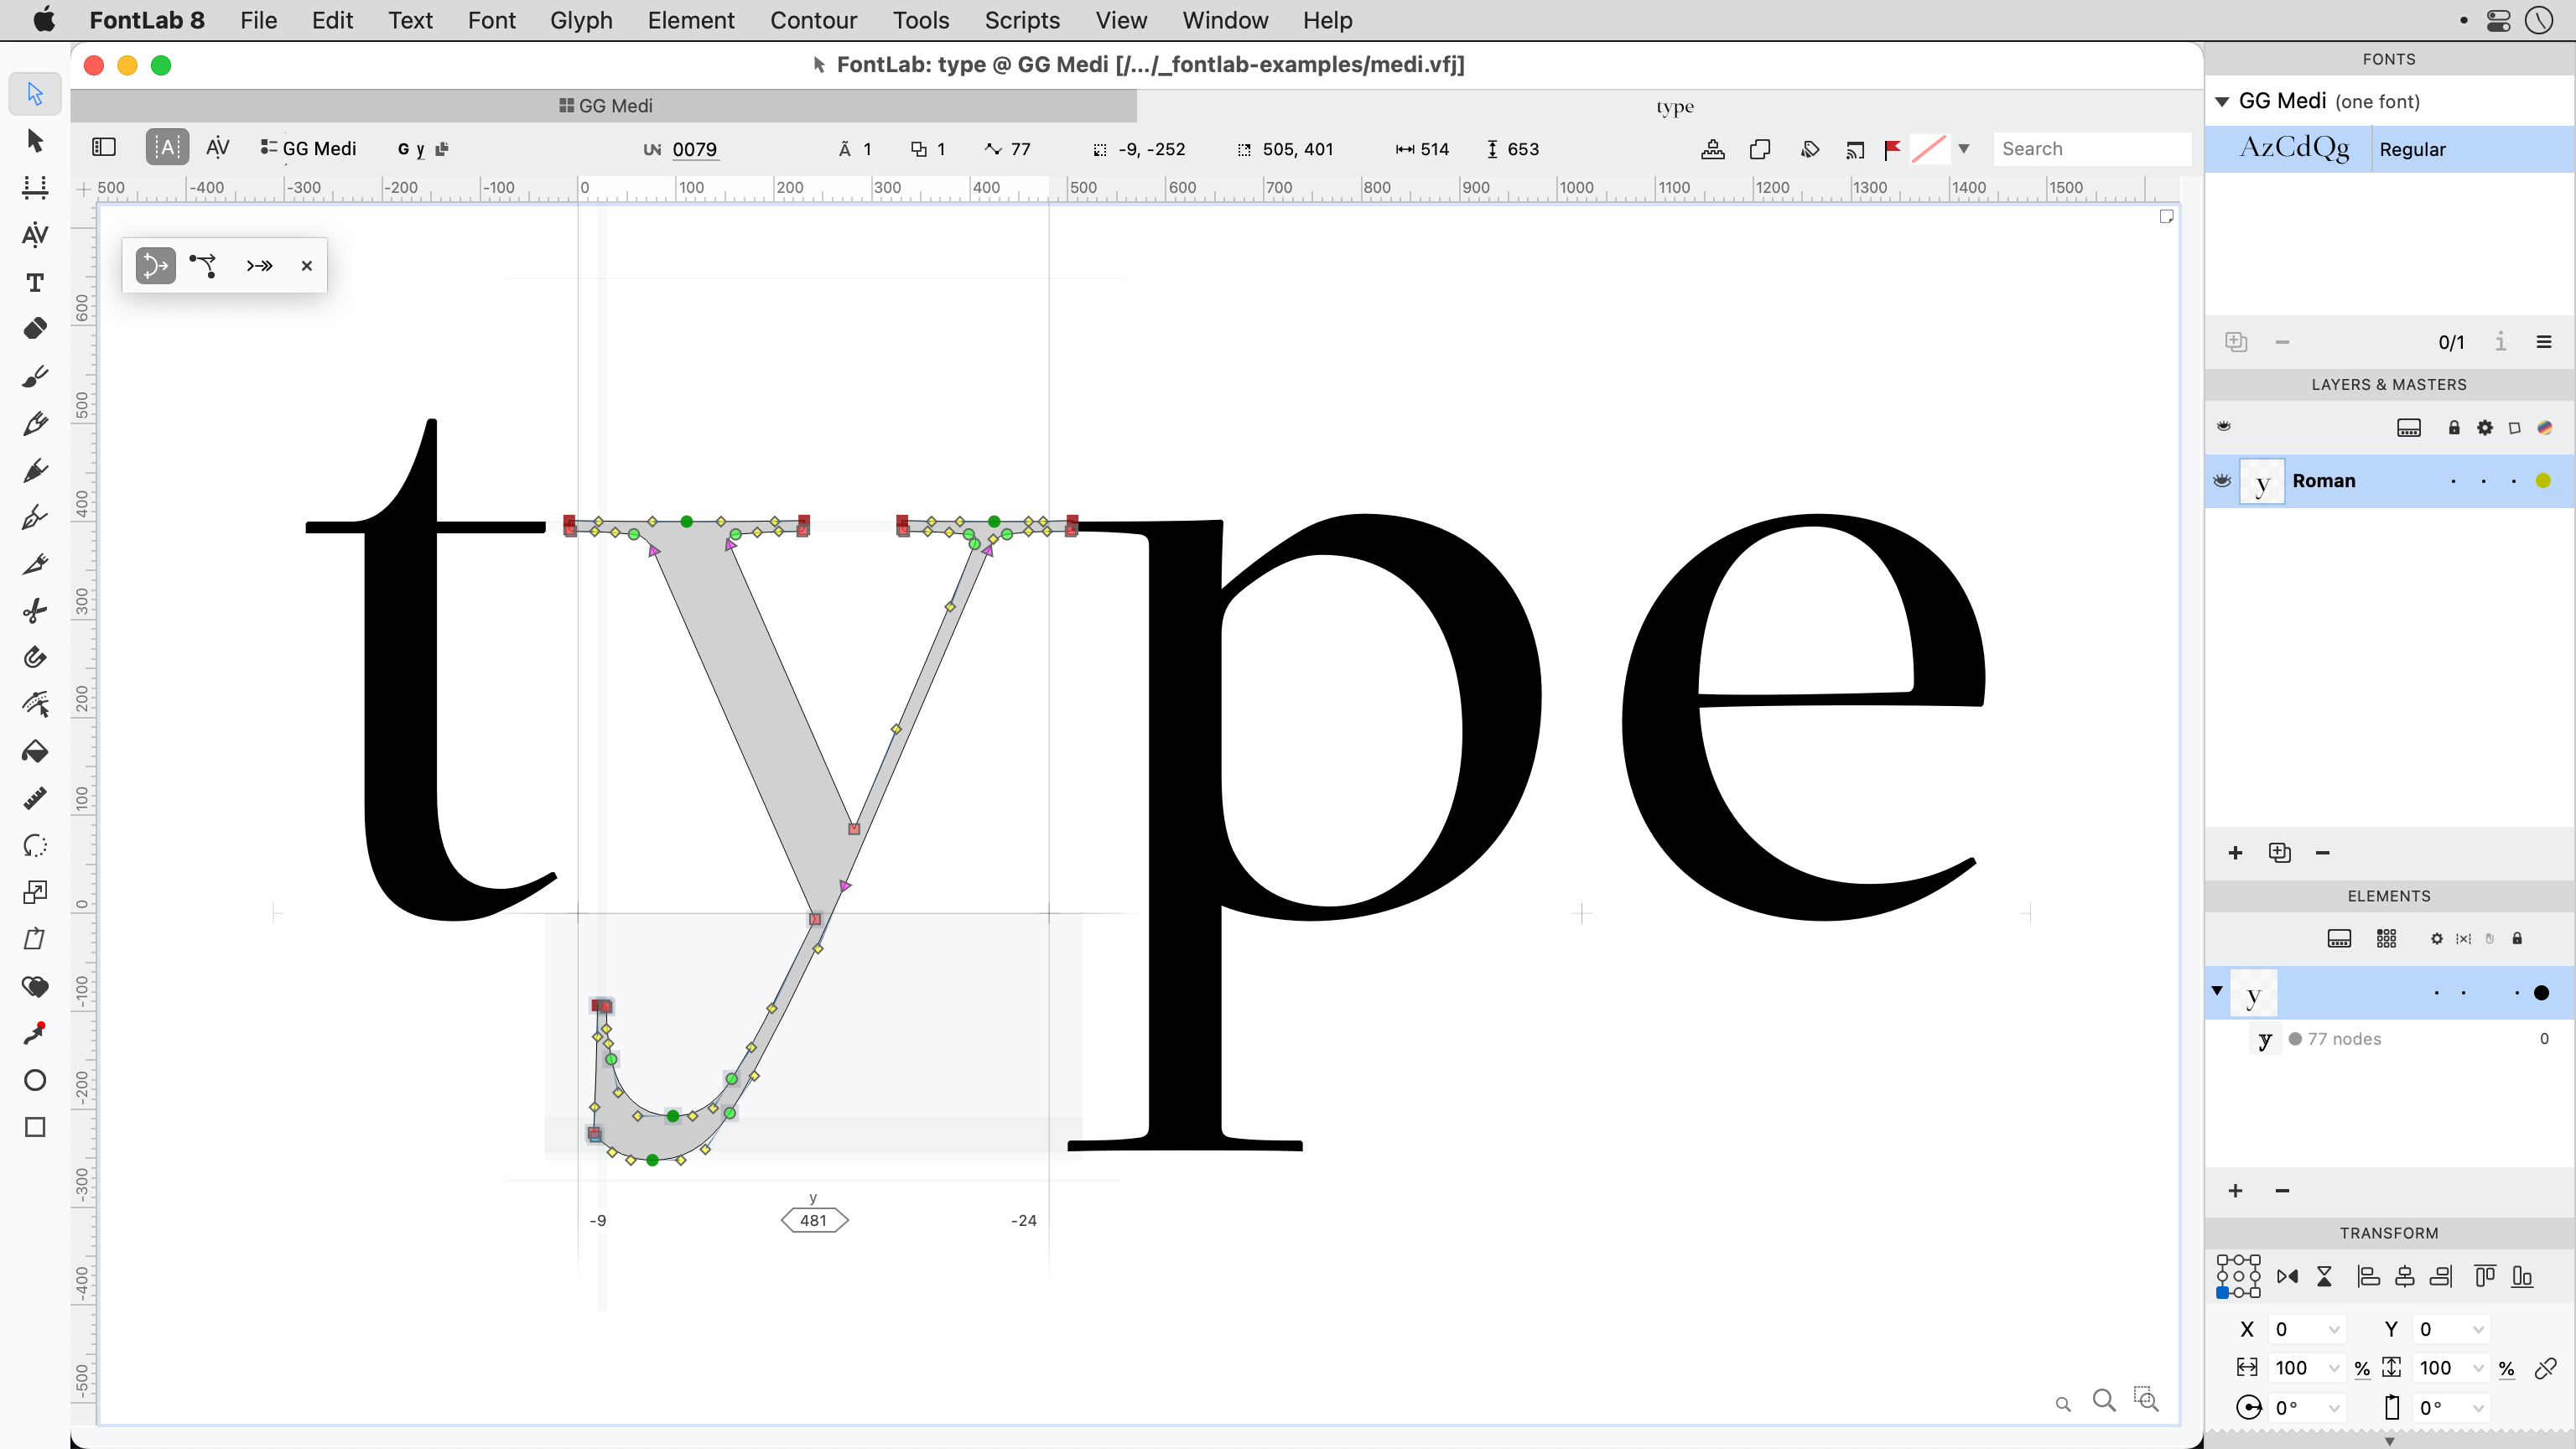
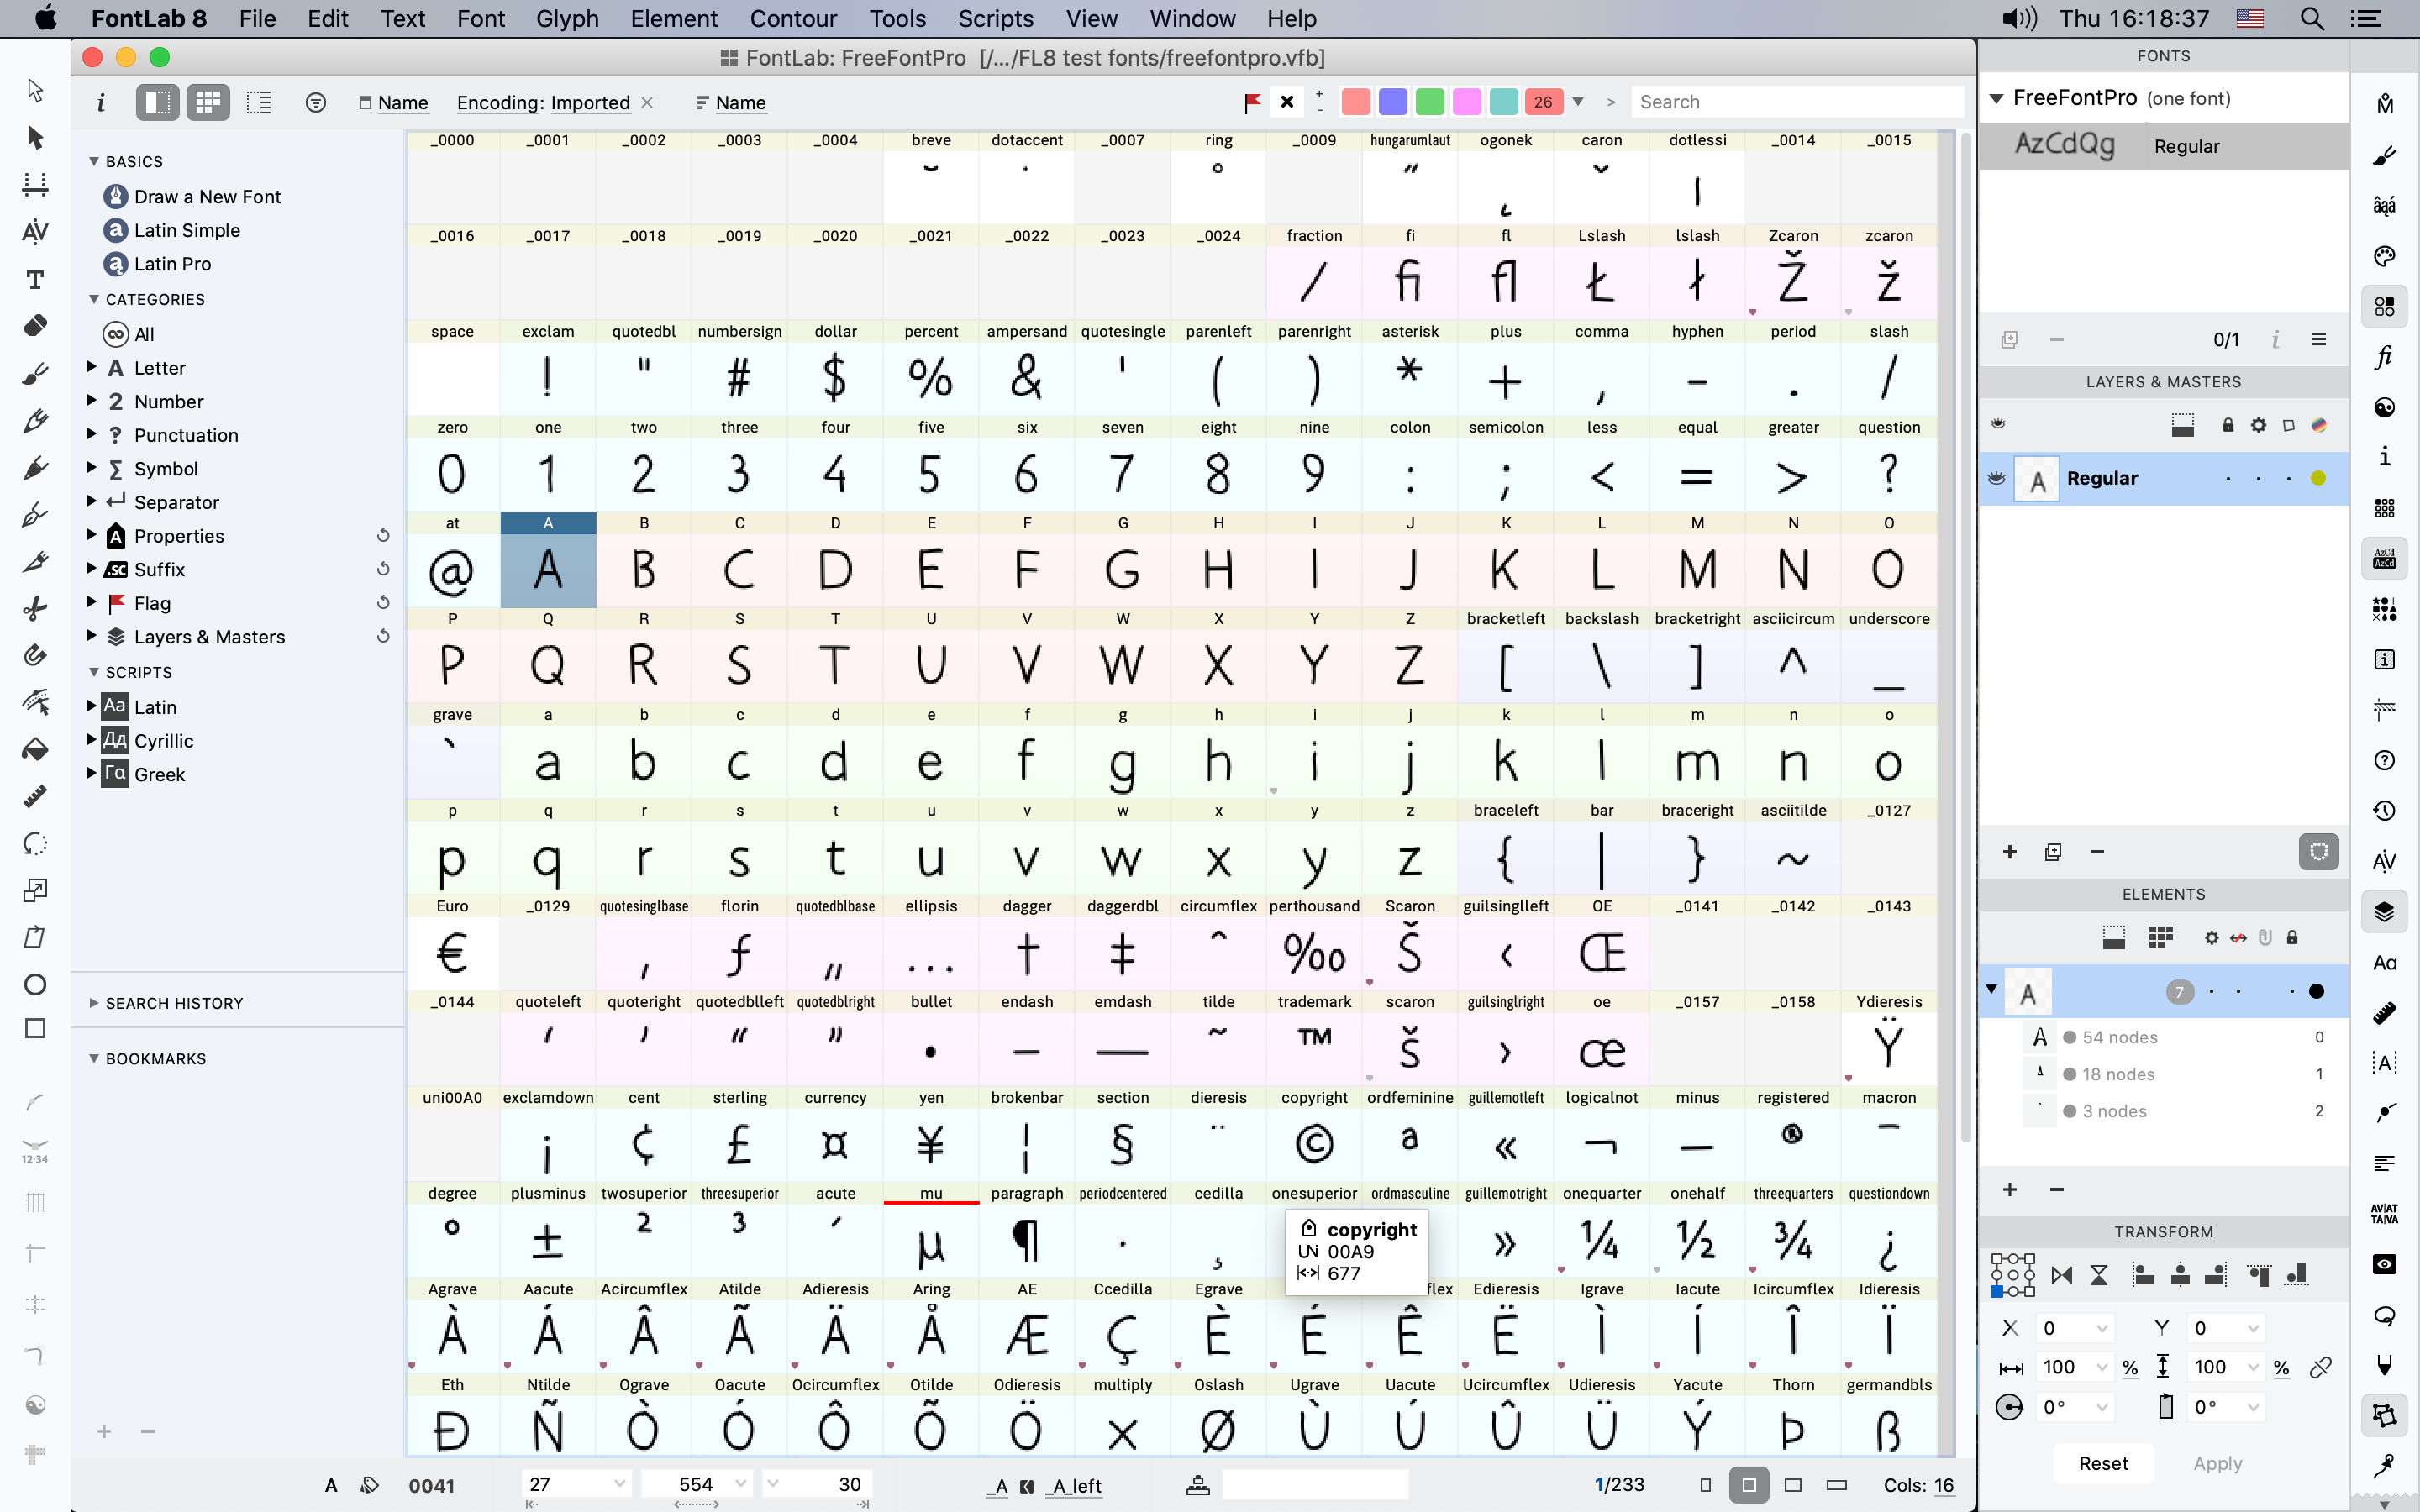
New Widgets are a simplified user interface elements that live inside the Glyph window. With widgets, you get easy access to the essential properties of a glyph, component, selection, stroke, or kerning pair.
When you have a current glyph in the Glyph window, FontLab shows the widgets below the current glyph, at the bottom of the Glyph window. The horizontal position of the widgets is flexible: if you scroll or pan the window, or you switch to another glyph, the widgets move in order to stay near the current glyph.
- To hide the widgets, turn off View > Widgets or click the × in the top-left corner of the glyph widget.
- To show the widgets, turn on View > Widgets.
- To place the widgets in a fixed position within the Glyph window, drag the widget’s blank area.
- To make the position flexible again, click the pin icon in the glyph widget.
Glyph widget
New Whenever a glyph is active in the Glyph window, the widgets show the glyph widget, which had three rows of UI items.
In the top row of the glyph widget, you can:
- close the widgets
- if you’ve moved the widgets to a fixed position, change the position to flexible
- rename the glyph: click the glyph name and choose the appropriate options in the ⋮ menu, enter the new name and click away
- change the Unicode codepoint: click the field, change the value, click away
- temporarily see Quick glyph info: click-and-hold the i button
- open the Glyph panel: Alt-click or Cmd-click the i button
In the middle row of the glyph widget, you can edit the left and right sidebearing values or expressions.
In the bottom row, you can edit the advance width value or expression, and you can assign the glyph to a right and left kerning classes.
Side widget
New Depending on the Glyph window selection or the active tool, FontLab may show a side widget to the right of the glyph widget.
The side widget gives you easy access to information that is relevant to the tool or selection. For example:
- Click a component to reassign a different glyph as the component, change its variation location, add the source glyph to the text, and transform the component.
- Click an element or activate the Element tool to transform the element.
- Click an anchor to rename or move it, change its appearance and copy it to masters.
- Click a guide to rename or move it, and change other properties.
- Click a node or handle to move it.
- Make a contour selection to transform it.
- Activate the Text tool to change the Glyph window font size, tracking, linespacing and direction, to convert the text case, or to apply features.
- Activate the Thickness tool to change the thickness of the element Stroke, Power Stroke or Power Brush.
- Activate the Guides tool to measure distances and angles.
Kerning widget
New If you activate the Kerning tool, FontLab places the widgets between the two glyphs of the pair. The kerning widget, where you can change the kerning pair value, appears above the glyph widget. The glyph widget shows the right glyph of the current kerning pair.
-
New If Preferences > Glyph Window > Rendering > Pixel-perfect is turned on, the rendering of contours in the Glyph window is now sharper.
-
New We have updated the default settings for the View menu and panel, so that your Glyph window is less crowded by default.
Glyph window property bar
New The Glyph window property bar has new content in its default state, that is, when no nodes, elements or components are selected.
- The center shows the glyph metrics (sidebearings and advance width), same as in the Metrics mode.
- Between the Unicode field and the glyph metrics, a more compact glyph info section is located.
- Hold the Glyph info button to see the glyph info popup with the glyph name and synonyms, the glyph preview, Unicode codepoint (with a new preview), name and category, and the new glyph layer bounding box info. In Font window, you can access the glyph info popup when you hold Space on a cell.
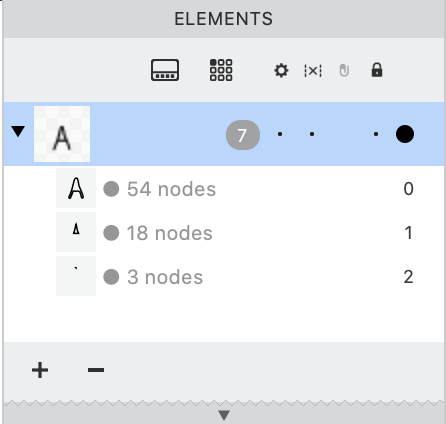
- Next to the Glyph info button, the bar shows the number of elements, contours, and nodes.
New Some buttons in the Glyph window property bar are hidden if they’re not applicable:
- the Flatten glyph button, if there are no components or multiple elements
- the Apply kerning toggle if the font has no kerning
- the Apply mark attachment toggle if the font has no mark attachment data
Glyph window zooming
When you use View > Zoom > Zoom 100% (Cmd3 Ctrl3), FontLab interprets the notion of 100% using the setting in Preferences > Distances > Glyph window zoom. New The setting now defaults to Fit to line height instead of Fit to safe metrics.
Window zoom preferences
New The Preferences dialog has a new Zoom page. Previously the zoom-related settings were in Preferences > Distances.
Zoom tool
We’ve improved the Zoom tool, which allows free zooming in and out in the Glyph window.
- To activate the Zoom tool temporarily, hold CmdSpace / CtrlSpace.
- To activate it permanently, click the last Zoom icon in the bottom-right of the Glyph window.
When the Zoom tool is active, you can:
- Click the window to zoom in a step.
- Hold Alt and click the window to zoom out a step.
New In addition, the new setting Preferences > Zoom > Zoom with ⌘Space now offers two different types of zooming if the Zoom tool is active and you drag.
- If to marquee is turned on, drag in the Glyph window to “draw” a rectangular marquee, release to zoom to the marqueed area.
- New If with drag is turned on, drag in the Glyph window to the right to zoom in, and drag to the left to zoom out. Release to finish zooming.
Automatic panning of Glyph window
With View > Center Glyph or Pair, you can control how FontLab automatically pans (horizontally scrolls) the Glyph window to ensure that your current glyph or selection is visible. This works depending on the zoom level, and is especially important when your Glyph window text has more than one glyph.
-
If View > Center Glyph or Pair is turned on, the panning is “eager”. The Glyph window scrolls left/right whenever you switch to a different glyph. If the zoom level allows for entire glyphs to fit, the Glyph window will center around the new current glyph. This ensures that your current glyph is always as visible as possible, but results in more “jumpy” experience.
-
If View > Center Glyph or Pair is turned off, the panning is “lazy”. If the zoom level allows for entire glyphs to fit, the Glyph window only scrolls left/right if you switch to a glyph that’s not fully visible. If the zoom level is closer, the Glyph window only scrolls if you switch to a glyph that’s not visible at all.
If the Contour tool is active and you make a contour selection, and you switch to a different matching master, or you change the current #instance layer with the Variations panel, the Glyph window tries to keep the corresponding selection, and New horizontally pans to make sure that the selection is visible.
Glyph window sidebar
Click the Content sidebar icon in the Glyph window property bar (the leftmost icon) to open the sidebar. In the Glyph window sidebar, you can edit the Glyph window text (using the “glyphtext” notation), perform case conversion, choose from predefined texts, change the text point size.
New Click the Layout toggle, to show or hide fields that you can use to:
- Change the visual tracking and linespacing of the text, which only applies to the text shown in the window, so it simulates tracking and linespacing changes made in end-user apps.
- Toggle the right-to-left rendering of the Glyph window text.
- Switch between the wrapping modes of the Glyph window (same as Text > Wrap).
Click the Features toggle to activate OpenType features and Unicode script processing. This activates full Unicode and OpenType text processing for the Glyph window text. When this setting is turned on, FontLab renders scripts like Latin in left-to-right direction, and scripts like Hebrew in the right-to-left direction. If you click Compile features, you can apply OpenType features to the text. New If the toggle is turned off, the features selector is hidden.
Text preview in the Glyph tab title
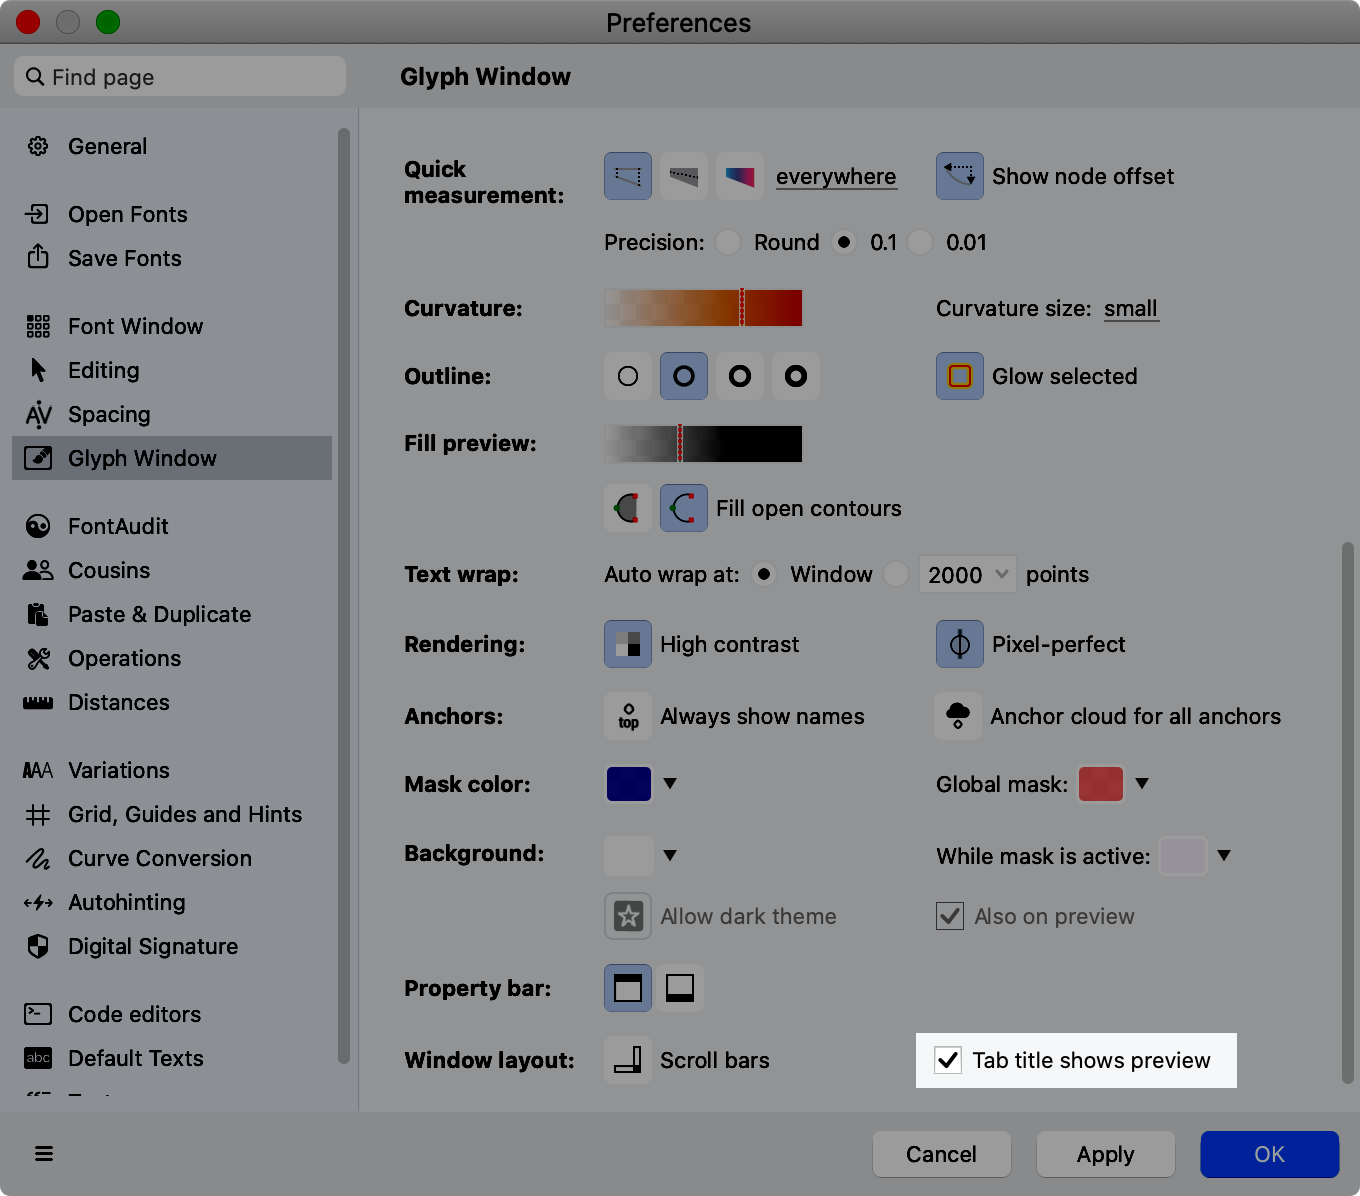
New If the new setting Preferences > Glyph Window > Tab title shows preview is turned on, the tab title shows a miniature preview of the Glyph window text, rendered in the current font. If the Glyph tab text contains just one encoded glyph, the tab title also renders it in system font. If the Glyph tab text contains just one unencoded glyph, the tab title shows the glyph name.
If the setting Tab title shows preview is turned off, the tab title shows the Glyph tab text rendered in system font.
Cancel drag with Esc
New If you’re dragging a node or element in the Glyph window, and you press Esc during the dragging, FontLab now cancels the dragging operation, so the items revert to their original positions.
Warning
This does not work for all types of items in the Glyph window.
View panel
In the View panel, you can quickly toggle visibility and snapping of various details of the Glyph window. The panel is a more efficient alternative to the View menu.
New We have updated the default settings for the View menu and panel, so that your Glyph window is less crowded by default.
Top View panel section
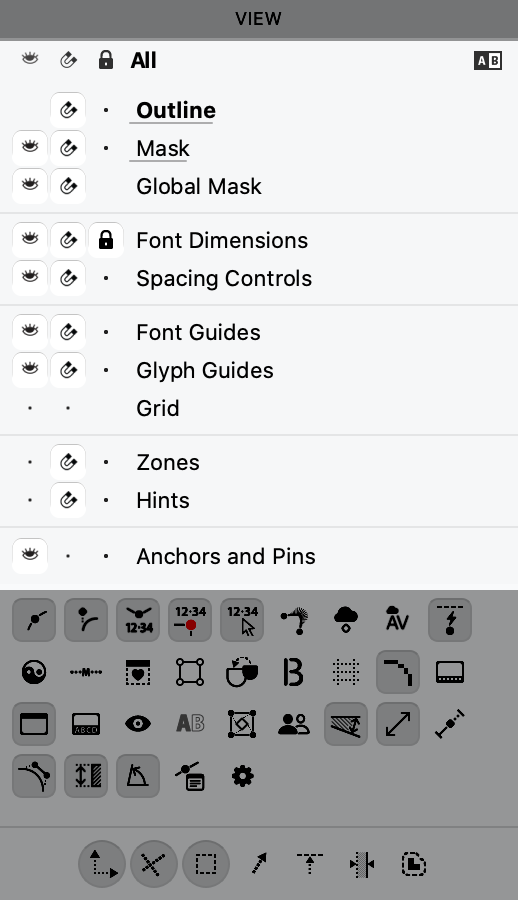
New The top section of the View panel used to be the 2nd section. It has a new layout:
- the view details are rearranged into logical groups
- if the visibility, snap or lock property is turned off for a given detail, the panel shows a small dot, like the right part of the Layers & Masters panel
Middle View panel section
New The middle section of the View panel used to be the 3rd section. It now has toggle buttons that control several of the same view details that are controlled in Preferences > Glyph Window.
At the beginning of the buttons list, you can now toggle:
- All nodes: turn on to see all nodes, turn off to see only nodes near pointer; same as View > Show > Nodes.
- Handles: turn on to see all handles, turn off to see only handles near pointers; same as View > Show > Handles.
Then, you can toggle:
- Coordinates: turn on to see coordinates for selected nodes and handles, all nodes and handles, or key nodes, depending on the setting in Preferences > Glyph window > Coordinates > Show for; same as View > Show > Coordinates.
- New Coordinates over node: turn on to see coordinates for nodes and handles that are under your pointer (cursor); same as Preferences > Glyph window > Coordinates > Show over node.
- New Coordinates on canvas: turn on to see coordinates of your pointer in font units when you move the pointer around the Glyph window; same as Preferences > Glyph window > Coordinates > And on canvas.
The section also includes the Tunni lines toggle, which was previously in the top section. You can also tap L to hide/show Tunni lines, or hold L to show them temporarily.
At the end of the buttons list, you can toggle the same settings as in the Measure and Auto-meter sections of Preferences > Glyph window:
- New Lengths & angles: turn on to see lengths and angles on handles and line segments.
- New Curve tension: turn on to see the curve tension on handles (if Lengths & angles is also turned on).
- New Stem widths: turn on to see the auto-metered stem thicknesses.
- New Corner angles: turn on to see the angles of corners (if Stem widths is also turned on).
Click the gear icon at the end to show/hide icons in this section.
New If you collapse the View panel, it will show only the visible icons from this section, as many as the panel width permits.
Bottom View panel section
New The bottom section of the View panel used to be the 1st section. It now shows the content of the View > Suggest menu:
- Suggest nodes
- Suggest lines
- Suggest bounds
- Suggest tangents
- Suggest guides
- Suggest stems
- Suggest distance
These buttons are no longer part of the View panel:
- Power nudge: the toggle is now available in the Contour tool toolbox. You can toggle it with ShiftC, or hold C to activate it temporarily as you work in the Contour tool.
- Preview rounding: the toggle was rarely used, and had no meaning if you have Font Info > Family Dimensions > Round coordinates turned on. If you work with fractional coordinates (that setting is turned off), you can still toggle Contour > Coordinates > Preview Rounding to see the true fractional positioning or the dynamically rounded positioning of items in the Glyph window.
Note
Visit the Consistency & precision chapter to read more about the changes to the Glyph window.
Preferences dialog
New preference pages design
New The list of preference pages is grouped into blocks for easier navigation.
New We have redesigned some pages in the Preferences dialog to make space for the new options. As a result, the Font window and Glyph window pages are now scrollable and show a “zigzag” at the bottom edge that indicates that there is more content.
Most panels that have scrollable content also use the zigzag indicator.
Searching preferences
New The Find page search box in the Preferences dialog is now on the top left above the pages list. To access it, click it or New press CmdF CtrlF.
New If you type a phrase into the Find page search box at the top-right of the Preferences dialog, the left-side pages list will show only the pages that contain matching settings.
Placeholder and caption font selector
In Preferences > Font Window, if you click the Default label for Placeholder font and Caption font, you can choose a different font from those installed on your system. New The custom font picker no longer uses the system font picker, but uses the same picker as File > Open > Installed Fonts…. Inside the font picker, you can easily filter the installed fonts by writing system.
Window scrolling
New Use Preferences > Glyph Window > Scrolling speed to change the ratio between the wheel / trackpad scrolling gesture and the actual scrolling of the Glyph window. 100% is the default (current) speed.
In the Font window, you can “browse” the font (change the current glyph) if you hold Cmd and scroll with the wheel / trackpad. New The browsing speed is now more natural.
Grid slant angle
New In Preferences > Grid, Guides and Hints > Slant angle, you can now use higher decimal precision, and you can define the grid slant angle as a X/Y slope ratio. This is an alternative way of specifying the slant angle, which FontLab has used for italic angle in Font Info > Font Dimensions > Slope.
Applying preferences
To apply the preferences and to close the Preferences dialog, click the OK button or New you can press CmdEnter CtrlEnter.
Other user interface changes
Numeric controls with slider and calculations
Most numeric text boxes in the user interface have new functionality:
-
New Click ⌄ at the right edge of the box to open a slider. Drag the slider to change the value, hold Ctrl move the slider at higher precision.
-
New Enter simple calculations into the box like
300+50or300*1.2and press Enter to put the result into the box.
Many text and numeric fields in the UI (for example on panels or in the property bar) had an icon label next to them, which explained their function. But sometimes that icon was a button, and it was not easy to tell if the icon is a button or just a visual label.
New In FontLab 8.2, label icons are inside the text field, and clickable buttons are outside the text field.
New If a text field is not active and you click its integrated label icon, FontLab 8.2 now selects all text in the text field, so you can easily type a new value to replace it.
New In most numeric fields, you can now enter numeric expressions, and FontLab 8.2 will convert them into an actual numeric value. For example, you can type 20*1.2 to get 24.
New If you enter a fractional value into a numeric field, FontLab 8.2 will store it at the precision that you’ve entered it, and will show the full-precision value when you click the field, but if you exit the field, FontLab will show a simplified value with only one or two decimal places.
If you use any of the sliders in the FontLab user interface (including sliders available as a the dropdown of various numeric fields) to choose a numeric value, you can:
- drag the slider control to change the value at the precision given by the current slider size
- New hold Cmd or Ctrl and drag the slider control by a small distance to change the value at high precision, drag further to gradually accelerate the movement (“lever dragging”, similar to Contour tool lever)
- New hold Ctrl and drag the slider control to change the value so that each screen pixel changes the value by one unit
Search boxes
New We have redesigned the search boxes across FontLab.
- Each search box has an industry-standard loupe icon.
- The placeholder in the search box on top of the Font window and Glyph window says Search.
- The placeholders in other search boxes say Find, followed by the type of item you can search for, for example Find glyph in the Classes panel. Previously, the placeholders in these search boxes said Filter.
- In the Gallery panel, the search box placeholder still says Filter.
- In the Preferences, Font Info and Actions dialogs, the search box is now on the top left. To access it, click it or New press CmdF CtrlF.
Customizing the user interface
You can use Python scripting to customize the user interface of FontLab more deeply, for example use a custom font or change some UI colors. Place a file named initScript.py in your user data folder. To open the user data folder, go to Preferences > General > User data, and click the folder icon. Inside the file, place the Python code that FontLab will run when it starts. You can use the example below for inspiration.
from PythonQt import QtGui
qapp = QtGui.QApplication.instance()

# Change the app UI font to a custom TTF, more info see:
# https://doc.qt.io/qtforpython-5/PySide2/QtGui/QFont.html
# https://doc.qt.io/qtforpython-5/PySide2/QtGui/QFontDatabase.html
fdb = QtGui.QFontDatabase()
fontid = fdb.addApplicationFont("/Users/YOURNAME/Library/Fonts/YOURFONT.ttf")
if fontfamilies := fdb.applicationFontFamilies(fontid):
    appfont = qapp.font()
    appfont.setFamily(fontfamilies[0])
    qapp.setFont(appfont)

# Modify the color palette, see more info:
# https://doc.qt.io/qtforpython-5/PySide2/QtGui/QPalette.html
palette = qapp.palette()
palette.setColor(QtGui.QPalette.Button, QtGui.QColor(200, 237, 255))
palette.setColor(QtGui.QPalette.ButtonText, QtGui.QColor(0, 0, 0))
qapp.setPalette(palette)
Warning
We don’t provide technical support for these types of customization.