Merging, Separating, Overlapping Shapes: Surgery
Avoid Overlap Problems, Adjust Letters More Easily

Benefit Confidently perform surgery—chopping and connecting—knowing that none of your patients will die.
In this tutorial you will learn all about how to manipulate your shapes in a bunch of different ways.
Sometimes you may want to joins shapes together, other times you might want to rip them apart.
You are the master surgeon!
Here are the main operations you need to know.
Merging
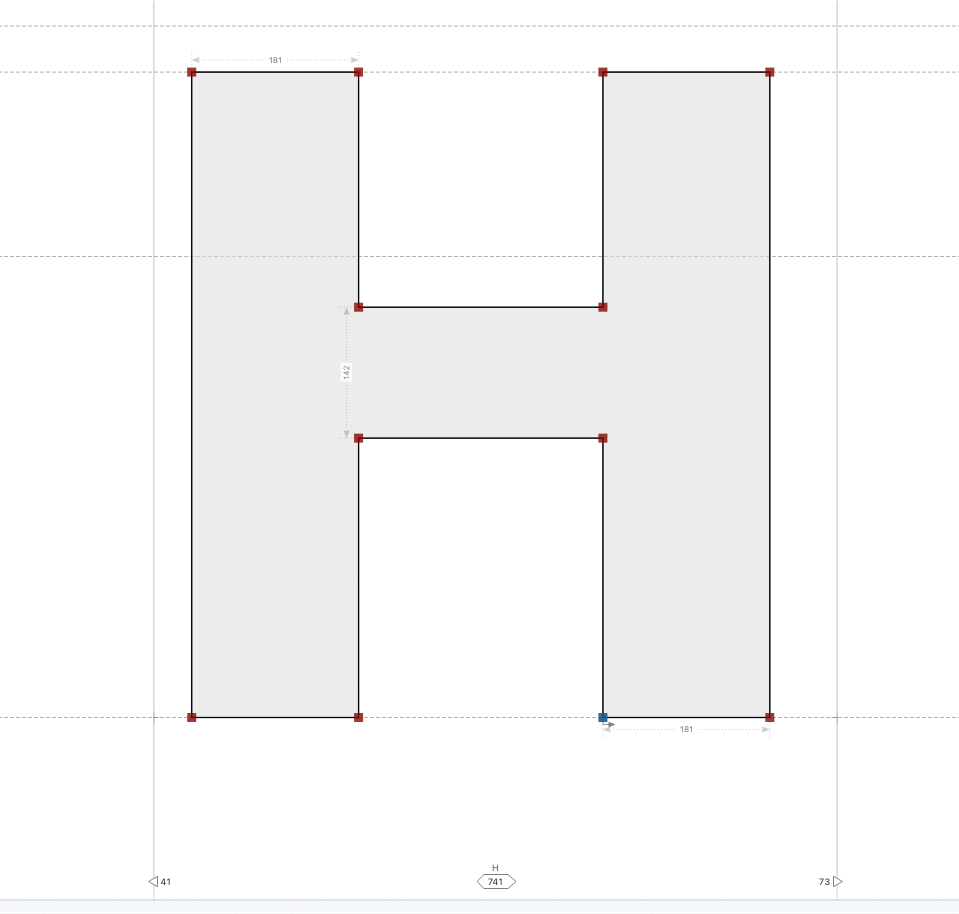
At the end of the last tutorial, we made an H with three elements, one contour each. (3×1 configuration).
There’s no need to combine those three elements into one. FontLab does that when you export your final font.
But here’s some reasons you might want to merge:
Why Learn Merging/Unifying?
In most cases, it’s not necessary.
One reason you might want to merge is to create letters that are impossible using separate shapes.
Here’s an example. These brackets (rounding of sharp junctions) on this b.
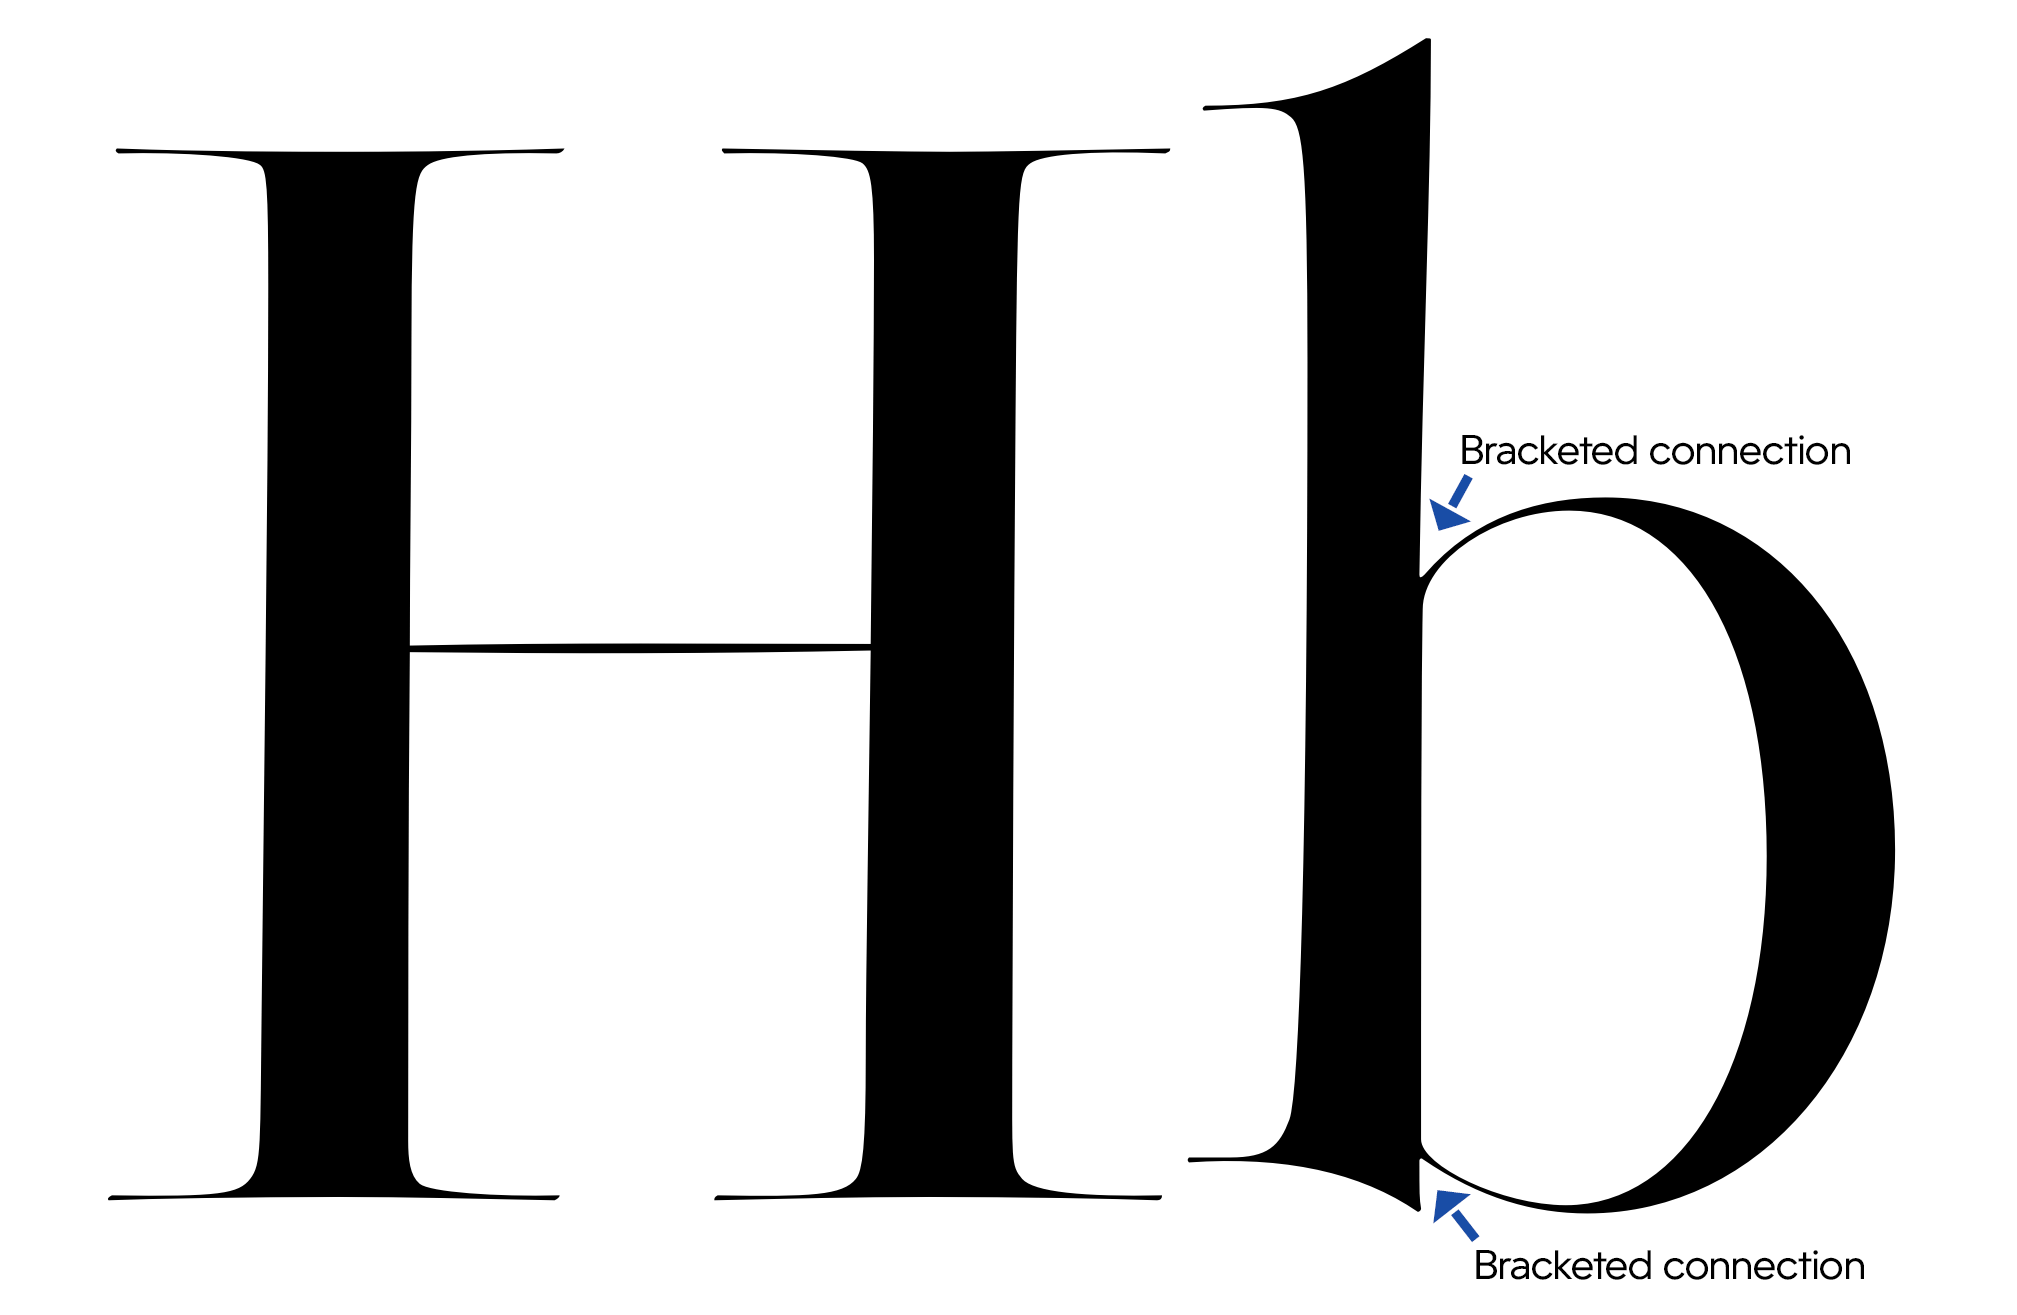
Also some forms of inktraps and filters cannot be put between separate elements.
Basically…the more complex shapes, the more details and filters, the more you need merge.
Merging the H
Let’s try to merge our H and prepare him for filters, like rounded corners, spikey corners, or inktraps.
Download VFJ
Open your H from the last tutorial. If you don’t have it, download this VFJ, and open it in FontLab.
Your Elements Panel will currently look like this:
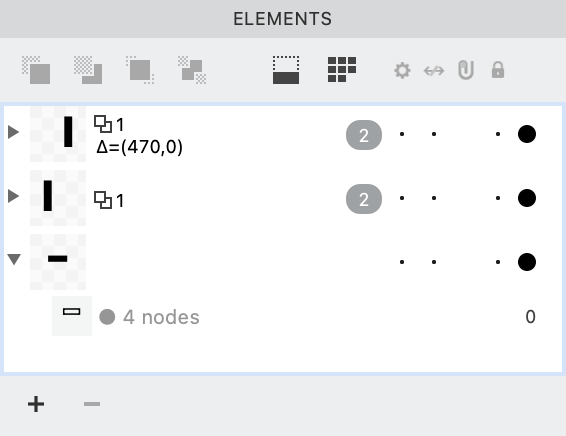
First, let’s combine these three elements into one element.
There are many ways to do this, but my preferred method for case-by-case is “combine to elements”.
Here’s the step-by-step: ❶ Push the Element (black arrow) tool. ❷ Drag and select the entire H. (Or use CmdA) ❸ go to menu: Element > Contours > Combine to Element (CtrlC)
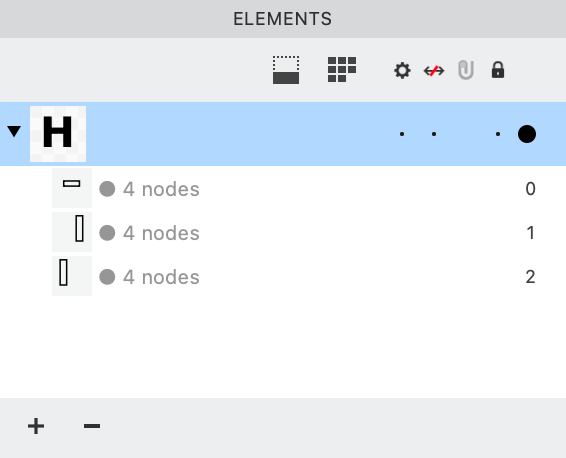
Now, your Elements Panel should look like this:
Push Space to see how this looks.
Ok, our H may not have this problem, but you need to be prepared for serious surgical complications.
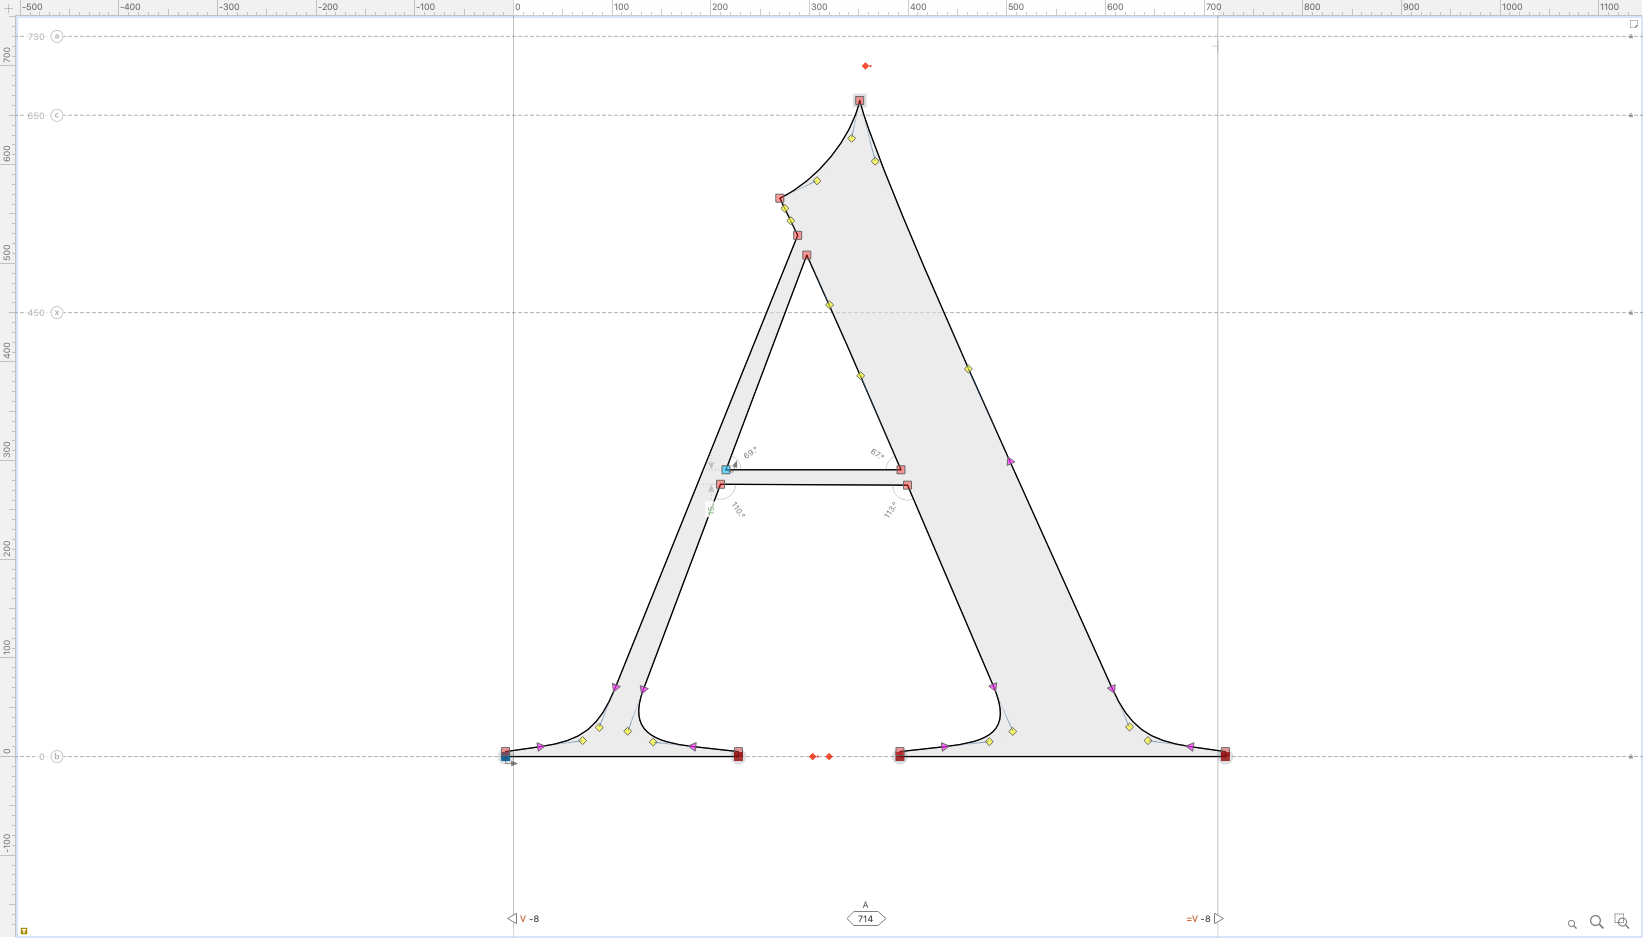
Contour Direction Issues
What if white lines are showing at the overlap, like this??

It’s a contour direction problem. Your contours are going the wrong way! (For OTF font drawing rules, click here.)
Don’t worry, it’s one of the age-old computer font problems!
click the Contour (white arrow) tool to see what is happening.
In this case, the horizontal is going clockwise (incorrect for black), instead of counter clockwise.
TO FIX IT: Make sure the Contour (white arrow) tool is on. Right click any of the horizontal’s lines. In the context menu, go down to “Reverse Contour” and click it.
That’s how you fix this problem if it ever comes up.
Removing Overlaps
It’s a good thing we changed that, otherwise our overlaps would remove incorrectly!
Now go to menu Contour > Remove Overlaps. This will give you a nice solid shape:
Info
You can only remove overlaps within an element. When you push Remove Overlaps any overlaps inside that element are removed.
Info: History
In FontLab 5, this operation was called Merge Contours.
It’s ready for you to put filters like Smart Corners!
You are mergin’ like a surgeon!
Making Overlaps
Here we do the opposite of “Remove Overlaps”.
Why make overlaps?
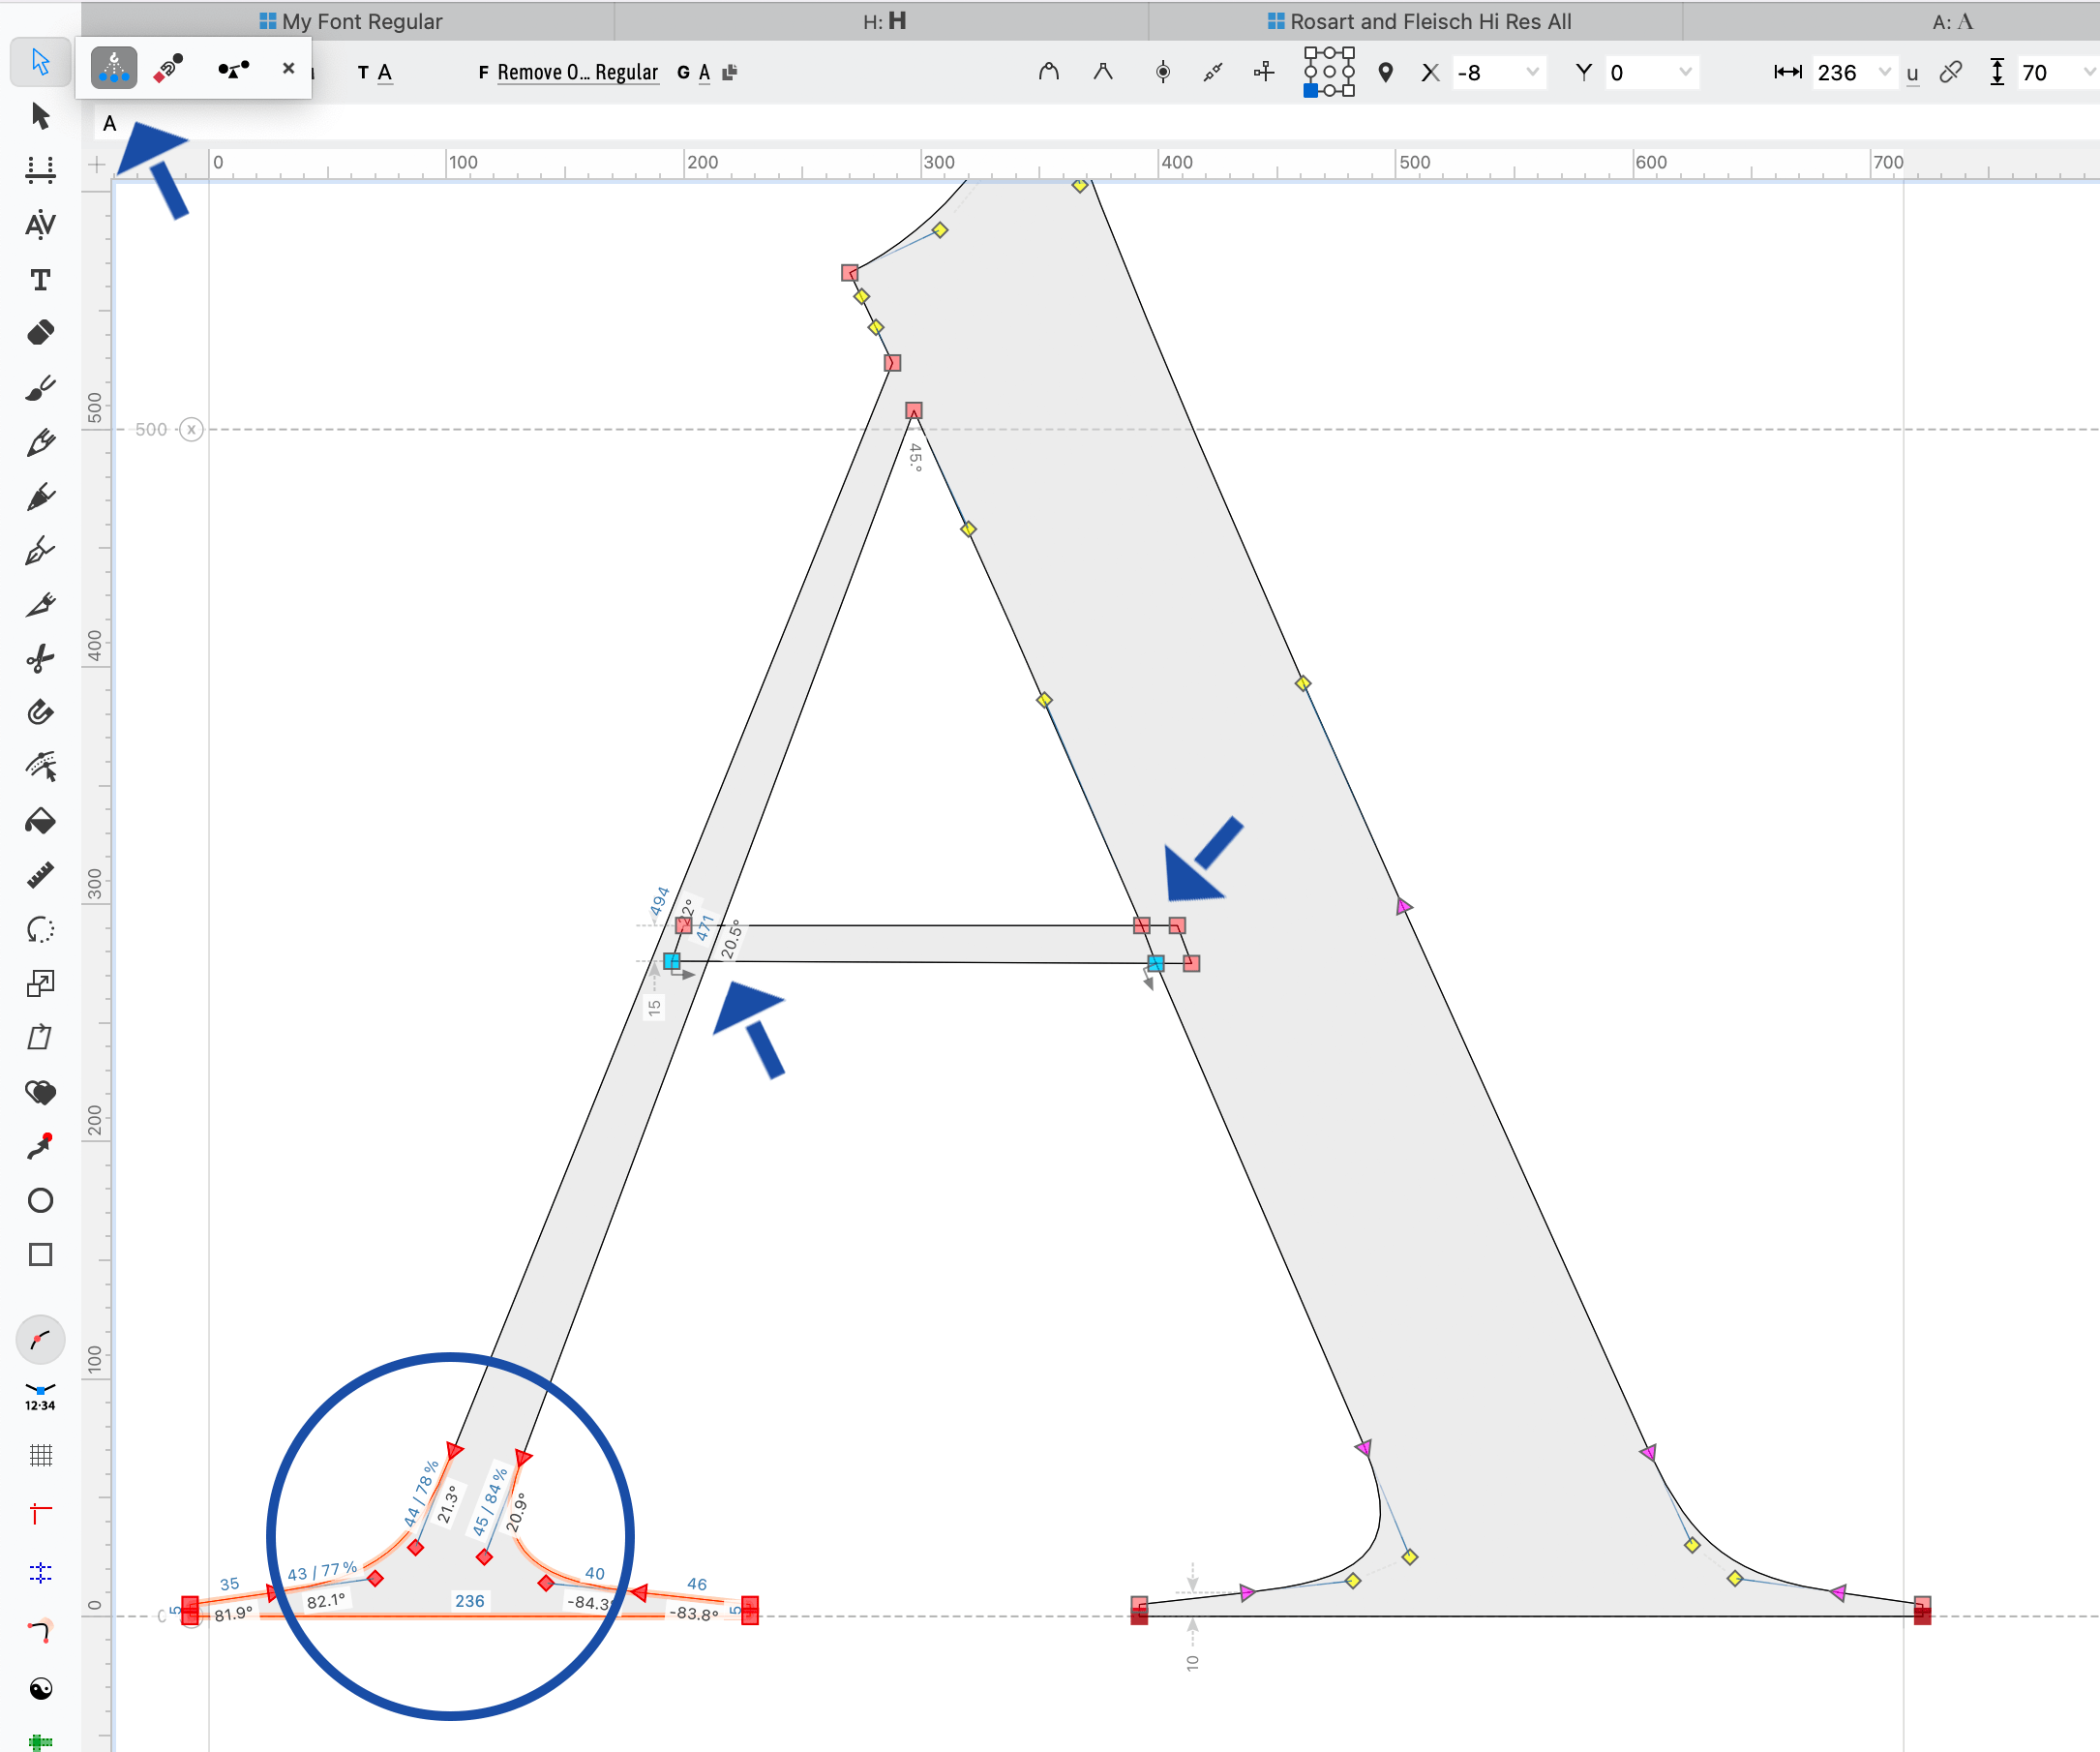
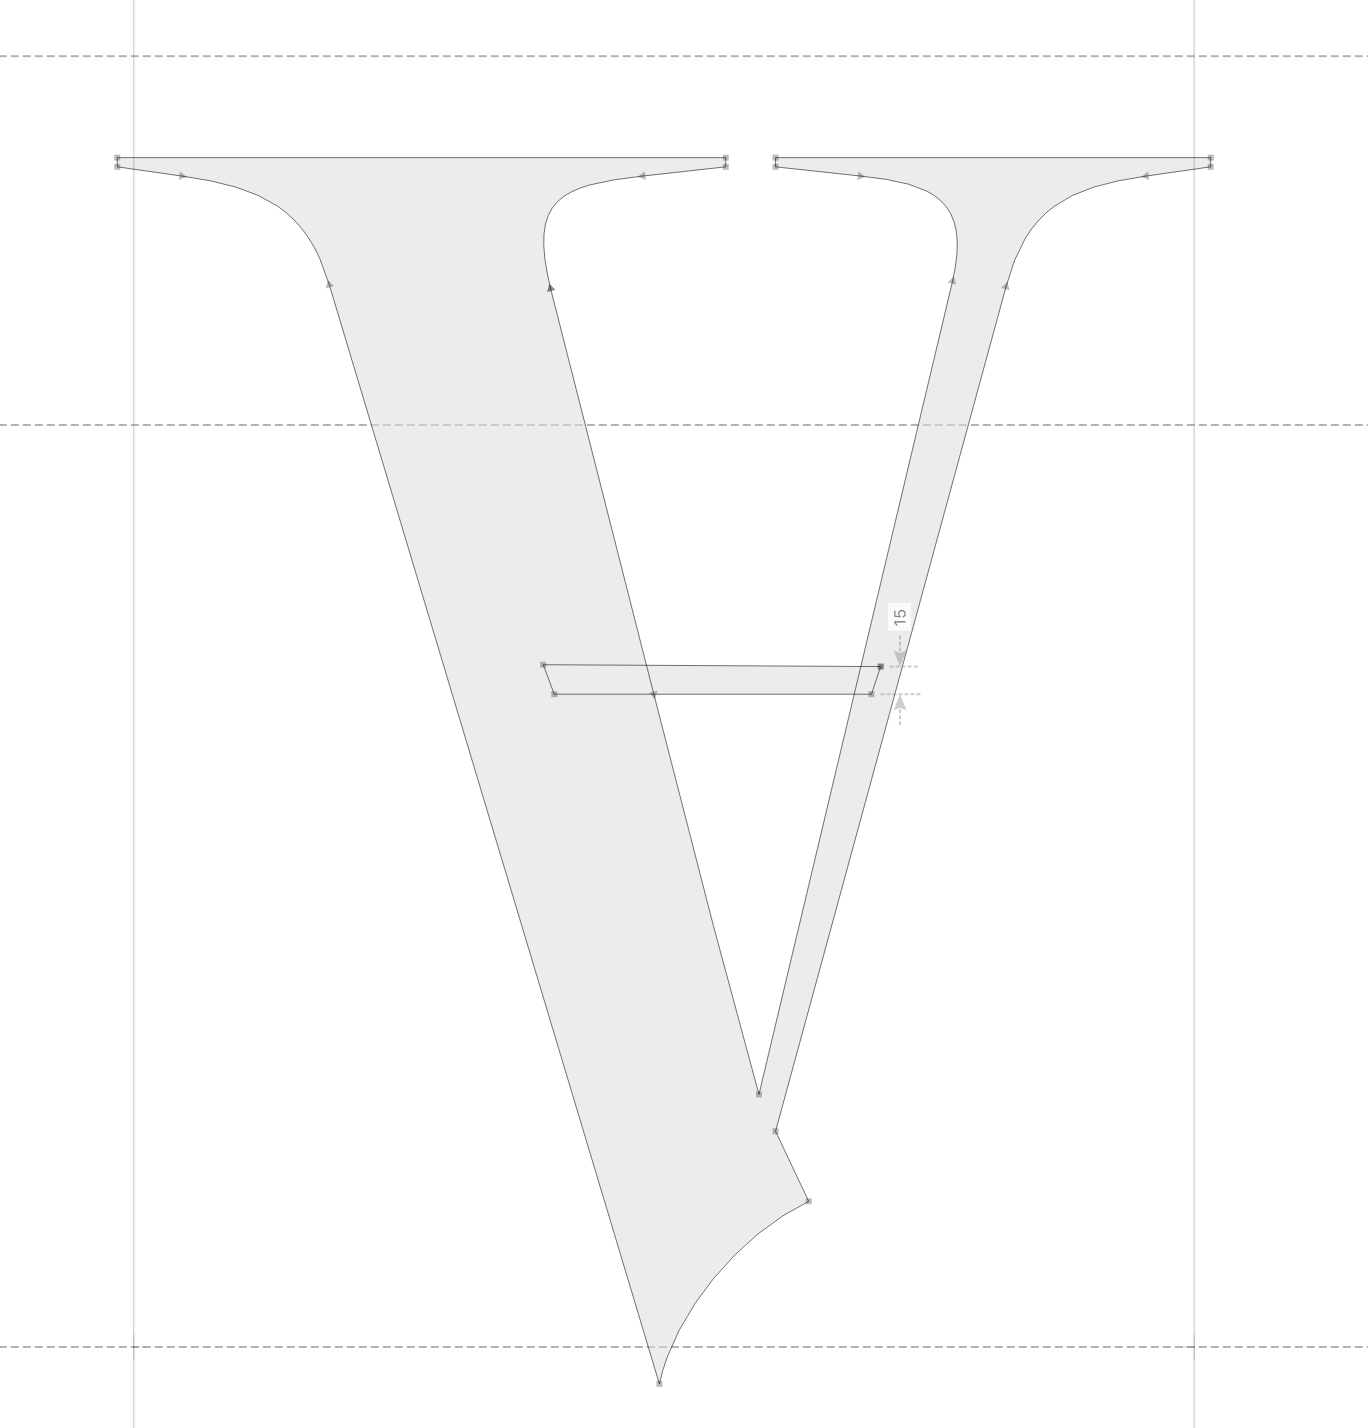
Let me show you how it can help you adjust, for example, the width of an A. We’ll narrow it.
Download VFJ
Ok, here’s a file for you to try it yourself. Go ahead and download!
In its present state, you’d have to move many nodes narrow this, right?! Look at all those dots everywhere.
So instead, we make overlaps. Each leg becomes separated from the middle bar.
Then we can adjust the width.
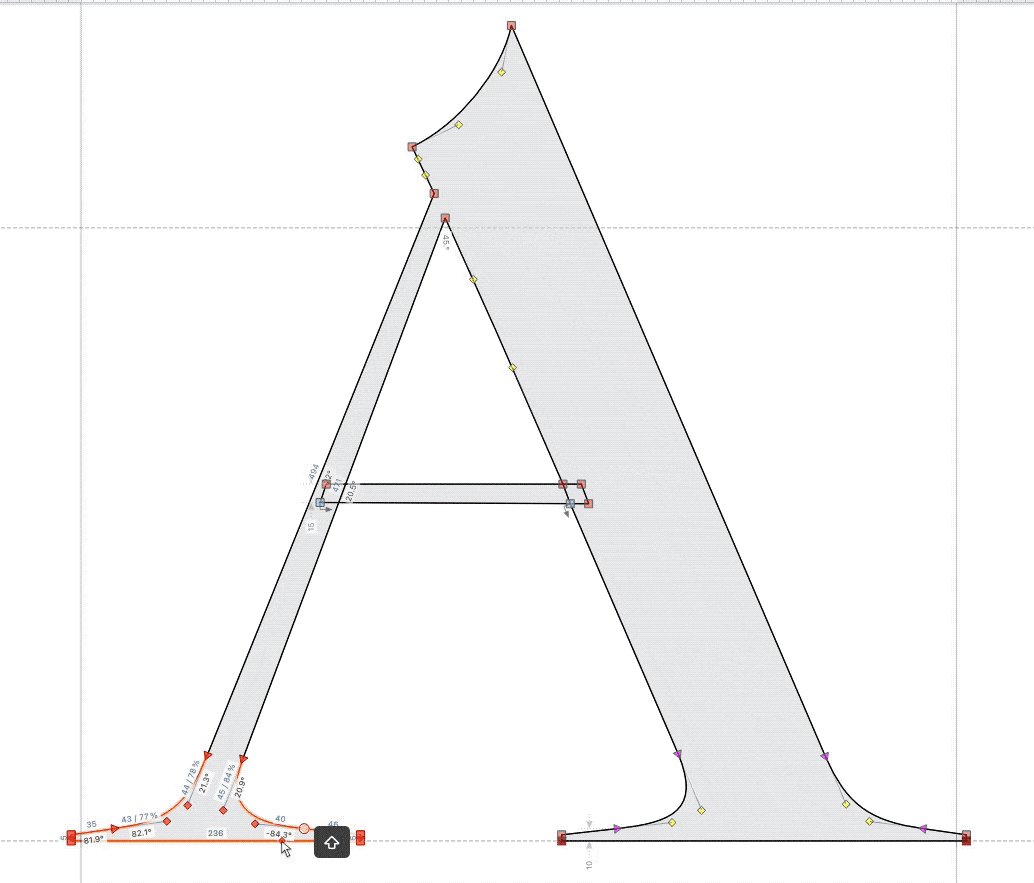
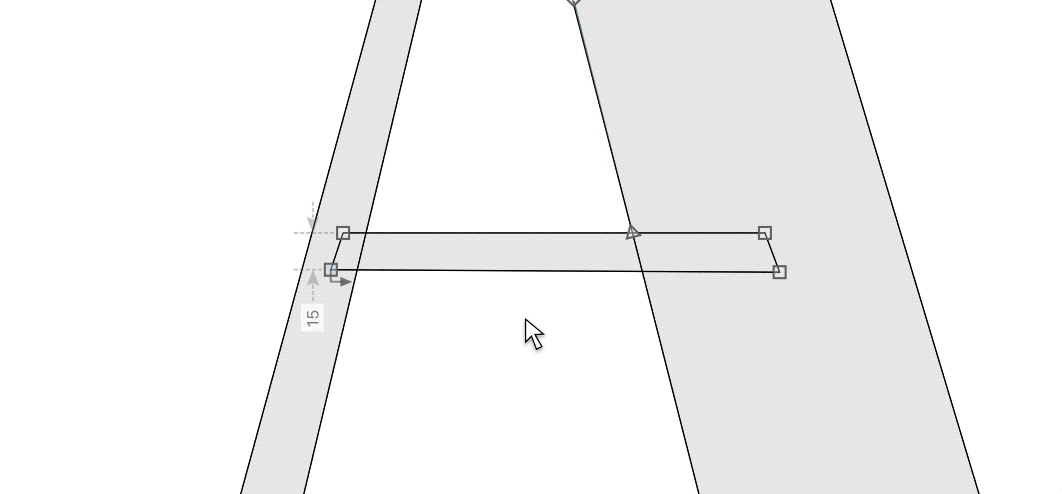
Here’s the step-by-step: ❶ Select the entire middle cross bar. ❷ Go to menu: Contour > Make Overlap (CmdShiftO). The overlap should be made. ❸ Highlight the foot. ❹ Push the Contour (white arrow) tool and select “Power Nudge”. Here’s all those previous steps in one picture. ▼
❺ Use the mouse to pull the foot inwards.
Got it? Great! Go!
Pro Tip!
Push Shift to make sure the leg moves straight.
❻ If anything nudges wrong, clean it up so that it moves better. (Notice that I cleaned up the right side.) ❼ After it is condensed fix the horizontal bar that is poking out.
That’s it!
Now this isn’t a fully finished condensed. You’d still have to trim the serifs and such.
But it’s a great starting point…and in a short amount of time.
Good job!
Separating Contours Into Elements
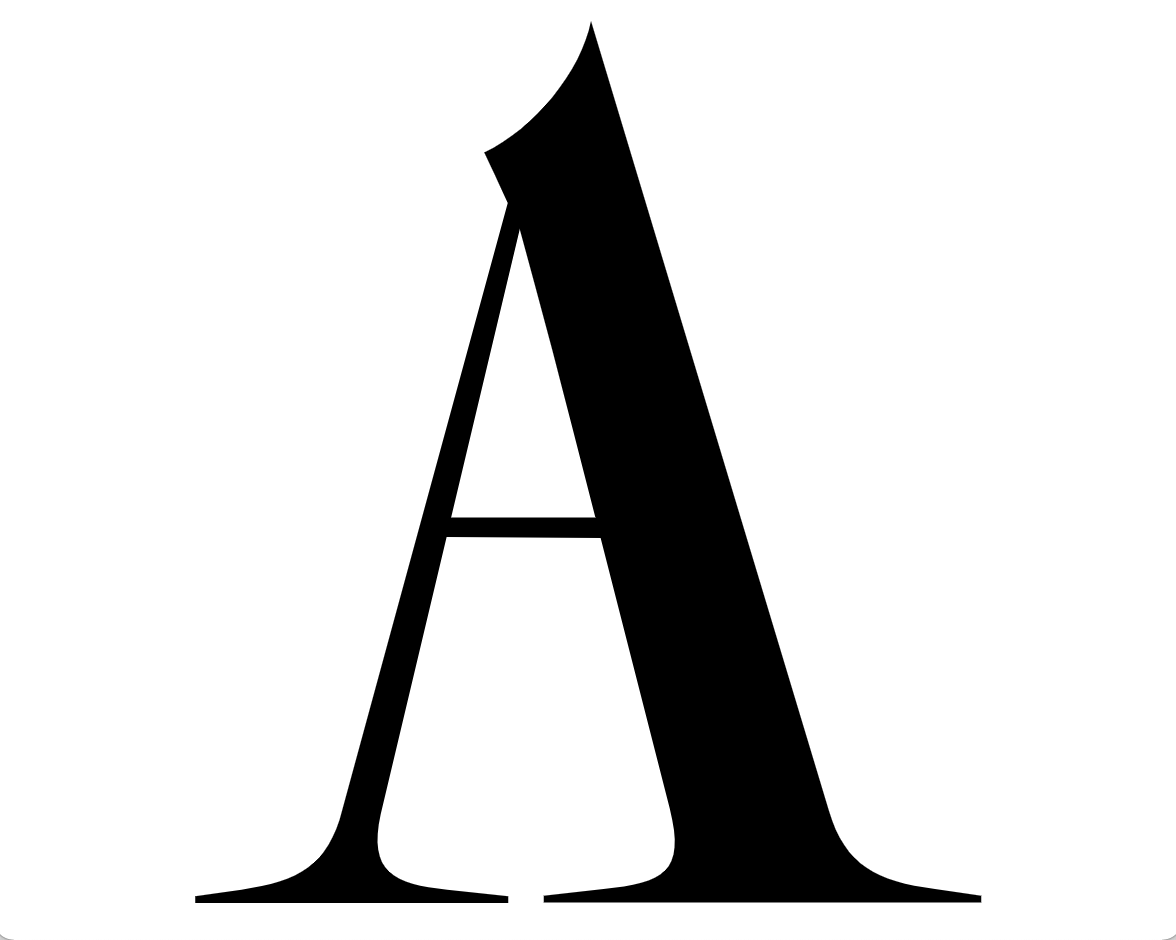
What if we want to reuse the A shape we just made?
We have a problem because we have one element with the Λ shape, but it also contains the horizontal!
If we flipped this as it, it would look like this:
Not quite right to have a crossed V.
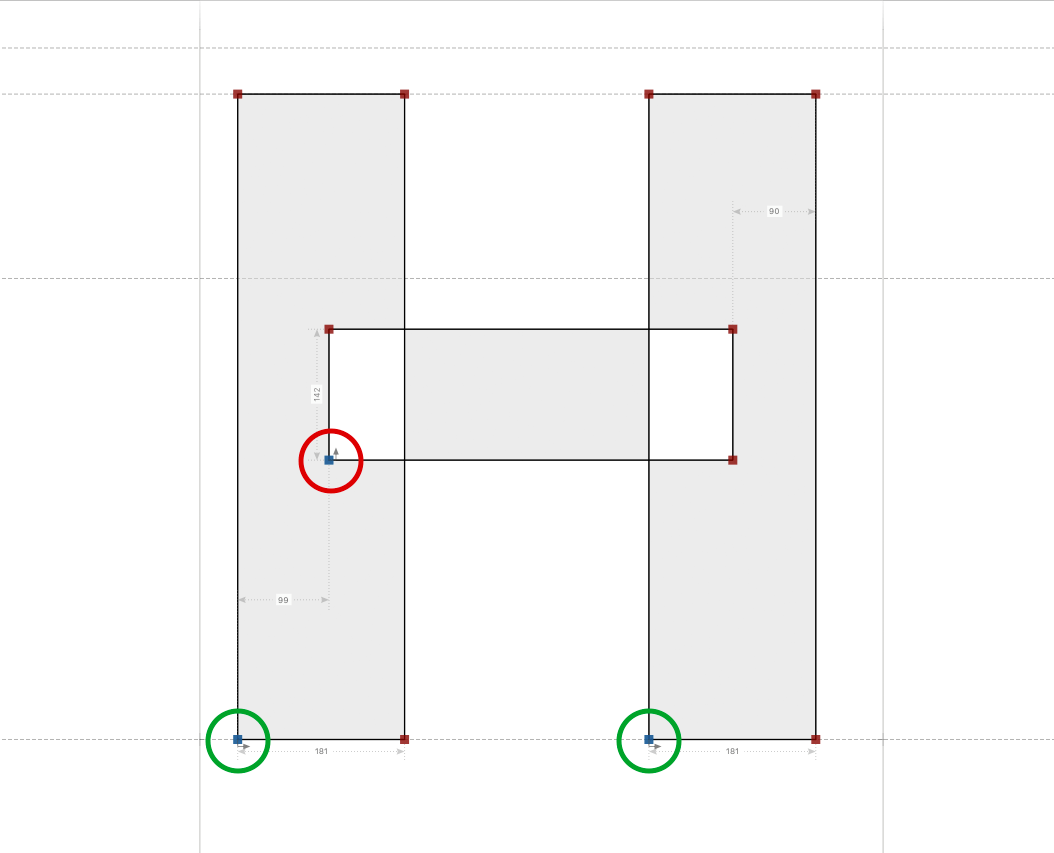
To take the horizontal out: ❶ Double click the horizontal bar to select it. If you have trouble with that, hold down Shift and click opposite sides like this:
❷ Go to menu: Element > Contours > Separate to Elements
That’s it! Notice that when you do this, it also takes the horizontal bar out of the V!
Besides fixing the V, we changed the A from a 1×2 configuration to a 2×1 (2 elements, 1 contour each).
Nice!!
Like a surgeon, for the very first time!
Happy cutting!
Coming Up: The Next Round of Surgery In the next round of surgery, you’ll be learning how open up contours and transplant them.