Layers & Masters Panel Basics
Benefits Enable yourself to make variable fonts when you know how to read this panel.
Knowing this panel is important for the next tutorial.
Example of the Layers and Masters Panel
The Layers & Masters shows the layers for your current glyph.
It looks like this:

What Are Layers?
What Layers Are Not
Layers in FontLab are not the same as layers in Adobe’s Illustrator!
You cannot design different parts of the letter in different layers and have it export.
FontLab’s Elements Panel is closer to Illustrator’s Layers Panel. Check out the tutorials on drawing to see how this panel works.
What Layers Are
Layers are flexible, and so are not easy to define.
It’s easier to show you the common types:
- Font Masters ←These are the main ones!
- Masks
- Glyph Masters (Intermediate masters) ←These fix interpolation issues for a single glyph.
- Specialized Layers
- #instance Layer
- Other
Font Masters
The main layers.
Font Masters hold your drawings, metrics and kerning.
In variable fonts, these mix to make interpolations.
In the Layers & Masters panel, Font Masters are in bold.
Masks
These are temporary.
Put bitmaps (png, jpg, tiff, etc.) back there to trace.
Put vectors back there, when you want to snap nodes to a similar shape.
In the Layers panel, Masks are blue.
Here’s an example of how you might use it.▼
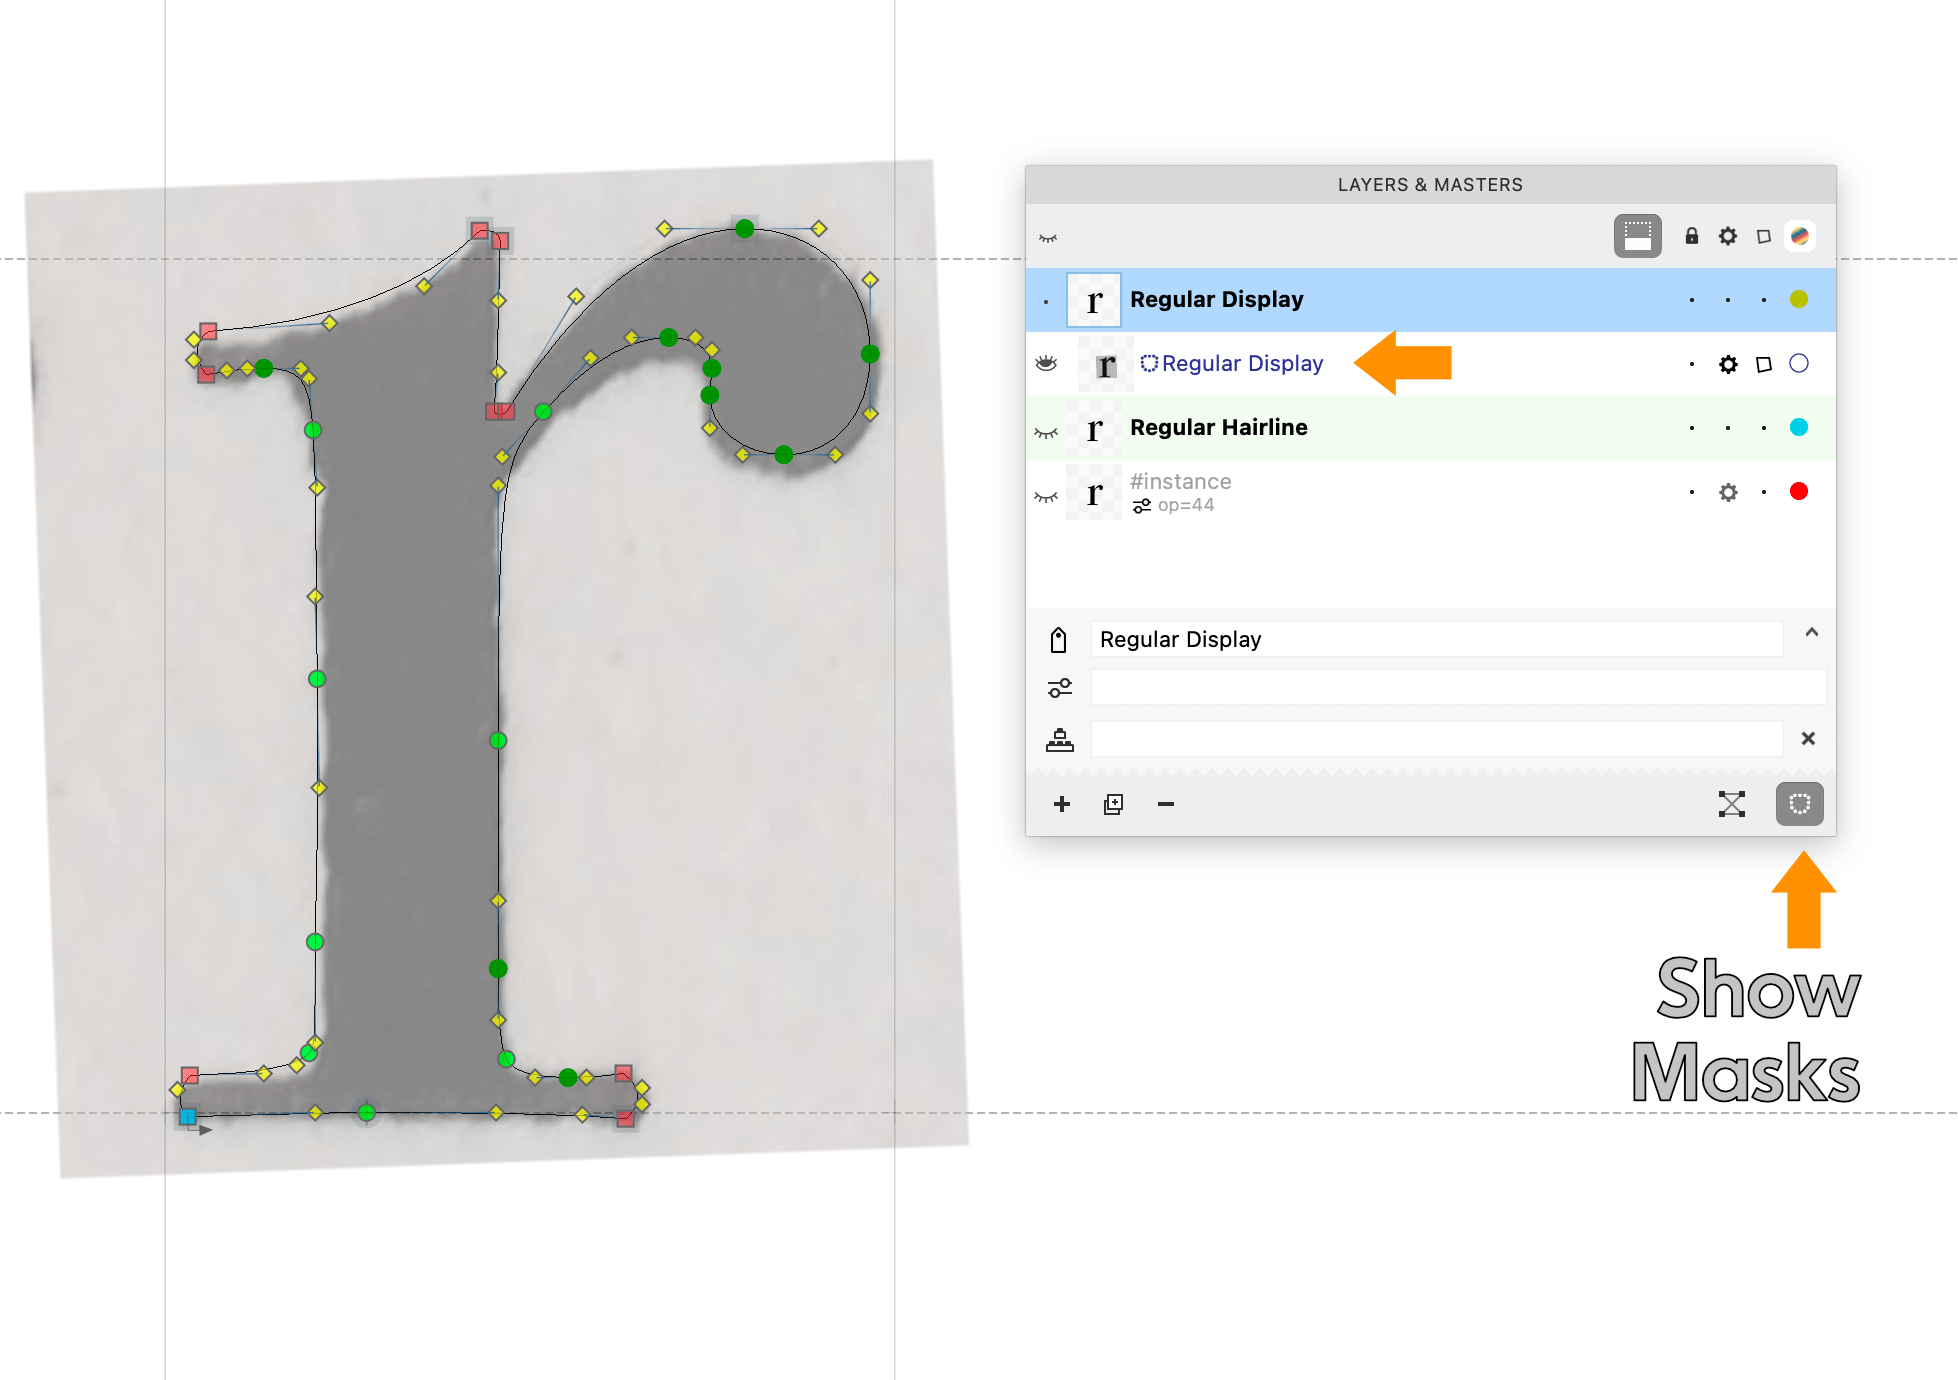
Use the button show mask layers.
Warning
With non-destructive objects like components and element references, I do not recommend menu: Tools > Swap with Mask. This will destroy those connections. Instead switch between layers and masks like this:

Info
With this example, use the View panel to turn off everything—except True Fill.
Special Layers
#instance Layer
This is such a helpful layer!!
It shows you what an instance looks like and you can take measurements and find interpolation problems!
Other uses
Here are some other ways to use layers
- You can also make non interpolating layers. For example, you could make a layer that stores all the drafts of that letter!
- You can interpolate a layer with your current version to modify it.
A couple things to keep in mind:
- Many layers can impact the saving time of the file.
- Many layers does not impact drawing, because when a layer is inactive, it doesn’t render. (Especially if your Layers & Masters panel is closed).
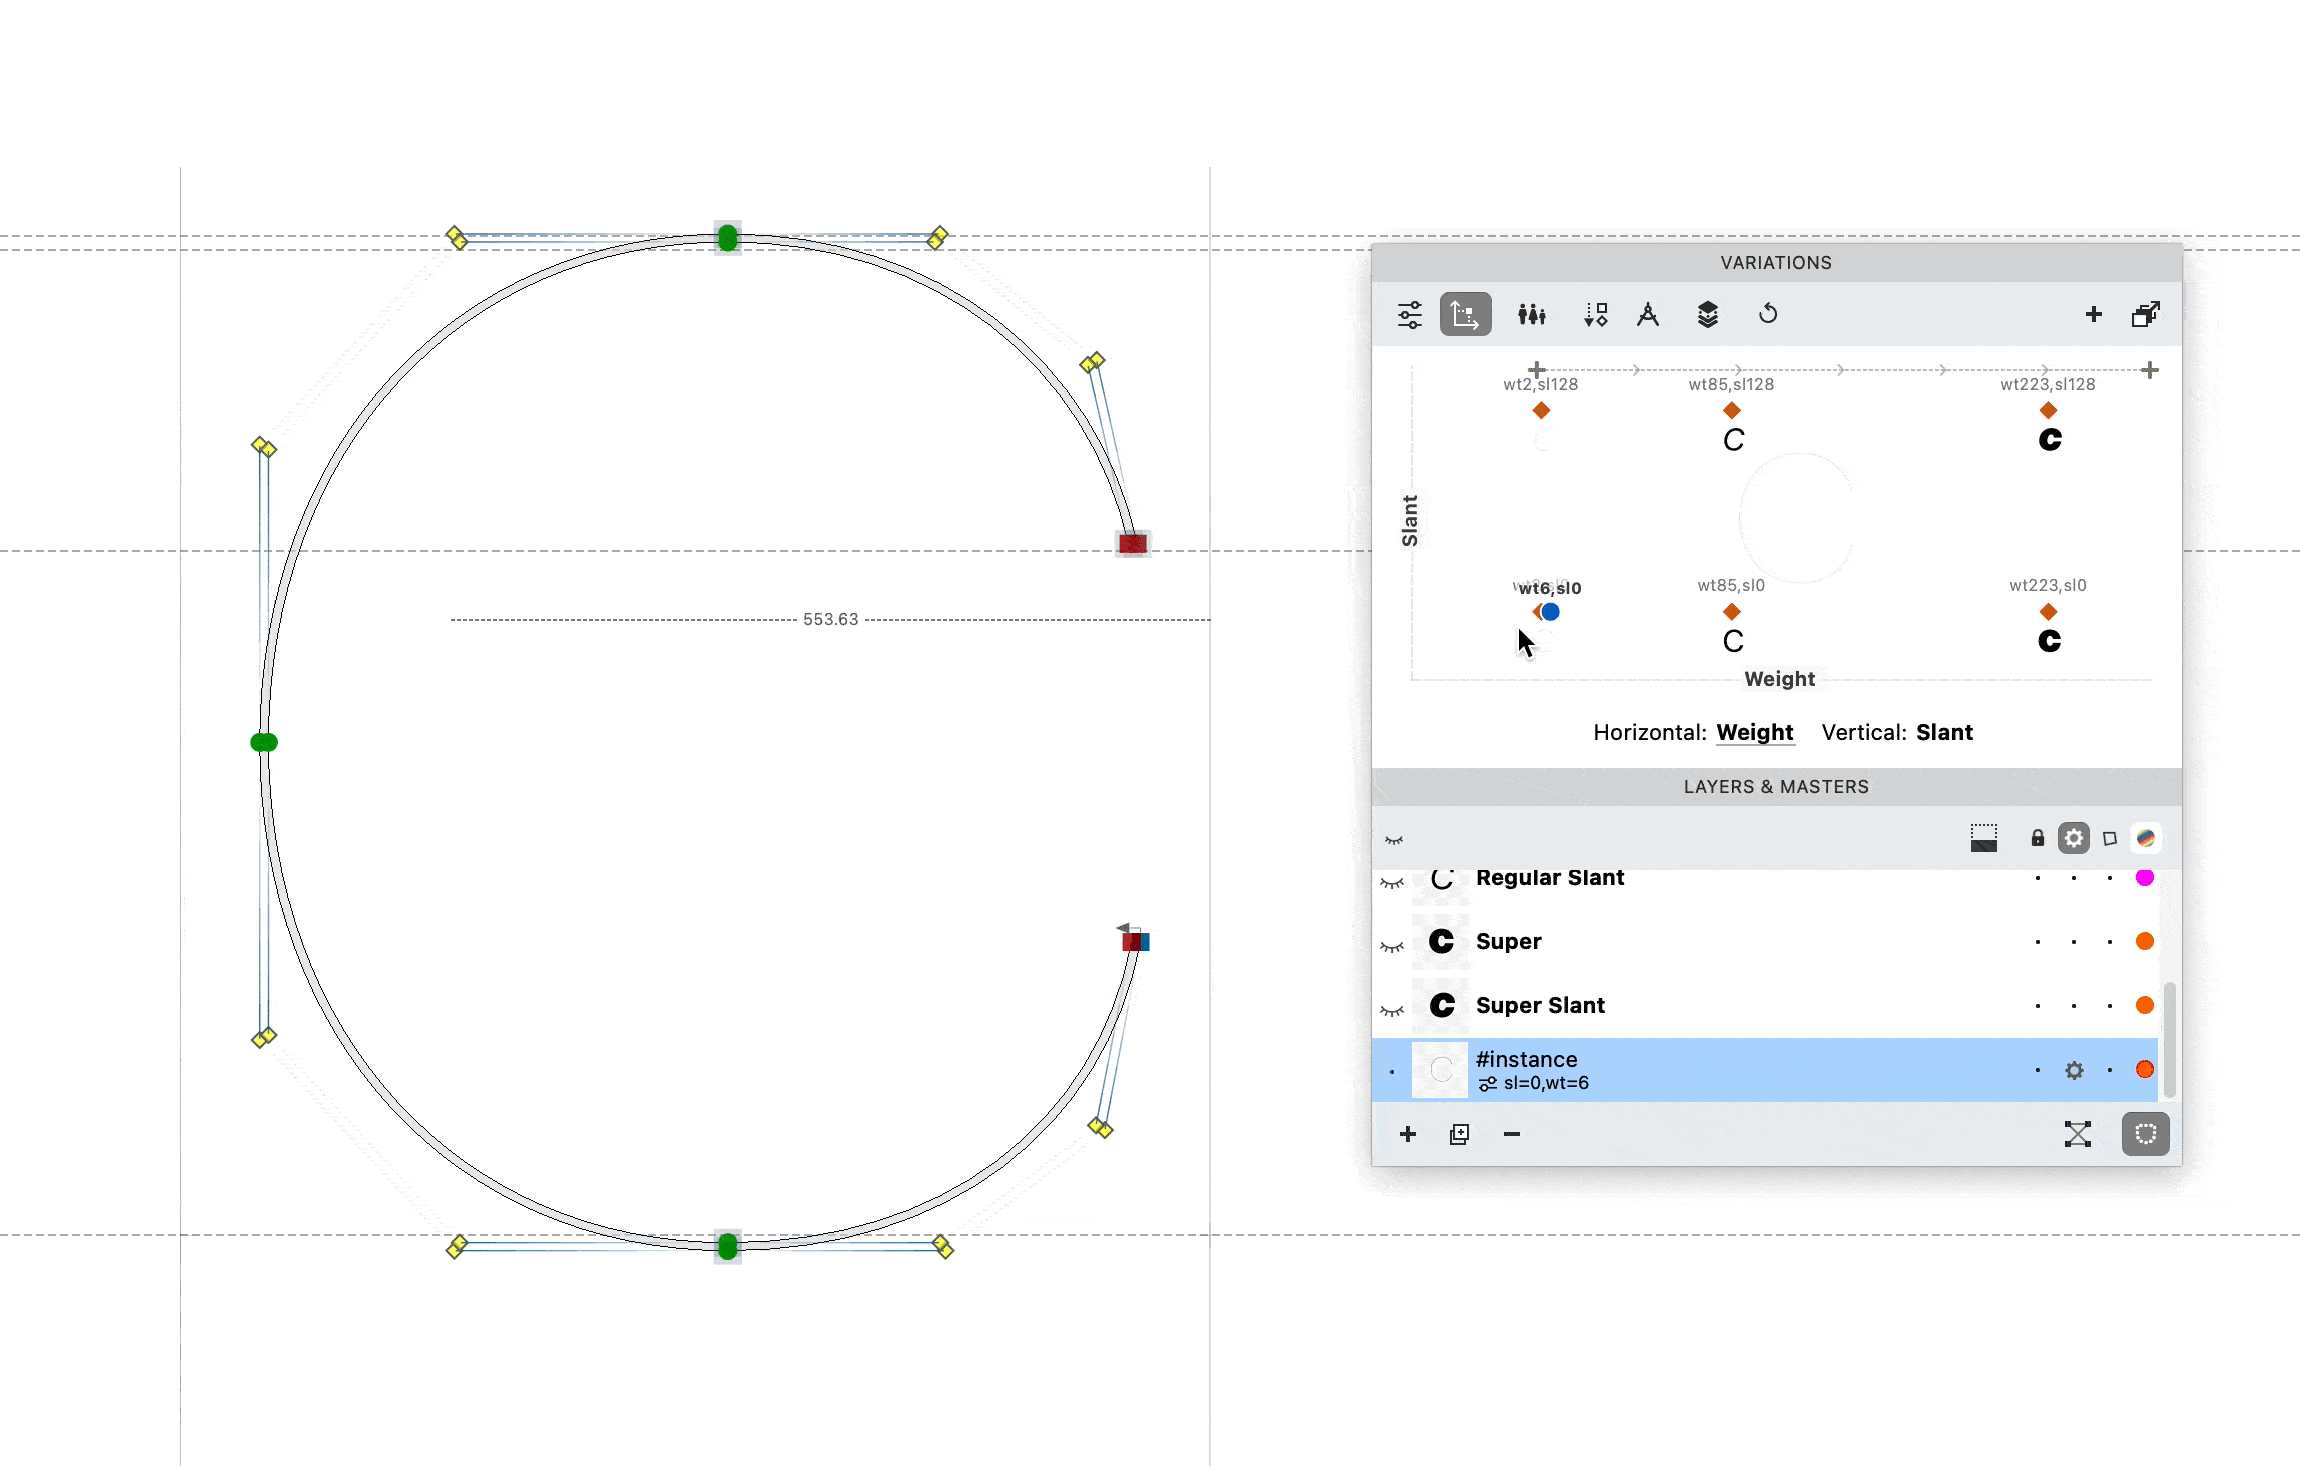
Example Full Layers & Masters Panel
Here’s an example of a very full layers and masters panel.
It’s a lot of stuff, and you might need to look at this a few times.

You don’t have to remember this all now. This is here for your reference.
That’s about it! Good work!
You are ready to set up variations.
PS
Colors
A word about the colors.
This does not change the actual color of your shapes. You use the Color Panel to do that.
This changes the color of your shapes for comparison purposes.
When the eyeball is on, that layer’s shape will show in the drawing window at that color.
It also changes the color of the shape in the Matchmaker tool.
Avoiding mistakes
Usually the color is off in your current master.
In your active master, that color will show, only if you go to Preferences > Variations > Preview master color.
You can set it as the background color. Or a bar that goes over the top of the drawing window.
Why? It helps prevent accidentally changing the wrong master, when shapes are similar, such as the period or macron.