Stop Wasting Time On Font Mistakes!
Common Font Mistakes and How to Avoid Them
Benefit Save time and frustration, with a couple workflow tweaks.
What if you make a mistake?
Even with all the advice in these tutorials, it’s likely you will make a mistake sometime.
I wrote all these tutorials, and it’s likely I will make all the same mistakes again!
There’s two options:
- learn from your mistake and do better the next time, or
- correct the mistake.
To a fault, I’m a perfectionist, so I have no choice but #2.
Here’s some ideas on how to fix a mistake.
How to Fix Letter Height Mistakes
Tip #1
Every designer, artist—you name it—makes a ton of mistakes.
It seems like they are perfect, because each designer is not going to talk about their mistakes. It seems like they wave a magic wand, and out comes a perfect font.
Here’s a story.
Story
I usually label whatever I do with version numbers. Usually in the form 0 – 1, where the first is the big version number. If I’m doing it for clients, I just send them something like this: “Name of Project - Ver 1.xxx”
So this one time, I have a client who insists he “doesn’t want version numbers”. He insists that I write the word “Final” on the last version. So I do that.
You can probably guess what happens next.
Name of Project - Final. Name of Project - Final 2. Name of Project - Final 3. Name of Project - Final 4. Name of Project - Final 5
Another Story
Another thing to notice: FontLab is currently on build 8,042 at the time of this writing.
They’ve done this: Build it, test it, fix it. Build it, test it, fix it. Build it, test it, fix it….over eight thousand times!!!
This is key: It’s never totally right the first time. Planning doesn’t always work.
Better to prepare for mistakes instead!!
How do you do that with fonts?
Re-use shapes, as in this tutorial, this tutorial, this tutorial, and this tutorial. That way, if you make a mistake on a serif, it’s no biggie, just change all 672 serifs with a push of a button.
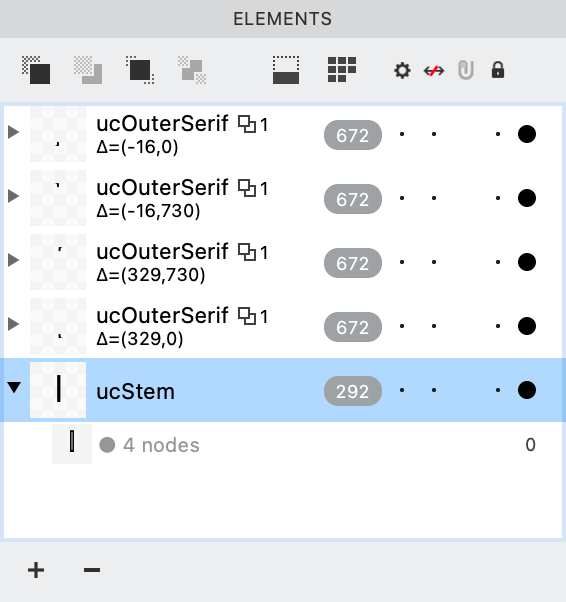
(Now even quicker with skins.)
Re-using shapes and non-destructive editing is the key to fixing mistakes!
Tip #2
Work in such a way that avoids risks.
You can do that by my tips in these tutorials. Especially the one on “Setting Your Letter Heights” and “Using Auto Layers”.
Also, don’t just draw everything (hundreds or thousands of symbols)
Then space everything. Then kern everything.
You are not a robot welding car parts.
You are not a factory worker tweaking thousands of widgets.
If you work like a robot, you risk demotivating yourself.
If you draw everything, you’ll feel like “My font is done!”
But if you want your font to be good, you are only 60 – 70% of the way there.
You will have weekends, weeks, or months of spacing and kerning and testing!
So even if your work ethic is through the roof, you are likely to cut corners, get bored or frustrated, or even worse, give up on your font.
Instead, spread out the boring stuff in a logical manner.
It’s less risky that way. In Tip #3, I’ll show you my method.
Tip #3
Avoid Risks, Particularly in Font Design.
Here’s a less risky way:
Do more big cycles, and less small cycles all at once!
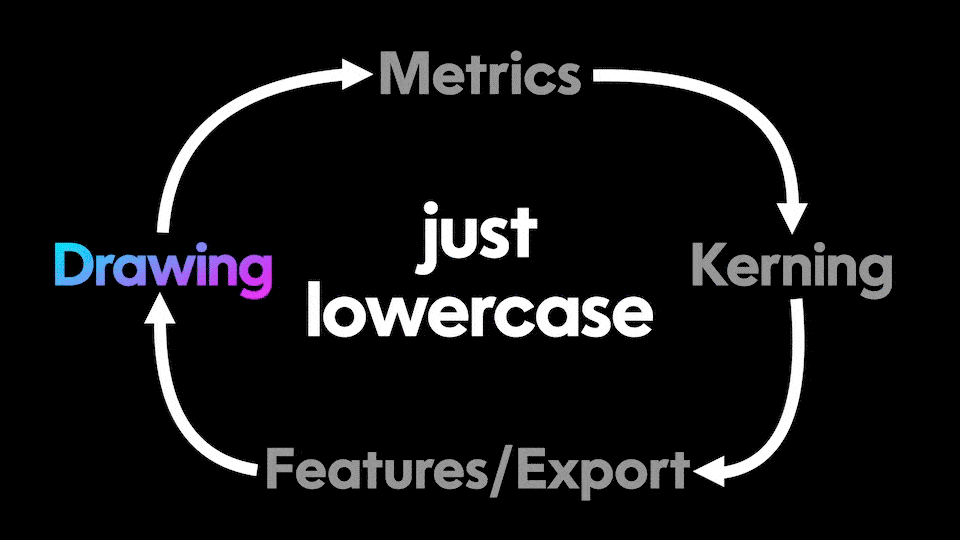
Here’s the workflow that I try to use, based on the principles in this book.
- Setting heights. Draw the tallest and lowest symbols, as in the “Setting Your Heights” tutorial. For example, generate these glyphs and draw them first (or whichever symbols will probably go lowest and highest in your font). “H Å Q g n l ó 1 0 (“
-
If you are planning on designing variable fonts, it would be good to also draw the above symbols at other weights, other widths, just to get an idea. You might entirely change those drawings later, but it is less risky to have an idea of your vertical metrics.
-
Draw the most important letters first.
- This will usually be lowercase.
- It’s tempting to go factory worker style: nhmu. Then obdpqg. etc.
- Instead, try doing the actual hard stuff first, like trying to match the different types of lowercase letters. Start with these characters instead, and make them match: novlty This will protect you from much tweaking.
- You might try making a couple diacritics: acute, ring, dieresis, and see how those look with your letters.
-
Caps first, only if you are making a titling (all caps) or small caps font.
-
Hone
-
Space
-
Metrics (Sidebearings)
-
Kern
-
Diacritic Letters (Optionally do kerning exceptions after this)
-
Features
-
Make Italic Versions
-
Make Variations
Now you will repeat this for each category of symbols: Uppercase, Figures (all types), punctuation (uppercase and lowercase), special symbols, other special stuff. ▼
What we are doing is this:
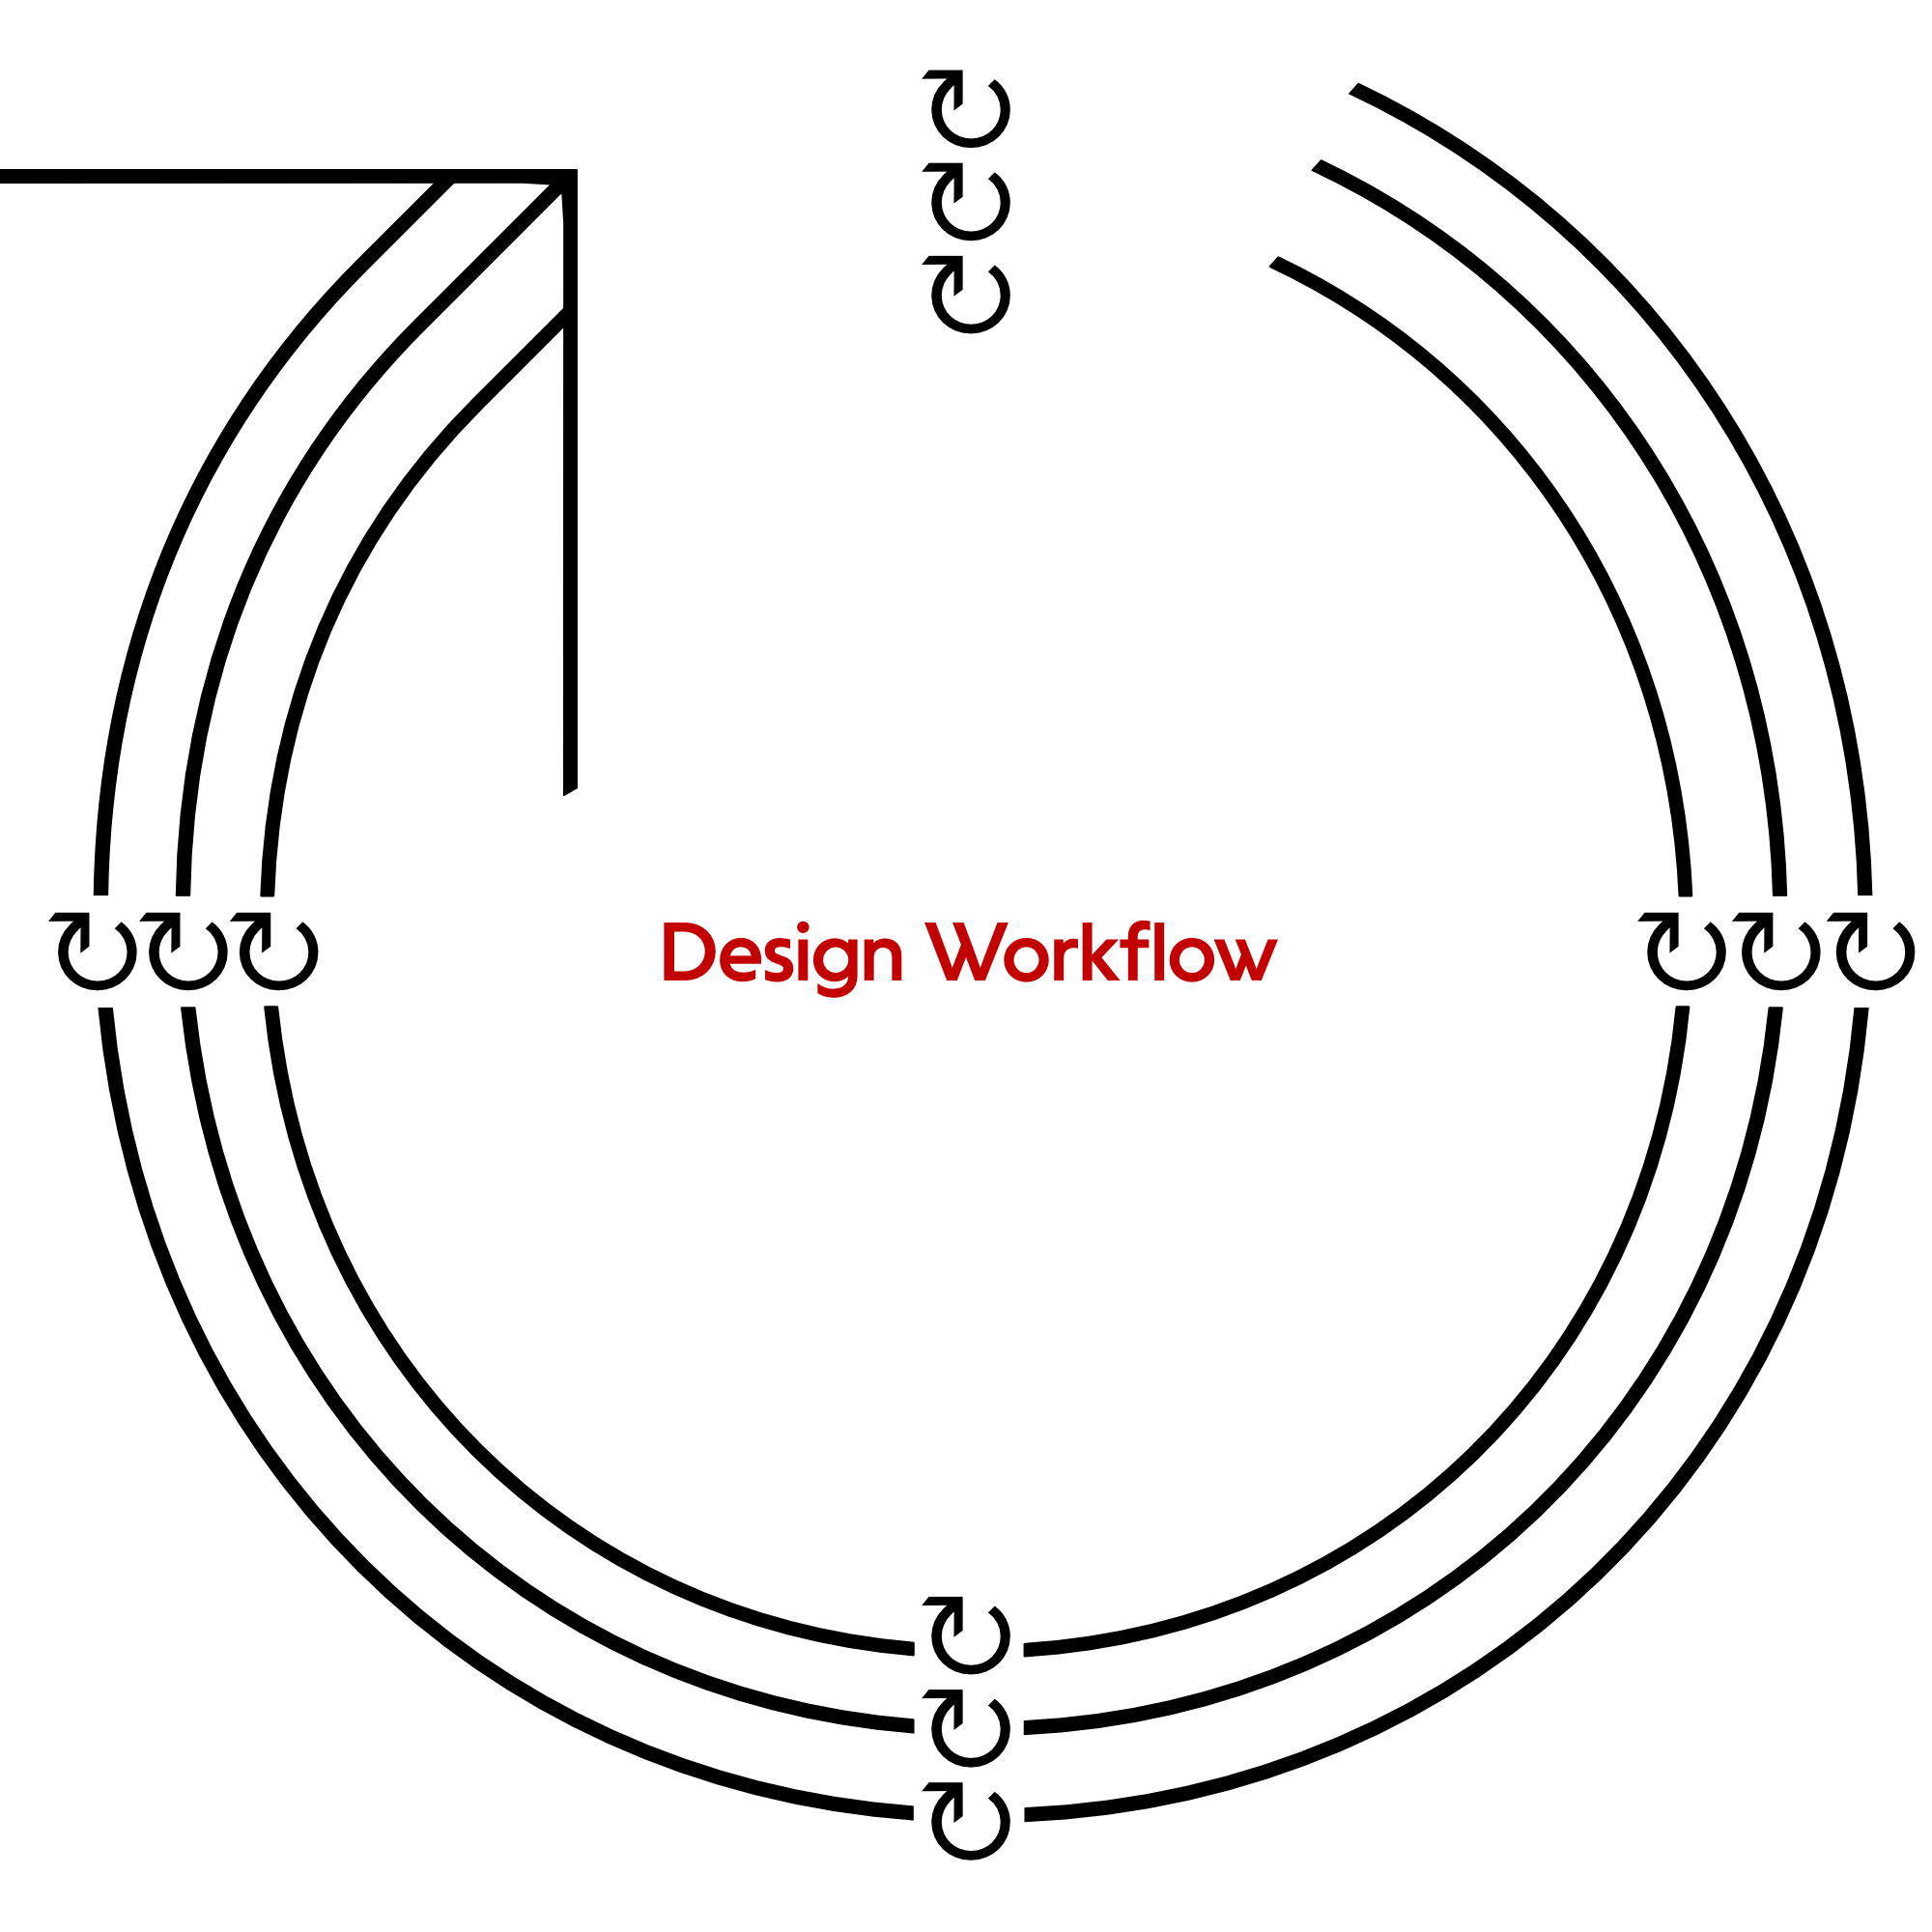
More big cycles, but one (or few) small cycles at a time.
This way is the robot way. ▼

One big cycle with many small cycles at a time.
Or you can do it free-for-all style and just tackle whatever letters or numbers strike your fancy. In my opinion, this type of workflow is still better than factory workflow.
This workflow is what I do.
But it’s based on my experiences. Do what makes sense to you, while avoiding the risk of boredom and the risk of mistakes.
Best of luck! Enjoy your font designing!
PS- BTW, to me kerning and spacing is not boring. It helps me find big mistakes in my letters. Besides, I find joy in seeing a word well spaced.