90 Second Quick Start Kerning
Kerning fixes pairs of letters who don’t get along.
Pre-kerning gaps look like this.▼

Before starting, go into the kerning workspace: menu Window > Workspaces > Kerning.
STEP #1 Make Classes
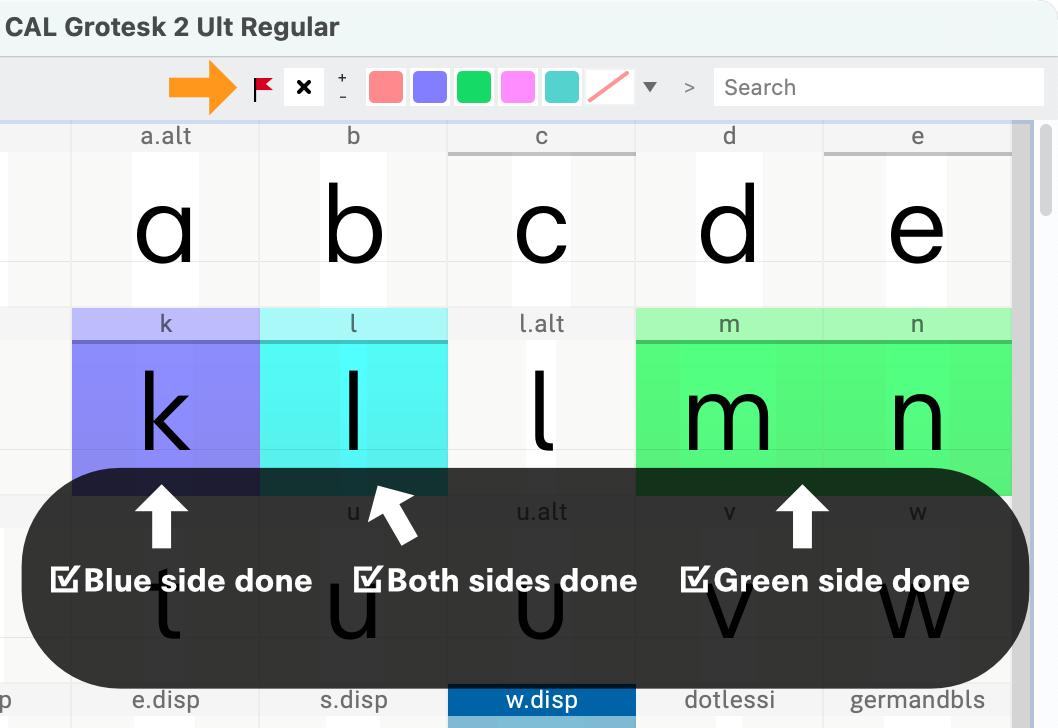
❶ Highlight the letters that have similar sides. For example, left side of mnr. ❷ Now think about an imaginary line between the pairs. In this case the mnr would go on the right side.

❸ With nmr selected, go down to the classes panel and select the correct class. (This time green.) ❹ Make the rest of your classes. Color code so you can remember what is done. I use: green=green class done blue=blue class done cyan=both classes done
Info
You can also try going to Classes Panel, then to the three line hamburger, and select Generate Kerning Classes. See if that works for you.
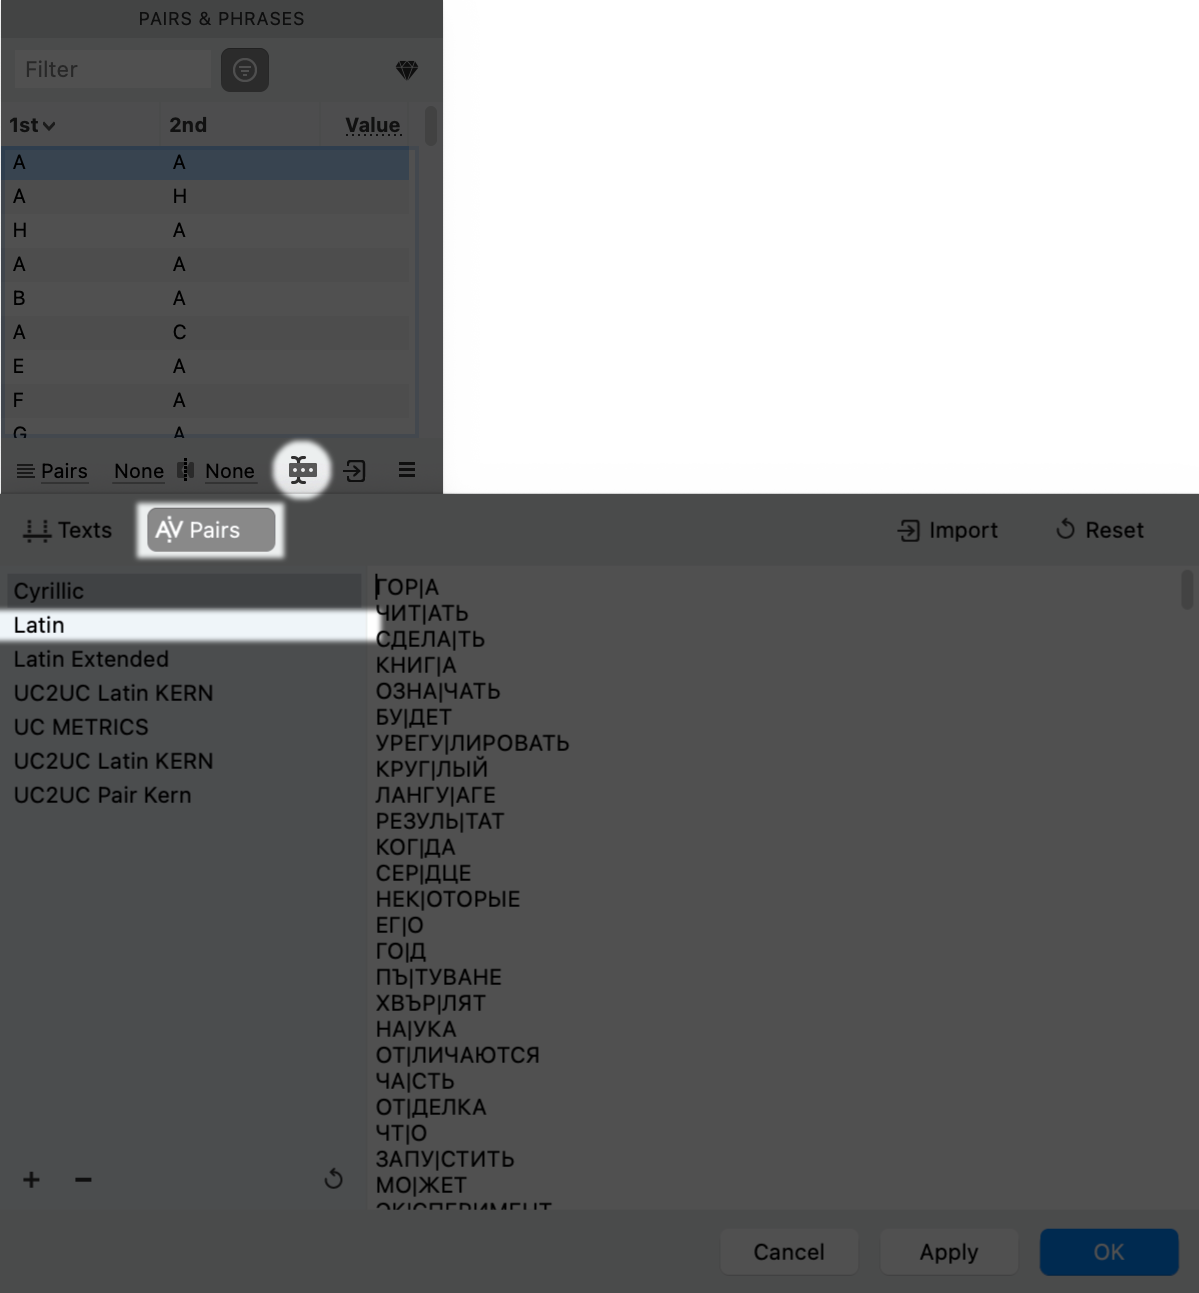
STEP #2 Getting Kerning List
❶ Get into the kerning window by pushing the AV symbol in the toolbar.
❷ In the pairs and phrases panel, push the three dot button and choose the kerning list that you want.
STEP #3 Kerning
Kern using the kerning window (main window).
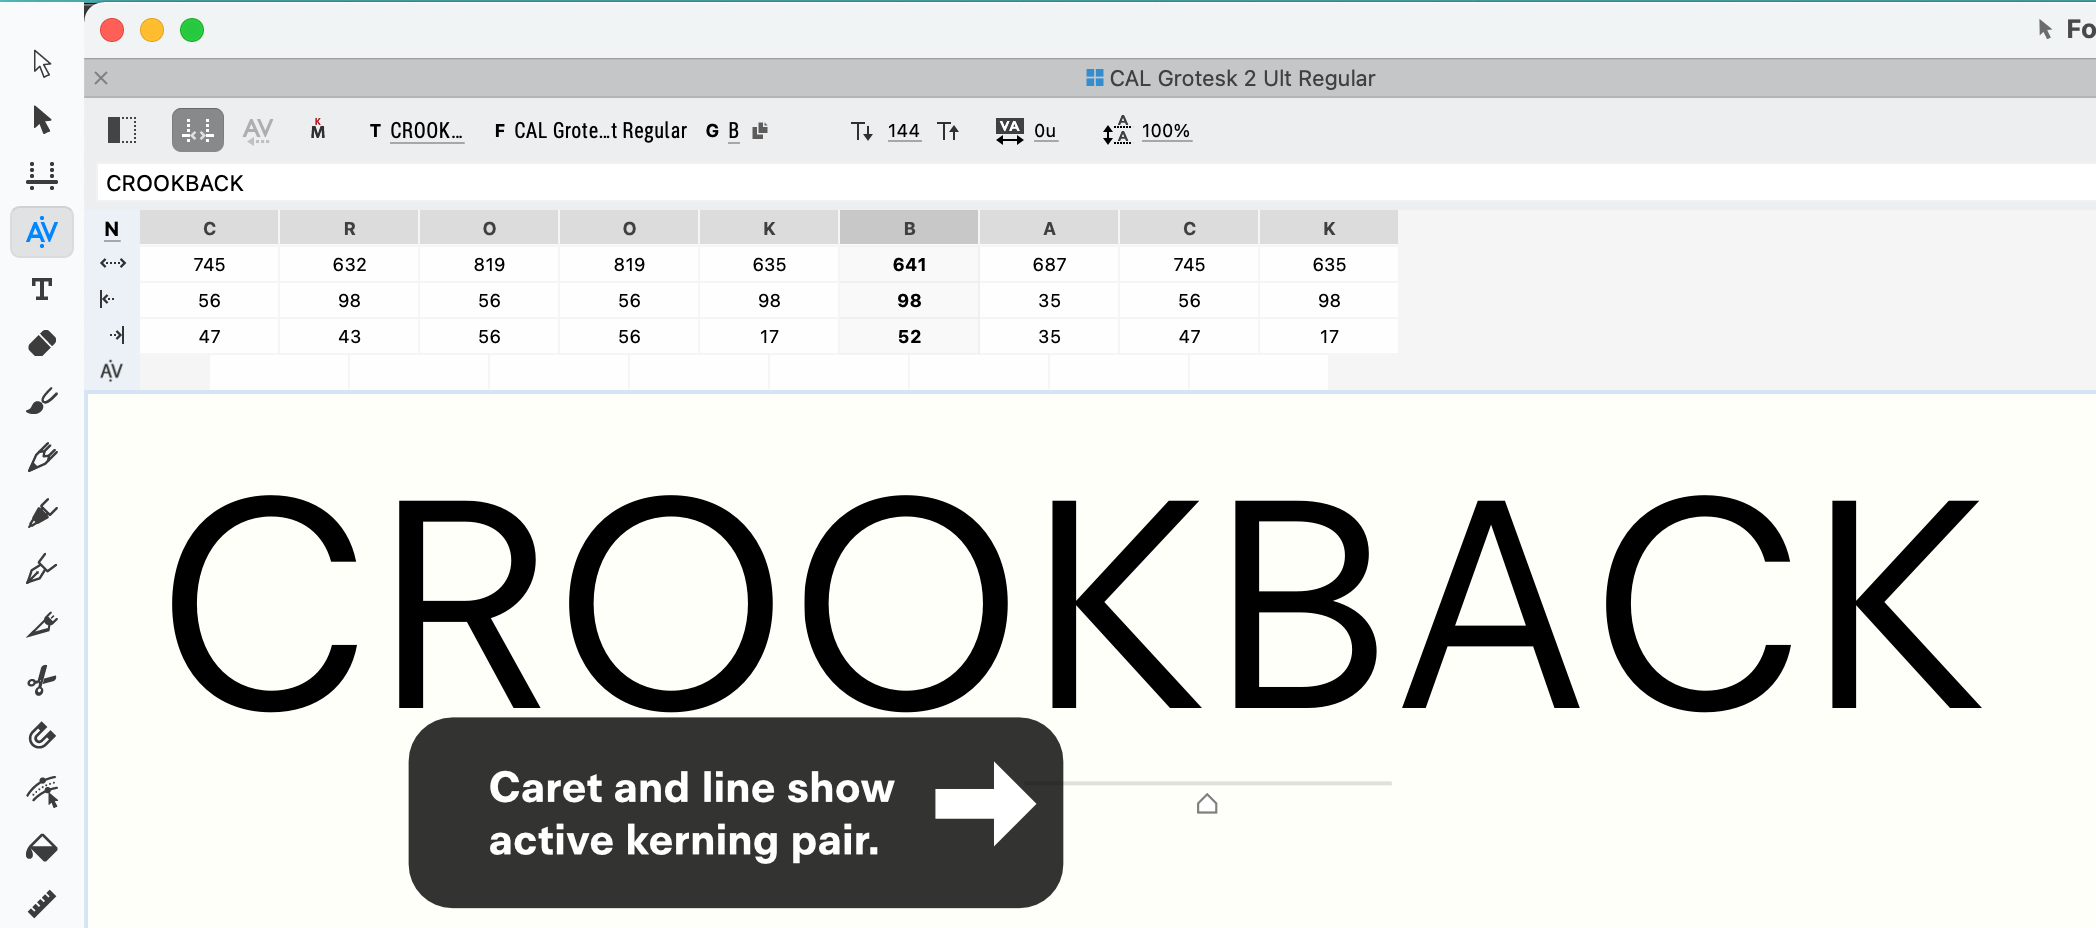
Option #1 Arrow Keys
Push ← left and right → keyboard buttons. Use Shift←↑↓→ for 10 units. Use Cmd←↑↓→ for 100 units.
Push ↑ and ↓ to go to different pairs.
Option #2 Mouse
Use the mouse to drag the pair.
Still push ↑ and ↓ to go to the next pair.
Phew…
That’s it!
Great work!!
PS
For information on customizing your metrics window, click here.
For information about customizing your mouse settings, click here.
Yay!→ To adjust how much a mouse key moves, go to Preferences > Distances > Metrics arrow key.
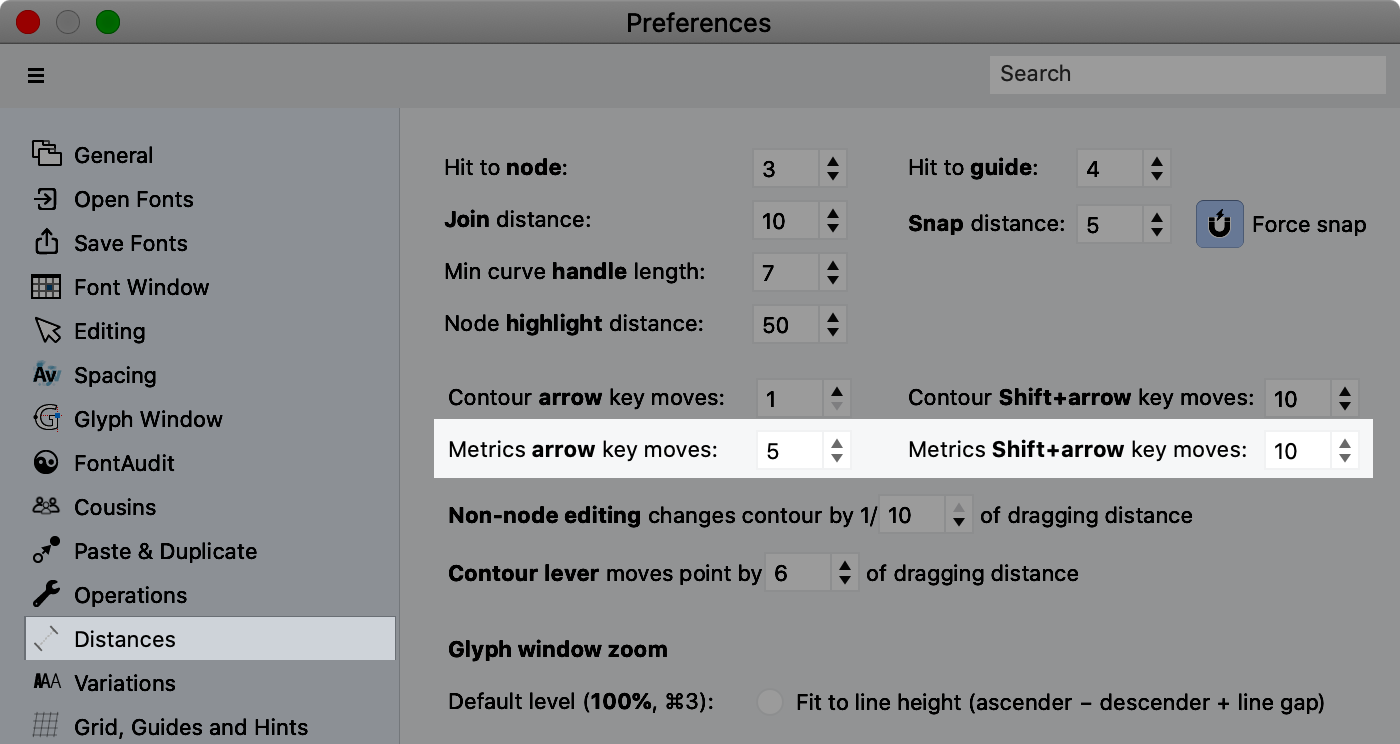
(Many designers like to use a value of 5 for kerning.)