Automatic Fixing Paths
Welcome to the refining stage!
You have some of your drawings in rough form.
Now, let’s remold any rough drawings into sparkling shapes you LOVE!
Benefits Save time with automatic cleaning features!
In this tutorial we’ll look at auto refining.
Think of these like power tools. You use the big power tools to get things cut right and into the right places.
Later, if you want things to look better crafted you work on your paths by hand.
Auto-Clean Up
Cleaning Scans and Imports
Sometimes when you have a scan, there’s extra shapes.
Even if they’re invisible, you’ll see these large negative sidebearings. ▼

Here’s how you fix it—without actually having to find a tiny dot somewhere!
Download VFJ
Step-by-Step
⓿ Download the file. ❶ Using the Contour, highlight the part you want to keep. Use Alt-drag for complex selections. ❷ Invert selection. Go to menu: Edit > Invert Selection ❸ Delete.
All the bad stuff is gone.
Automatic Cleaning Extra Nodes on Paths
Automatic cleaning and related operations are at the bottom of the Contour menu.
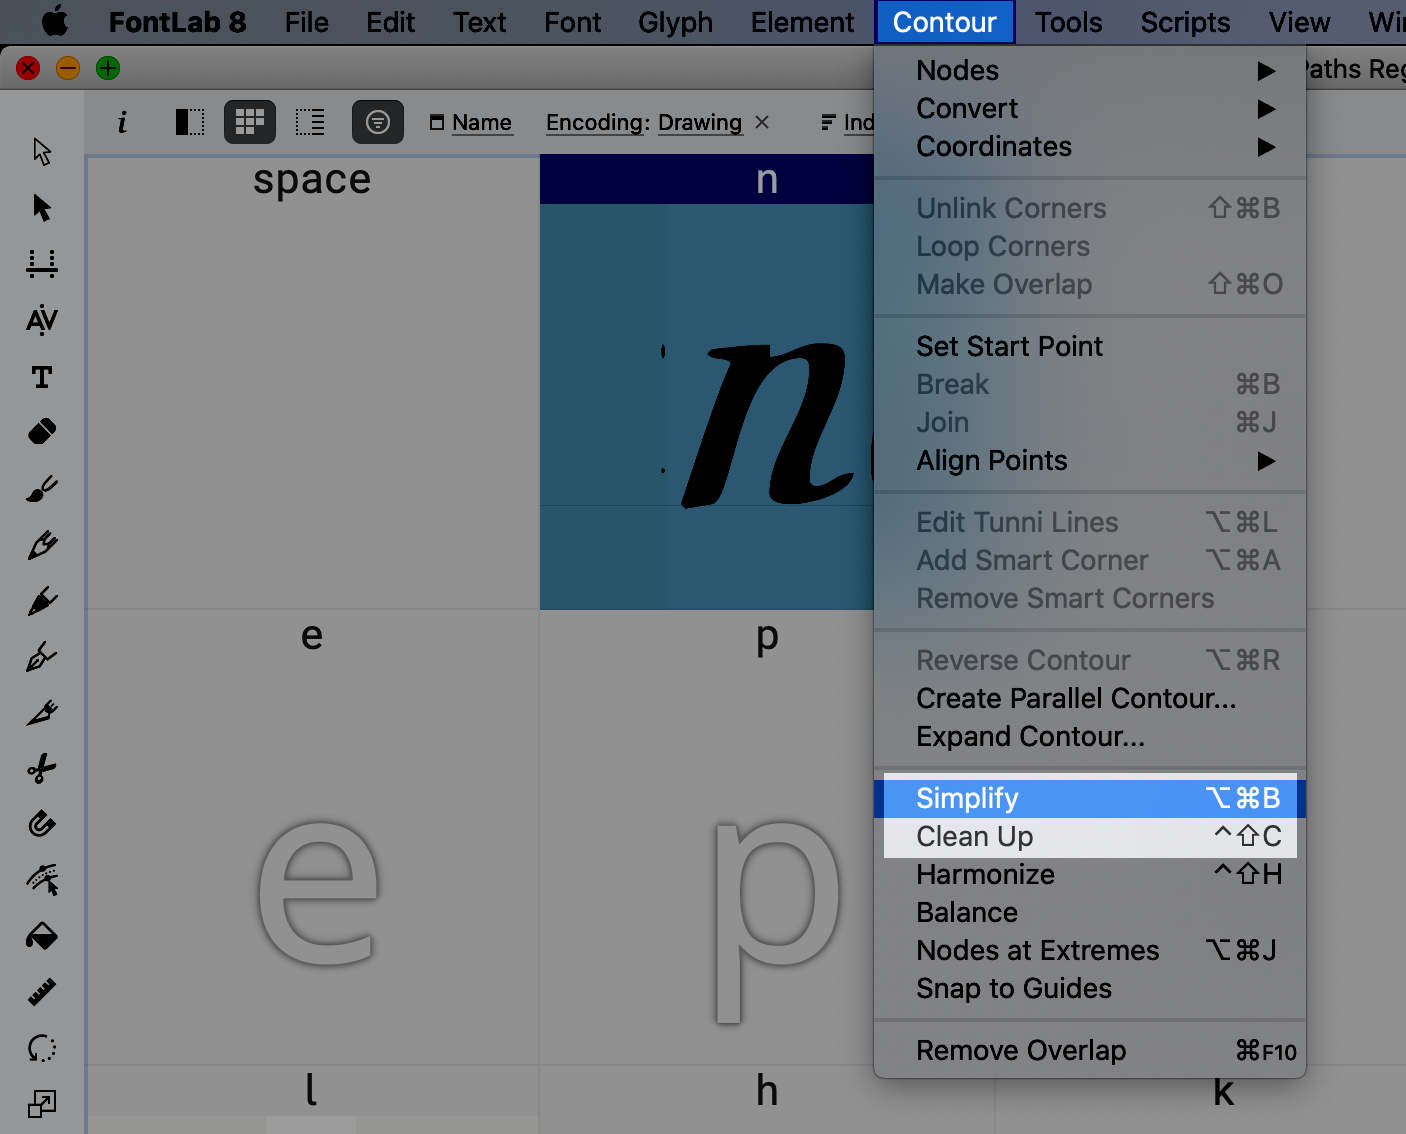
What they do
Simplify Erases nodes. Adds extreme nodes. Clean Up Similar to simplify. Does not add new nodes.
Test on your shape to see what works better.
Semi-Automatic Cleaning
If none of those got everything you needed, try the Eraser.
Hold down Shift. The eraser will turn green. Click, hold, and brush over the area.
Info
Increase the size of the eraser by holding Ctrl (Mac), clicking and dragging up or down.
Auto Curve Fixing
Go back to the Contour menu.
Let’s look at some commands that automatically fix curves. ▼
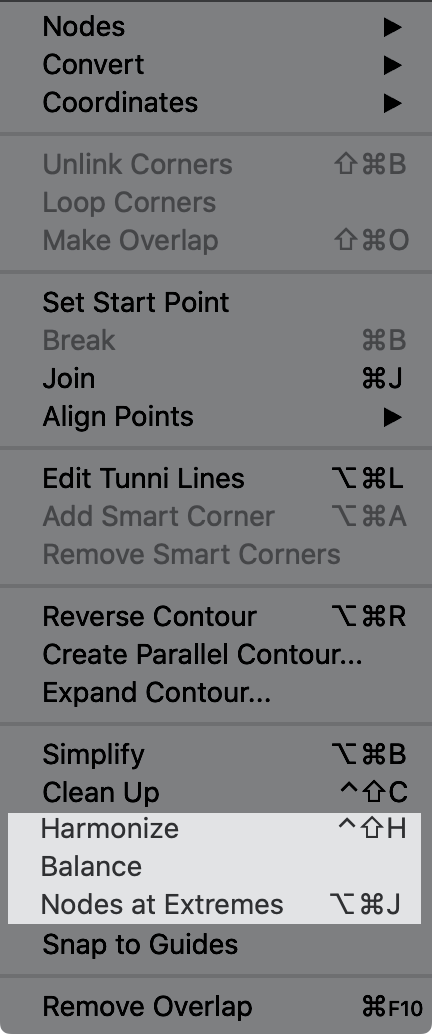
Harmonize Makes your curves smooth. Balance Eliminates bunching on a node. Evens out the lengths of your handles. Nodes at Extremes Adds nodes at extrema of curves. Leaves other nodes alone.
Try applying these to your shape to see what happens!
More on these in the curves tutorial.
Auto Height Fixing
The last option is for fixing the heights of your letters. ▼
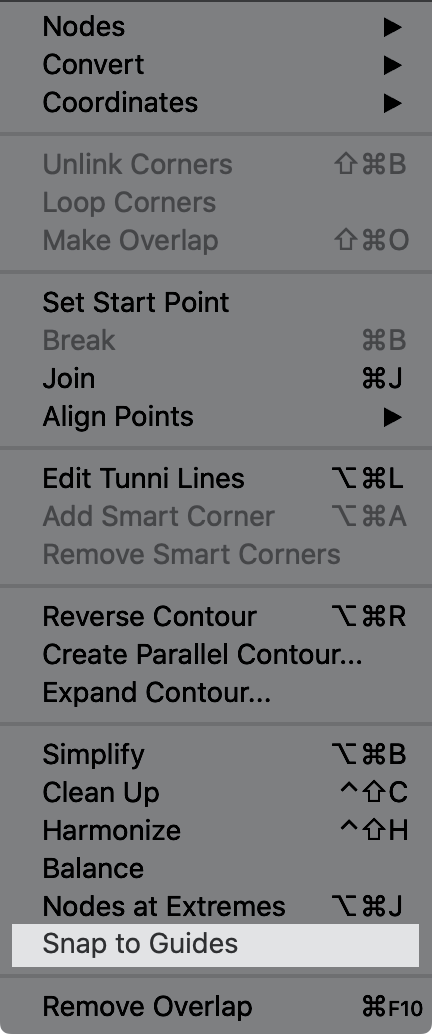
Snap to Guides snaps highlighted shapes to nearest font dimension (caps height, x-height, etc.), font guide, glyph guide. The farther you are zoomed out, the farther the nodes will snap.
Step-by-Step
⓿ In the above file open the drawing window for the l. Look at how off the shape is! ❶ Select the entire shape with the Contour. ❷ Zoom pretty far out. The l should be about the size of half your pinkie finger. ❸ Go to menu: Contour > Snap to Guides.
Info
Snap to guides only work on your current selection. If nothing is selected, the entire path snaps.
Info
Snap to guides only works on paths, not elements. Even in the Element tool, it will change your path.
If you’re asking…
Why is there a second ascender line? See the height tutorial.
Auto Align
OK, you have the top and bottom lined up. But the sides of the l are still crooked!
Step-by-Step
❶ Open the Transform panel. Right click the toolbar and select “Transform”. ❷ click a crooked side. ❸ On the Transform panel, push one of these buttons.
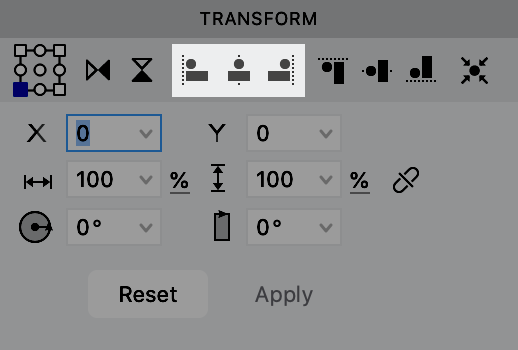
❹ If you are using unrounded coordinates (decimal nodes): Push menu: Contour > Coordinates > Apply Rounding.
Auto Centering
Go to the i in the same file.
❶ Let’s fix the i dot a bit. Highlight the middle two green nodes, then push align center in the Transform panel.

❷ You can use align left to fix the center nodes’ right handles. ❸ Now select everything, the rectangle and the dot, and push align center.
Both the dot and the top should be in the center of the window.
Info
You can also apply this using the Element tool. Remember, if you use the Element tool, you are out of the element container. The element coordinates will change in the Elements panel.
Aligning Top or Bottom
To move the i dot higher:
❶ Select the entire dot. ❷ Push align top. ❸ Adjust using the arrow keys. Hold Shift to move in units of 10. Hold Cmd to move in units of 100.
Info
With a complete contour or element, pushing align top moves the shape to the cap height. Pushing align bottom moves the shape to the baseline. Pushing “align vertical middle” centers the shape between baseline and cap height.
PRO Tip
Aligning to Center of x-height If you want to align symbols, like hyphens to the middle of the x-height or small caps, try this.
In Font Info, temporarily change the caps height to be the same as the x-height. Center your object. Then just change the caps height back. You can even move the caps height into negative territory. That way, you can center a dot between the baseline and descender!
EZ peezy!
Phew. There’s a bunch of things to fix!
Ok…
Are your drawings more cleaned up?
If not, that is OK, there’s a lot more tools and tricks.
Good work!