Copying Kerning into Another Master
Copy kerning quickly into another master or font.
Benefits Save time and get a head start on kerning.
Copying Classes into Another Master
Before you copy kerning, you should copy classes.
❶ Open the Classes panel. ❷ click the hamburger, select copy classes from, as below. ▼
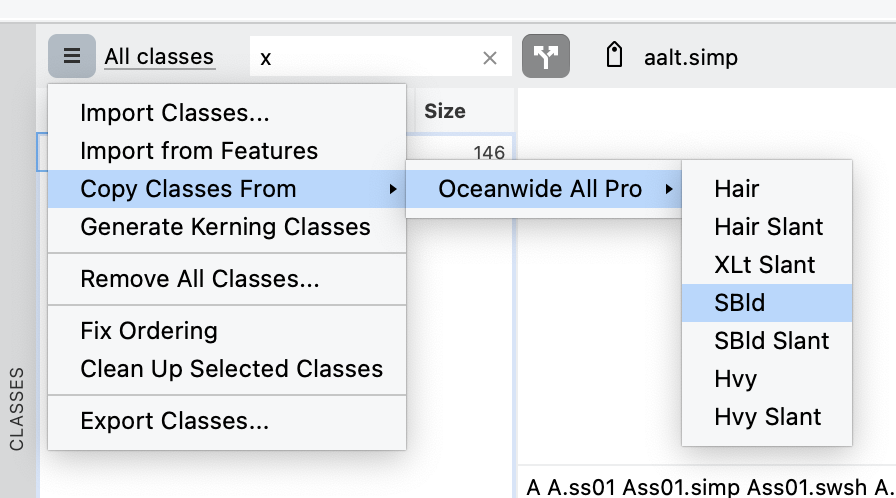
The dialogue comes up like this.
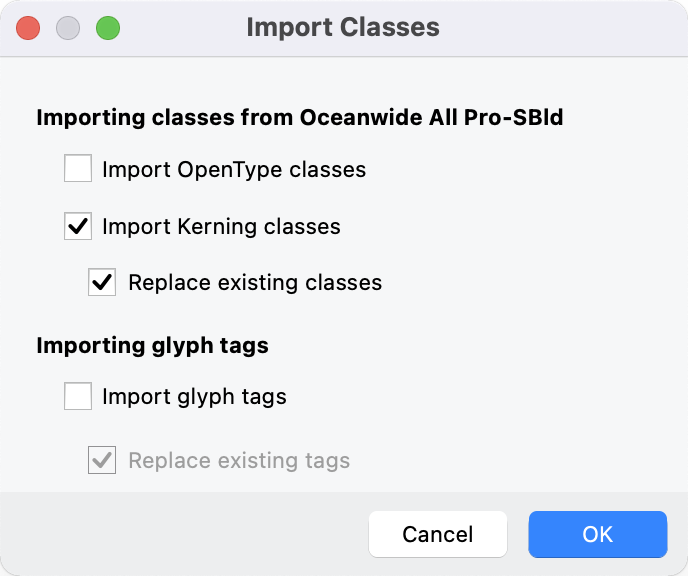
If you’re copying kerning classes only, the option above words.
Check Replace existing classes. That way, if you changed a class, the old classes will get updated.
Once you have the correct classes, you are ready to copy kerning.
Copying Kerning into Another Master
Copying kerning into another master is very easy.
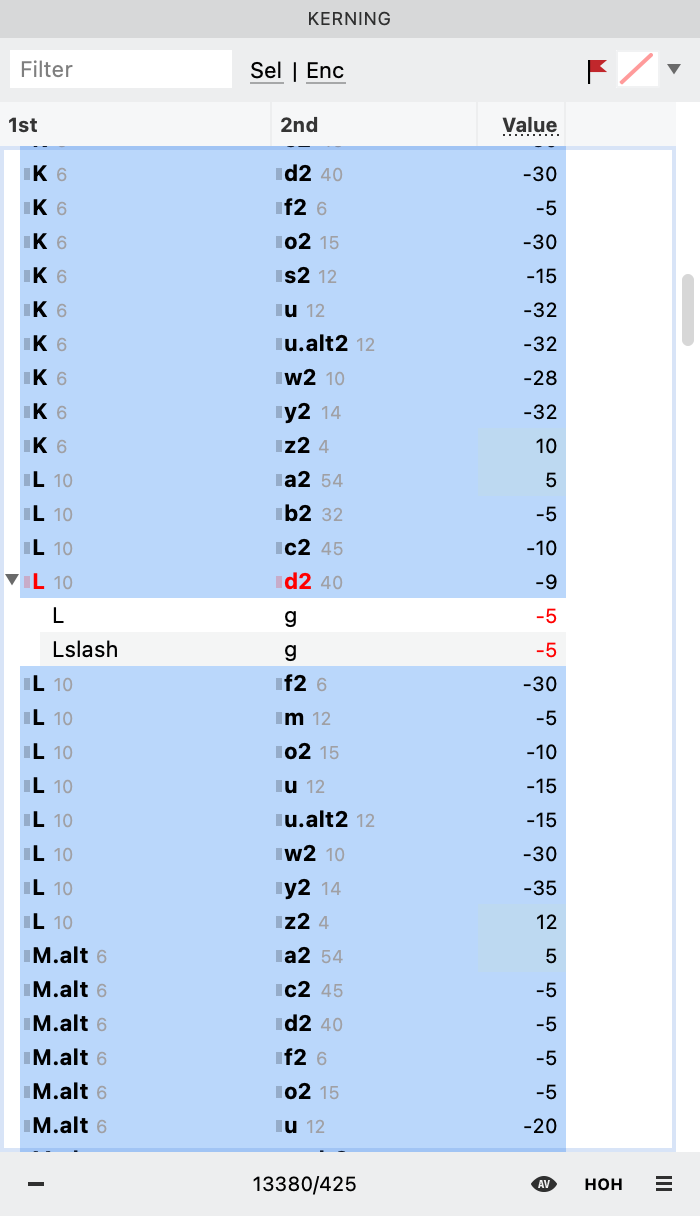
❶ Open up the Kerning panel. ❷ You just highlight, CmdC, go to next master, then CmdV.
Like this.▼
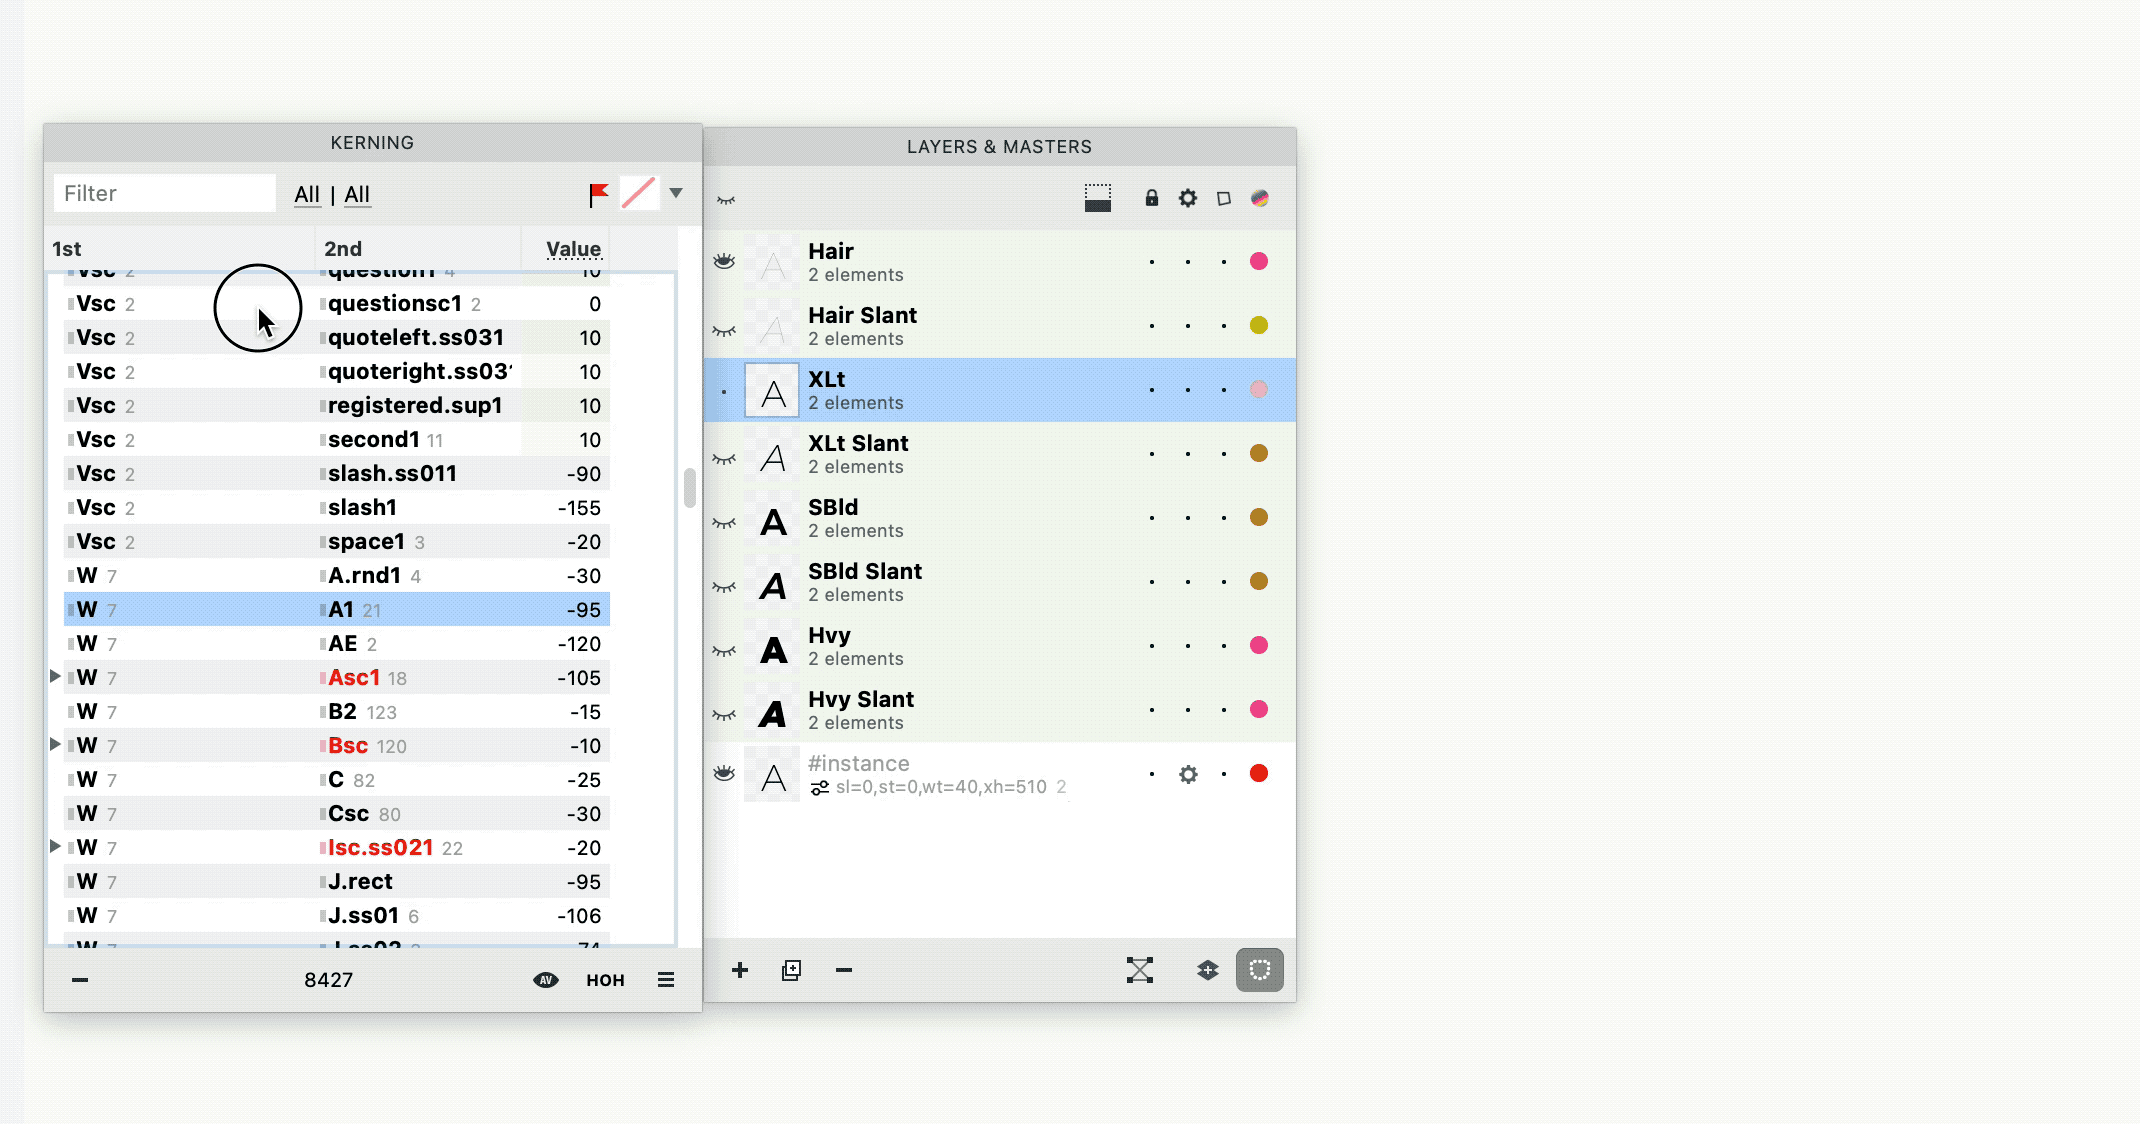
(BTW, I don’t necessarily recommend naming your small caps Vsc. But the name did help me with autogenerating SS features in complex situations.)
Caution
Kerning information cannot be copied into a spreadsheet. Neither can you copy information from outside of FontLab into the kerning window.
Copying is easy. The main problem is not copying. It’s selecting!!
How to Select the Correct Pairs
This is a bit tricky.
There are three filters to help you select the right pairs:
Basic Filter
The main filter allows you to type a glyph, such as A. This will only filter out the pairs with the A.
If you push A * it will only show pairs with A on the left. You can also do * A.
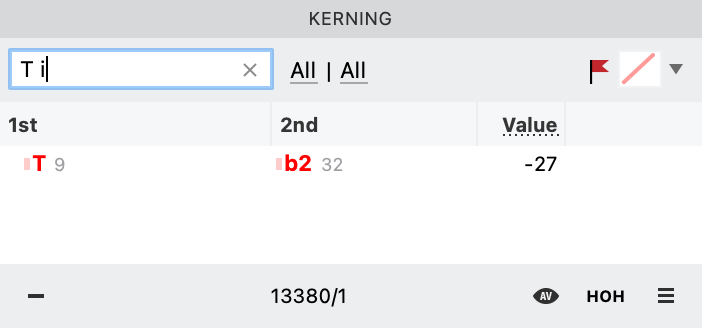
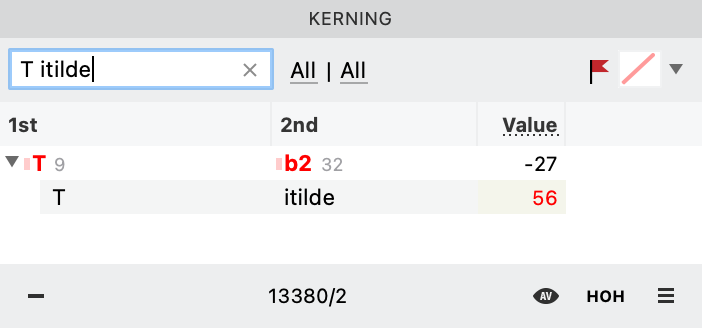
If you do something like T i it will only show that pair.
If you want the exceptions, type in the particular glyph.▼
Info
This filter only searches by glyph names.
Selection Filter
Unlike the basic filter, this one can select large groups.
You choose the selection filter, “Sel”, from each side of this drop down.
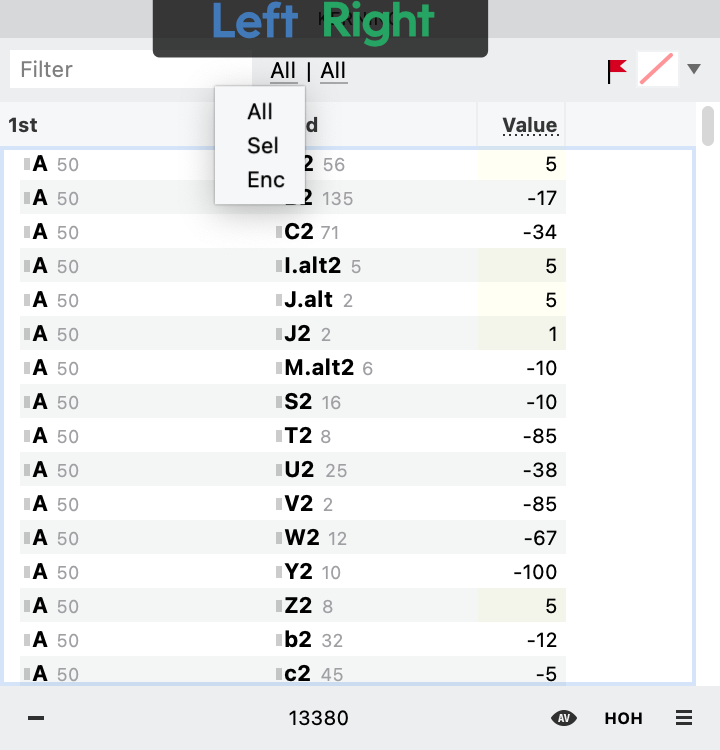
The Sel filter is based on your font window selection.
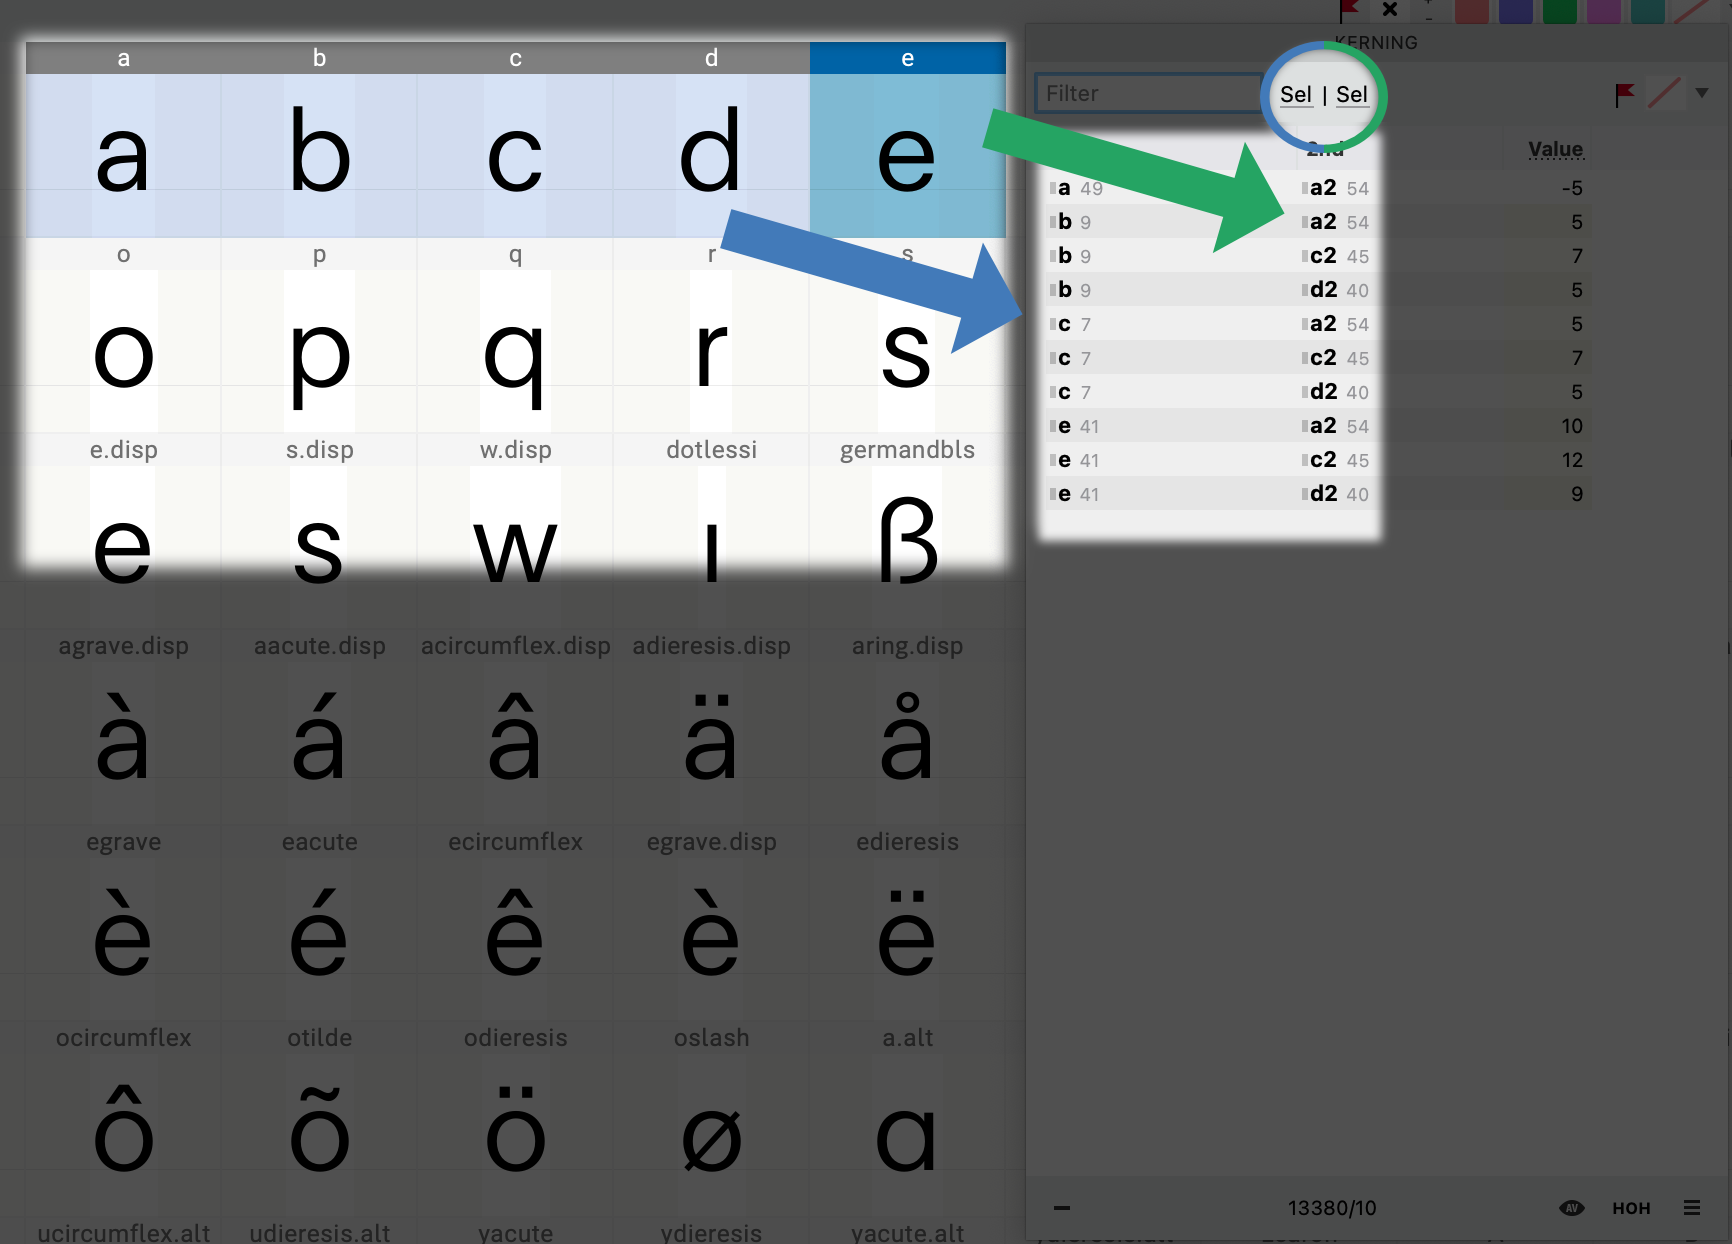
Example. Here I have abcde selected.
“Sel” is selected in the left. Therefore, the Kerning panel shows you all pairs with abcde on the left.

The other side says “all”, so anything goes on the right side.
A lot of times, you may not want to copy all the kerning from that side.
However if you put select on both sides, that is not very helpful, unless you want to say, copy only lc2lc kerning (lowercase to lowercase).
So really…we have to use the select filter plus the third type of filter.
The Encoding Filter
The encoding filter is the most flexible. But it takes longer to set up.
Bear with me while I show you.
First we need to create and encoding page, then load it up.
Steps
❶ Highlight all the symbols you want to kern with. For example, you might do all lowercase, all uppercase, or all punctuation. Here I’m going to choose all unaccented lowercase. Now we do a special copy by going to menu: Text > Copy Text As > One per Line. ❷ Go into Notepad (PC) or TextEdit (Mac). File > New. Paste into new file.
On Mac, if you see it looks like this, the document is in rich text format. This is bad.
Change to plain text by going to TextEdit’s menu: Format > Make Plain Text. Push OK. The window should look simpler.
Now do this next step before you save.▼
❸ Paste this to the top, which gives FontLab instructions on where to put the encoding page.
%%FONTLAB ENCODING: 7001; Kerning Lowercase
%%GROUP:KERNING
Feel free to change this how you want. Every time you make a new encoding page, you need to use a new number.
Info
There are certain numbers that have already been used. Windows use 1250 – 1258. Mac uses stuff in the 10,000 range (10006 – 10101). Adobe uses 1 – 10 range, and 1303 peculiarly. The number you choose probably won’t overlap, but just so you know.
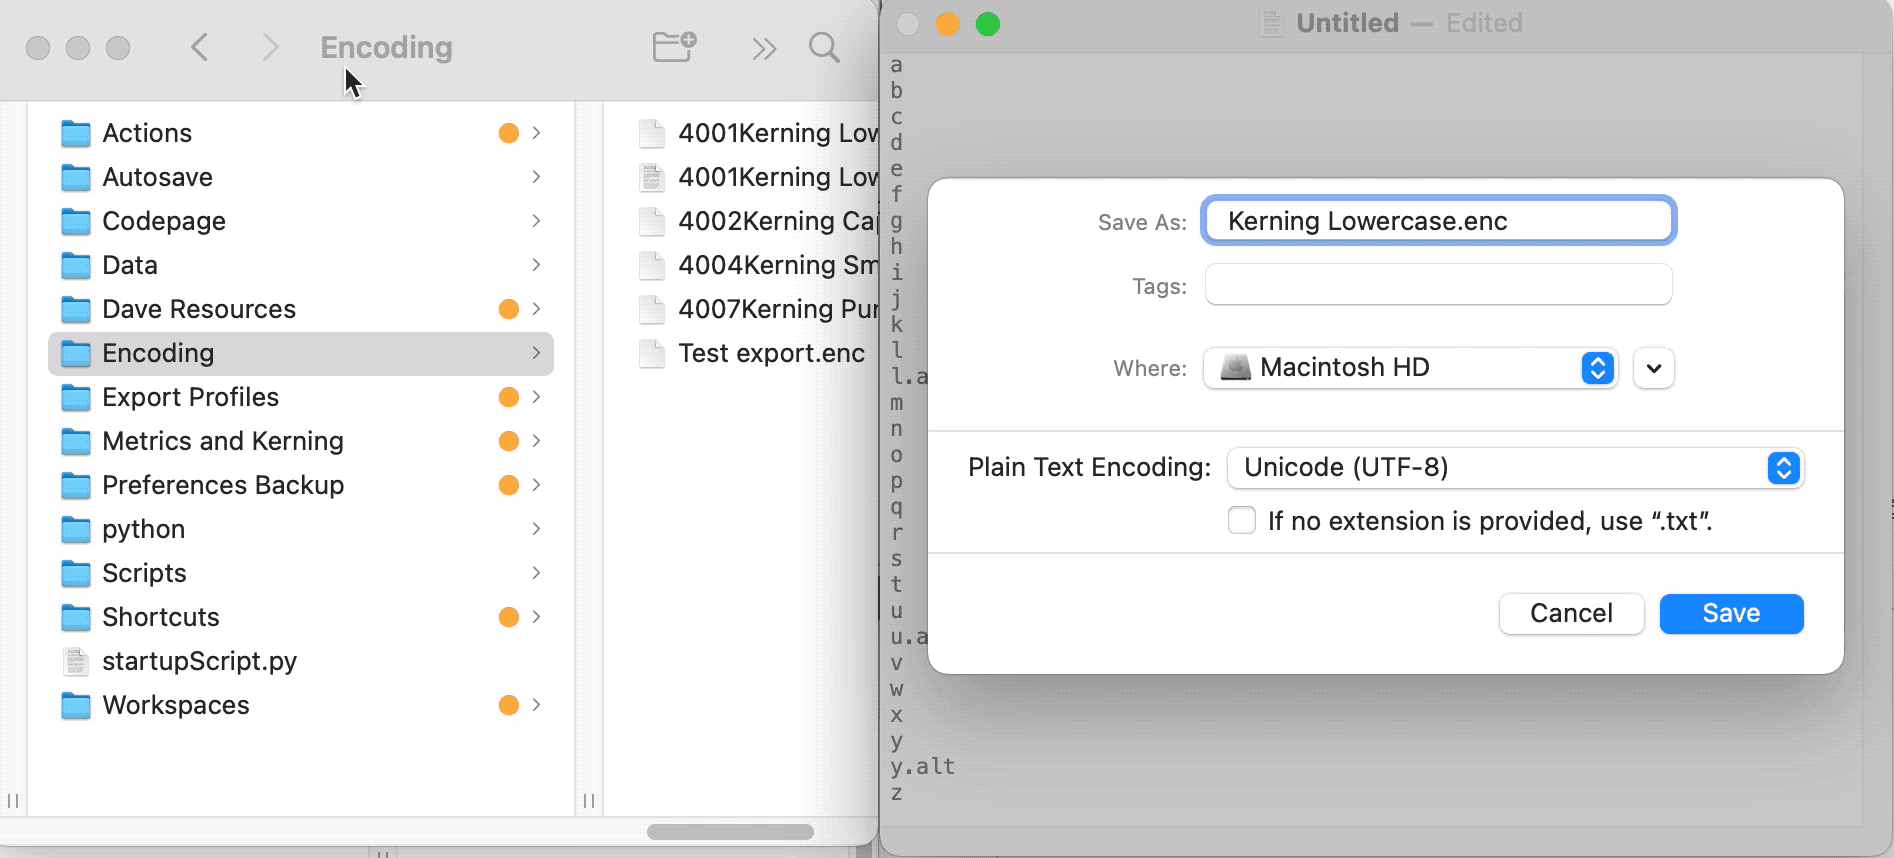
❹ Ok, let’s save this bad boy. Push CmdS. Let’s call it “Kerning Lowercase.enc”.
On Mac, uncheck ‘If no extension is provided, use “.txt”.’
If you know how to navigate to the FontLab 8 folder, do that.
If not, go to finder menu: Go > Go to Folder… Now paste this entire line into the box: ~/Library/Application Support/FontLab/FontLab 8/Encoding
Are you in the folder?
Now drag the folder name onto the save dialogue.
In Windows you can get to the similar place. Go to Windows File Explorer and copy this into the top bar: %userprofile%\AppData\Roaming\Fontlab\FontLab 8\Encoding
If you need more help to find the folder, see the tutorial Importing Settings and Shortcuts into FL 8.
Ok, so that’s saved. It should be named “Kerning Lowercase.enc”
If it is named “Kerning Lowercase.enc.txt” take the txt off.
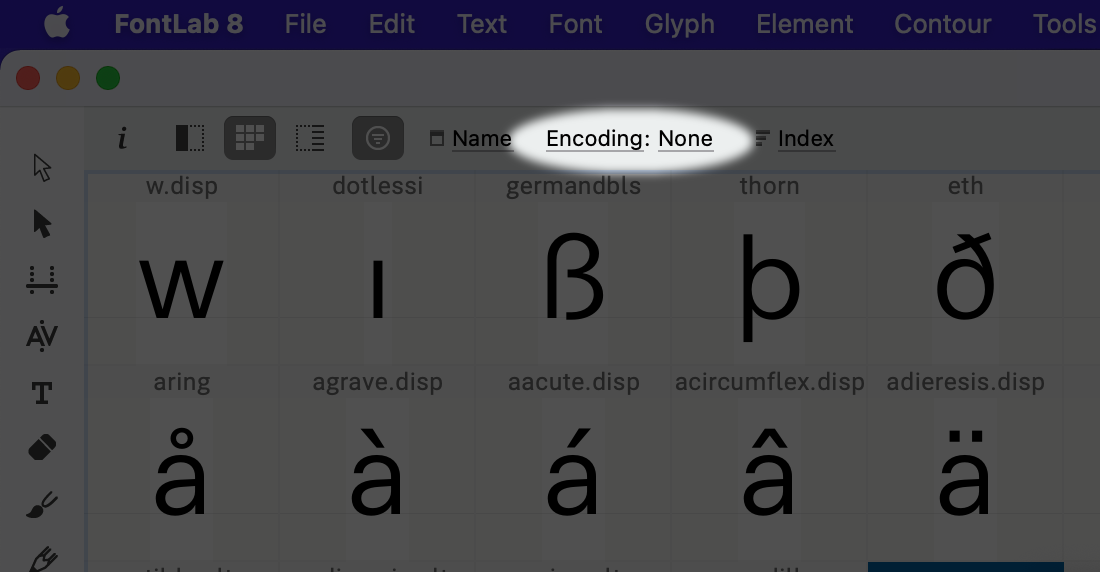
❺ Now close FontLab. Fire it back up.
In the font window, go up to the top where it might say “none”. click that.
Finally, our encoding page!
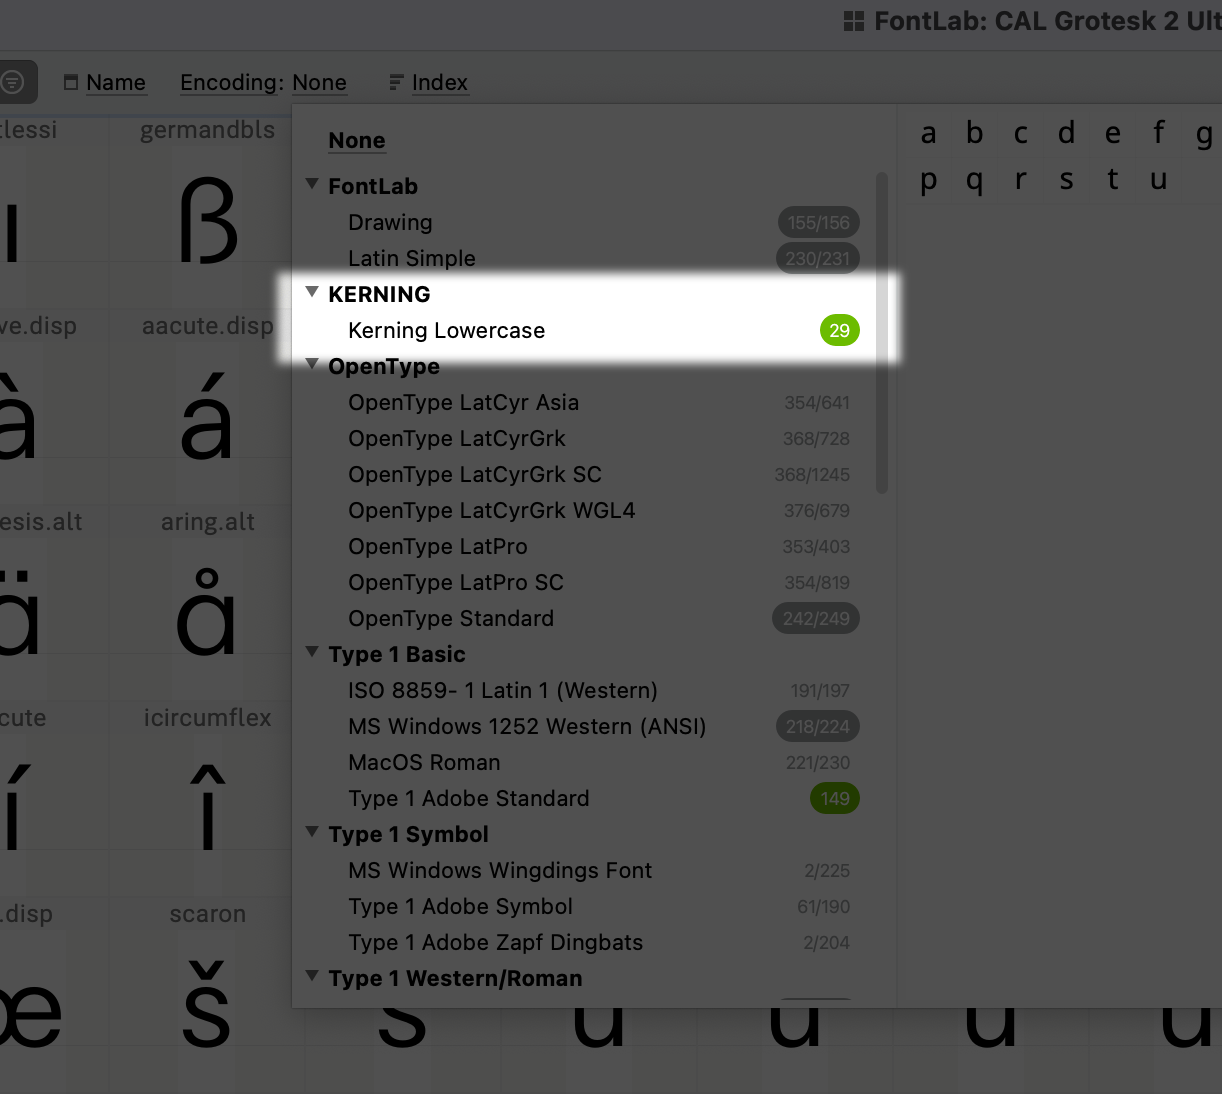
click that.
❻ If all of the other letters are now hidden, unclick this.
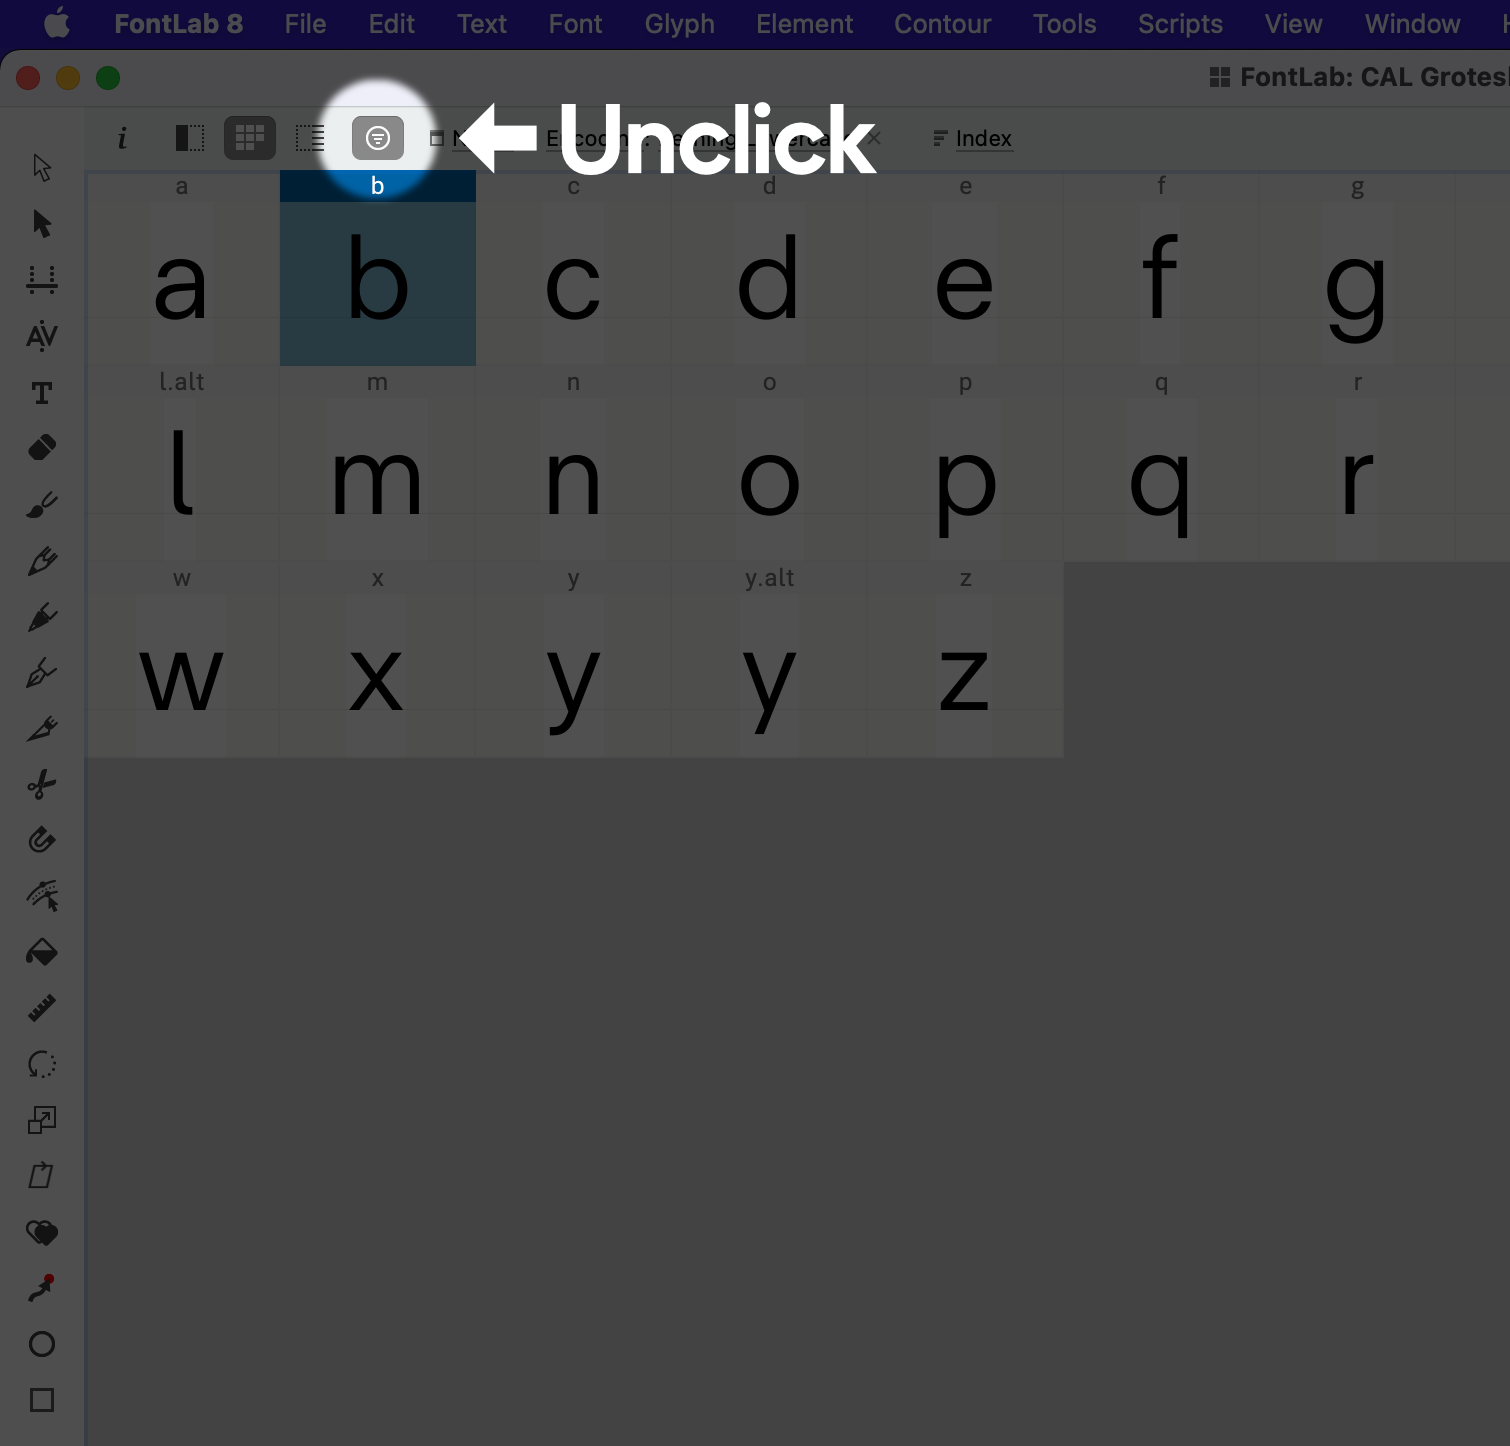
❼ Here we are!!
Let’s copy the Uc2lc (uppercase to lowercase) pairs.
In the Kerning panel, change the filter to Sel | Enc.
Now select your uppercase.
It will show you all your UC2lc pairs (Uppercase to lowercase).
Push CmdA to select all.
If you want to select exceptions, you will need to open the triangles.
Then push select all again.
Now you can copy these into the other master.
Good work. That was a lot! But if you save a couple classes, say one for lowercase, uppercase, and punctuation, this will save you time in copying the kerns.
Caution
If you want to include ALL your kerning, you must put EVERY lowercase into that group. Also you must select ALL uppercase. Otherwise you might not copy all kerning into the next master.
Copying Kerning Values
You can copy single kerning value, as here:
Currently, there is no way to copy kerning values, say from uppercase to small caps.
Anyways, I hope this helps you see how to do this!
Regards,